Should You Put Acoustic Panels Behind Speakers? (Explained!)
Should You Put Acoustic Panels Behind Speakers? (Explained)

Yes acoustic panels should be placed behind speakers to help smooth out the sound quality in the room. That’s the best location to reduce reflective sounds coming from the part of the room with the highest pressure — which is often the front.
Check Availability Of Acoustic Sound Panels
Acoustic treatment is a topic not emphasized enough in home theater I feel.
For example placing acoustic panels behind speakers, when done right, can benefit their performance in your room.
So today I wanted to give you a guide on not only what that entails, but how you can ultimately implement acoustic treatment for better sound in your small or large entertainment room.
That way you better understand the benefits of putting sound panels behind your speakers — whether they’re floor-standing or smaller models.
There’s a lot to cover though so let’s get to it.
What Is Acoustic Treatment
Acoustic treatment to put it simply, is the implementation of some sort of object or configuration made with the purpose of diffusing or absorbing sounds in a space.
These treatments can come in many forms, and it isn’t uncommon for some spaces to need a combination of solutions to achieve sound quality that’s optimal for that particular space.
Bass traps and acoustic panels are 2 of the most popular implementations.
Taking the time to properly ensure a room is a acoustically treated is a great way to effectively improve audio quality.
Why Acoustic Treatment Is Important
Acoustic treatment is important because it can literally mean the difference between a sound that’s underwhelming and one that sounds absolutely amazing.
Often times this is something that tends to be skipped, but even in a home theater that already sounds great, this can help to elevate it to the next level.
There’s typically 3 forms of sound that you’re trying to treat when doing this process; reflections, reverberations, and resonance.
Although all 3 are important to mitigate, reflections, at least in my opinion, are the most egregious and crucial to deal with.
One of the most common reflections that occur are called SBIR (speaker boundary interference response)
This is a form of acoustical distortion that happens when a speaker is close to some sort of boundary which includes walls/floors, & even the ceiling.
The reflection from this hard surface then creates a delayed mirror image of the sound that emanates from that speaker.
These are most common in the lower frequency and can lead to an uneven sound where some parts of the room are boosted while other parts are quiet.
What makes it worse is there can be multiples of these reflections depending on the amount of speakers/subwoofers you have.
These can lead to lobbing, comb filtering, etc which can disrupt the level of immersion you experience.
However, suprisingly enough, it’s actually possible to over do it and do too much treatment to the room which can lead to the room sounding smaller than it really is.
Finding the right balance where there’s still a slight amount of liveliness but not to the point where there’s an echo is key.
Ways You Can Implement Acoustic Treatment
Using Acoustic Panels
You may have seen these used by recording artists or streamers, but basically acoustic panels are a great way to help reduce reflections in the room and improve sound.
They absorb unwanted frequencies and reverberations that can typically cause an echo.
By dampening unwanted noises, these panels are an easy way to improve audio characteristics of a room.
Made from any number of various types of light weight foam or fiberglass, sound waves travel into this material and get trapped — reducing the amount that actually reflect back into the room.
Since this foam works off of air movement, it travels through the material and creates friction, which changes the energy and slows it down.
That leads to absorption.
These panels are typically effective for smaller bookshelf speakers and monitors.
It’s important to keep in mind though that they aren’t the most effective at absorbing the unwanted low frequency sounds that larger speakers and subwoofers emit.
That’s where bass traps come in.
Implementing Bass Traps
Dealing with lower frequencies can be a lot more difficult due to the sheer size and energy these particular sound waves carry.
This causes them to be omnidirectional, meaning it travels in every direction irregardless of the direction the speaker driver is facing.
But to make it simple, you can think of bass traps as an effective way at dealing with these issues in the lower frequency response.
Bass traps are acoustic energy absorbers that help with room modes caused by standing waves.
These standing waves can cause dips or peaks in the sound you perceive — so by implementing bass traps, you can enjoy a smoother listening experience.
You’ll want to place them in corners since that’s usually where bass waves gather.
Reducing Floor Reflections With Carpeting

Hardwood floors are a primary candidate for first reflections, and can be a main contributor to reduced sound quality.
By using thick carpeting or rugs, you can reduce these reflections.
Using Thick Drapery For Windows
Similar to hardwood floors, windows are another reflection point due to their hard surface where waves can often reflect off of.
Using thick sound absorbing curtains or drapery is a great way to take care of these.
Integrating Low-Noise Split Air Conditioning
Low noise split air conditioning is another way to ensure proper sound quality in the room.
By using these in combination with other tips talked about here, you can prevent sounds from leaking or entering through air ducts and vents.
Implementing Helmholtz Resonators
Helmholtz Resonators, while not typically used in the household setting, are basically a small circular apparatus with varying use cases and can sometimes help with sound.
They can be helpful in dealing with different frequencies depending on their specific shapes and size.
Installing Ceiling Clouds
Ceiling clouds are pretty cool in my opinion since they’re a way to acoustically treat a larger room.
They’re usually placed in larger rooms from the ceiling, and help with the sound waves that may reflect up there.
They come in many different styles and materials.
Using Acoustic Sealant On Cracks & Crevices
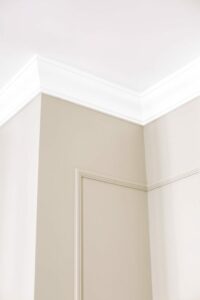
Another thing to keep in mind is that sounds can escape through even the most minute of cracks and crevices.
This can alter the acoustics of the room more than you’d initially think.
Acoustic sealant is a useful remedy to this, and can be used to further isolate and lessen the transmissions of sound through things like corners and windows.
Identifying Reflection Points With The Mirror Test
Finding places where soundwaves from your content might be reflecting can be identified by using what’s called the mirror test.
Basically while sitting in the main listening position, someone else would walk along the wall with a small mirror until you see the speaker in the mirror.
Have them mark that spot with a small piece of tape.
That’s the main reflection point of that specific speaker.
You’ll want to do this for each of the main 3 front speakers, and place panels at each of the marked spots.
Using Diffusers
Diffusers are helpful in that they can help reduce soundwaves to achieve a better acoustic balance in a room by dampening it.
This can be a good balance since acoustically treating to much can lead to the room sounding too quiet if over done.
They can be helpful for keeping a space sounding more lively, and can be used in combination with sound absorbers.
Where Should Acoustic Panels Be Placed? & What To Keep In Mind
Taking Into Account Height Of The Room
The height of the room will have an influence on where acoustic panels should be placed.
However the higher the ceiling and more irregular the shape of the room, the more complicated things get.
As a general idea, you’ll want to place each panel on opposing walls in pairs around the perimeter of the room.
If you figure 2 for each speaker in a 5.1 channel setup, then that equates to 10 panels being effective.
However that can, and most likely will vary but it’s just a general idea.
For example, placing panels where 2 surfaces meet, or in dihedral corners, is a good way to further isolate the sound to just that specific room.
Spacing Of The Panels
Spacing of the panels will obviously depend on how large they are, but also what you’re using them for.
In a recording studio for example, panels should cover nearly 100 percent of the wall.
However in a typical home theater, they’ll be used much less — and even less so for a smaller home theater.
A helpful tip is to keep at least 1/2 an inch to an inch of space behind fiberglass sound panels.
The reason for this is the sound waves will travel through the panel, go through the air gap behind it, hit the wall, then go back through the panel in the other direction.
This effectively allows it to mitigate these sound waves even further.
Bigger Rooms With Higher Ceilings
Elongated rooms, rooms with irregular shape, and ones with high ceilings will likely require a different level of treatment than a smaller room.
This is because as sound rises, it spreads out and reflects downward though it is possible that the sound wave can also not have enough energy to do this, and simply dissipates.
This happens when the frequency is lower, or when the ceiling is really high where it can’t reach it.
If it’s a longer room, it’ll also require more panels due to their simply being more surface area for waves to reflect off of.
Ceiling clouds like we talked about earlier can be a helpful apparatus in improving the acoustics.
Even though all ceilings are technically reflective, the higher that ceiling is, the more necessary treatment may become.
Placing Panels Behind Speakers

What about behind speakers like in our original question, should panels be placed there?
Well here’s what to remember.
The front of the room, in the area that’s between your wall and your speakers is typically the highest pressure area in the room.
This is because not only do these front firing speakers fire their sound forwards, they also emit indirect sounds from the sides and back of their cabinet.
From there, early reflections as they’re known, arrive at your ears soon after the main sound from your content.
This can mess up imaging and articulation in the small details.
So by placing sound absorbers behind the speakers, it helps to mitigate this issue.
A common descriptor you’ll see on panels is something called their NRC rating.
The NRC rating (noise reduction coefficient) is basically a quantification of how well a material does with reducing and/or absorbing sound.
It’s measured on a scale from 0.0 to 1.0 and the closer towards 1 the NRC rating is, the better it is at absorbing that sound.
However, you want to make sure the panels or device you use (such as bass traps) interact with pressure waves and not air waves/movement.
That’s because the lower frequencies are pressure waves and are what usually causes the issues.
But if you use something that deals with air movement, this can potentially hamper sound quality since the higher frequencies from your speakers might be affected.
This is where diffusive panels can also be helpful as they simply act to reroute the sound rather than get rid of it.
As to which is the better application really depends on your room as a combination of the two may be best.
You can always try moving the speaker closer and farther from the wall to see how it interacts with it, but you’ll likely still want to implement at least one kind of treatment in this particular area.
Without a version of sound treatment, some level of distortion will always be present.
So to answer the original question, panels work great when placed behind speakers to put it simply.
However that’s actually not the only place they should go for optimal sound quality.
Behind The Television
Similar to the reasons given for speakers, you should place panels on the side and if possible, behind the television as well.
Sound waves can collide or interact with each other to a high degree, and by implementing these panels here, they can help to improve your sound quality.
How Many Acoustic Panels Do You Need?
The number of panels you need depends a wide variety of factors.
But to generalize, 2 for every speaker is a good starting metric to guage things (but again, that’s dependent on the room)
Diffusion Or Absorption Behind Speakers?
So should you use diffusion or absorption behind speakers?
If it’s a panel or technology that deals with pressure, then absorption typically works best.
Otherwise it may be smart to go with panels that offer diffusion.
Do Acoustic Panels Actually Work?
As long as acoustic panels are implemented properly, using the aforementioned & subsequent tips in this article, acoustic panels absolutely work.
What Acoustic Panels Are The Best?
There’s so many types of panels that it really depends on the type of panel, the material, room size, speaker count, etc.
These are the type of panels I use.
Check Availability Of Acoustic Sound Panels
How Do You Mount Acoustic Panels?
With regards to how you mount acoustic panels, that again depends on the type you’re using.
A lot of times though, there will often be an adhesive back on the panel where they can be simply attached to the wall.
Final Thoughts
So hopefully this clears up whether or not acoustic panels should be placed behind speakers.
To summarize, yes they absolutely should, along with being placed on areas surrounding to help smooth out the sound quality in the room.
Sound waves tend to reflect, resonate, & reverberate — and if you can properly place these panels in the right spots in the room, these should be greatly diminished.
Until next time, make it easy, keep it simple.
About Me



Leave a Reply