25 Of The Worst Home Theater Mistakes
25 Of The Worst Home Theater Mistakes
Truth be told, I’m happy to finally be making an article like this; highlighting 25 of the worst home theater mistakes that exist out there.
There’s certainly a bunch, so I wanted to be sure to cover the most important things you’ll definitely want to avoid doing along with what you can do instead.
Think of this as a comprehensive guide so to speak.
Trust me, I’m not exempt from any of these either; and in fact, they’re actually based off my own personal experience from over the years (essentially where I got the ideas)
What’s really interesting is a few of these I didn’t even realize until a short while ago, meaning you may likely be doing the same thing even now!
So the goal today is not only making sure that we avoid these, but making sure you get the best bang for your buck no matter what system or speaker you have.
These tips will range from beginner mistakes, all the way to things even experienced people may not have known.
So strap in, and let’s get to it! 😀
1.) Not Taking Into Account The Importance Of Room Type And Seating Position
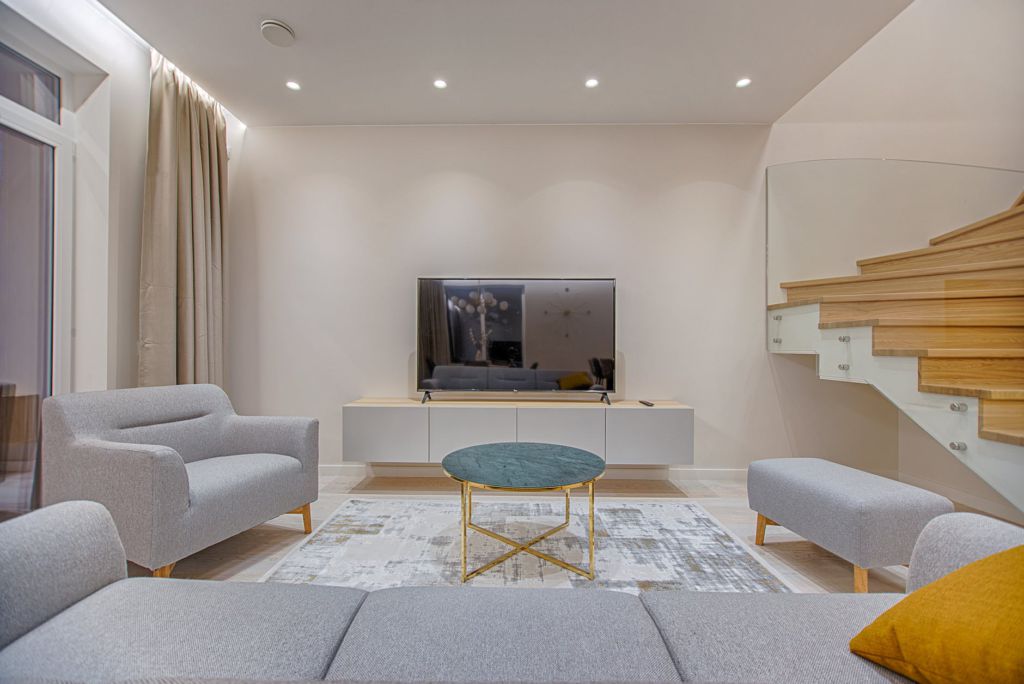
Whether you’re in the planning stages of your new home theater system, or looking to improve upon what you already have, undoubtedly the single most important factor that will influence how your setup sounds the absolute most is the room that your using.
Why though?
Well it has to do with the properties of sound itself.
Sound travels in waves; where the higher pitched a sound seems, the shorter and faster that particular wave travels, while the lower pitched a sound is, the slower and longer that wave is.
These waves travel throughout the room, reflecting off of some surfaces and being absorbed by others before finally reaching your ears.
Now here’s why the room type plays such an important role. When a room has a lot of reflective surfaces such as hardwood, marble, etc, the sound is continuously reflected, with some of the waves even interacting with each other.
When this happens, it can cause the sound to seem almost harsh, especially when turned to moderate volumes. This not only limits your speakers’ full potential, but may also lead to ear fatigue.
To combat this and make sure that your speakers are performing to the best of their capability, you’ll want a lot of soft padded material in the room.
Why?
Because soft material helps to absorb excess sound waves, leading to a much clearer and articulate sound. It also has the added benefit of helping your subwoofer sound better as well.
So take notice of what your particular room is like, and try to add as much furniture and objects as possible since it’ll help improve sound, as well as reducing potential echoes which are especially problematic in bigger rooms.
You you could also implement sound panels which tend to help.
https://easyhometheater.net/should-you-put-acoustic-panels-behind-speakers
Of course seating position is a close second for a number of reasons, so you’ll want to optimize this as well. When you don’t do this, you may again be limiting the full potential of your system, so taking the time to make sure your listening position is just right will make a world of difference.
If you’re not sure how to do that though, I did a fantastic article on how to get the best seating no matter what kind of room you have so definitely make sure that you check that out as well.
That way you’ll be on your way to surround sound nirvana in no time.
https://easyhometheater.net/home-theater-seating-ideas
2.) Not Making Use Of HDMI
Here’s one you might not even realize, HDMI cables are pretty important if you’re trying to have the best home theater experience.
Why you ask?
Well besides the fact that more and more devices are moving to solely HDMI each day, it also offers the best sound quality comparatively with other cables.
HDMI is actually an acronym that stands for High Definition Multimedia Interface and was released in the early 2000’s as a successor to DVI, the previous default standard.
It brought with it a host of improvements including higher bandwidth (meaning the ability to transfer more information at one time) and more utility since it reduced the amount of wires one needed to actually set everything up.
Eventually, support for more advanced technology was introduced in further iterations including, 4K and HDR support. But using an HDMI cable not only provides the best quality sound, it also saves space since it has the ability to carry both audio as well as visual information, making it a sort of all one cable.
Even if you don’t have one or your receiver isn’t compatible with another device through HDMI, you are able to use a what’s known as a Toslink (or optical) cable for the sound instead.
Sure it won’t be as good quality sound, but it’s not that dramatic of a difference so don’t worry about missing out on a ton. As far as which one to go with, they all pretty much do the same thing so worrying about a specific brand isn’t really necessary.
As long as it says that it’s a high speed cable, you’re good to go. If you’re curious more about how they work or even which ones I personally use, then I’d suggest checking this article I did talking about exactly that.
https://easyhometheater.net/hdmi-cables-explained
3.) Not Getting Any Output From Your Speakers Due To Setting Things up Wrong
No sound being output due to setting your speakers up is an issue a lot of people can relate to since it’s probably one of the most common.
So why exactly does this happen and how can you avoid it?
Well there’s a few different ways.
When you’re setting up your home theater for the first time, you of course want to make sure that all of your speakers are connected with the appropriate speaker wire into the correct spots in your receiver.
Putting the left channel speaker into the center speaker slot or something similar can cause issues so make sure that they’re in the appropriate places.
However where the biggest problem usually arises when attempting to get external devices like blu ray players and cable boxes working with your speakers.
As a general rule of thumb, any modern television should have what is known as an ARC input (audio return channel) This basically allows the receiver to process all of the sound while the TV is only responsible for the picture.
Not putting things in the right place can certainly cause an issue when it comes to audio output.
So what you do is place one side of the HDMI cable in the slot named ARC on your television, and the other in the Arc slot on your receiver.
Then you take another HDMI cable, and insert one side into the next input on your television, and the other side into the back of whatever device you’re attempting to use.
This will allow the device to work with your speakers; that is if there’s an ARC input on your receiver as well as your TV.
While there definitely should be, there’s always exceptions, so if one of the two doesn’t seem to have one then don’t worry, all hope isn’t lost. In this instance you’d just need to use what’s known as a toslink (or optical) cable to connect the two.
Also make sure that you change the input on the TV to the correct one too otherwise you won’t get a picture.
If you’re still having issues, definitely check out the article that I did that talks about this very thing and how to properly set things up step by step just in case you may have missed something.
https://easyhometheater.net/why-arent-my-speakers-working
https://easyhometheater.net/how-to-set-up-a-home-theater
4.) Not Calibrating Your Speakers
This is something that people either don’t take into consideration, don’t fully understand the importance of, or simply don’t bother doing, but calibrating your speakers is one of the most important things that you can do when it comes to getting the most out of your stuff.
Why is that exactly?
Well think of it this way, let’s say you’re a professional Nascar driver and you want to beat the other drivers.
Would you simply slap anything together and hope for the best?
Or would you pick the best parts that you can and fine tune them to be as synergistic with one another as possible to get the best possible result.
Random analogy I know, but it’s the same principle when it comes to speakers. You’re going to want to fine tune them if you want to get the best sound possible from them.
But how exactly do you go about doing this?
Well there’s actually 2 different ways that you can. The first one is one that I use and personally recommend; which is letting the receiver do so automatically.
You see, some receivers actually come with what’s called an optimization microphone, which essentially does all of the work for you.
All you do is plug it in, set it at ear level on a flat surface, and it does all of the advanced calculations like distance, delay, etc. for you.
It’s a really handy little tool that I can’t recommend enough.
For example the Denon AVR-S760H 7.2 channel receiver calibrates your speakers this way, tuning them to the specific acoustics of the room.
Now the second way to do this would be using what is referred to as an SPL meter to actually do so manually.
But keep in mind it would not only take longer doing it this way, but also be more prone to human error as well which is something to keep in mind. Here’s a list of good receivers that include the mic too and an article on a few ideas to further optimize what you have.
https://easyhometheater.net/the-best-home-theater-receivers
https://easyhometheater.net/home-theater-ideas
5.) Setting Your Speakers In The Wrong Spot
Just like calibrating your speakers is important, the spot where you physically place them relative to your seating position is just as important.
This is another one of those things where you wouldn’t expect it to make a huge difference, but it actually does.
So starting with your left and right speaker, what I personally recommend is not placing them any closer than 6 feet apart but also no further than 12 feet.
Placing them too close together gives a narrow soundstage, making it seem like the sound is coming from a specific spot in the room (which kind of defeats the purpose since it’s supposed to be you know, surround sound)
Placing them too far apart has a similar effect, allowing you to be able to tell which speaker is making a specific sound which is the exact opposite of what you want.
So try to stay within that 6 to 12 foot range when setting them.
The center speaker would then of course go directly in the middle of them. Ideally you also want all three to be at around ear level as this gives the greatest effect.
If you can’t achieve this with your personal setup, then going a little above ear level is fine, just try to avoid going below it if possible.
Now with regards to the surround speakers, you’re going to want them to be at least 2 feet above ear level if possible and directly to the left and right of the seating position.
This isn’t set in stone of course, but it is what I’ve personally found to sound the best, so see how it works for you.
Also if you’re running a 7.1 setup, then setting the back 2 speakers at or above ear level is perfectly fine. Just make sure that the rear speakers are at the same height as the surround ones.
You’ll also want to be at least 4 feet away from the back wall otherwise you won’t get a good surround effect.
6.) Setting Bookshelf Speakers Sideways
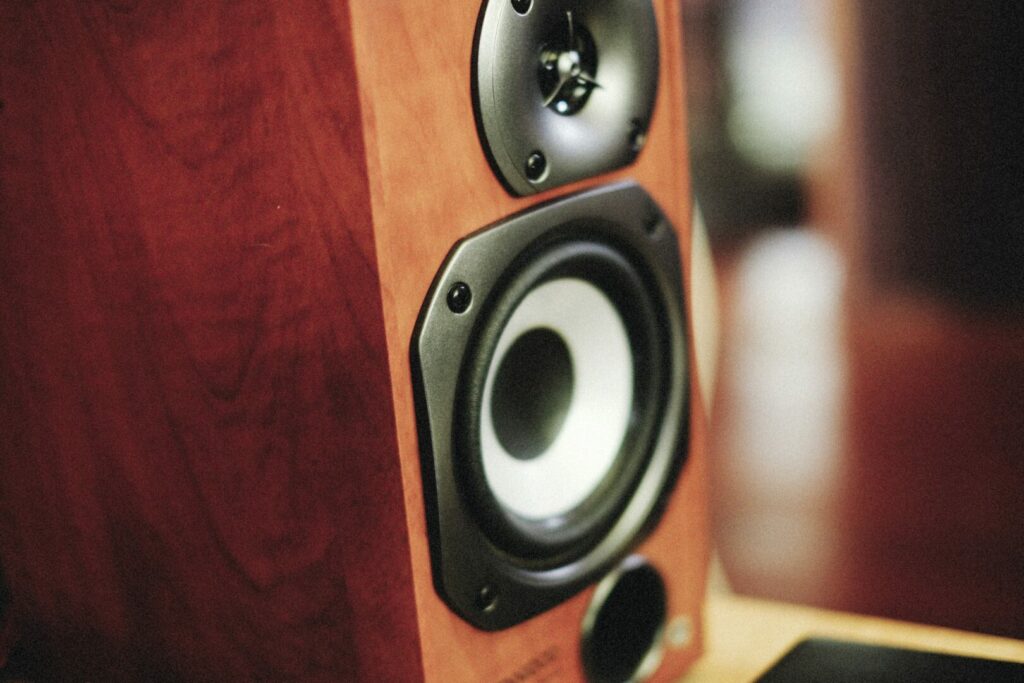
This is a weird one, but it is something that I’ve seen people do.
Again this is one of those personal preference things since sound is subjective, but I’m of the idea that placing a bookshelf speaker sideways is not something that you want to necessarily do.
The main reason why I’d say this wouldn’t be the best idea is due to the fact that the typical bookshelf speaker has drivers that are set up in a specific configuration known as a vertical dispersion design.
This basically means that when placed correctly, the drivers sit atop one another and emit sound that way, hence the vertical part in the name.
However when you place a speaker that’s meant to be placed right side up horizontally instead, it has the tendency to throw the sound off.
I can’t exactly articulate what it sounds like, but if you try this you may hear a difference; and not for the better.
So just make sure that they’re placed standing up unless they specifically state that their meant to be placed sideways. Here’s an interesting read that explains why this makes a difference.
https://www.soundandvision.com/content/dispersion-show-and-tell
7.) Using Center/Left & Right Channel Speakers That Are Too Small
Here’s one that I’ve certainly done in the past without immediately realizing it.
With that being said, there’s a chance you may be too.
Using a left/right or center speaker that’s too small for the room is a pretty common error.
Maybe the individual doesn’t particularly notice it, or perhaps their significant other doesn’t want speakers that take up too much space.
Whatever the case, if possible, you’ll definitely want to avoid this because you’ll undoubtedly end up sacrificing sound quality.
So how can you tell that what you have is too small?
Well actually a few ways.
The first way that’s a surefire way to tell is if during movies or shows, you have a hard time discerning dialogue unless the volume is set extremely high.
Not only is this a sign that the setup is inadequate for the room, but more specifically, it’s a sign that your center speaker in particular is in need of an upgrade.
The center speaker is arguably the single most important component, so skimping out on that is going to end up leaving a lot to be desired; not to mention you’ll struggle to hear dialogue unless it’s cranked really high.
Speaking of which, another way you can tell that the speakers are too small for the room is if you have to set the volume really high to hear anything.
If you find that you’re needing to set the receiver volume to -10 just to hear the content, then it’s almost a given that you’re due for an upgrade.
Not only could doing this potentially damage the speakers in the long run, but the closer you go to 0, the more distortion you’re introducing into the content as well.
So if you’re having to set it that high just to be able to make out what’s happening, then audio quality is unfortunately being sacrificed even if you don’t realize it.
I know when I personally upgraded to something more fitting to the room, it was like night and day. Getting the right one for your room really can make all the difference honestly.
If you turn up the receiver volume and find that content just sounds hollow or tinny, then that’s another good sign that either things are set up wrong, or your speakers are vastly underpowered for the room.
If this is the case, and you’re not sure what speaker would be the right choice for your room, no worries, I’ve got you covered.
These two articles should definitely help with your decision making process, so make sure that you have a look if you want a few suggestions in that regard.
https://easyhometheater.net/the-best-bookshelf-speakers
https://easyhometheater.net/the-top-10-center-channel-speakers
8.) Using Outside Speakers Inside
This is another one that I can say that I’ve done in the beginning; which is using speakers meant for outside, inside instead.
Now you wouldn’t think that something like this would matter, but in actuality, they’re a lot different.
Many people may be of the assumption that a speaker is simply a speaker, but it’s a little more complicated than that.
The reason why they’re so different is that a speaker that’s meant to be placed outside tends to favor the treble side of the sound spectrum.
Why?
Well when a speaker is placed inside a room, the sound of course reflects off of all the objects in the room while it’s travelling to your ear. The higher frequency sounds have a much easier time doing so since they move so much faster than lower frequency ones.
However when placed outside, lower frequency sounds have a harder time traveling than their higher frequency counterparts.
Simply put, it takes a lot more energy to produce a lower tone, so speakers made for outside get around this by favoring the higher tones so you can actually hear it. You probably wouldn’t notice it outside though, since that’s what they’re made for.
However when you use one inside, it can definitely cause things to sound sibilant. Speakers created for the outdoors also tend to be made of plastic or some other material instead of wood, so this makes a fairly big difference too.
So long story short, use home theater speakers inside, otherwise the sound won’t exactly be stellar. Hopefully that makes sense since I tried to make it as easy to understand as possible.
But for those of you out there that are still curious about the specifics, then this is a good read.
http://www.explainthatstuff.com/sound.html
9.) Mismatching Speakers From Different Brands
I’d say that mismatching different brands is probably one of the most common mistakes that people make.
Be it getting a few different speakers from a garage sale, being gifted a few from a friend, or even just buying one and then another; you’ll want to be sure that you avoid doing this.
Why?
Well it has to do with not implementing what is known as timbre matching.
In short, timbre matching is where speakers of the same model and brand are used to get the most even sound.
The reason you want to avoid mismatching is that each manufacturer has a certain sound signature that differentiates themselves from one another.
One brand might tend to favor bass, while another brand might favor mids.
Mixing and matching is going to end up causing your sound to be all over the place, with no real sense of actual cohesion.
Since there can be variation in sound within the same brand and even line of speaker, imagine the variance when you use an entirely different brand.
So yeah, definitely make sure that they match. Even if this isn’t fully possible, at least make sure they’re all of the same brand since at least that way they’ll be somewhat similar.
Do that, and you should be good. Just try to get ones from the same line if possible.
Here’s a little more on timbre matching and why it’s so important.
https://easyhometheater.net/how-important-is-timbre-matching-your-home-theater-speakers
10.) Using Ceiling Speakers As A Surround System
This one’s definitely on the bizarre side of things, but in case it isn’t obvious, using ceiling speakers as a surround system is definitely on the list of things that you shouldn’t do.
You’d think that knowing this would be a given, but I actually had a friend do this and I was shocked to say the least. Their reasoning was that they didn’t have the space for bookshelf speakers, so they decided to do it this way.
If you find that you don’t have the space for a typical surround system, then at least go for a sound bar that’s capable of emulating this. Using ones made for the ceiling in this fashion is going to severely limit the quality since it wasn’t designed to be used this way.
Not only will it seem off, but the perception of surround sound itself will likely be lost.
So yeah, don’t do this.
Here’s an article on soundbars that lists a few capable of replicating that surround aspect.
https://easyhometheater.net/the-best-sound-bars
11.) Turning The Volume Up Past 0 db
Here’s something that I could see being a common misnomer when first entering into the audio world, and that is that going up past 0 dB in volume on the receiver.
Before explaining why it’s such a bad idea to do this, we first need to actually understand what dB even means. dB stands for decibels, and in the most basic terms, is a measure of how loud something is.
Now without getting too complicated, human hearing is extremely vast so using measurements in the form of decibels allows us to standardize different levels of volume so that we have an idea of exactly how loud something is.
But what’s interesting is that it isn’t a linear relationship.
A noise at 20 decibels and a noise at say 40 decibels is described as being a jump of more than 10 times.
If a noise then goes up to 60 dB, it’s noted as being 10 times louder than 40 dB and 100 times more so than 20dB.
Seriously, how weird is that?
So then what does all of this have to do with the receiver though, and why is it bad to go past 0?
Well if you haven’t noticed, the volume on a receiver is shown as a negative number, more specifically -dB. The reason for this is that it refers to what is known as reference level.
Reference level is basically a universal audio standard used when making content. It’s what allows sound engineers to mix content without confusion by having a single understood standard.
So when you have the volume at say -30dB, it’s basically telling you that it’s 30 decibels away from reference level. The negative number is just a denotation of how many decibels away from reference level you are.
The problem arises when you go above reference.
Normally a positive number is a good thing, but here not so much. The farther above 0dB that you go, the more distortion you’re introducing into the sound (not to mention it’d be pretty freaking loud by this point)
But not only is distortion an issue when reaching these levels, you also run a few more serious risks like receiver potentially overheating and short circuiting, the drivers in the speakers warping or even breaking, and even hearing loss if it goes from a quiet to loud scene at that level.
Needing to go that high is usually a sign that your speakers are not powerful enough for the room, or that they’re incorrectly calibrated.
Settings in the actual receiver could be an issue too since there’s one called DRC (dynamic range control) which sort of mellows the difference between the highest and lowest sounds, meaning an explosion and a line of dialogue would be around the same volume.
This is particularly helpful for night time viewers, but not so much if you’re watching in a normal setting.
Check to see if that’s on and if it is, you might want to turn it off if you’re not in a quieter environment. Hopefully doing so should remedy the issue.
Here’s a really good read by the way if you’re interested in the specifics of human hearing.
https://geoffthegreygeek.com/understanding-decibels/
12.) Using Speaker Wire That’s Too Thin
This is one of those mistakes that’s really easy to make since it isn’t covered nearly enough.
You would think that any speaker wire would do the job since it’s merely responsible for transmitting information from point A to B.
While true, there’s slightly more to it than that.
The major variable in that sentiment is the distance that information has to travel before reaching the destination. The longer the distance, the thicker the wire has to be to do the job adequately.
Speaker wire thickness is typically referred to by the AWG number (American Wire Gauge) and more specifically, is measured in mm (millimeters)
The strange thing though is that the lower this number is, the thicker the actual wire is. The reason for this has to do with the amount of resistance to an electrical current a wire possesses.
The smaller the wire, the more resistant to a current it is and thus, the higher the number will be.
On the other hand, the thicker the wire, the less resistant it’ll be due to there being more area for the current to travel through. This of course gives it a lower number.
For distances that 50 feet and less, you’ll typically want to with go with 16 gauge wire as that usually works the best. If you had a much bigger distance, say something like 100 feet, using that same 16 gauge wire could potentially experience issues due to the distance.
What you find when you use wires that are too thin for the distance they’re being used for is that you typically need to turn the volume to a higher setting just to get the same output had you used one that was thicker.
That and quality of the sound might take a hit as well. For those longer distances 14 and in this case even 12 would likely be applicable.
But for the average living room, you’re fine sticking with the standard 16 gauge. Though going thicker won’t exactly hurt anything, it wouldn’t really be necessary either.
This is the one that I typically use that should work great for you as well (unless you’re the one with that 100 foot room, in which case you’ll likely want to go bigger)
Also, just in case you need help with actually hiding the wires themselves so that you’re not tripping all over the place, I’ve got you covered.
16-Gauge Speaker Wire
https://easyhometheater.net/hiding-speaker-wire-solutions
13.) Setting The Subwoofers In The Wrong Spot
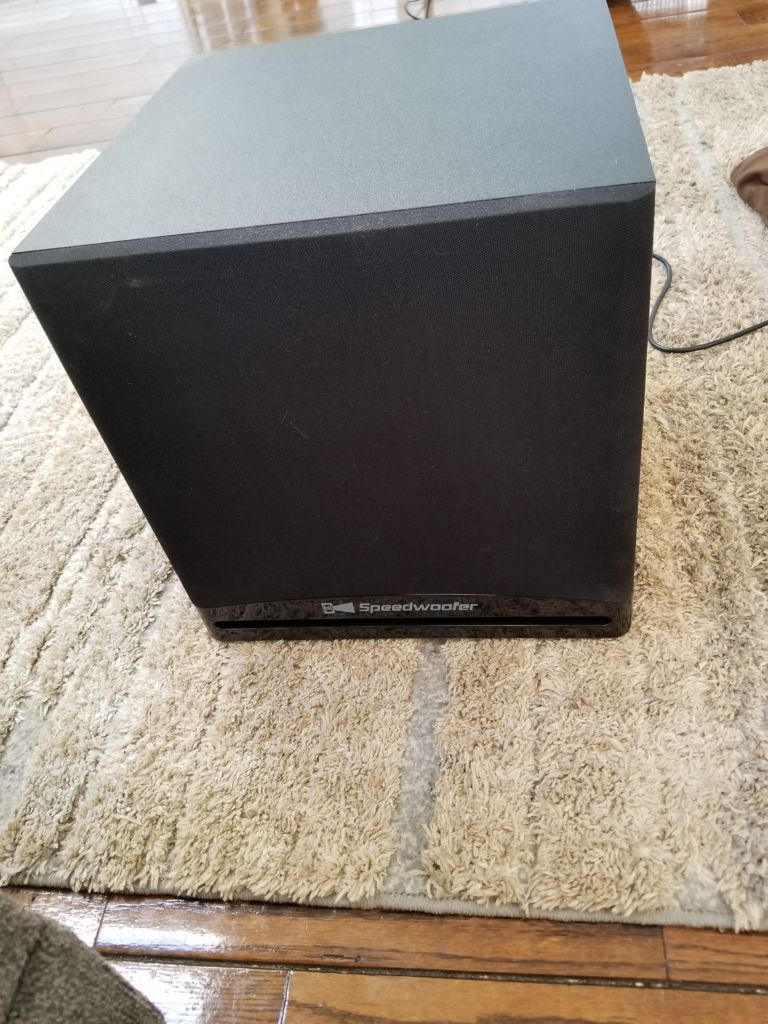
Another huge mistake that I see a lot of people make (myself included initially) is that setting the subwoofer wherever in the room is perfectly fine.
This isn’t true at all.
While it’s true that you might get lucky with great placement right off the bat, there’s likely a place in the room where it’ll sound better.
Now I’ve talked about this many times before, but the placement of the sub can be the difference between things sounding perfect, and sounding like there’s no bass present at all.
This has to do with what are known as peaks and nulls.
As sound waves travel throughout the room, they interact with everything in it, including themselves. In some spots, these waves will double upon each other which is what we call a peak, causing things to sound boomy and bloated.
In other spots however, they completely cancel each other out leading to a lack of bass in that spot. These are known as nulls.
So how do you predict where these happen?
Simple answer, you really can’t; at least reliably anyway since every room is different.
However what you can do is minimize the instances of them, as well as making sure your specific seating area doesn’t fall within a peak/null through a variety of ways; one of the most important being the subwoofer crawl.
This is basically where you place the subwoofer in your seating position, and go around the room to find where the bass sounds the bass before placing it in that exact spot.
Another way of combating these is by adding an additional sub to your setup.
If you aren’t sure about the best way to do this, or if you’re simply looking for tips on how to optimize your bass fully, I highly recommend you to check this as this should help out immensely (not to mention it’s a good read in general)
https://easyhometheater.net/setting-up-2-subwoofers
14.) Turning The Subwoofer Volume Too Loud
Since the importance of the subwoofer is generally understood by now, I’m pretty sure you’re fully aware of the importance of setting it up right as well.
What I mean by that is like your speakers, your subwoofer should also be calibrated.
Like I mentioned earlier, even though it’s possible to do this manually, having the receiver adjust things for you is probably the best course of action.
However there is something that I didn’t touch upon and it’s something that’s just as important.
If you look on the back of your sub, then you’ll likely notice a bunch of knobs with one of them being the volume setting.
A huge mistake that a lot of people make here is assuming that the volume knob (also referred to as the gain) should be turned up all the way up.
While the gain knob does adjust the volume, turning it too high can cause the subwoofer to sound boomy and distorted which is the opposite of what you want.
Also playing it too loud can cause it to stop working which isn’t good.
Once the gain knob is set, you shouldn’t mess with it again. Should you need to adjust the volume of the sub again in the future, it’s best to do so on the actual receiver where you can fine tune things with a greater granularity.
But where should the knob actually be set then?
I’ve found that it sounds best with either the knob set in the middle at the 12 o clock position, or at the 1 o clock position.
Even the 2 o clock position is still acceptable if you like a little more oomph. But turning the knob any more than that and the low end starts to overshadow the content, which should never happen.
So just set it anywhere from the 12 and 2 position, and you’re golden.
15.) Using Subwoofers Out Of Phase
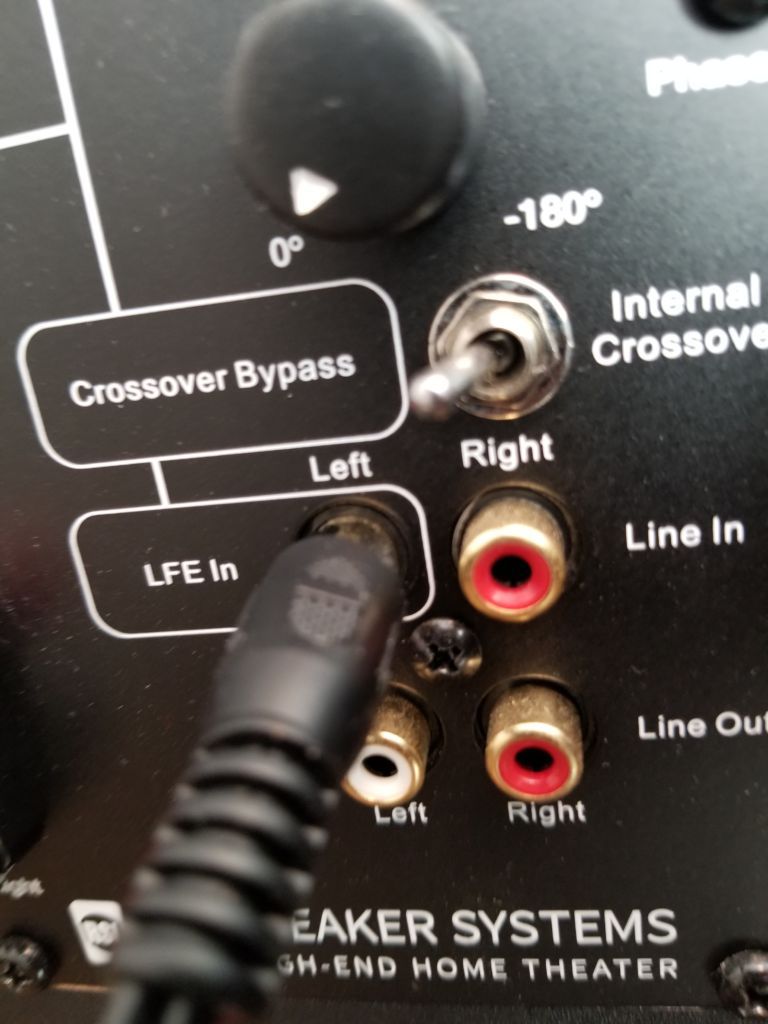
Another knob or switch you’re likely to notice on the subwoofer is one called phase.
This is a setting that basically switches the polarity of a subwoofer by adding a delay to the incoming signal, thus causing it to be either in or out of phase.
But why exactly would someone want to do this?
Well if you have a large room with 2 subwoofers with one in the front of the room, and one towards the back, it’s possible that one of the subwoofers could seem to be playing before or after the second.
So by hitting the switch on one of them and adding a delay, it can cause them to sound more in sync with one another.
The setting can also allow a better integration between the sub and speakers so that things sound a bit more cohesive.
However this is personally one of those things that I’m a little ambivalent on because in theory it should make a world of difference but in practice, I’m not to sure how effective it is.
I’ve had much better results with either turning the volume of the subwoofer up or simply moving it, so I’m not too sure about the efficacy of this one.
I would at least say try and see what difference you notice and if all else fails, you can always move it to a different location or adjust the volume like I did.
Just don’t make the mistake of having a subwoofer that sounds completely separate from your speakers since it’s a sign that something may be set wrong.
Everything should blend together ideally.
Here’s a little more on phase and polarity if you’re curious.
https://www.mtx.com/library-phase-discussion
16.) Placing Your Receiver In A Cabinet
Putting your receiver in an enclosed space, especially a cabinet, is definitely falls under the list of things that you never want to do.
This is honestly one of the worst you could probably do when it comes to home theater errors.
An AV receiver has ventilation holes on the top, and or sides which allow air to freely flow through it. This air allows it to stay cool since the electricity that it uses causes the circuitry to heat up.
However what happens when you put it in a small space with no air is it has a much harder time with ventilation which can cause it to overheat.
What happens if it overheats?
Well a number of bad things could potentially happen.
It could possibly short circuit and break.
If it’s sitting on a softer surface like plastic, it could melt it.
Then the worse thing that could happen is if it gets hot enough, you run the risk of potentially starting a fire.
This is why it’s extremely important to put your receiver in a place that’s well ventilated and open.
You’ll often see informational notices on packaging emphasizing the importance of doing this, and that’s the reason why.
Another big no no by the way, is placing things on top of it as this can cause the same hazards mentioned before and can impact how long the receiver lasts.
As long as it’s in an area that’s open and visible, you’ll be good to go.
17.) Not Taking Into Account The Lighting Conditions Of The Room
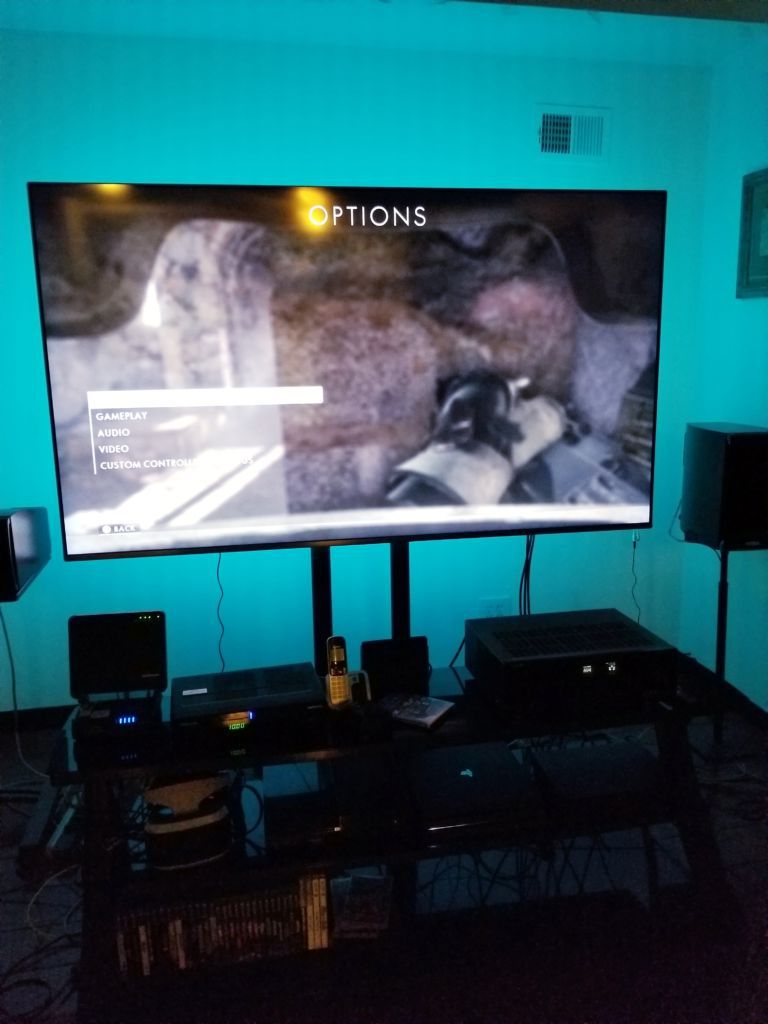
I think lighting conditions is certainly one of those things that wouldn’t immediately come to mind necessarily when thinking about ways to best optimize your home theater experience.
But make no mistake, the lighting in the room can make a pretty big difference. If you typically watch your content in rooms with a lot of open windows and light, then beams of direct sunlight on the screen is probably something you’re pretty use to dealing with.
But having the screen in direct sunlight is preventing you from getting the best picture quality without question.
https://easyhometheater.net/home-theater-paint-color-ideas#Taking Into Account The Lighting Of The Particular Room
If physically moving the television is out of the question, then light blocking curtains are probably the next best option.
They’ll block out those harsh rays, preventing your image from becoming washed out; especially since a dim setting provides the best result in terms of picture.
Also try to not place any direct sources of light such as lamps opposite of the screen since it’ll have a negative effect on picture quality; not to mention it also being overly distracting.
Conversely if you’re somebody who watches content in a dark environment most of the time, then eyestrain is a very real possibility due to the fact that the screen is so much brighter than its surroundings.
Even if it doesn’t seem necessarily bright bright at first, watching for hours in that kind of environment can still cause visual fatigue.
What you can do to combat this is add ambient lighting to the room. The soft glow of a lamp on a low setting for example, can help with this tremendously, giving the room a unique sense of character.
You can even add an LED lightstrip to the back of your TV that allows you to control the intensity, color, etc. all with the press of a button on either the included remote or your smartphone.
I personally use one on my TV, and I can’t get enough of it honestly. It’s really awesome in person, so no doubt that you’d like it too.
WONTEX Blackout Curtains
Music Sync Color Changing LED Strip Lights
18.) Placing Your Display In A Less Than Ideal Place
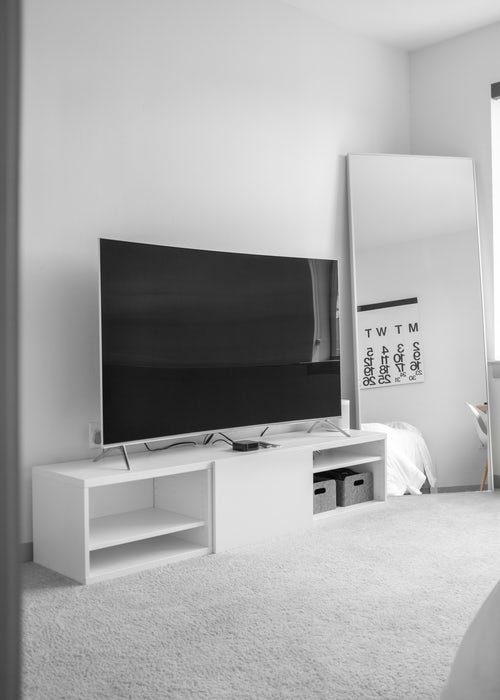
Similar to the lighting in the room affecting picture quality, where you place the display matters a lot as well. Ideally, you don’t want to place it near or opposite a window because it’ll simply get washed out from over exposure of sunlight.
But more so than that, where you place it is also going to dramatically affect the viewing the viewing angle as well.
The viewing angle in simple terms, is basically the point where the picture looks best. So if a display is touted as having great viewing angles, that means that sitting off a little to the left or right won’t influence how things look on screen as much.
But in that same vein, you ideally want your seating position to be as close to the center of the display as possible.
This is because directly in front is where the content will look best. It’s important keep in mind that the more off axis that you sit from the television, the more the picture quality will degrade, hence why being in a direct line of sight of your TV is so important.
The of height of the set matters a lot too. If possible, try to have it anywhere from eye level when seated, to 2 feet above when seated. Any more or less than that, and I’ve found that things start to go downhill.
Another thing that I want to emphasize is to not put the television around heat sources or above a fireplace. I know that that’s a popular place for displays to be placed, but overtime it can have a negative effect on the circuitry so just keep that in mind if you do.
19.) Using A Display That’s Too Small For The Room
This is something I’ve seen far too often. Whether it’s something that’s unintentionally ignored, or merely disregarded, you don’t want to neglect going with a TV that’s appropriately sized for your room.
Going with something to small is going to cause problems with reading text and actually seeing what’s happening on screen.
Conversely, going with one too big is going to end up taking up too much space and be way too close.
So how can you tell what size screen is the right one to go with for your room?
What if I told you there was a calculator that could tell you exactly that.
Turns out there actually is.
Simply enter the size of the TV you currently have, or the distance you plan on sitting from the display and it’ll tell you exactly what the right choice is for you and why.
It’s super helpful and a tool that I often use myself.
Keep in mind that bigger screens, especially newer ones, will be 4K which gives you a 4 time boost in resolution.
This means you can technically sit closer without compromising picture quality, so the size you go with doesn’t necessarily have to be as big.
As a general rule of thumb, starting with 50 inches, the minimum seating distance will be around 5 feet.
Then every 5 inches in display size you go up from that will correspond to a 6 inch increase in distance; meaning at 55 inches the minimum distance should be 5’6, and so on.
But you can always use the calculator to get a more exact answer too.
https://www.inchcalculator.com/tv-size-viewing-distance-calculator/
https://easyhometheater.net/what-is-a-4k-television
https://easyhometheater.net/the-best-tvs
20.) Not Optimizing Your Display
I’m not sure if it’s just me, but I often feel like the display is incredibly neglected when it comes to home theater.
We place so much emphasis on getting things right with our speakers, that it can be somewhat easy to forget that the display holds just as much importance in the AV world.
I mean heck it’s even in the name. So just like with calibrating our speakers, a major step that a lot of people tend to forget to do is to actually calibrate their display.
Now some manufacturers do provide decent presets out of the box that claim that they’re all ready to go, but you won’t have a picture that’s completely your own until you adjust the picture for your specific viewing environment.
Doing so can be the difference between an initially bad looking picture to a much better looking one after.
This, granted you do things the right way.
You can either have your television professionally calibrated for a fee, or you can adjust things yourself.
The professionally calibrated way will be much more in depth than what is normally possible since they use special tools to access a special menu, which then allows them to tweak it with precision.
But an interesting thing to note is I’ve seen people who have had it done, and preferred the way the picture looked before.
That’s probably due to the fact that it’s typically calibrated in the warm 2 setting, which is the closest to the reference standard film makers use, 6500K; which can be seen as too yellow to some.
What I would personally do is adjust it yourself first then see how you like it.
I’m personally of the opinion that you can get a more than satisfactory result by yourself.
But how can you actually optimize it?
Well to make it easy, check out the article I did that shows you exactly that.
It’s not that hard, and shouldn’t take too long so don’t worry. But it’s definitely worth doing if you want the best visual experience possible.
https://easyhometheater.net/how-to-optimize-your-tv
21.) Not Turning On 4k Support In The Settings Menu For A Samsung TV
This tip is a a very specific one that only applies if you have a recent Samsung TV, but I definitely thought it was important to include because it was a mistake that even I made and only recently corrected.
If you happen to use multiple HDMI ports on the TV with devices that support 4K, weirdly enough, 4K pass through for HDMI slots 3 and 4 is turned off by default.
That means not turning them on in the menu will result in only 1080p being displayed.
I’m not sure if this is an error that Samsung isn’t aware of, something only specific to my model of TV, or whether it’ll be patched in the future, but for now you will want to check to see if they’re turned on.
In order to do this, go into the general setting in the menu, hit external device manager, then hit HDMI UHD Color.
The first and second slots should already be active by default, but check to see whether the 3rd and 4th ones are as well. If not, simply press the center button on the remote on each of them so that they are.
That’s pretty much it.
Again I’m not sure if it’s just my display, but it’s certainly worth checking in your own. It’ll save you the hours of confusion that I went through wondering why the 4K wasn’t working.
That was certainly fun…
22.) Using The Wrong Aspect Ratio
Here’s another scenario that isn’t common, but may apply to you if you notice something off about the way content looks.
To keep it simple, displays use what is known as an aspect ratio to display content.
An aspect ratio is basically a standard used to determine the shape of your display. For example for square displays, a 4:3 aspect ratio is used.
That means that if the screen were to be cut into 4 equal parts width wise, you would have 3 equal parts height wise.
4:3 isn’t used that much anymore and instead, 16:9 has become the new standard.
What’s interesting is that filmmakers use a completely different standard, 21:9.
21:9 is much wider, and in order to actually fit, they have to place black bars at the top and bottom of the screen so that it’s displayed correctly. I’m sure you’ve seen those before.
They’re actually called letterboxes, and they’re used because the content was originally filmed in a much wider context (the more you know right?)
But what you want to be careful of is using the wrong aspect ratio because doing so can cause the content to either look stretched, too small, letterboxed, and so on.
Unless you want to use a different one, I’d personally just stick with the 16:9 ratio since that’s what the current standard is.
I know that occasionally, updates in your cable box or television can change your aspect ratio completely so check in the menus to see what it’s currently set at.
https://www.rtings.com/tv/learn/what-is-the-aspect-ratio-4-3-16-9-21-9
23.) Not Setting The Cable Box To 1080p Or Its Highest Setting
This one can be the result of either an update, or a brand new cable box not being set as this initially, but make sure that your settings use the highest available display resolution within the actual device.
Normally this is 1080p, but I do know that 4K cable boxes exist and are being rolled out to more people as time goes on. I’d check to see what yours is currently set to because it may just turn out that it’s capable of a lot more than you originally thought.
Plus like I said, a stray update or setting change can alter this, so it’s always good to check up on this from time to time.
24.) Using HDR+ On Actual HDR Content
Proper HDR, which stands for High Dynamic Range, probably makes one of the biggest differences when it comes to picture quality.
I mean it allows the brightest and darkest parts of the screen to show at the same time while giving you the most detail in each. It’s similar to how the human eye works in that that contrast between light and dark doesn’t come at the expense of detail.
It really is one of those things you just have to see in person because no joke, I honestly think it’s one of the most mind blowing tech advancements in recent years.
It’s really incredible on a TV with correct settings.
Because of that though, manufacturers have developed a faux HDR dubbed HDR+ which simulates this effect on non HDR content.
While it is a little better than standard content, it’s not as good as the real thing since colors can sometimes get somewhat saturated.
But a big mistake that I’ve seen people make is using HDR+ on actual HDR content. That’s definitely something that you don’t want to do.
If the content natively expands the dynamic range already, then applying this setting on top is not only unnecessary, but degrades picture fidelity as well.
So if you see that your TV has this setting and you wish to use it, only use it on regular content. Otherwise you’ll just be sacrificing quality.
You should have a look at the following article to see exactly why HDR is the future of display tech, and why I laud it so much.
https://easyhometheater.net/what-is-an-hdr-television
25.) Setting Display To PC Instead Of RGB In A Gaming Console

This is another really specific thing that you might do if you having a gaming console like an Xbox Series X or Playstation 5.
If you go into the settings, you might notice that under the display setting is a few different options that include PC and RGB.
Make sure that it’s set to RGB and not PC. RGB, which stands for Red, Green, & Blue, is basically a denotation for the pixel standard used in televisions.
PC on the other hand, is used for, like the name suggests, PCs. Setting it to anything other than RGB on a TV might provide you with a seemingly better picture at first, but it’s not as it seems.
When you do this, black levels can become crushed, and you begin to lose shadow detail which is definitely something that you don’t want. So leave it on the default, unless you’re actually using a PC monitor, since they use a different display technology.
This is further compounded when you add things like HDR and Wide Color to the mix. More about that here if you’re curious.
https://easyhometheater.net/what-is-a-wide-color-gamut-tv
Bonus: Not Using A Surge Protector
This is a huge investment that a lot of people don’t use but should.
A surge protector can literally be the difference between riding out a harmless lightning storm, and finding out you have fried electronics.
I want to emphasize the importance of using one because I always doubted the efficacy or even need of having them until one faithful day, a terrible thunderstorm came through and completely trashed my receiver and speakers.
It was eye opening to say the least, and showed me that they’re used for a reason.
Since then, I’ve always had one and haven’t had a single problem since. When storms like that happen, the excess electricity that they generate can overload any electronics to the point that they can’t recover.
A surge protector helps to negate this extra energy. So yeah, just want to spare your new toys of the same fate mine unfortunately suffered.
Highly, highly recommend you use one if you aren’t already. Take it from me, it’s not just hyperbole; this can actually happen.
AmazonBasics 6-Outlet Surge Protector Power Strip
Bonus#2: Using Only 1 Set Of Wires With A Stereo Ceiling Speaker
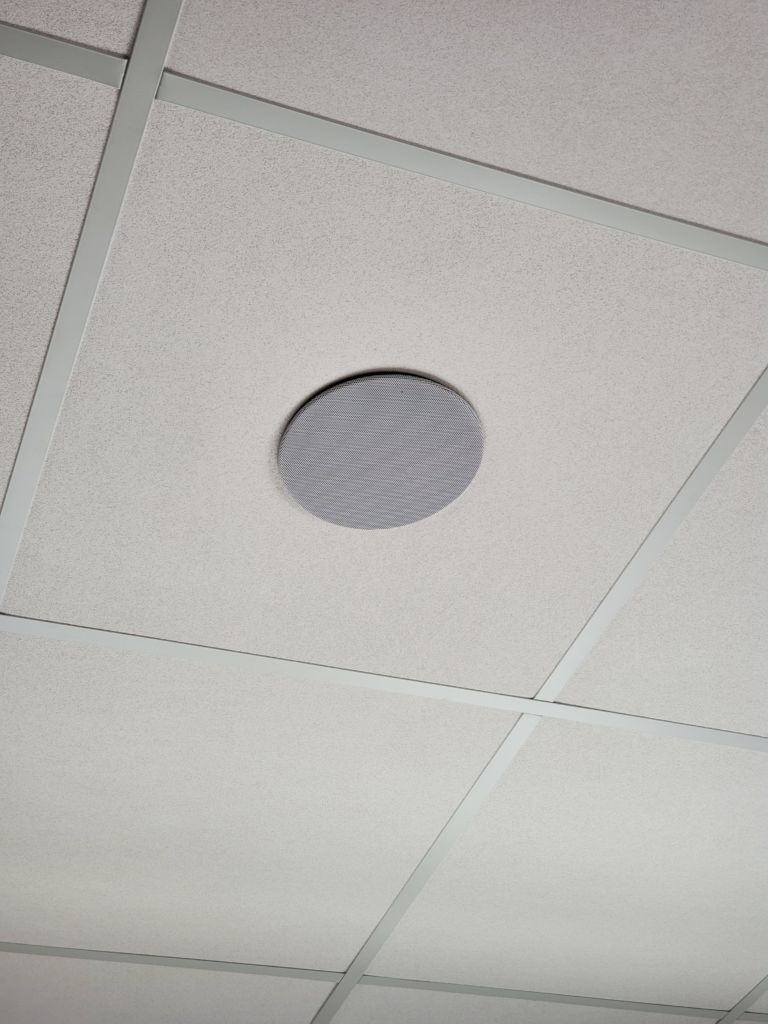
If you’ve ever had the pleasure of owning a ceiling speaker, then you’d know how convenient they are. This is even truer when it comes to stereo ceiling speakers — which are able to replicate stereo sound from only a single speaker.
But what some may not realize is that when you use these kinds in particular, 2 sets of wires should be used instead of 1 since they’re technically 2 speakers in 1.
When you don’t do this, what can happen is 1 side of the speaker not working, the sound being very low, or worse, it not working entirely.
Again this is for the stereo kind, not the normal ones.Normal ceiling speakers only require 1.
The only exception to this is if you use 4 core speaker cables, which essentially combines those 2 pairs into a single wire. I’d definitely recommend it if you plan on going this route.
https://easyhometheater.net/the-best-ceiling-speakers
Bonus#3: Setting Your Speakers To Large Instead Of Small In The Receiver Settings
A common issue that sometimes happens (depending on what receiver you use) is that after automatic calibration, it may end up setting your speakers to the large setting instead of small.
Basically the determination of whether a speaker is capable of reproducing a full range sound or not is denoted by the name large or small. Large means it’s full range and can produce sounds both above and below 80 Hz, while small means it can’t and is only capable of the ones above it.
80 Hz is of course the recommended setting of where your subwoofer should take over, but the problem is, receivers can sometimes set the speakers to large — causing an overlap in sound.
By setting a smaller bookshelf speaker to the large setting, this not only asks more of it than what it’s likely capable of, but you end up with holes in your sound or things just seeming off.
You’d probably notice a reduction in volume and most likely clarity too unfortunately.
So the solution is to go back into the receiver menu and change the setting to small for everything except the subwoofer so that way the speakers handle everything above 80 Hz, and the sub takes care of things below that; giving you a much cleaner sound.
Now the exception to this is if you’re using floorstanding speakers since they actually are full range typically due to their bigger drivers, and can handle bass ranges much lower than a bookshelf speaker can.
But from personal experience, even then I’d still set those to small too since it puts less stress on the drivers, and frees up more power for them to execute the higher range sounds with much more breadth.
Final thoughts
Woo that took a while, but hopefully this will help you to avoid 25 of the worst home theater mistakes that new, and even seasoned enthusiasts often make.
Hopefully you learned at least one new tip that can help you to take your setup to the next level.
Actually speaking of which, be sure to check out 10 Home Theater Ideas To Use Right Now and Extremely Common Home Theater Problems if you want to make sure that you have all your bases covered in terms of optimizing your set up.
But if you apply the things talked about here, you’ll have a system that should provide for a great experience..
Until next time, make it easy, keep it simple.
About Me

Jay
Hey everyone it’s nice to meet you. I'm Jay, writer & founder of the site Easy Home Theater. I've been with this hobby of home entertainment for many years now. I decided to create this site to be a helpful resource, and share everything that I've learned from personal experience with you. I also happen to be a huge gamer, lover of all things tech related, and a major fitness buff (love weightlifting)
Contact: Contact Jay
Facebook: https://www.facebook.com/Easyhometheater/
X: https://x.com/easyhometheater
Pinterest: https://www.pinterest.com/easyhometheater/pins/
Instagram: https://www.instagram.com/easyhometheater/
Followit: https://follow.it/easy-home-theater
Bluesky: https://bsky.app/profile/easyhometheater.bsky.social
18 Comments so far:
-
-
That really means so much honestly, thank you! Yeah I tried to really cover as much as possible to help as many as possible, so it’s awesome to know that at least somebody found it useful. If you ever have any questions, feel free to reach out.
-
-
Fantastic article. I bought my partner a soundbar for christmas and we managed to get it working but im sure it could sound better. Can you help me. The back does not have an output for HDMI. The options are AUX, OPTICAL or COAXIAL. TV has no Coaxial. So I used a minijact to connect my headphones output in TV to AUX input in soundbar. Is this the best option?
-
Thank you! And that’s an awesome present, I’m sure they were happy to get that. In regards to your question, honestly when HDMI isn’t an option, optical is always your next best bet. There’s a slight audio difference sure, but it isn’t as monumental as you’d think so certainly go with optical since you’ll still get a good sound experience.
-
-
This is wonderfully in depth review of some of the issues that can arise with home theatre. It’s great that you have taken the time to go through each problem in such detail and I’m sure that many people will now look into their own setup and inevitably make improvements!
Great article well done! I will be using this site as a source of info for all friends with these concerns.
-
Appreciate it a lot! Glad you found it helpful.
-
-
I actually know nothing about this topic, and this article was very informative. I’m going to save it as a reference for the future when I have the space to do something great!
-
Awesome! I’ll be here if you need any help with anything.?
-
-
I know that story. When I first bought my first home theater I was not thinking too much about where it should be set, the sitting are as well as speaker position. So after it was set, the first thing we noticed, was that not all of us could enjoy the view as a person who is watching from the center.
Another thing you also mentioned is the location of sound systems. I just put it behind our armchairs, thinking that was good enough for everyone. Again it showed that the sound was really distorted, especially for the person sitting behind that armchair.
My advice for everyone who is about to install home theater – make a good planning of your space and equipment so you do not make the same mistakes I did.
I love your website by the way.
-
Haha glad someone can relate! Yeah there’s so many things that can go wrong and a lot of times you don’t even realize it when it does. I completely agree with your sentiment, taking your time is the most important thing you can do. This is something that you’ll be with for a potentially long time so why not you know? Glad you like it, means a lot.
-
-
Fantastic article with home theater mistakes I know I would make when purchasing a home therater system, I knew nothing about home theater systems until I read your article. At least now I know what to avoid which should be extremely useful, I hope you write another article soon on some of the best home theaters for people who live in apartments with pets
Jeff
-
Appreciate it Jeff! And if that’s the case, perhaps a soundbar might be the better choice in your case?
-
-
Hey great insight on to things you should look into when setting up your sound system. I really like the advice on using wires that are too thin as this relates to what I am trying to accomplish now, but in this case I am turning a downstairs basement into a movie theater type set up any recommendation on the wire to use for this room?
-
Are you running the wires from somewhere else or simply in that room? If it’s the former then definitely go with 14 or even 12 since longer distances require more thickness to keep the same signal strength. If its the latter though, 16 or even 14 to be on the safe side is fine.
-
-
Thanks for the information.
I did notice a significant difference in 2 different types of speakers I had.
Is there a brand of speakers you recommend over others?
-
That’s dependent on so many things it’s nearly impossible to say, especially since different people prioritize different things you know. What’s something you’d ideally like in a speaker? (For example how big would you want it, how many watts, etc) and I can give some suggestions from there.
-
-
Great website. I am setting up a Home Theater in a room above my garage. The room is roughly 15’x30′ and has, what I consider, a cove ceiling about 8′ at its highest. I am setting up a 7.1 system. I read you shouldn’t put your surround speakers in the ceiling. A cove ceiling essentially forms half a hexagon above the walls. The walls are about 4′ high. Would it be OK to put the surround speakers in the sloped/inclined portion of the ceiling?
-
Hey joe, I appreciate it. And in regards to your question, if they’re ceiling speakers then it’s perfectly fine. I actually have a ceiling similar to yours and what I did was use these wall mounted speaker clamps just before where the ceiling slopes that hold the speaker level and then from there they can be aimed downwards. But I’m curious were you talking about actual ceiling speakers or regular ones?
-





A really great article, so detailed on each and every mistake that many of us wouldn’t even think of! Those many years of “being with this hobby” really show here and I’d say has surpassed the hobby level probably years ago. Anyway, this very knowledgable article is a real treasure as for those who only plan to set up their first home theater, as me, as for those who already are in the matter and could improve their current experience with it, equally. I surely learnt a lot from you, thank you!