How To Set Up A Home Theater
How To Set Up A Home Theater
Alright you’re here because you want to know how to set up a home theater.
It’s often made way more complicated than it needs to be, so this will be as straightforward as possible.
It will also be picture heavy since it’s easier to understand.
This is a setup guide for the traditional 2.1, 3.1, and/or 5.1 setups.
The reason this doesn’t mention soundbars or home theaters in a box is because each one is different, and they usually have their own respective setup instructions.
Planning Where To Put Your Stuff
Connecting The Wires To Your Speakers
Hooking Up The Receiver
Subwoofer Placement
Calibrating Your Speaker (Not Completely Necessary But Generally Recommended)
∼ What You’ll Need ∼
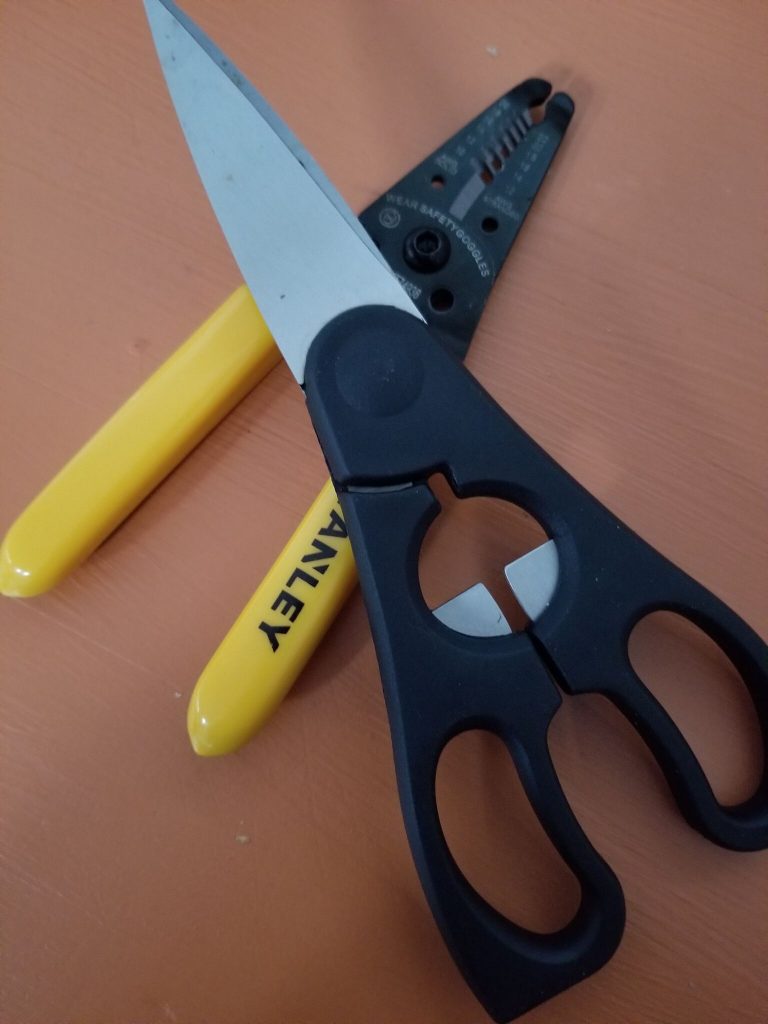
- Speaker Wire (most commonly 14-16 gauge wire)
- Wire Stripper
- Scissors
- light of some sort to see behind your receiver
- HDMI cables for each of your devices
- RCA cable for your subwoofer
- Speaker connectors (banana plugs or pin plugs depending on what your speakers use; if it says 5 way binding posts in the product description then that means they accept any kind of connection)
- Possibly a few other things depending on your setup so here’s a recommendations list just in case
- Patience! This is going to take a decent amount of time, so make sure that before you do this, you have nothing important to do after or around this time. Luckily it’s really not that difficult. Plus keep in mind you’ll probably only have to do this once so don’t fret, you got it!
Planning Where To Your Stuff
Whether it’s a small home theater or large entertainment room, one of the most important things to keep in mind even before calibrating your home theater speakers & placing your equipment, is knowing beforehand where you want your stuff to actually go.
Placement plays a key role in your overall experience so you’ll of course want to do this right.
Here’s what to keep in mind for each part of your system.
The Receiver
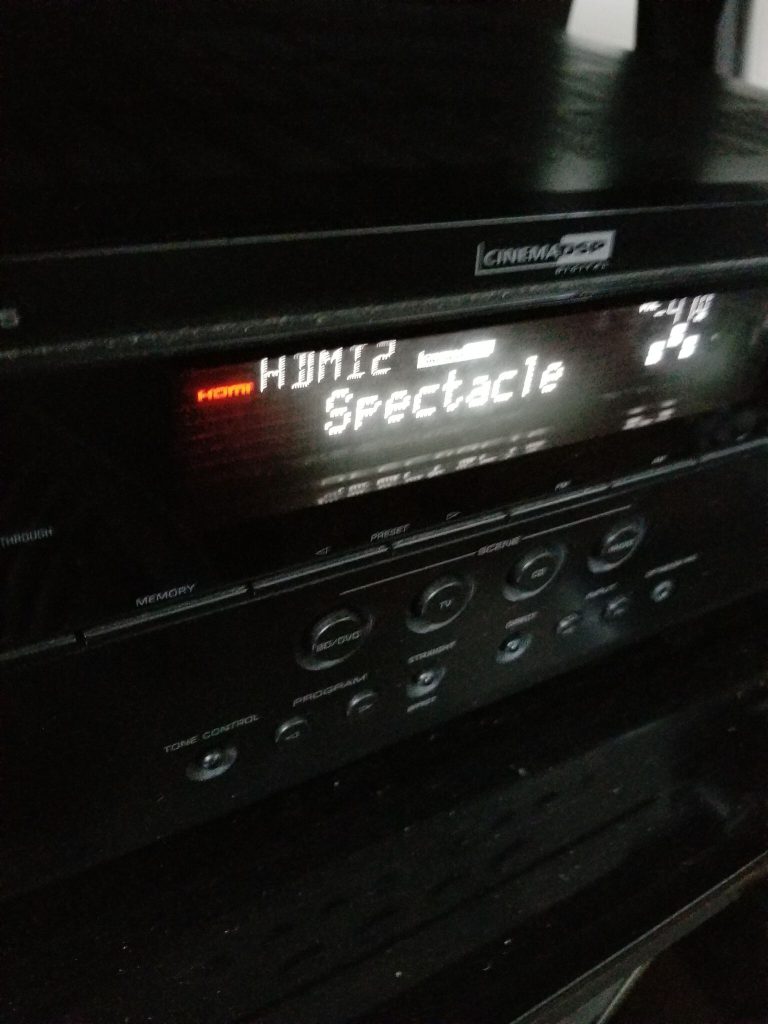
When it comes to setting up a home theater system, you can think of the receiver as basically the main hub who’s job it is to process everything from the picture all the way to the sound.
To say it’s important from not only from a picking the right one standpoint, but also in regards to proper setup is an understatement.
And as I’ve alluded to, the proper setup is important for the overall health and longevity of your receiver as well.
Basically you want to make sure that your receiver is placed somewhere where it can get adequate ventilation and air flow so that it works properly.
Believe it or not, if you place it in somewhere like a cabinet behind glass or a small space, it can get too hot and overheat.
So make sure it’s in a space where it can get enough air.
Also make sure that you don’t put anything on top of the receiver too since that’ll also block the vents which can cause it to overheat in the long run.
Front Left & Right Speaker
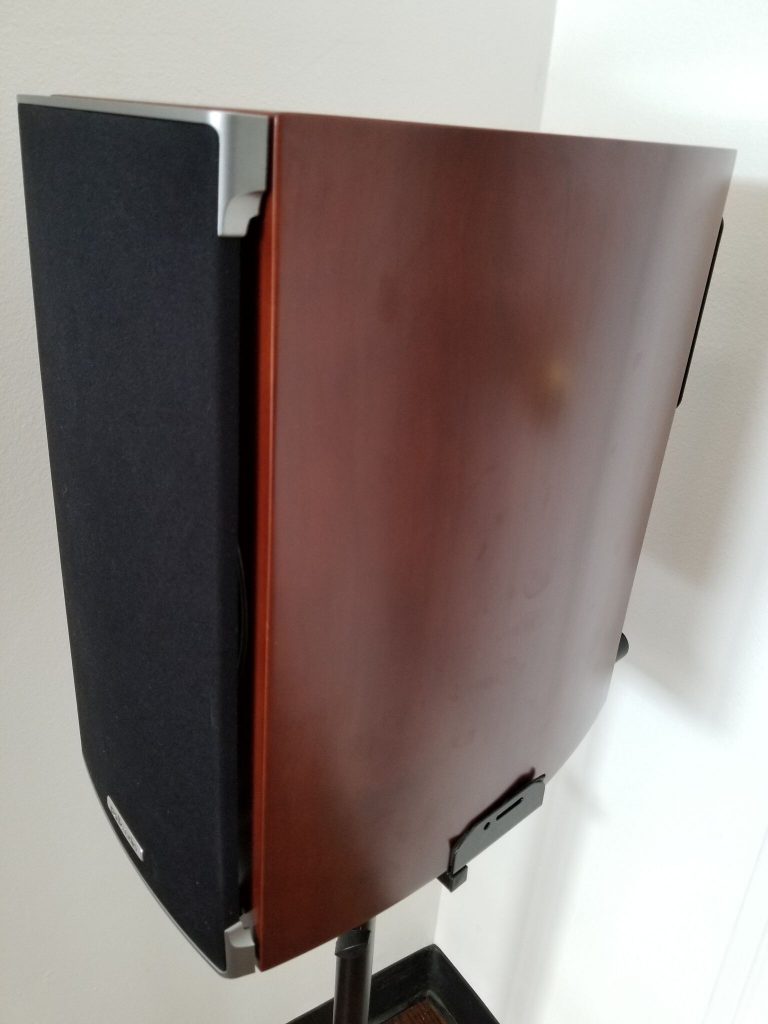
Ideally when you have your front left and right speaker hooked up, you want it at the same ear level where you’ll most commonly be sitting.
That’s the most optimal position when it comes to getting the best immersion from your speakers.
Now this isn’t gospel, but generally try not placing these more than 12 feet apart.
If you place them too far from each other, you’ll hear the separate sound from each speaker rather than it blending together like you’d ideally want.
This effectively diminishes the feeling of a seamless sound presence and it can be pretty distracting as a whole.
If it’s too close, something called the sound-stage (which is basically a term for how well your sound blends together) will be really narrow sounding and you’ll notice it.
An example of this would be say if you happened to place your front left & right speakers 6 feet apart, and you sat a little to the outside of where your speakers were facing.
What you’d probably immediately notice is a lack of immersion since it’d sound like the audio was coming from off to the side rather than in front of you.
This could also lead to you having to increase the volume just to hear what’s going on which isn’t necessary if they’re just placed correctly.
So at least 6 feet apart but no greater than 12 would provide for the best soundstage in that instance.
A little something else to note if you do want the best sound is to place them at a distance that’s equal to or less than where you’ll be sitting.
So for example let’s say you place them 8 feet apart, if you’re sitting 8 feet away or more from the speakers themselves, then you’re golden. That way it blends together into a convincing mix.
Keep in mind that if you’re using a 4K TV, seating may be closer since the resolution of the image itself is higher.
To help determine where to sit for great picture quality with a 1080p or 4K TV, as well as where to place the front speakers, this calculator may help.
https://easyhometheater.net/seating-speaker-calculator
Another thing that you can sort of play with is the angle of your speakers too depending on where your seating position is.
When they’re angled inwards, the sound is more precise but the optimal listening position is also narrowed. This often referred to as toe-in.
When you angle the speakers outwards, (referred to as toe-out) you do get a wider soundstage since the sound is more dispersed, but things can also sound airy.
While certainly not necessary, adjusting the angle can help depending on your room, so you’ll want to see what works for you.
Surround Speaker
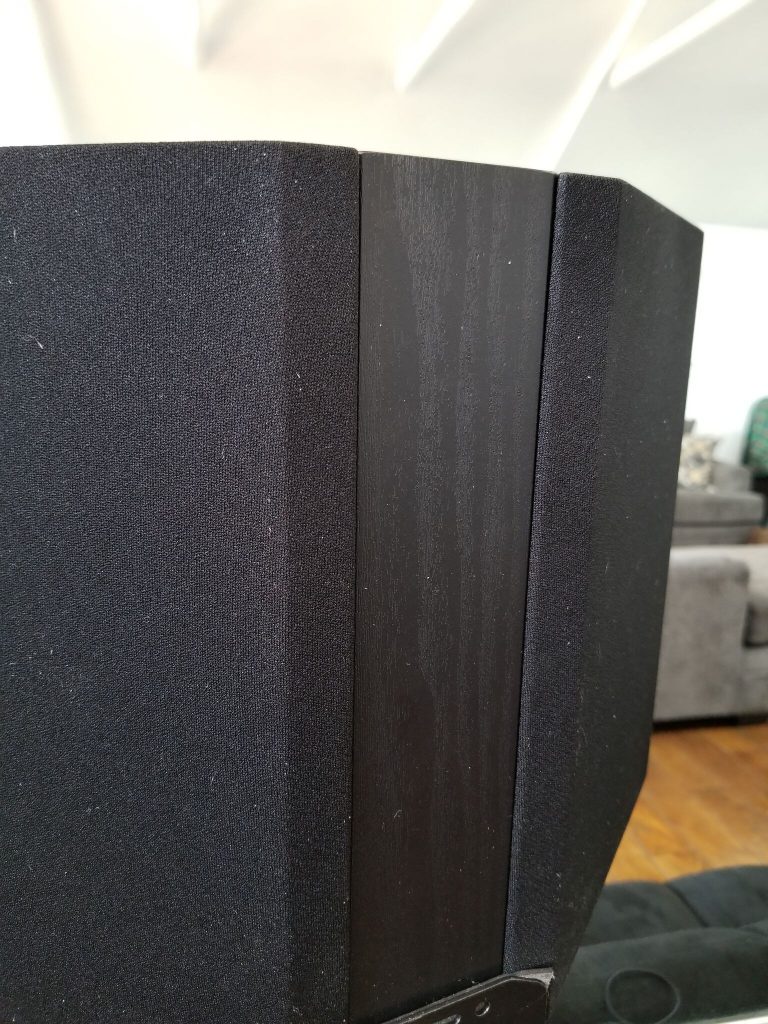
With regards to the surround speaker, this is an interesting one.
Besides the fact that you can wall mount these along with any of your speakers really, the setup of your surround speakers is a little different. Unlike your left and right speakers, the surrounds should ideally be placed up to 2 feet above your ear level when you’re sitting.
This gives a better surround sound presentation from my experience, but they can also be placed at around ear level if this isn’t possible. You just don’t want to go below ear level because the surround sound perception is lost.
You also want to place these not behind you, but directly to the left and right of your seating position.
If you are doing 7.1, then the extra 2 speakers would go behind you and these can be placed at the same height or higher than your surround speakers.
For a small room home theater setup, you may even decide to forgo a surround setup in favor of a 3.1 setup, or even opt for a sound bar.
Either way there’s lots of options to go with so ultimately it really just depends on your room size, seating, and your priorities.
The Center Speaker
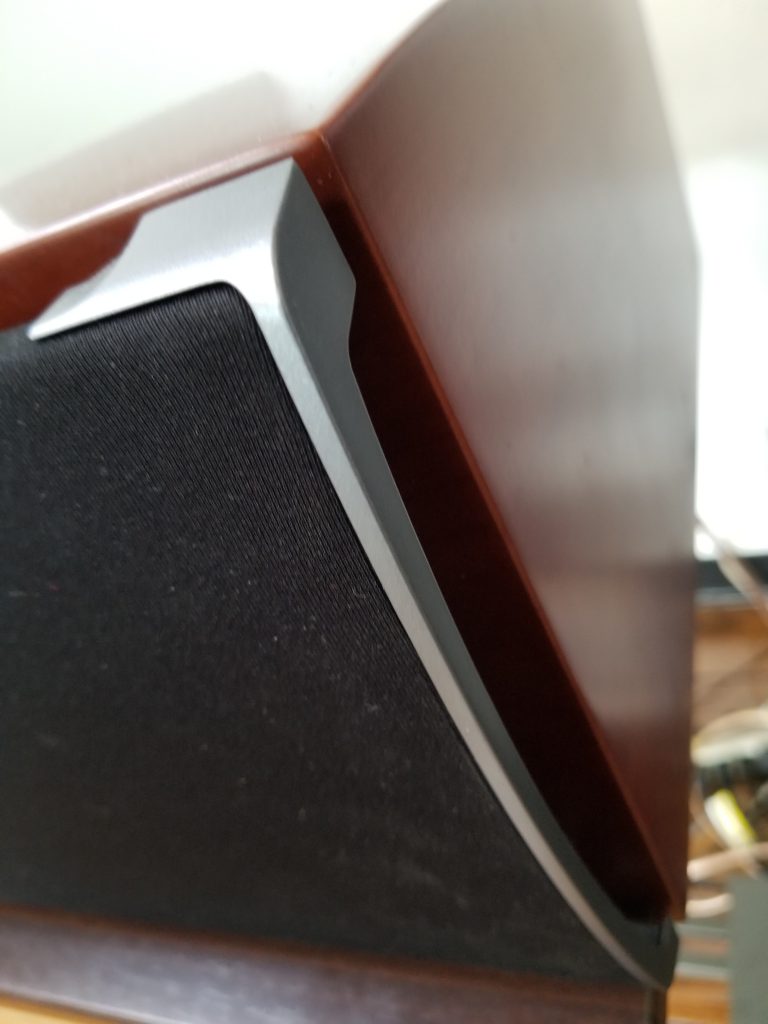
A close second in importance only to the receiver, the center channel speaker is responsible for up to 80 percent of dialogue in your content, so getting the placement right of this one certainly is important.
The interesting thing about the center speaker is that for the most optimal sound, it should be placed as close to the center of the screen possible.
What I mean by this is of course isn’t putting it in the middle of the screen since it’d block your view, but putting it directly below the screen in the middle.
This allows you to get the most clarity from your center, and makes it seem as though the sound is coming from the TV and not the speaker.
So if you were thinking about putting this one in a cabinet under your TV or something, probably not the best idea.
You also have the option of placing it above your TV angled downwards towards the listening position as well, but I’d personally only recommend that if you can’t place it directly below your display.
One of the most important things you’ll want to keep in mind too is that your left, right, and center speakers should all be at the same level as one another.
If one is higher than another, that can disrupt the sound stage and make things sound uneven.
Placing them at the same level (ideally your ear level when seated) allows the sound to blend together seamlessly for the best soundstage.
The Subwooofer
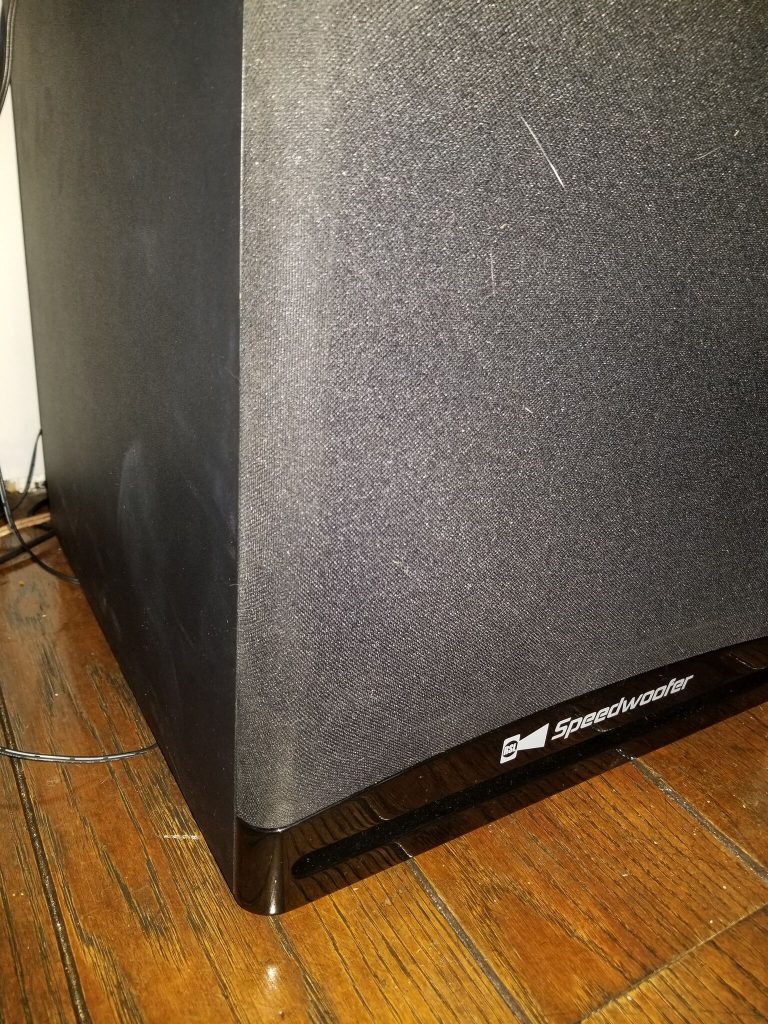
The subwoofer is also going to be a little different as well since it’s dealing with more of the lower sounds. We’ll deal with this last since it’ll be the last thing we setup. It’ll have its own section so don’t worry.
Connecting The Wires To Your Speakers
Alright so you’ve got all of that situated and now it’s time to connect the wires! So here’s the thing, you can use either scissors (which is a little harder) or you can use my personal favorite, this cool wire stripping tool to make your life easier.
Up to you, but I personally use that thing. However I’m going to show you how to do it both ways so no ones left out. First with the scissors, then the wire stripper. 🙂
*I’m going to be using whats called a pin plug in this tutorial, but you can use other connections too depending on what your receiver/speaker.*
Before the first step though, what you’ll want to do is take the spool of wire, and roll out the amount of wire you think you’ll need for each speaker.
To do this, roll it from where you plan on placing the speaker, all the way to where the receiver is. Then cut it.
Step 1. Cutting the wire
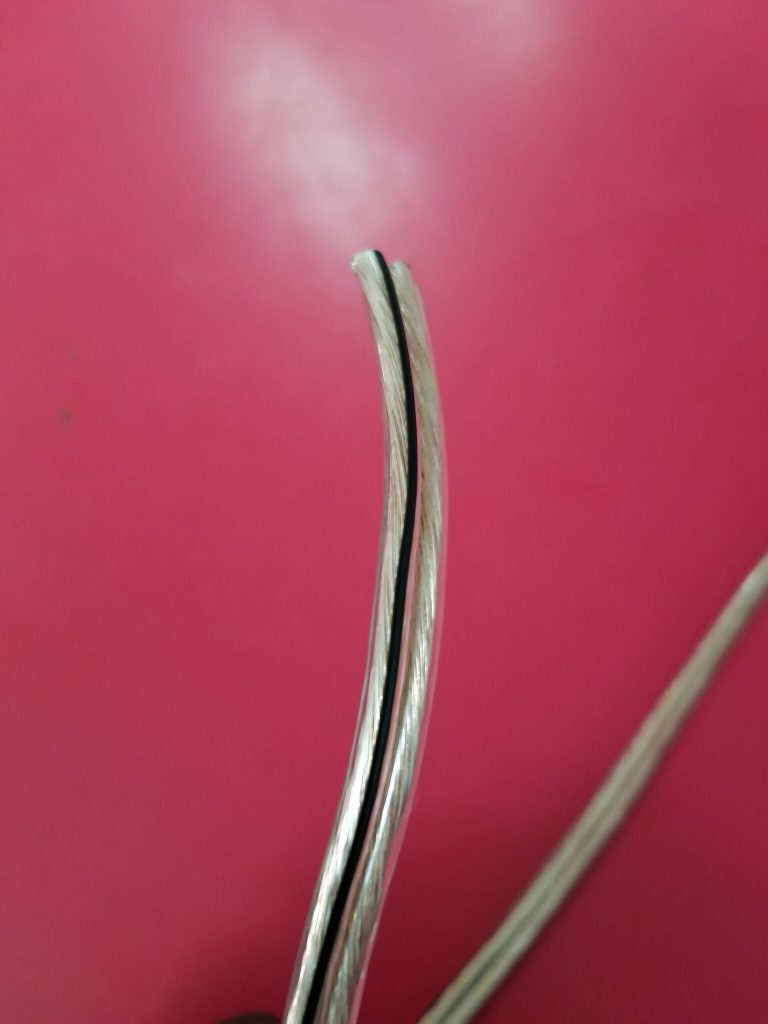
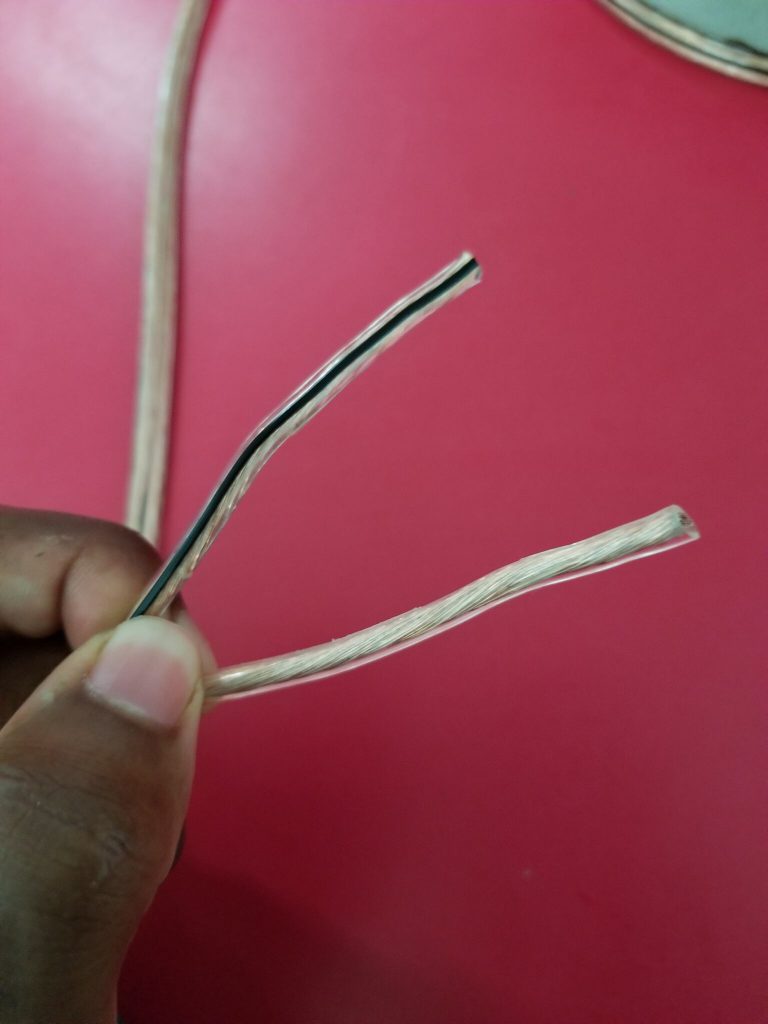
With scissors: So before you do anything, what you’ll want to do is separate the wire a little so that it looks like this by cutting down the middle.
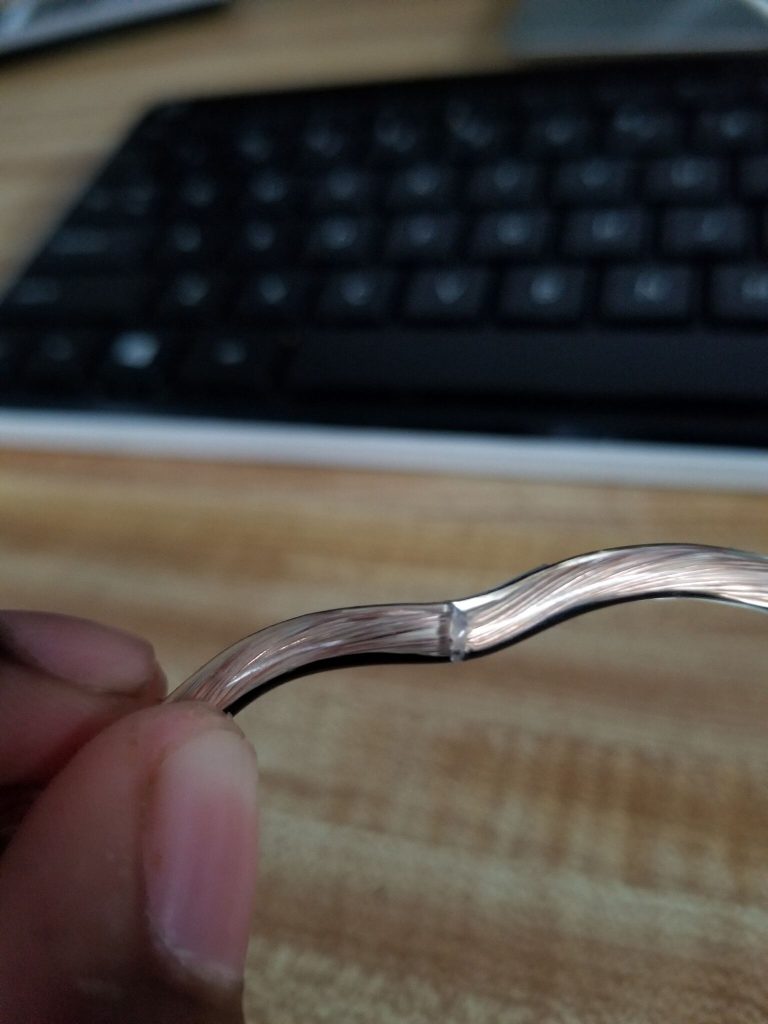
After, you’re going to take the wire, and make a small cut all the way around the wire. You don’t want to cut all the way through, but you just want to cut around it so that there’s a visible notch.
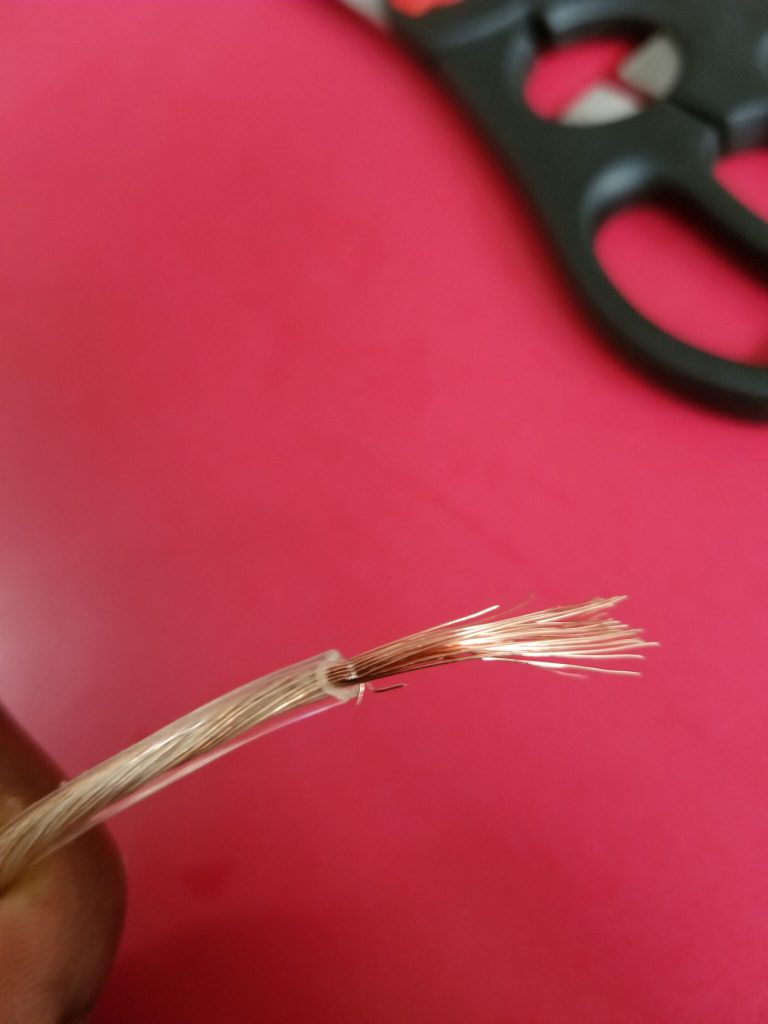
The little strands inside is what you don’t want to cut, only the insulation (that’s the outer plastic covering of the wire.) Then when you have a cut all the way around the wire, you can use either the scissors or your hands for this next part.
From there, you want to gently pull it so that the insulation cover is removed. Don’t worry about losing a few strands, but if you lose a lot of them, then you might want to start over on that wire.
Once you have the gold strands exposed and it looks like the picture above, you’re ready for the next step.
With the wire cutting tool:

Make sure you separate the wire so that it looks like this.
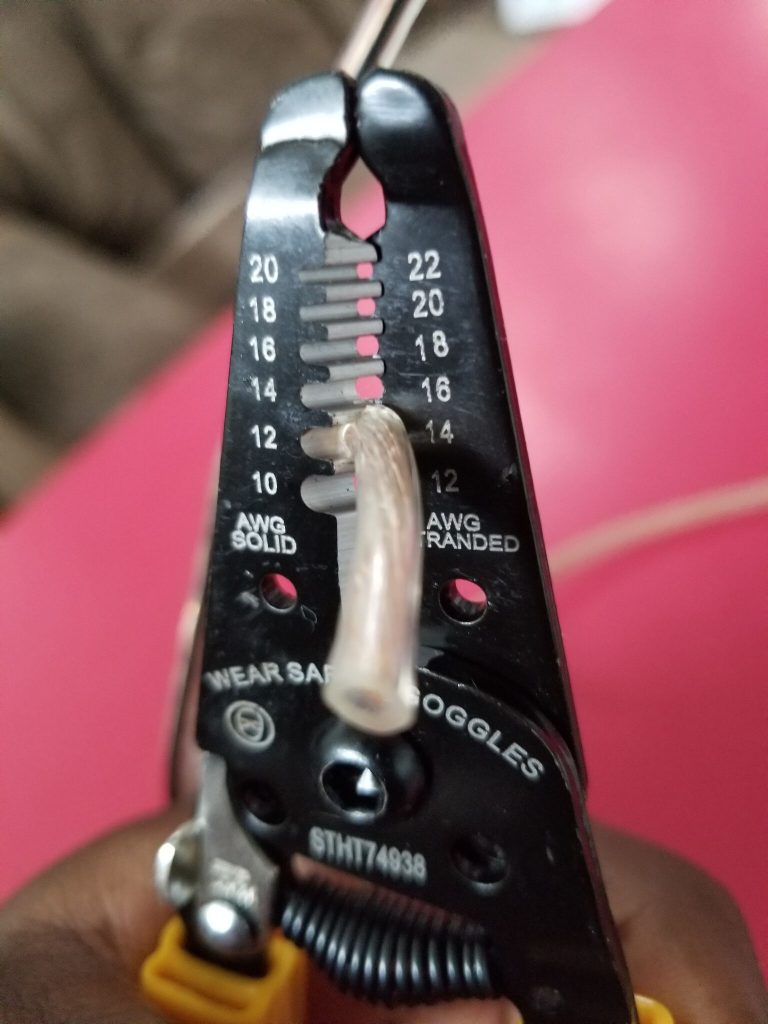
Now take the wire and place it in the appropriate diameter hole of the wire stripper.
Lets say you have 16 gauge wire; then all that means is that you place it in there where it’s marked 16 stranded. Whatever gauge wire you have is where you’ll put it.
Clamp it all the way down, and lock it with that little lever to the left. Then just pull, and it’ll perfectly strip the wire. It may or may not give some resistance but just pull and it’ll give.
Step 2. Attaching the connectors
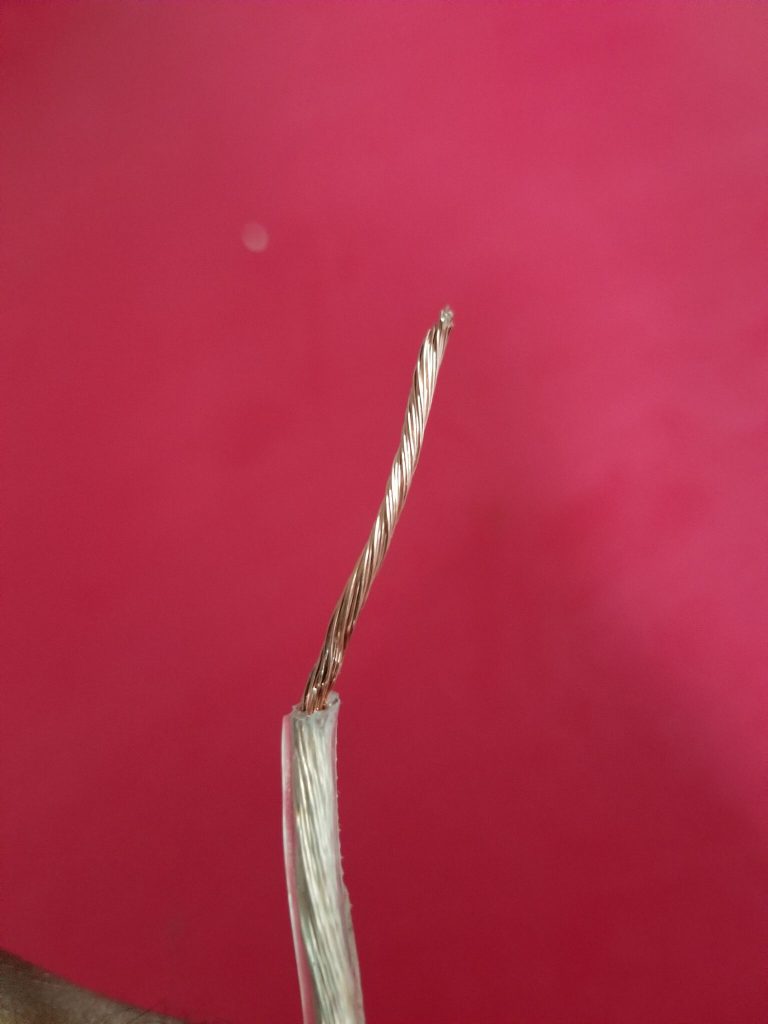
What you’re going to do next twist the gold strands until it looks like this.
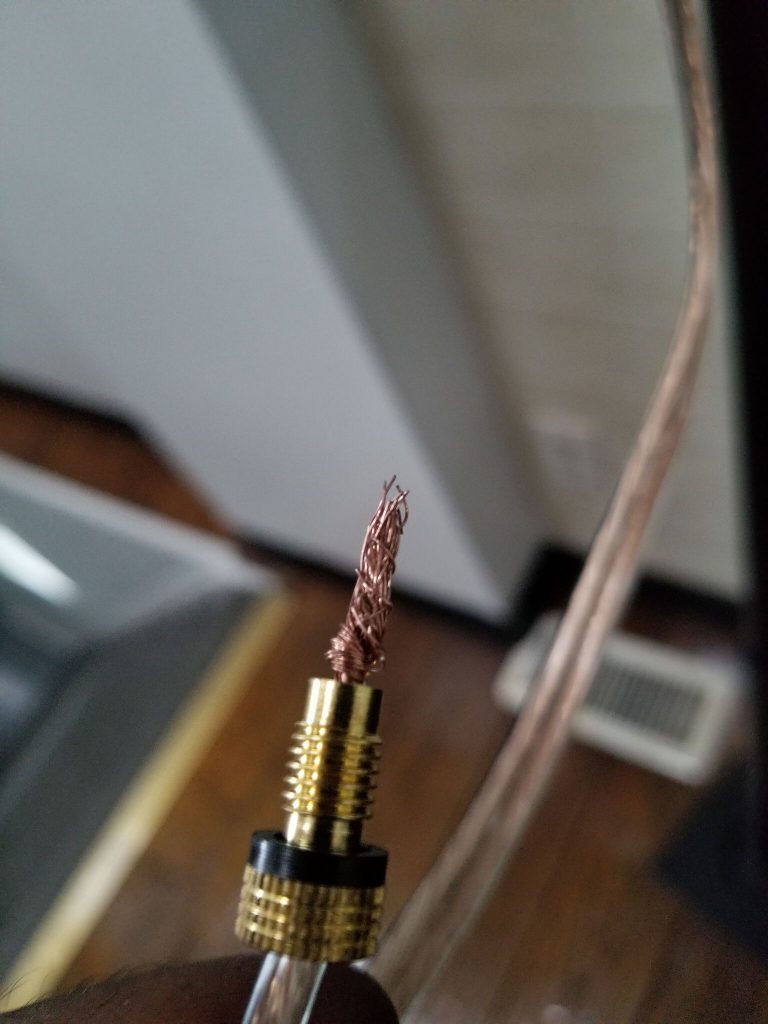
Then you’re going to insert the gold strand bundle into the hole of the pin/banana plug. Make sure you unscrew the connector first so it looks like in the picture
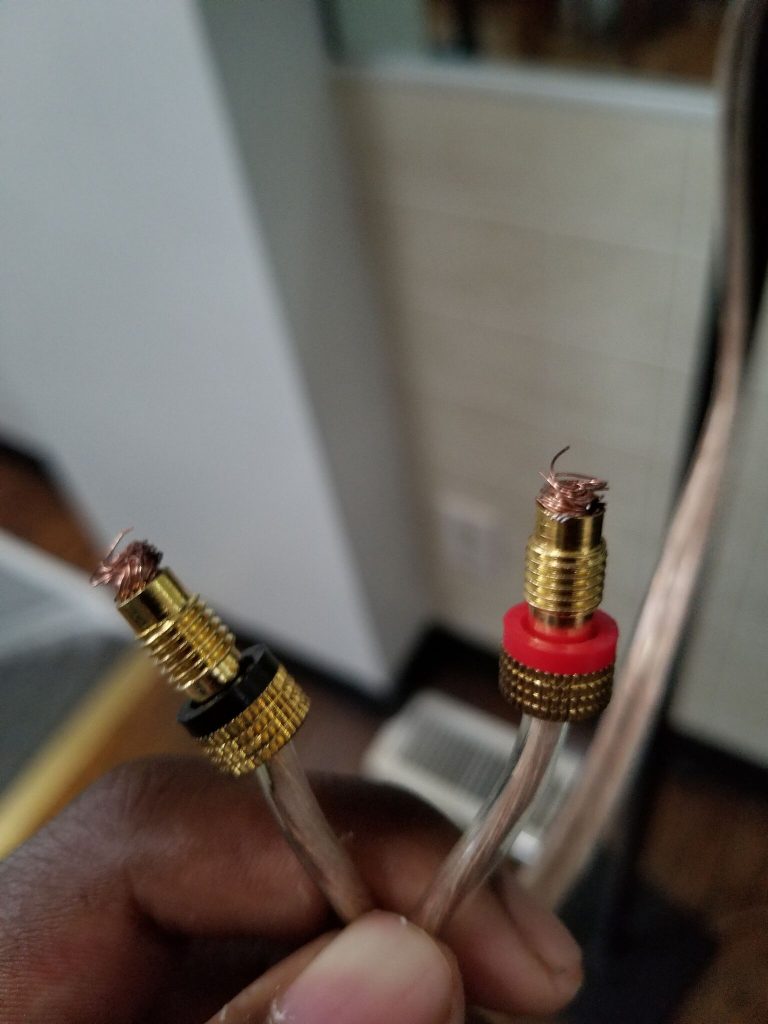
Twist the bundle around until it looks like this.
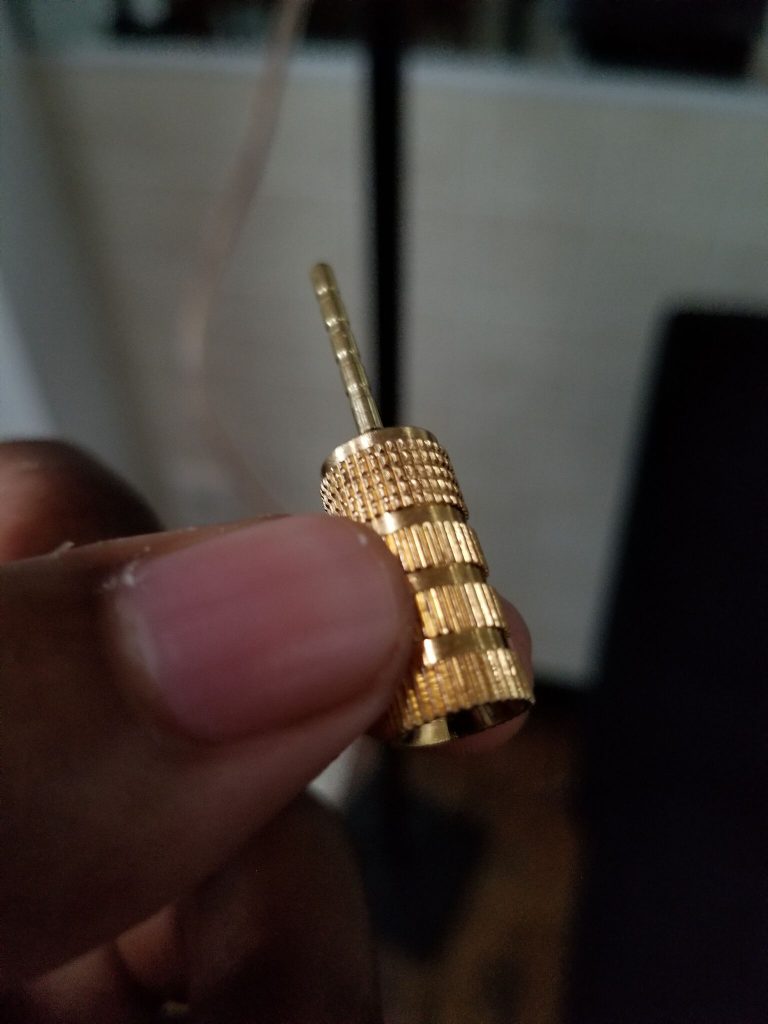
And then take the cap that you unscrewed before and screw it back on..
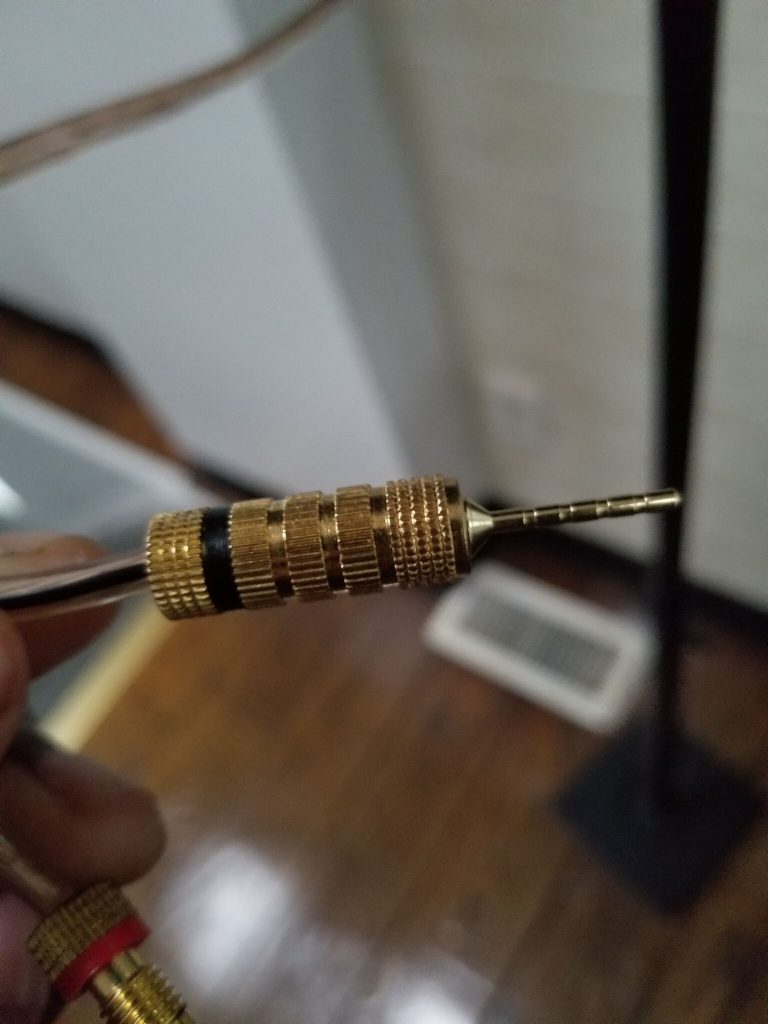
That’s it really. Just strip each wire and do the same thing for each one.
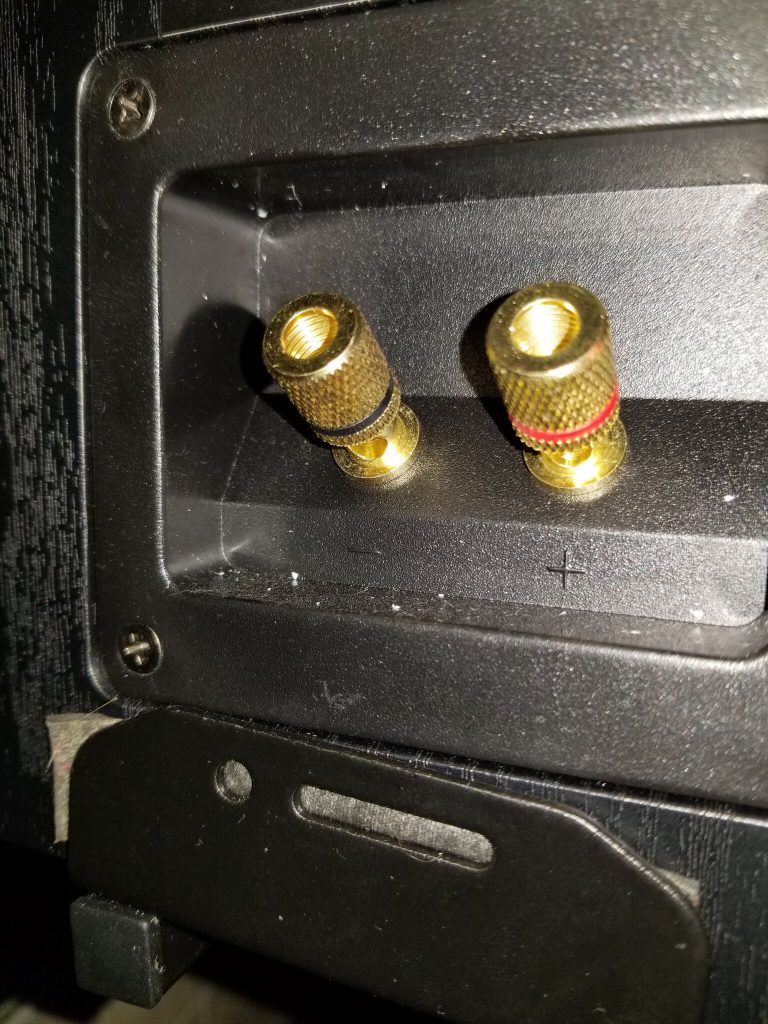
Now these are called binding posts and are where the connectors go into (this is the back of my speaker).
Each speaker or receiver may have a different type, but a lot of times they will have what is called a 5 way binding post which means it can accept any type.
But you may have to unscrew them on the back of your speaker until it exposes a hole
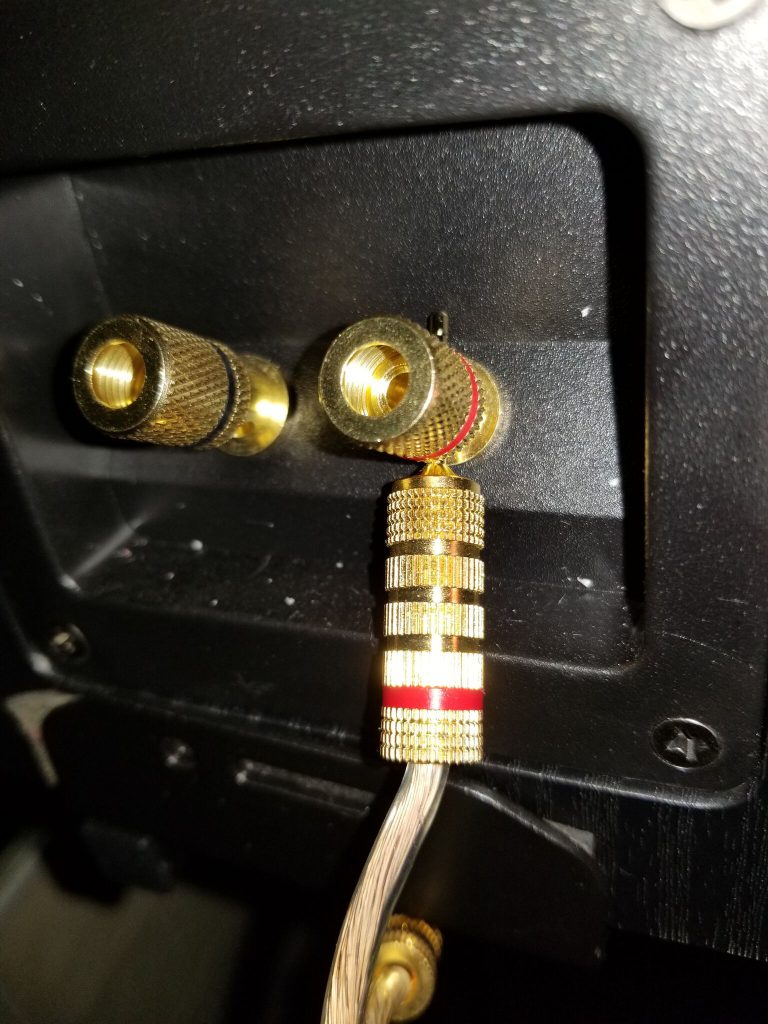
It would then go into this hole, and you’d tighten it back down until it holds the connector.
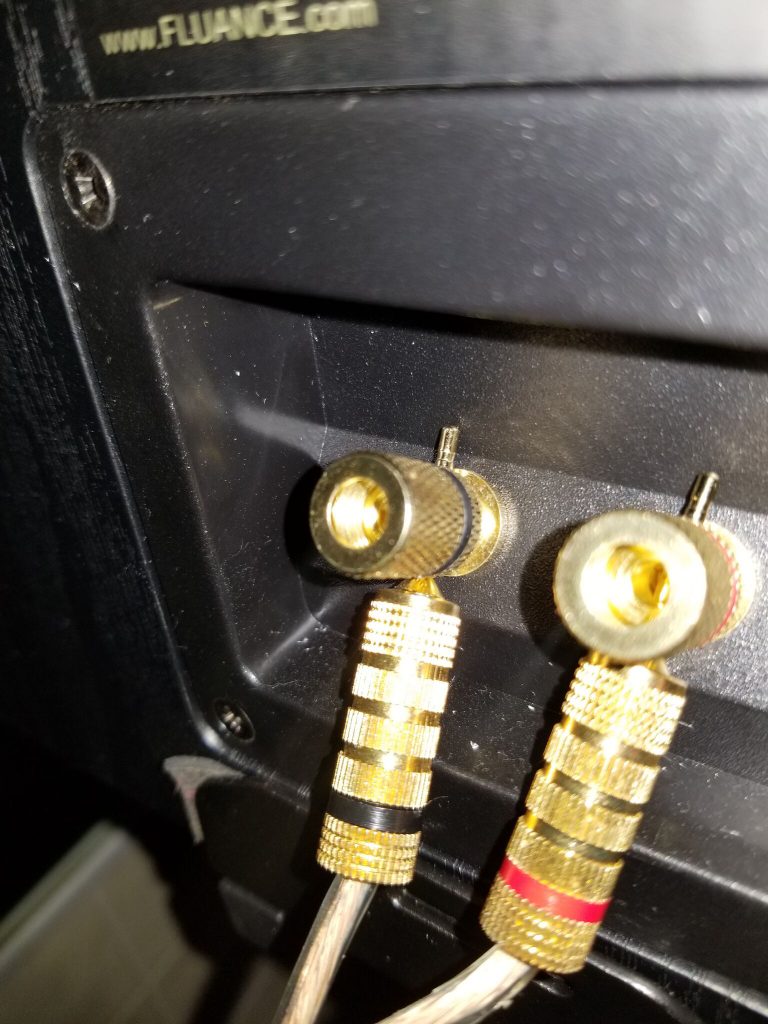
Remember there’s two of these on one side of the wire that goes into the speaker like this.
Then on the the other side of the wire, the other two go into the receiver.
Keep in mind that one is negative and one is positive. It doesn’t matter what color you choose to be negative or positive, but whatever color you do choose for each, make sure you stick with the same scheme for each speaker.
That is absolutely paramount to remember.
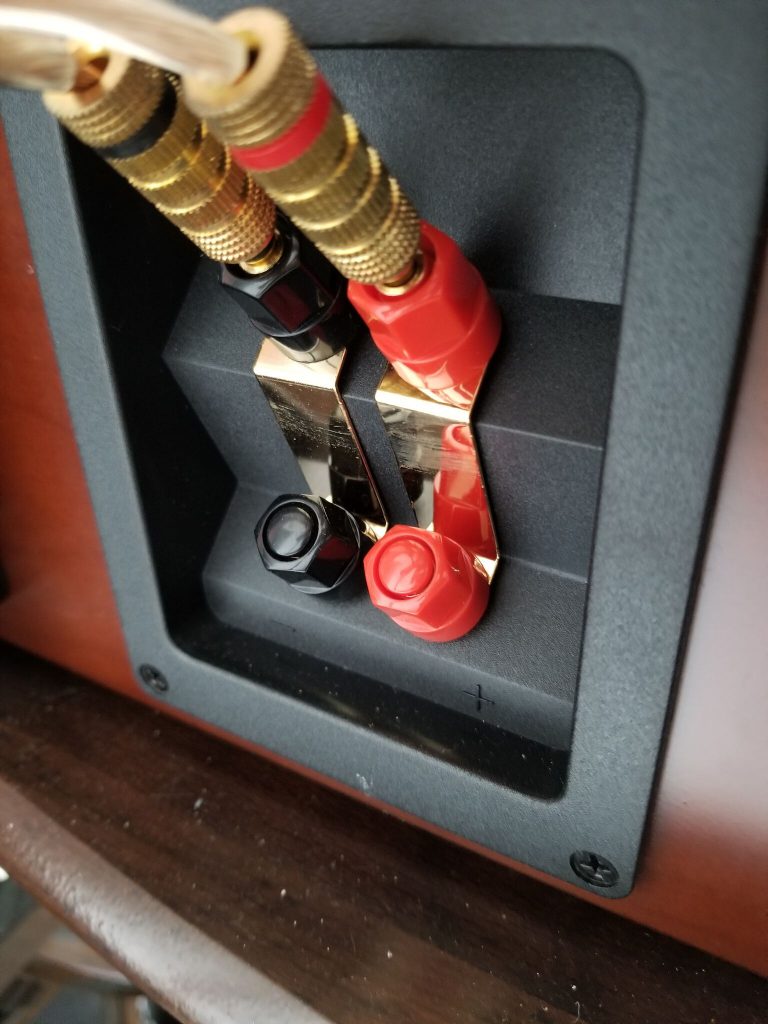
Notice those other holes that we didn’t plug into though?
You can also use what is called a banana plug to actually plug into the top holes like this. You would remove the cap with something like a paper clip, then plug into it.
Up to you what you choose to do though.
Step 3. Plugging in to the receiver
Once you have all your speakers setup with the connectors on both sides of the wire, now it’s time to connect them to the receiver.
First, make sure the receiver is completely off and unplugged before you do any of this please.
Now let me say this, if you used the pin plugs, then you’ll either connect them 2 different ways depending on your receiver.
You might have to unscrew the post to reveal a hole like shown with my speakers above— in which case you would then place the pin in the hole and screw the thing tight. Like shown above.
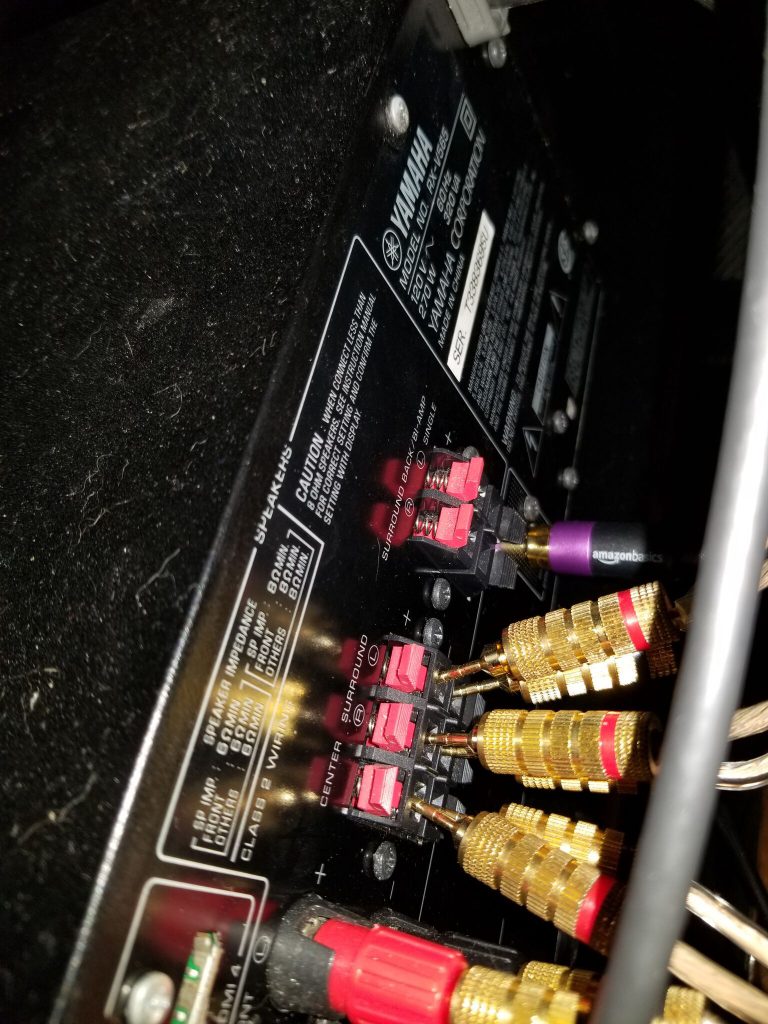
Or it might be spring loaded like this, and in that case you would push it to reveal the hole and put the pin in.
On the back of the receiver it’ll tell you where to connect each speaker so you’re not just guessing where to put it. Remember negative to negative, positive to positive.
Hooking Up The Receiver
You’re doing good we’re almost done. 😀
Setting up a home theater receiver isn’t too difficult luckily, you just have to make sure the speakers and devices are connected into the appropriate slot.
Here’s where you’ll also notice two different types of slots called HDMI outputs and HDMI inputs.
Here’s an easy way to remember the difference.
An HDMI output means when a device is connected into that particular slot, it is sending the signal out to some other device, hence the name out.
That other device receiving the signal will have an HDMI input slot where the other side of the HDMI cable is connected into, hence the input part.
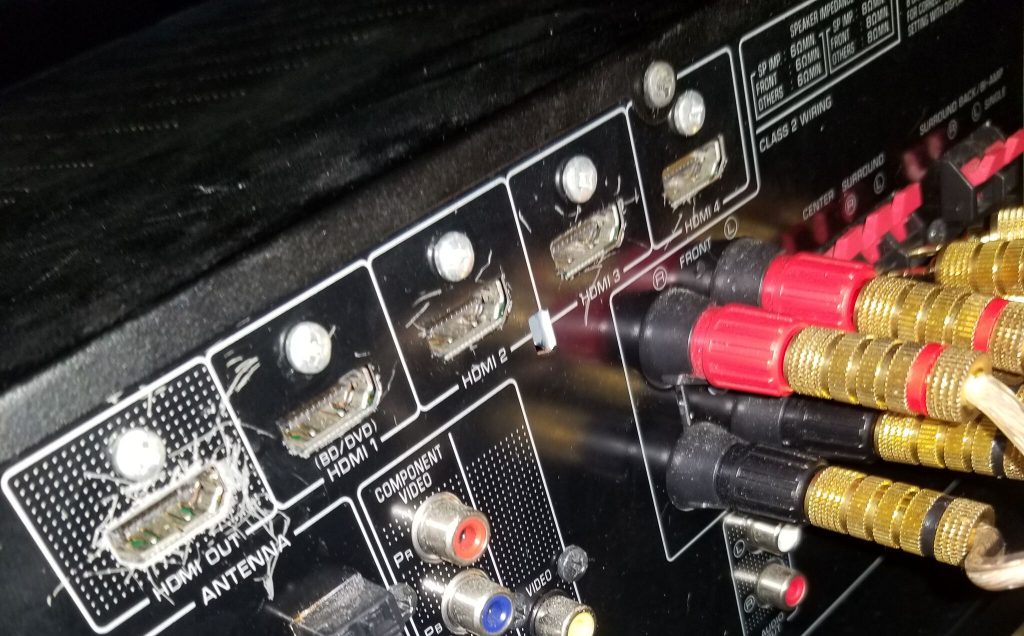
The reason this distinction is important is because one HDMI side will go into the HDMI out on your receiver. The other side will go into the first HDMI input of your TV. This is basically allowing your receiver to process the sound rather than the TV.
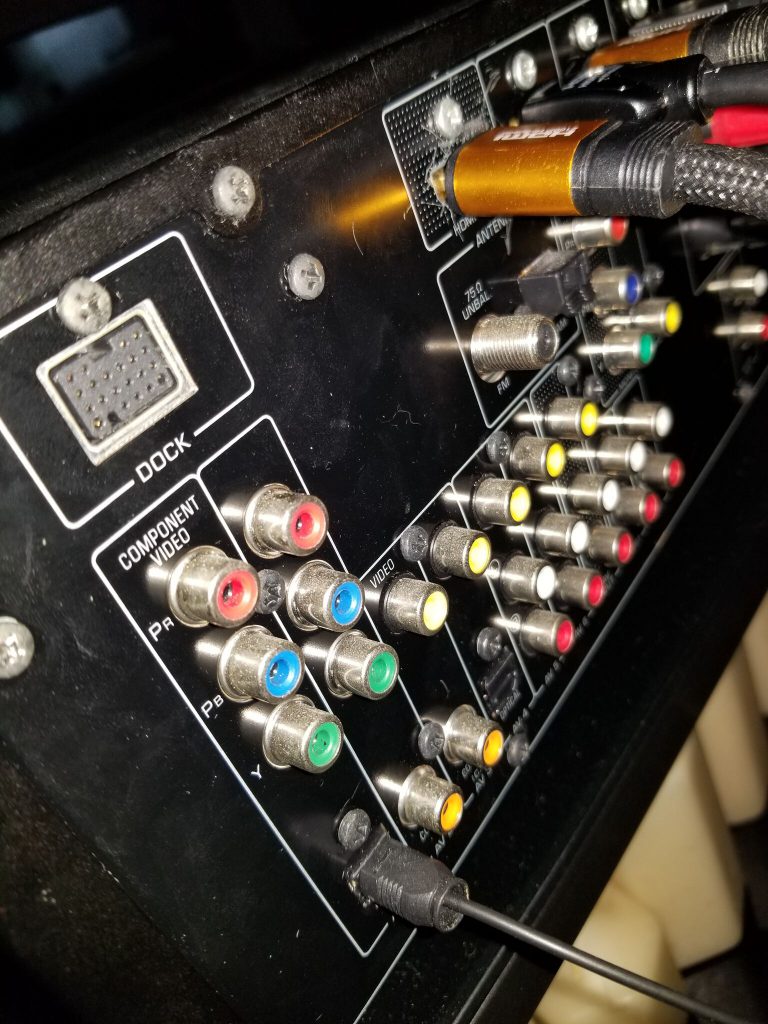
Be sure it is set to input 1 on your television. From here, every other device you plan on using will be connected into your receiver, not your TV.
So your TV should only have 1 HDMI connected into it, all the other ones should be in your receiver. just to clarify that. If your DVD player/ whatever device doesn’t have an HDMI, you would have to use an optical cable for the sound like shown in the bottom left of the picture.
If you happen to have an older TV or receiver that does not support something called ARC (audio return channel) then you would need to connect an optical cable from the television to the receiver.
Here’s something important that you also need to know (well besides actually plugging in your receiver’s power cord now after everythings connected.)
With your new receiver’s remote, you’ll need to change the input to whatever device you plan on using.
So for example if your cable box is connected into the slot labeled HDMI 2 on your receiver, you’ll need to change it to input 2 on on your remote.
Not that hard right?
The device that you use has to be powered on too by the way, otherwise your TV might say no signal.
Subwoofer Placement
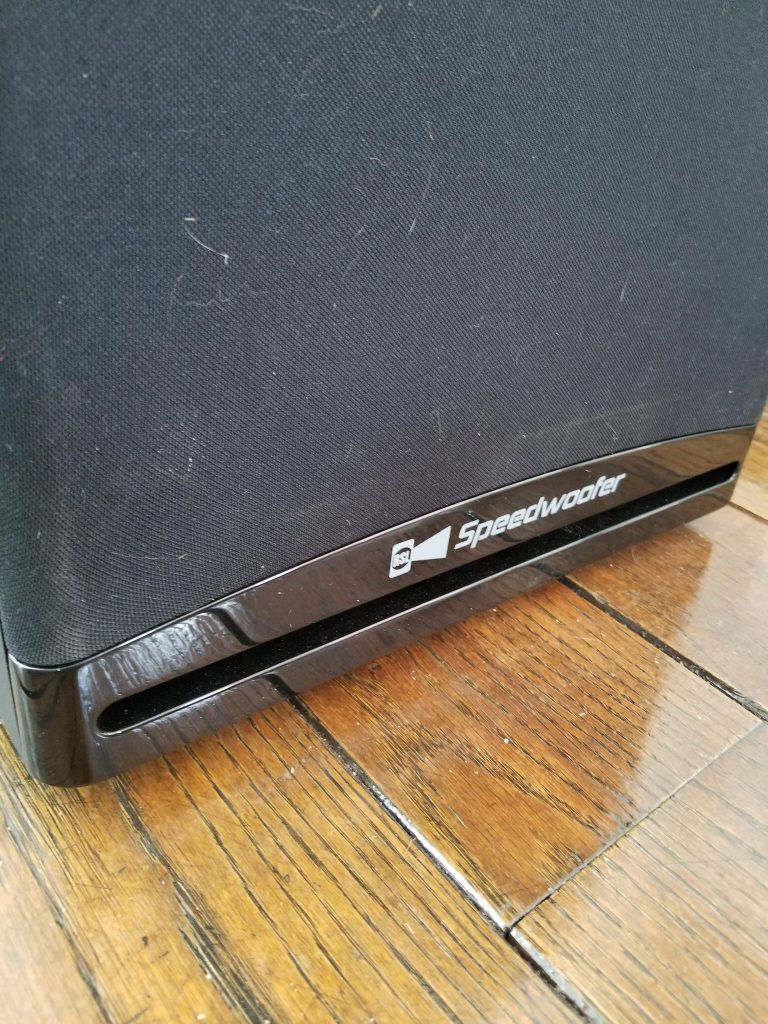
Subwoofer placement has to be one of the funnest things because it allows you to directly hear differences even a few inches away. What we’re going to do now is something called the subwoofer crawl.
To save time, the subwoofer crawl basically entails moving around your room to find out where it sounds best.
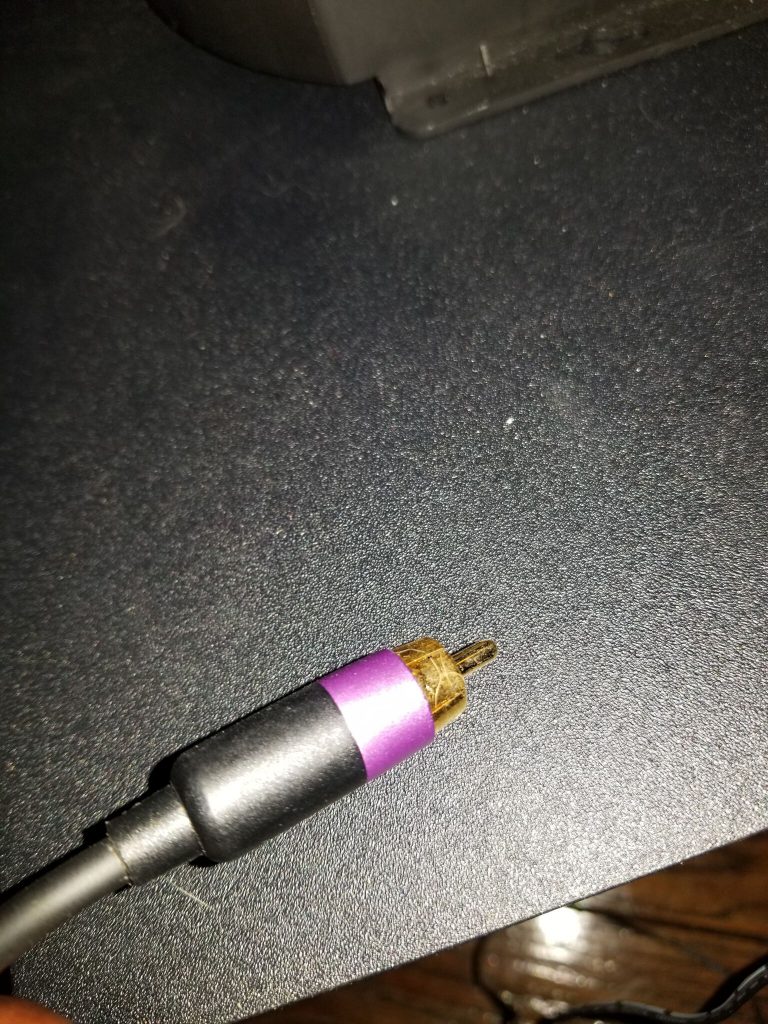
So to get straight to it, what were going to do is plug in our RCA cable, which looks like this, to the receiver and to the subwoofer.
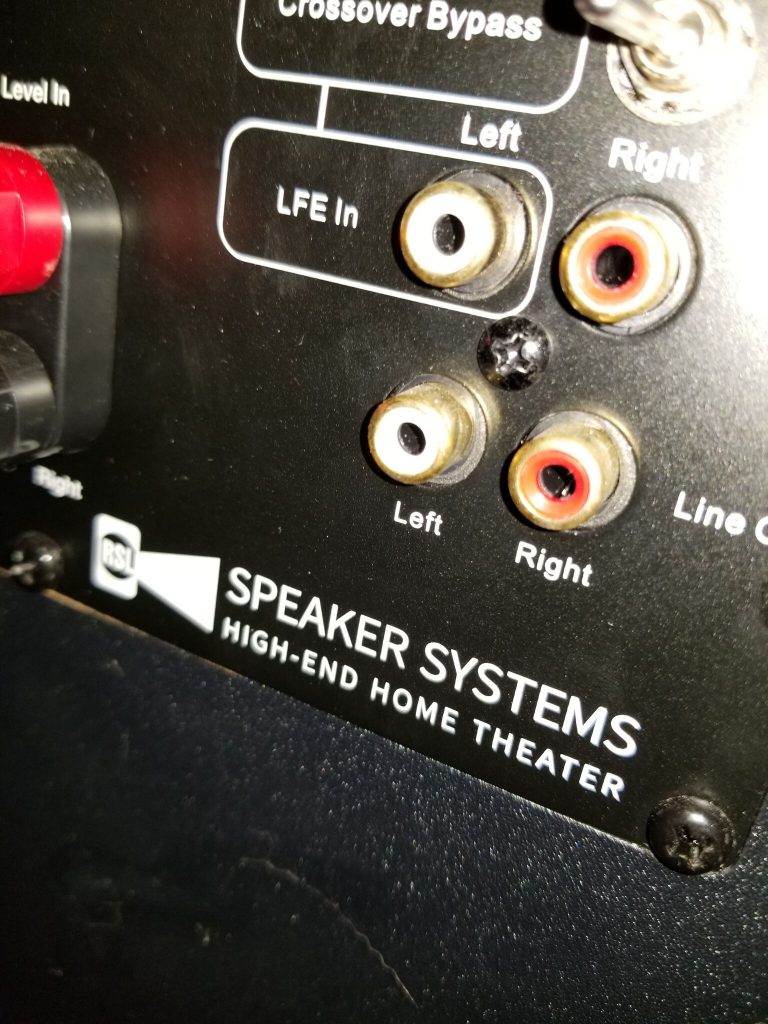
It’ll go into the slot called LFE in, line in, or something similar depending on the sub.
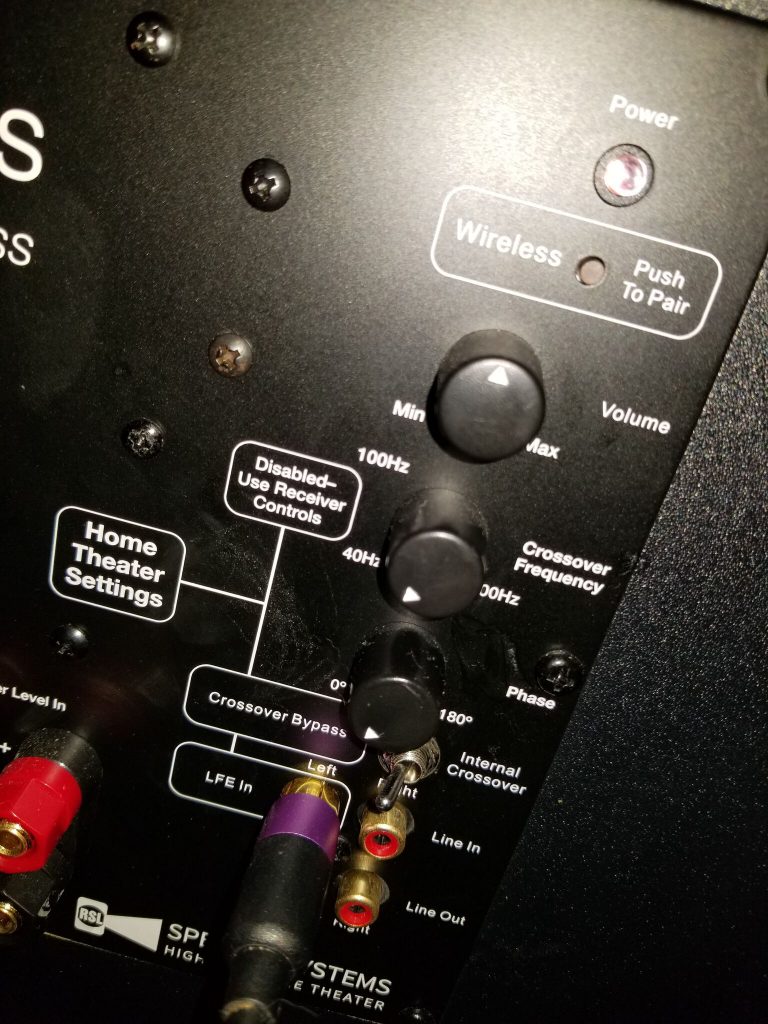
Turn on your subwoofer and turn the volume on the subwoofer knob to halfway. This is also commonly referred to as the gain.
If possible, turn the crossover frequency knob on the sub to where it says disabled; and if it doesn’t say that anywhere, then turn it all the way past 180. This just tells the receiver to do the processing and not the sub.
Next turn the receiver & subwoofer on after plugging them back in, and play something you’re familiar with; be it music, a movie, tv show etc. and move around the room listening for differences in the bass.
In some areas it will sound boomy, and in some areas there will be almost no bass what so ever.
Listen to where it sounds the most balanced to your ears. When you find it, that’ll be where the sub goes. You can mark that spot with a piece of tape or an object.
Then place your subwoofer in that new spot, and listen back from your seating position to see if everything sounds good. If it does then guess what, you’re done, that’s it.
You now have your new system set up, woo!
As a little side note, something else to consider is the addition of an extra subwoofer. Not only will you get more even bass coverage, but a stronger bass output overall.
I talk about all the benefits of using 2 subs below, so definitely be sure to check that out because there’s actually quite a few.
https://easyhometheater.net/setting-up-2-subwoofers
Calibrating Your Speaker (Not Completely Necessary But Generally Recommended)
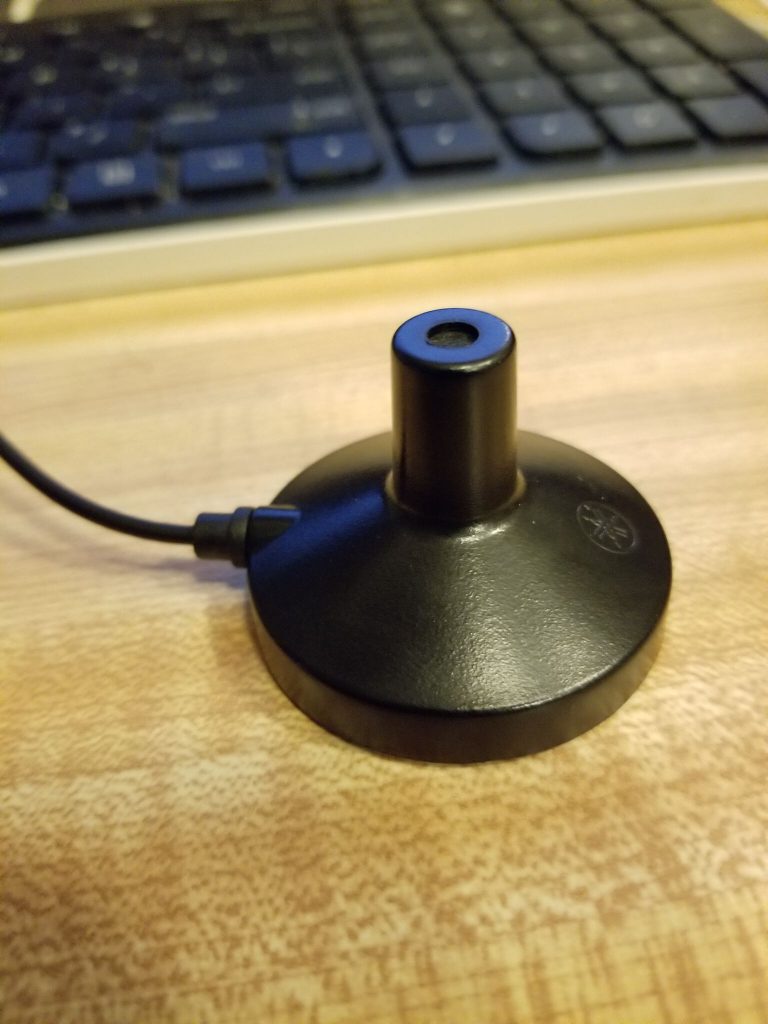
Now here is the interesting part.
Technically you are done for the most part, so if you don’t feel like doing anything else then by all means enjoy your new setup; I wouldn’t blame you.
This next part is completely optional so it can be done at any time. But if you are someone that does want the best sound possible while wanting to fully utilize your new setup, then stick around for this.
If your receiver came with something that somewhat resembles this, that is what is called an optimizer mic. Like the name suggests, its job is to optimize the sound!
The cool thing is it takes all of the work out, meaning all you literally have to do (after making sure the mic is on a flat surface and your surroundings are quiet) is plug it into the part where it says optimizer mic, calibration mic, or something similar on your receiver, press enter on your remote, and it will automatically calibrate your speakers for you.
Isn’t technology great?
Here’s a receiver that actually comes with one.
Yamaha RX-V685
Now if you are a little more old school, or your receiver doesn’t have one of these, then fret not there’s still a way to do it, albeit a little more hands on.
You would have to use what is called an SPL meter to measure the decibel reading from each speaker, and manually adjust the volume level for it in the menus.
You would also have to be sure to set the crossover to 80 HZ which basically just means to send all the low frequency sounds to the subwoofer.
Now if that sounds like too much work then you can always get a receiver that comes with a mic, or you can skip this step all together.
I know for me personally, I bought a receiver that had the optimizing mic since I liked that it did the work for me, but again hey, that’s up to you.
Now that you have your new setup all ready to go, tell me about it! I’d love to hear about it and how you’ve liked it thus far; maybe I can even offer you a few more tips!
For example, if with your new set up you notice wires everywhere, then you’ll certainly want to hide them out of the way. Here’s how to do exactly that.
https://easyhometheater.net/hiding-speaker-wire-solutions
Or if for example you find that your speakers aren’t working when you turn the receiver on, then here’s a few things you can do to fix that.
https://easyhometheater.net/why-arent-my-speakers-working
Perhaps even, you’re just curious as to how long your speaker setup is good for?
https://easyhometheater.net/how-long-do-speakers-last
Point is, if you have any specific questions at all in the meantime, don’t hesitate to ask me or even leave a comment below because chances are, someone else may have that same exact question and it’ll help them too.
But that’s it for now folks.
Like I always say, make it easy, keep it simple!
About Me

Jay
Hey everyone it’s nice to meet you. I'm Jay, writer & founder of the site Easy Home Theater. I've been with this hobby of home entertainment for many years now. I decided to create this site to be a helpful resource, and share everything that I've learned from personal experience with you. I also happen to be a huge gamer, lover of all things tech related, and a major fitness buff (love weightlifting)
Contact: Contact Jay
Facebook: https://www.facebook.com/Easyhometheater/
X: https://x.com/easyhometheater
Pinterest: https://www.pinterest.com/easyhometheater/pins/
Instagram: https://www.instagram.com/easyhometheater/
Followit: https://follow.it/easy-home-theater
Bluesky: https://bsky.app/profile/easyhometheater.bsky.social
2 Comments so far:
-
-
That’s awesome! No problem, really glad that you found it helpful honestly.
-




Wow ! Amazing post – so much good info here you clearly know you way around the Audio world. Wicked Website as well – i will be sure to bookmark it and head back here often – thanks for the sharing of your knowledge.