As an Amazon Associate I earn from qualifying purchases. Disclosure

How To Create The Best Home Theater System For Your Needs

How To Create The Best Home Theater System For Your Needs


So you decided that getting a sound system is something that you’re interested in, awesome!

But now what?

How do you create the best one for your needs? To answer that, here are things to keep in mind.


Determining A Budget For Your Home Theater


So you finally sat down and decided, you know what, I think I’m going to create my personal home theater system. But what is actually the best, and would allow you to get the most bang for your buck? Well unfortunately there is no magic formula where its a one size fits all, it’s probably going to be a little more hands on than that… (I can already hear the booing).

Fortunately however, what I can do is provide you with as much info as possible so that your decision will be that much easier for you, so that you have an idea of what works for you.

This is going to be focused on actually creating your system, while in the next part, I’ll help you with getting everything set up. I hope it’ll be a good read that should prove immensely helpful for you; so lets get into it! 😀

Now before we get into any type of equipment talk, room details etc., we’re going to start with arguably, the single most important thing, and that’s….(drum roll) the budget!

Like with many things in life, your budget is going to be one of the biggest deciding factors in what you ultimately end up deciding upon.

So in knowing that, obviously it would be impossible for me to just throw out some arbitrary number, but what I can do is give an idea of factors to keep in mind.

First off you’ll want to take the more personal approach and take the time to create the one that is the best for you.

That means considering things like room size, seating, etc.

If you’re one of the few where money isn’t a factor for you, then setting a budget probably wouldn’t be applicable and instead just take the rest of the later tips into consideration.

But for the person who is a little more financially conscious, it’s going to boil down to common sense. If you spend most of your budget on let’s say, two really top of the line left and right speakers, then buy whatever receiver that might not even provide them with enough power, that’s obviously going to hamper your potential experience.

The benefit of setting a budget in the first place is that you’ll at least have a bracket to work in to get the best components.

So let’s say you’re like you know what, x dollars is my maximum for example. Awesome, that makes your life a lot simpler because from there you know what to get within your particular range.

At the same time, keep in mind that keeping your budget somewhat flexible can be helpful since it might save you potential headaches in the long run, especially if the thing you get is actually quality and is actually built to last — rather than simply breaking after a short period of time.

For example if you get something that’s built with quality in mind, chances are it’s going to holdup better than something that might be lesser quality and seem like a good idea at the moment.

Not just that, but if you plan on upgrading years later, some of your current equipment might be able to carry over so then that’s something less you have to worry about!

This isn’t something that’s always certain mind you, since it will of course depend on the thing it is that you’re actually looking at, but it’s still something to think about.


Stereo or 5.1?


The next thing you’re going to want to do is ask yourself, are you looking to take the easier route and simply purchase a home theater in a box? Or are you looking to make your own system?

If it’s the former, then while it wouldn’t be my very first choice, there are a few good ones out there that will suffice.

https://easyhometheater.net/the-best-home-theater-systems


But if you’re thinking long term, and actually want to create something on your own that’ll knock your socks off and serve you for years to come then read on.

Now before we continue, I have to stop to ask you something; something that’s very important… (no it’s not a marriage proposal don’t worry)

Are you looking to primarily play music, watch movies, or both?

If your emphasis is just on music, then you’ll be more concerned with stereo sound which would simply be 2 speakers.

But if you’re going after a more complete system, then you’ll want to start with the more traditional 3.1, or 5.1 setup (the first number denoting the number of speakers and the last, the amount of subwoofers) for now until you get more comfortable and decide where you want to go from there.

https://easyhometheater.net/the-best-bookshelf-speakers


Make Some Room!


After that, what will undoubtedly have a huge impact in regards to what sort of setup you may want to go with is your room size.

What I highly recommend after you decided on a budget is measuring the size of your room with a tape measure measuring length, width, and even the height.

From my personal experience and honest opinion, your room is going to have the biggest impact on sound bar none.

Sound waves created by your audio sources will travel throughout the entire room, and whatever object is in that room, is going to affect the sound in one way or another.

Take for example your living room.

If you have hardwood floors and the sound is reflected off that, typically what will happen is that the sound you end up hearing with be a little more harsh as opposed to if you had soft carpet; in which comparatively, you might find it to be a little warmer.

But perhaps, it might be the exact opposite, still be hard on the ears, and seem hollow due to the fact it’s always different depending on the characteristics of a room.

Sound is weird right?

This is one reason why someone might think a particular speaker is less than stellar when in fact, their room may just need some acoustical adjustments to better accommodate their new purchase.

Simply put, it’s always going to be different, and you’ll find out what needs to be done when you get into the setup process. One thing I can recommend to you right off the bat is to try and add as many soft fabric objects to the room as possible.

These can be in the form of an extra chair, a couch, you get the idea. The reason for this is like we said, sound travels and reflects; but what happens when that reflection hits a soft surface is it gets absorbed.

What this does is allow the purest sound to be heard because there isn’t any extra reflecting sounds adding to it. So with the more soft objects in a room, the better things will sound basically.

Your room size itself will then also determine the best fitting speaker as some need lots of space to operate.

If you have a smaller or even medium room size, let’s say 16×20, then you’ll be able to get away with a bookshelf speaker. However when you approach the large room territory, over 25 feet, then you’ll most likely want to start looking at floor standing speakers since they would sound better for your application.

Typically they produce more bass, have a broader range of sound, and can go louder; with the only tradeoff being the price. If that sounds like something that would be more applicable to your current situation, then this may help you.

https://easyhometheater.net/the-best-floor-standing-speakers


If your focus is television and movies, listen when I say this, if there’s one thing you don’t want to skimp on, it’s going to be the center channel speaker. The center channel is going to be where the majority of dialogue, and some music/sound effects come from, and will act as the foundation of your entire setup.

Ever watch a movie and you’re like wait what did they say?

Can you rewind that?

Yeah that’s the job of the center so that you don’t miss those important details. These are the ones that you’ll want to check out if you’re thinking about adding one to your setup.

https://easyhometheater.net/the-top-10-center-channel-speakers


While we’re still on the subject of rooms, your seating area also comes into play. It only makes sense that where you sit in the room is going to have a measurable effect on what you hear, so taking your time getting that right would be wise.

Now what that entails would be too much for me to explain here so if you’re curious about that and want to get the best out of even your current system, I highly recommend you take a look here.

https://easyhometheater.net/home-theater-seating-ideas


The Receiver/Subwoofer


The next thing that comes in at a really close second is going to be the subwoofer. A good subwoofer will provide that visceral, larger than life feeling making things that much more dynamic, so getting one that’s quality can certainly enhance the experience.

It’s going to be responsible for producing that convincing thump that you feel in movies.

Picking a good subwoofer isn’t too terribly hard, as there are many quality ones, but for me personally, a rule I follow, and something that I would recommend to you, a subwoofer that can at least reach into the 35 Hertz range with no discernable distortion is definitely one to look into; the lower the hertz, (abbreviated to Hz) the better.

This means that it’ll be able to dig deeper the lower that Hz number is, in turn giving you a much smoother and richer bass.

Also the higher RMS the better (which is basically the continuous amount of power that the subwoofer can produce; you’ll often see this mentioned where it lists the specs.)

To make it easy for you, I even did an article on these too explaining all of this.

https://easyhometheater.net/the-best-home-theater-subwoofers


Now after you’ve done that then you’ll want a receiver.


In short, a receiver is where the sound is processed and output, so buying one that is appropriate is important as well.

What I mean by this is say for example you unknowingly buy a speaker that has a rating of 6 ohms, (simply put, this is a measure of electrical resistance)

If you purchase a receiver that only is rated to handle 8 ohms, there might be some problems with providing it with enough power; thus it may not work properly or sound much quieter than it’s supposed to.

So if anything, when buying a receiver, you want to match the ohm rating to the one of whatever speakers it is that you are buying, unless it states that it can do that as well as lower ratings.

Wattage per channel is something you may also see when buying a receiver, and this simply means how much power it can provide each speaker it’s connected to with generally the higher the wattage per channel, the better.

Yet another thing will revolve on you deciding what you plan on connecting to your receiver.

Are you going to be connecting a few gaming consoles and or a Blu-ray player to it?

If so then you’ll likely want to invest in a few HDMI cables, some speaker wire (16 gauge speaker wire unless it’ll be going over 35 ft. then use 14) and an RCA cable that’ll be used to connect the subwoofer. It’s a lot simpler than it sounds and I even talk about that here as well.

https://easyhometheater.net/the-best-home-theater-receivers


Surround Advice


In terms of the surround speakers that you’ll be using, luckily you do not need to dedicate a large portion of your budget to these.

I won’t say that any speaker will do, because that’s far from true, nor will I say that their only job is to solely produce ambient noises and effects since that would be misinformed as well; but what I will say is that in comparison with everything else, they aren’t necessarily in the top 3 of most important things ( left & right channel, the center, and the subwoofer)

There happens to be 3 types of surround speakers that you should be aware of and that is Bipole, Dipole, and Monopole speakers. Unfortunately, this is where controversy arises because there is a general disagreement as to what surrounds are best and under what circumstances.

While I can’t provide you with concrete evidence on what is the best, I can provide you with anecdotal experience. At my old place, I had a speaker that could act as both a dipole and a bipole speaker, pretty cool little thing admittedly.

Problem being, naturally, there were no instructions on how to actually place the things so it was up to me to figure out. I put them on the side of my seating position on bipole, and what I found was that the feeling of surround sound was lost since I could tell where the sound was coming from. In dipole, it sounded much better where that feeling was there.

A few years later I tried these same ones but in a bigger room this time.

What I found then was that bipole was the better option because dipole sounded too diffuse, and when something happened in the movie like a the sound of a car passing behind you, directional cues with bipole were much better.

By no means is this definitive, but basically long story short is the best surround speaker is going to depend both on the room they’re being used in as well as the capabilities of the speakers themselves.


Timbre!


One more quick thing that I forgot to mention that is not talked about too much is the concept of timbre matching.

In short, timbre matching is the matching of at least the front 3 speakers ( left, right, and center) so that the sound that is projected is uniform and tonally even. They all are from the same manufacturer and line basically.

The reason this can be pretty important is that if you bought mismatching speakers for your left, right, and center, one may have a certain sound signature that favors treble, while another might sound bass heavy/muddy — and together this might potentially sound somewhat disjointed.

You really want to strive to make them all the same speaker if you can.

Buying the speakers from the same line ensures that you will get a much smoother soundstage, and the best experience overall. It will also make things that much more engaging when something pans on screen and sounds the same directionally.

Nothing more jarring than having one speaker sound like exceptionally louder than another one.

But you know, hopefully all of this helps, so that you now have a much better grasp on creating that perfect system that will work specifically for you.

It may be a lot to take in but don’t feel overwhelmed at all, because if you still have any questions, don’t hesitate to ask. Check out Recommendations too if you want a few ideas to point you in the right direction.

Oh and quick little pro-tip; writing down your budget at the top, then as your shopping, writing down each item you plan on getting under it will give you a visual that’ll make things easier for you so you know if everything still is within the limits of your particular budget.

That and just taking notes beforehand on what you’re looking for definitely helps too.

But for now that’s really it honestly. Like always if you have any questions, comments, concerns, or something helpful you found out, let me know in the comments down below; I’d love to hear from you.

Until next time, make it easy, keep it simple 😀


10 Home Theater Ideas To Use Right Now

10 Home Theater Ideas To Use Right Now


What good is a home theater if you aren’t getting the most out of it?

As unfortunate as it may be, the fact of the matter is many aren’t fully utilizing their system like they could be. Chances are, there’s improvements even now you could be implementing into your setup.

So with that being said, here’s my gift you; 10 home theater ideas you can use today to elevate your surround sound experience.


Get A Surge Protector


Testing How A Room Sounds With The Clap Test


Not Happy With The Way Your Speakers Sound? Try A Mirror


Do Your Eyes Get Tired While Watching TV? Do This


Get A Smart Universal Remote


Is The Bass In Your Room Lacking? You May Want To Try 2 Subwoofers


Is There A Mishmash Of Wires? Labeling Might Be A Smart Idea


Optimizing Your TV’s Picture Quality


The Furniture Matters


Are Your Wires In The Way? You Could Always Try A Wire Tacker


Using A Surge Protector


I can’t stress this enough; surge protectors can be a big help.

Why though?

Well think of it this way. When a storm rolls in and lightning strikes, what do you think happens when your electronics aren’t protected?

That’s right, they run the risk of getting fried. Don’t think that happens all too often? Well it does.

My last setup got shorted because I was of the same mindset that that doesn’t ever really happen, but lo and behold….yeah…wasn’t happy.

So, I just want to prevent your new toys succumbing to the same fate mine did. A surge protector can be a big help in preventing that from happening.

It’s certainly one of the many mistakes that people often make which I also talk about here.

https://easyhometheater.net/25-of-the-worst-home-theater-mistakes


ALESTOR Surge Protector with 12 Outlets and 4 USB Ports


Testing How A Room Sounds With The Clap Test


What in the world is a clap test?

In short, a clap test is a really basic test without equipment, used to get an idea of how sound interacts with a room. When you move into a new place devoid of furniture, chances are it’ll sound pretty empty.

The point of this test is that it will allow you to to gauge how much acoustical treatment a room needs, without the usual hassle.

How do you do it though?

Simple. First go outside, making sure you’re standing away from any reflective surfaces.

Then you’re going to clap once, and make note of how it sounds.

What you should be listening for is a lack of any kind of echo. Then go back inside, and clap again. This time you’ll likely hear a slight one.

The more carpeting and furniture you add to a room, the less pronounced it’ll be. This is because the softer material absorbs sound rather than reflecting it like a hard surface would.

A room with hardwood flooring will have a sound signature harsher than that of a carpeted one.

That’s why ideally, when you clap in a room that has adequate treatment, there won’t be an echo at all. Keep this in mind with regards to your setup.


Not Happy With The Way Your Speakers Sound Now? Try A Mirror


This is another cool trick you can try to improve your sound.

For this you would need 2 people and a mirror.

With one person sitting down where the content will be primarily watched, the other person would hold the mirror and walk slowly along the wall.

Do this until the person sitting down can see the reflection of one of the speakers. When you see it, stop, and make note of where exactly that spot is.

Then repeat that walk for the other 2 speakers and mark those.

The idea here is that the point of visual reflection in the mirror is also where the sound from your speaker is reflecting to your seating position.

By placing acoustic panels in those spots you marked, it’ll help dampen the unwanted sounds that could be affecting your audio quality. With doing this you may notice a difference immediately.

Calibration of course helps too though there’s a few things with regards to mistakes you’ll want to keep in mind.

https://easyhometheater.net/25-of-the-worst-home-theater-mistakes


12 Pack- Acoustic Panels Studio Foam Wedges


Do Your Eyes Get Tired While Watching TV? Do This


A common issue with TVs is that they aren’t typically calibrated right out of the box. Many displays are set with the backlight at the maximum value possible.

Leaving it like that in a darker room could bring about eye strain. To offset this juxtaposition of light and dark, try a backlight that’s 60 percent of the max.

I’ve personally found that to be the sweet spot for average day and nighttime viewing though it could be different for you depending on your viewing conditions.

Another thing you may want to try is an ambient light. An ambient light is basically a strip of lights that go behind the screen with the goal of reducing eye strain.

The cool thing is they come in a bunch of colors, and it adds a certain sense of character to the room overall.

Here’s how to optimize your television as well which can certainly help with picture quality.

https://easyhometheater.net/how-to-optimize-your-tv


Luminoodle Color Bias Lighting


Using A Smart Universal Remote


If you have a lot of devices in your home theater then by default, you’ll also have a lot of remotes. So it only makes sense then to make it easy on yourself and simplify it.

A universal remote is helpful because you can control all of your components with one remote, along with added bonus of not worrying about losing several of them.

Now a smart universal remote is even better because they usually have a mini screen and expanded support for more devices.

Whatever you pick, these nifty little devices can make your things a heck of a lot easier with regards to home theater (and who doesn’t want that?)

I even did a piece on the best ones to go with to make your decision even easier.

https://easyhometheater.net/the-best-universal-remotes


Logitech Harmony 650 Infrared All in One Remote Control


Is The Bass In Your Room Lacking? You May Want To Try 2 Subwoofers


If you have more than one seating position, 2 subwoofers might be something you want to try.

Like I’ve mentioned before, there are multiple dead spots in any room. Unfortunately, if someone happens to be sitting in one of these nulls, they might not hear any bass at all.

However, with an extra sub, it can help with the unevenness of bass in the room.

When properly setup, it can help add a lot of depth to your overall sound quality.

Funnily enough, I actually talk about this very topic here.

https://easyhometheater.net/setting-up-2-subwoofers


Is There A Mishmash Of Wires? Labeling Might Be A Smart Idea


If you haven’t put much thought into wire labels, then you might want to. With all of the extra HDMIs and stuff that you’ll likely acquire over time, it’ll probably start to get confusing.

But by putting labels on your wires, you’ll always know what they’re connected to when you have a bunch of things going.

But you’ll also want to keep them out of sight for both aesthetic and practical purposes, so here’s a few tips on how to easily do that.

https://easyhometheater.net/hiding-speaker-wire-solutions


Optimizing Your TV’s Picture Quality


Most people lose out on the full capabilities of their televisions because they aren’t aware that it’s even a thing, let alone what improvement they would get.

But if you’re noticing your picture looking washed out or off, or you’re not sure which color temperature to use, optimizing or even calibrating your display can provide a very noticeable improvement.


https://easyhometheater.net/how-to-optimize-your-tv


The Furniture Matters


This kind of ties into what I was talking about before; the furniture you get matters.

When designing your home theater, opt for chairs with as much cushioning as possible. Obviously comfort is a factor, but the sound will be much better in a room with plush furniture as well.

Speaking of plush, one really cool idea that springs to mind is a bean bag chair!

They’re incredibly comfortable, while definitely adding a sense of character any room.

But if you’re still curious on exactly why the furniture in a room would matter, definitely have a look at this interesting read below.


https://easyhometheater.net/home-theater-seating-ideas


Sofa Sack – Bean Bags Bean Bag Chair


Are Your Wires In The Way? You Could Always Try A Wire Tacker


I like using wire tackers because they help keep annoying wires out of the way, and they’re not hard to use.

Best part is it functions like a regular stapler, so there’s nothing really complex here. They’re another really helpful tool to have in my opinion.

With that though, that about wraps it up for this one.

These are 10 concepts anyone designing a home theater should keep in mind..

We often get so caught up in the excitement of having a new setup that we forget to really make the most of it.

But with these steps, you’ll be on the your way to surround sound bliss.

That’s it for now, see you next time.


Polk PSW111 Subwoofer Review-The Little Sub That Could

Polk Audio PSW111 Subwoofer Review – How I Came Across This Little Beast Of A Sub


Polk Audio PSW111 Review

(Edit: Another model to consider that may also be of interest to you is the Polk Audio HTS 10 Powered Subwoofer which is a great alternative to the one talked about in this original review.


I bring this up because due to it’s age, actual availability of the older PSW111 might be variable; but the newer Polk HTS10 is a solid alternative.


A lot of the positives mentioned in the original review still hold true with this subwoofer.)


Check Availability Of Polk Audio HTS10 Subwoofer


Appearance


Features & Specifications


Setup,


How It Sounds


Likes


Dislikes


Final Thoughts.


Appearance


So usually what’s common with subwoofer reviews is that they like to make mention of what type of box that it came in along with stuff like that. Unfortunately though, I would have no idea of knowing what type of box it came in since I didn’t exactly buy it at a store.

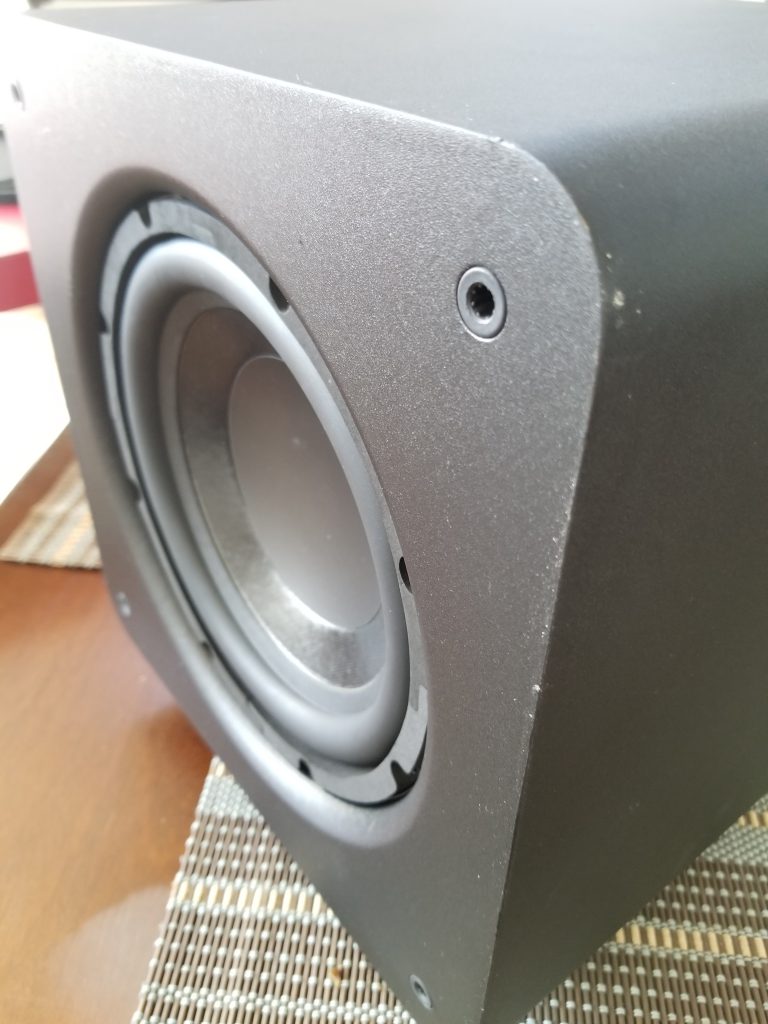
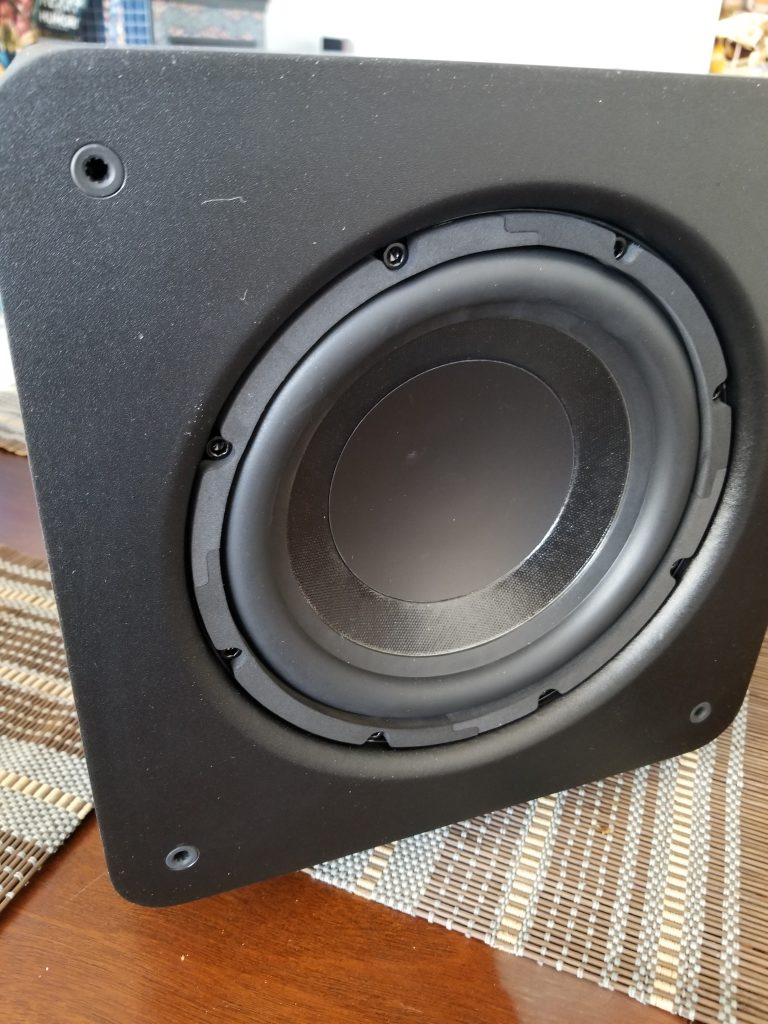
So we’ll move onto the aesthetics aspect of it. First impression? Well it’s actually pretty small.

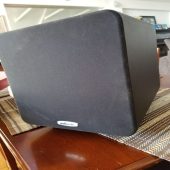
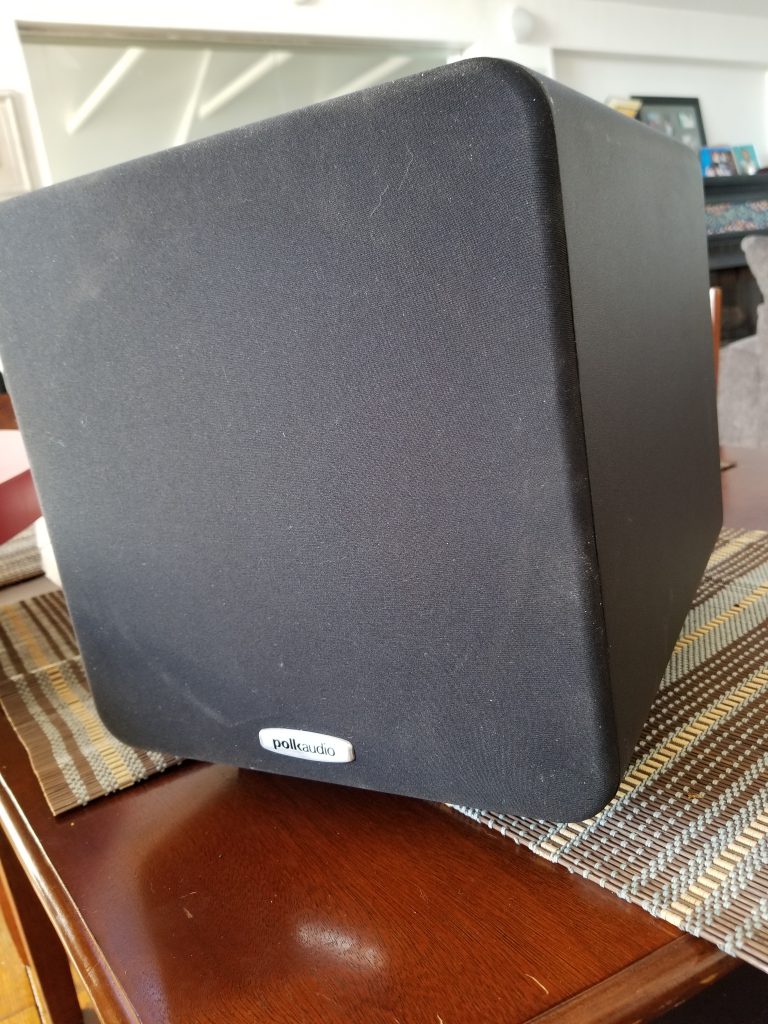
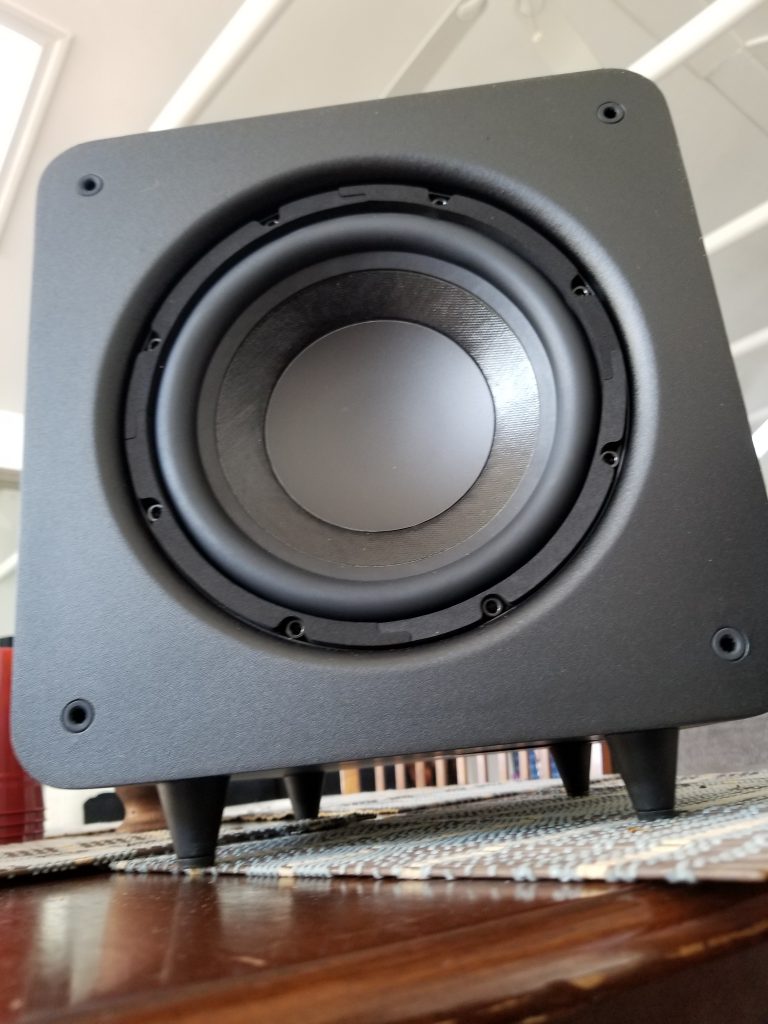
It’s only 11 inches wide, and about a foot tall so if you were worried about it taking up ungodly amounts of space then don’t worry. It’s in an all black finish, and has 4 rubber feet on the bottom.

That’s so it doesn’t go dancing across your hardwood floor/ annoy the neighbors under you during your 2am jamming sessions. It’s made of MDF wood which I like as well.

For those unaware by the way, MDF stands for medium density fiberboard. What that is is a combination of wood and resin pressed together into a very solid object.

Reason why this would be important is due to the fact that when a speaker produces sound, it vibrates.

That extra vibration can change the sound output from the driver itself. Being made of this material dampens this vibration tremendously so you get a much cleaner sound.

One the thing that did take me by surprise when I first got it though wasn’t its compact stature, but its weight!

Even though it’s a little guy, this thing is a slightly over 20 pounds! Definitely didn’t see that coming but it just adds to that premium feel.

Speaking of which, the grill in front is simple with the small Polk emblem on the bottom. It’s also completely removable. The material on the front feels thin but strong if that makes sense. Up to you whether you want it on or off.

Then on the bottom you have a downward firing port that helps with an extra level of clean, powerful bass.

Overall though, it’s an attractive exterior and gets a thumbs up.


Features & Specifications


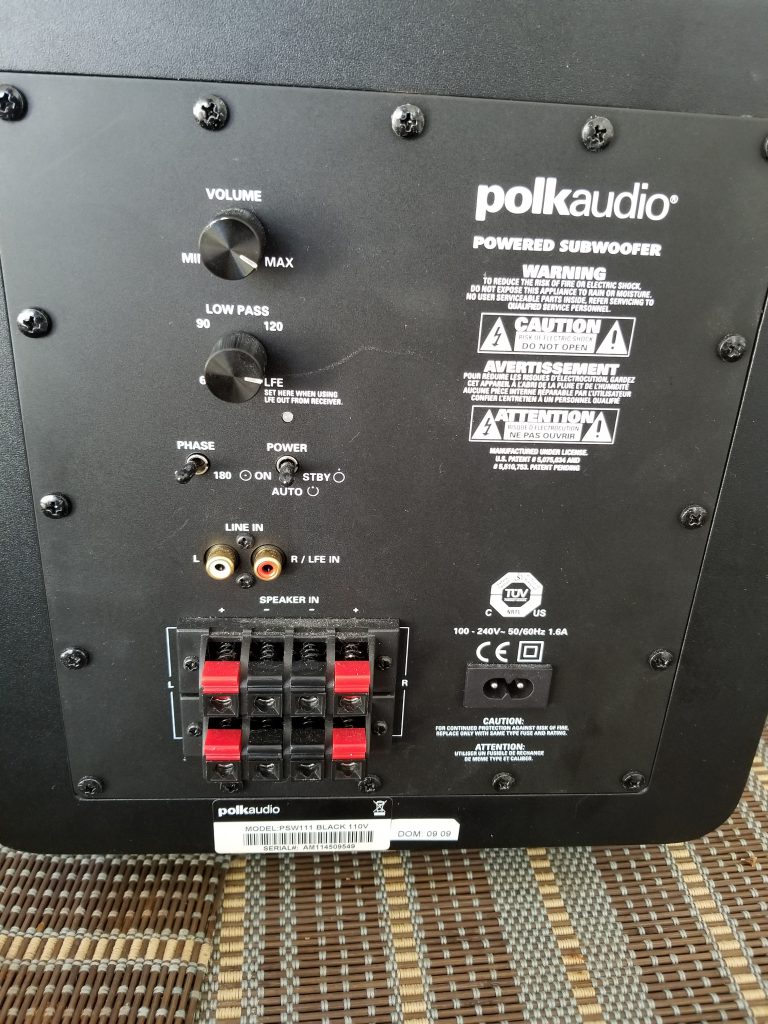
Just to reiterate with regards to the specs, it’s MDF and comes in at 12 inches high and 11 inches wide (also 13 inches deep). It has 150 watts of continuous power and a 300 watt peak while being Kippel optimized. This is allows it to remain distortion free, even at the highest volumes due to specialized internals.

It has an 8 inch driver as well. The frequency range goes from 38 to 250 HZ which is respectable. It also has a low pass frequency control which allows you to control the crossover from the sub.

Honestly I would recommend setting this all the way to the right because that would let the receiver process the sound rather than the sub trying to do it.

It has a volume knob which let’s you adjust to your personal liking ( although I personally recommend setting it halfway; anything over that I noticed started to seem somewhat distorted)

There’s a phase switch present as well which like the name suggests, changes the phase of the subwoofer. This would only be useful if you setup your subwoofer on the opposite side that your speakers sat; otherwise don’t worry about that setting.

The power switch which is for turning it on and off. Then it has LFE in and speaker in (though again you’d connect those to the receiver ideally.)

What’s particularly cool about this subwoofer is that it comes with what’s known as smart amplifiers. Now a quality amplifier is an absolute necessity when it comes to good sound; as this is arguably the biggest factor that will determine how loud the sub can go. More about that here. http://www.explainthatstuff.com/amplifiers.html

Basically what you need to know is that those allow it to consume energy only when it needs to rather than being constantly on; and when it is on, it uses very little in total. This low power consumption should technically help you save on your electric bill which is a pretty awesome little bonus.

By the way, from me to you, keep in mind that specifications are just numbers. While they can give you an idea of how something may sound, by no means is that the entire story. It may sound worlds different than the specs suggest so just remember that.


Setup


As far as setup is concerned, it was relatively simple. I turned it on with the switch on the back, and set the gain at half. I used an optimizer mic with my receiver to calibrate it then did the subwoofer crawl. Pretty straightforward. It didn’t take up a lot of space so that’s a plus.


How it Sounds


Here’s the part you really want to know, how does it sound? Well I started off the same way I do with any new speaker I get, music! I like to try different genres just to see how versatile the the sub/speaker is.

So I connected my phone to the receiver via auxiliary, put the playlist on shuffle, and played some rock songs.

Took me by shock when about 10 seconds in the kick drum kicked in. The bass from this little thing was so pronounced and authoritative.

It was the kind of bass that made you want to nod your head along with it. It had an almost physical element to the bass which was awesome.

So now I had an idea of how it did in that genre, next I wanted to try R&B so I tried a few songs.

Wow does this thing hit. Mind you I’ve heard subwoofers that admittedly dug deeper, but definitely not at the size.

The PSW111 definitely had that punch with bass that you can feel. It just sounded so good; better than I was expecting that’s for sure.

So to really test its mettle in the music department I decided to play some electronic music. Talk about a party. It let out a visceral thump with each bass hit that pretty much let you know it wasn’t playing around.

I’d call this the little sub that could because man does the sound belie its initial stout appearance. It did not disappoint what so ever.

However I wasn’t done and at that point it was time to watch a movie.

So the movie I really wanted to try with this sub was one of my favorite movies, the Dark Knight (the first one) I’m not one to spoil movies though, so what I will say about my experience with that was it was definitely fun.

What I did happen to notice during the movie, was that you could tell when it wanted to go deeper like some of the bigger subs but couldn’t quite. But I wouldn’t necessarily fault it for that since you do have to tamper expectations on a sub that’s only 8 inches.

It’s not going to shake the walls down like a 15 inch goliath, but it still performs and well at that. But on the more eventful scenes with dramatic musical scores, it was certainly convincing.

The best way to sum up the sound of the PSW111 is punchy and clean sounding with respectable, but not groundbreaking extension into the lower notes.

Some subwoofers often have the issue of having a little too much rumble in turn sounding muddy, but this did not have that issue what so ever. It knows what it can and can’t do; and with what it can, it executes phenomenally.


Likes


  • I loved how musical it sounded, as with anything I threw at it, it played like a champ
  • I love the small form factor
  • The bass was very prominent but didn’t overstep boundaries.
  • The thing was just plain fun


Dislikes


  • May not have the most extension in really large rooms.


Final Thoughts


Besides those two very slight criticisms, this is an excellent sub that overall does not disappoint. It does movies and music beautifully, and when turned up loud, there’s no distortion to be found anywhere.

If you have a smaller room, dorm, apartment or whatever, the Polk PSW11 will work great.

It’s certainly one of my favorites because of how compact yet powerful it is. It’s really awesome.


How To Set Up A Home Theater

How To Set Up A Home Theater


Alright you’re here because you want to know how to set up a home theater.


It’s often made way more complicated than it needs to be, so this will be as straightforward as possible. It will also be picture heavy since it’s easier to understand. We won’t dilly dally though so we’re just going to get right into it.


This is a setup guide for the traditional 2.1, 3.1, and/or 5.1 setups. The reason this doesn’t mention soundbars or home theaters in a box is because each one is different, and they usually have their own respective setup instructions.


Planning Where To Put Your Stuff


Connecting The Wires To Your Speakers


Hooking Up The Receiver


Subwoofer Placement


Calibrating Your Speaker (Not Completely Necessary But Generally Recommended)


What You’ll Need 


  • Speaker Wire (most commonly 14-16 gauge wire)
  • Wire Stripper
  • Scissors
  • light of some sort to see behind your receiver
  • HDMI cables for each of your devices
  • RCA cable for your subwoofer
  • Speaker connectors (banana plugs or pin plugs depending on what your speakers use; if it says 5 way binding posts in the product description then that means they accept any kind of connection)
  • Possibly a few other things depending on your setup so here’s a recommendations list just in case
  • Patience! This is going to take a decent amount of time, so make sure that before you do this, you have nothing important to do after or around this time. Luckily it’s really not that difficult. Plus keep in mind you’ll probably only have to do this once so don’t fret, you got it!


Planning Where To Your Stuff


When it comes to setting up home theater speakers, one of the most important things to keep in mind, even before calibration and placing your equipment, is knowing beforehand where you want your stuff to actually go.

Placement plays a key role in your overall experience so you’ll of course want to do this right.

Here’s what to keep in mind for each part of your system.


The Receiver


Building Your Own Home Theater

When it comes to setting up a home theater system, you can think of the receiver as basically the main hub who’s job it is to process everything from the picture all the way to the sound.

To say it’s important from not only from a picking the right one standpoint, but also in regards to proper setup is an understatement.

And as I’ve alluded to, the proper setup is important for the overall health and longevity of your receiver as well.

Basically you want to make sure that your receiver is placed somewhere where it can get adequate ventilation and air flow so that it works properly.

Believe it or not, if you place it in somewhere like a cabinet behind glass or a small space, it can get too hot and overheat.

So make sure it’s in a space where it can get enough air.

Also make sure that you don’t put anything on top of the receiver too since that’ll also block the vents which can cause it to overheat in the long run.


Front Left & Right Speaker


Ideally when you have your front left and right speaker hooked up, you want it at the same ear level where you’ll most commonly be sitting.

That’s the most optimal position when it comes to getting the best immersion from your speakers.

Now this isn’t gospel but what I would recommend with these is also not placing these more than 12 feet apart, and no closer than 6 feet together.

If you place them too far from each other, you’ll hear the separate sound from each speaker rather than it blending together like you’d ideally want.

This effectively diminishes the feeling of a seamless sound presence and it can be pretty distracting as a whole.

If it’s too close, something called the sound-stage (which is basically a term for how well your sound blends together) will be really narrow sounding and you’ll notice it.

An example of this would be say if you happened to place your front left & right speakers 3 feet apart, and you sat a little to the outside of where your speakers were facing.

What you’d probably immediately notice is a lack of immersion since it’d sound like the audio was coming from off the side rather than in front of you. This could also lead to you having to increase the volume just to hear what’s going on which isn’t necessary if they’re just placed correctly.

So at least 6 feet apart but no greater than 12 would provide for the best soundstage.

A little something else to note if you do want the best sound is to place them at a distance that’s equal to or less than where you’ll be sitting.

So for example let’s say you place them 8 feet apart, if you’re sitting 8 feet away or more from the speakers themselves, then you’re golden. That way it blends together into a convincing mix.

Another thing that you can sort of play with is the angle of your speakers too depending on where your seating position is.

When they’re angled inwards, the sound is more precise but the optimal listening position is also narrowed. This often referred to as toe-in.

When you angle the speakers outwards, (referred to as toe-out) you do get a wider soundstage since the sound is more dispersed, but things can also sound airy.

While certainly not necessary, adjusting the angle can help depending on your room, so you’ll want to see what works for you.


Surround Speaker


With regards to the surround speaker, this is an interesting one.

Besides the fact that you can wall mount these along with any of your speakers really, the setup of your surround speakers is a little different. Unlike your left and right speakers, the surrounds should ideally be placed up to 2 feet above your ear level when you’re sitting.

This gives a better surround sound presentation from my experience, but they can also be placed at around ear level if this isn’t possible. You just don’t want to go below ear level because the surround sound perception is lost.

You also want to place these not behind you, but directly to the left and right of your seating position.

If you are doing 7.1, then the extra 2 speakers would go behind you and these can be placed at the same height or higher than your surround speakers.

For a small room home theater setup, you may even decide to forgo a surround setup in favor of a 3.1 setup, or even opt for a sound bar.

Either way there’s lots of options to go with so ultimately it really just depends on your room size, seating, and your priorities.


The Center Speaker


A close second in importance only to the receiver, the center channel speaker is responsible for up to 80 percent of dialogue in your content, so getting the placement right of this one certainly is important.

The interesting thing about the center speaker is that for the most optimal sound, it should be placed as close to the center of the screen possible.

What I mean by this is of course isn’t putting it in the middle of the screen since it’d block your view, but putting it directly below the screen in the middle.

This allows you to get the most clarity from your center, and makes it seem as though the sound is coming from the TV and not the speaker.

So if you were thinking about putting this one in a cabinet under your TV or something, probably not the best idea.

You also have the option of placing it above your TV angled downwards towards the listening position as well, but I’d personally only recommend that if you can’t place it directly below your display.

One of the most important things you’ll want to keep in mind too is that your left, right, and center speakers should all be at the same level as one another.

If one is higher than another, that can disrupt the sound stage and make things sound uneven.

Placing them at the same level (ideally your ear level when seated) allows the sound to blend together seamlessly for the best soundstage.


The Subwooofer


The subwoofer is also going to be a little different as well since it’s dealing with more of the lower sounds. We’ll deal with this last since it’ll be the last thing we setup. It’ll have its own section so don’t worry.


Connecting The Wires To Your Speakers


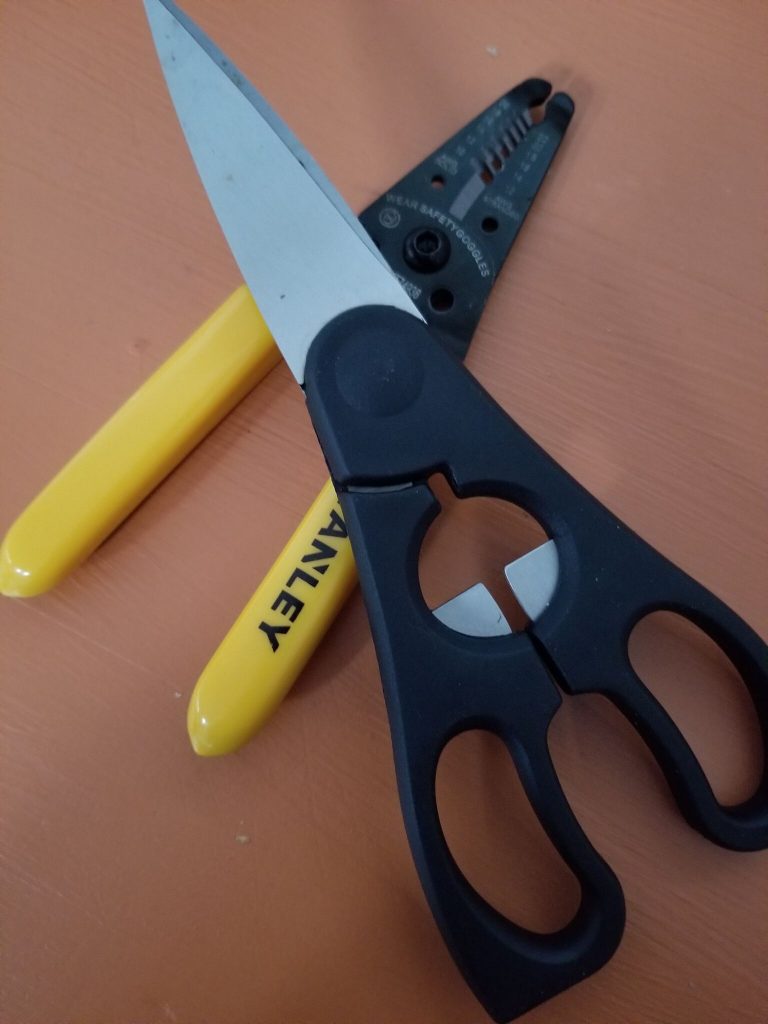
Alright so you’ve got all of that situated and now it’s time to connect the wires! So here’s the thing, you can use either scissors (which is a little harder) or you can use my personal favorite, this cool wire stripping tool to make your life easier.

Up to you, but I personally use that thing. However I’m going to show you how to do it both ways so no ones left out. First with the scissors, then the wire stripper. 🙂

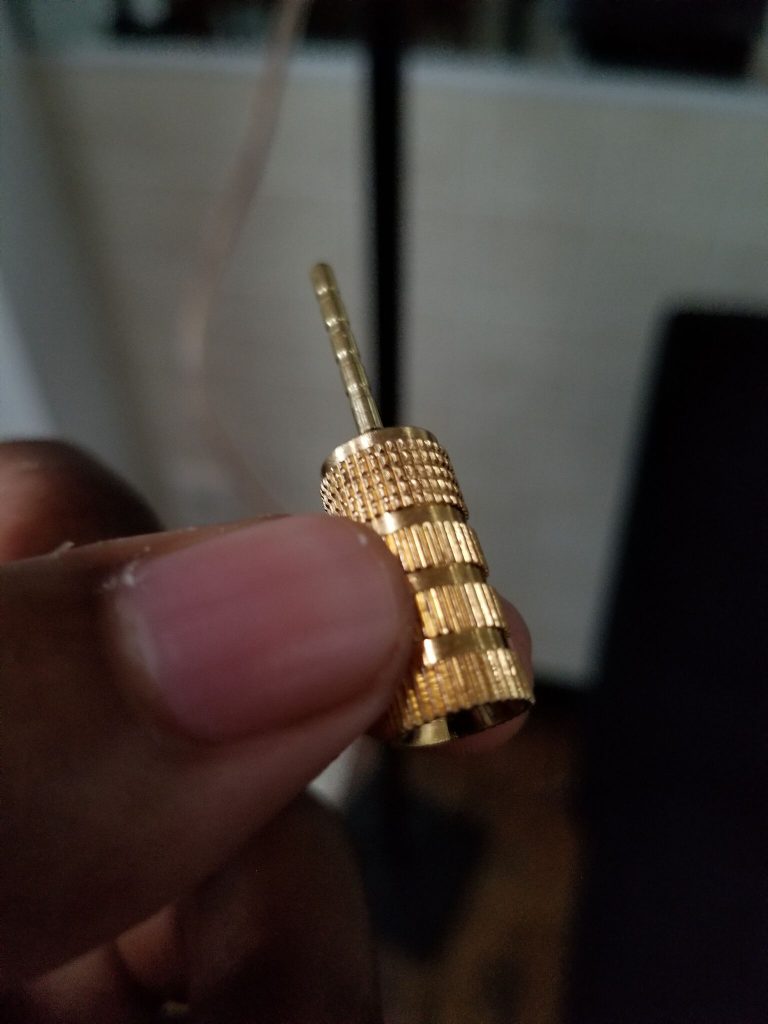
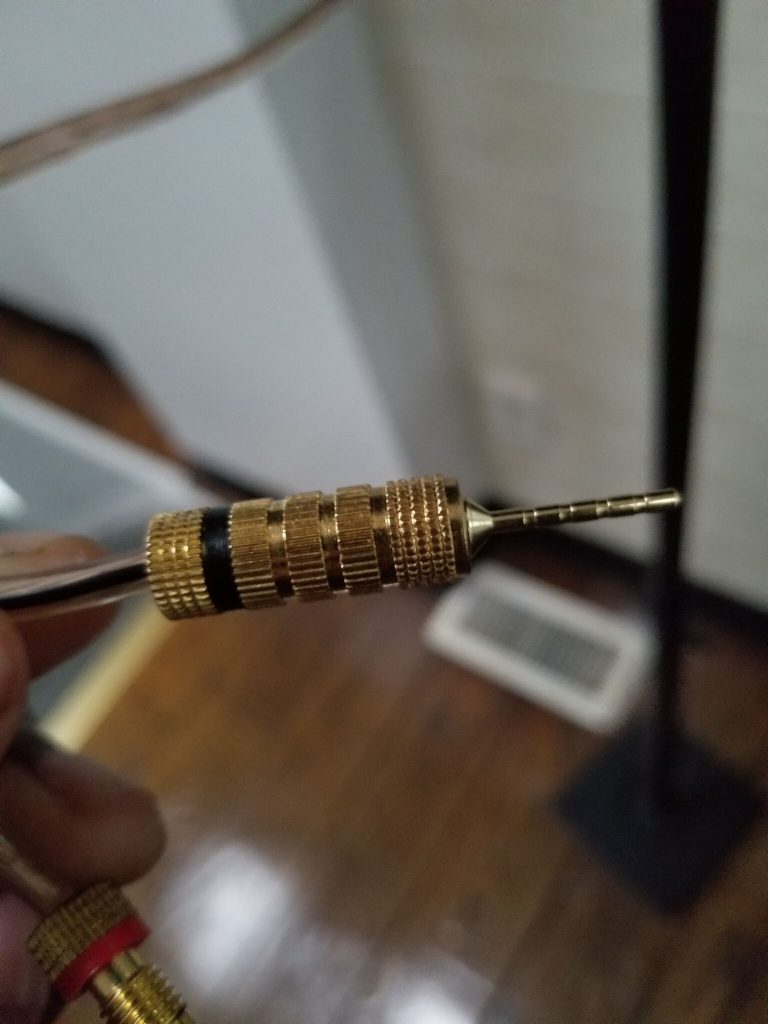
*I’m going to be using whats called a pin plug in this tutorial, but you can use other connections too depending on what your receiver/speaker.*

Before the first step though, what you’ll want to do is take the spool of wire, and roll out the amount of wire you think you’ll need for each speaker.

To do this, roll it from where you plan on placing the speaker, all the way to where the receiver is. Then cut it.

Step 1. Cutting the wire


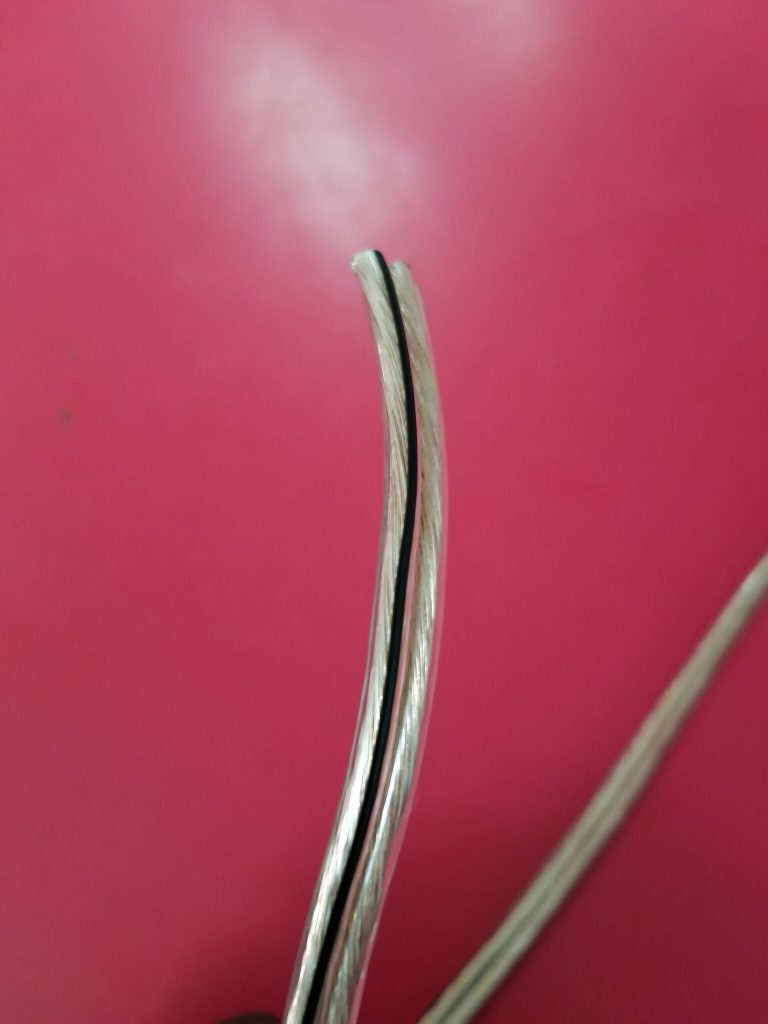
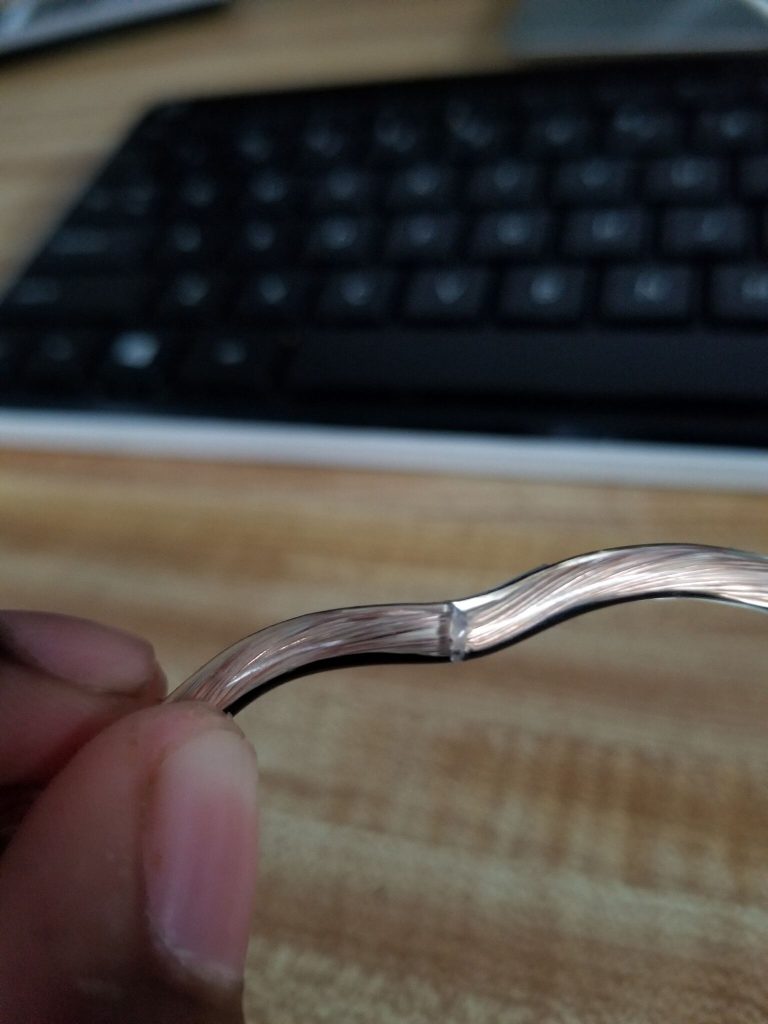
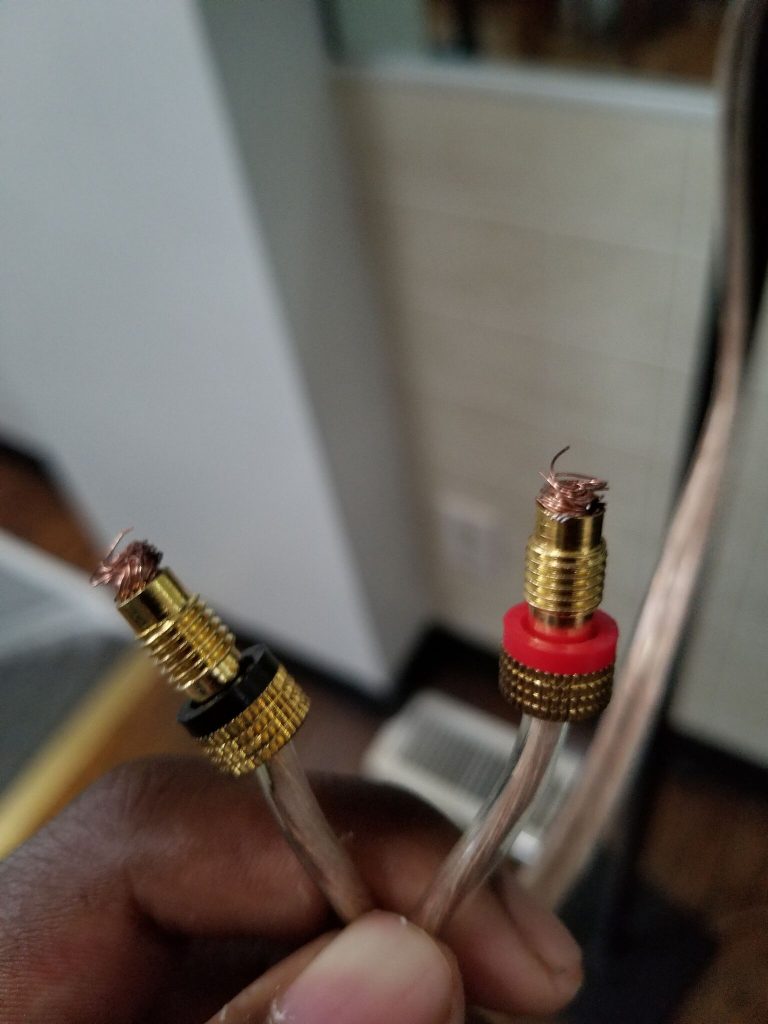
With scissors: So before you do anything, what you’ll want to do is separate the wire a little so that it looks like this by cutting down the middle.


After, you’re going to take the wire, and make a small cut all the way around the wire. You don’t want to cut all the way through, but you just want to cut around it so that there’s a visible notch.


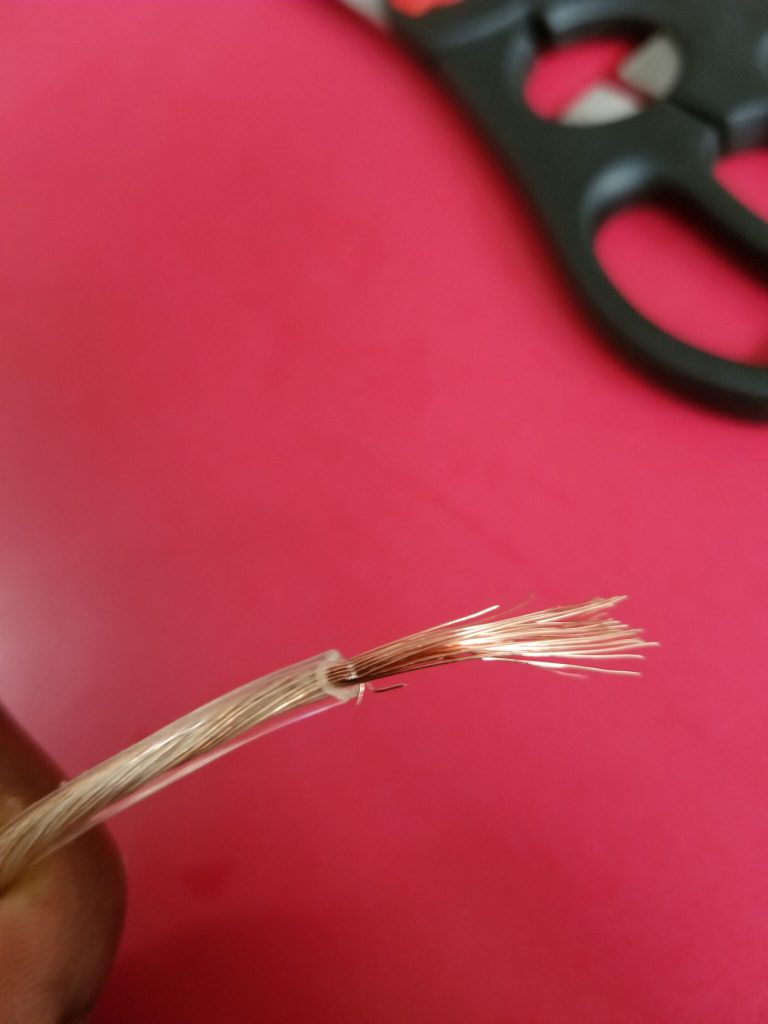
The little strands inside is what you don’t want to cut, only the insulation (that’s the outer plastic covering of the wire.) Then when you have a cut all the way around the wire, you can use either the scissors or your hands for this next part.

From there, you want to gently pull it so that the insulation cover is removed. Don’t worry about losing a few strands, but if you lose a lot of them, then you might want to start over on that wire.

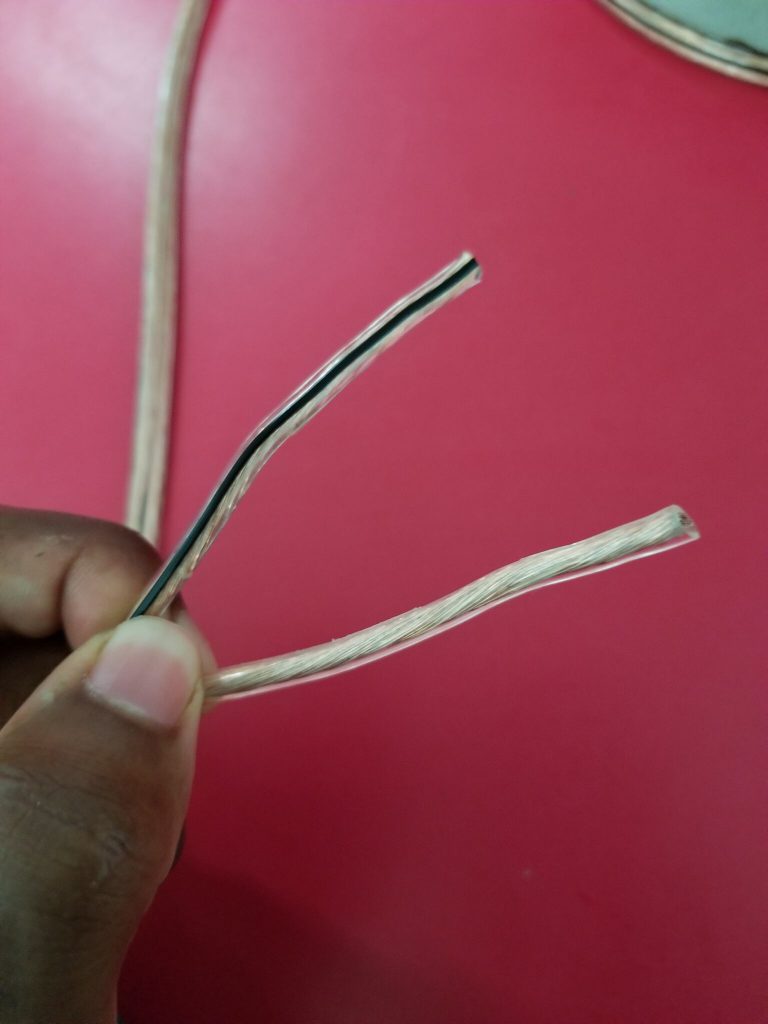
Once you have the gold strands exposed and it looks like the picture above, you’re ready for the next step.


With the wire cutting tool:

Make sure you separate the wire so that it looks like this.


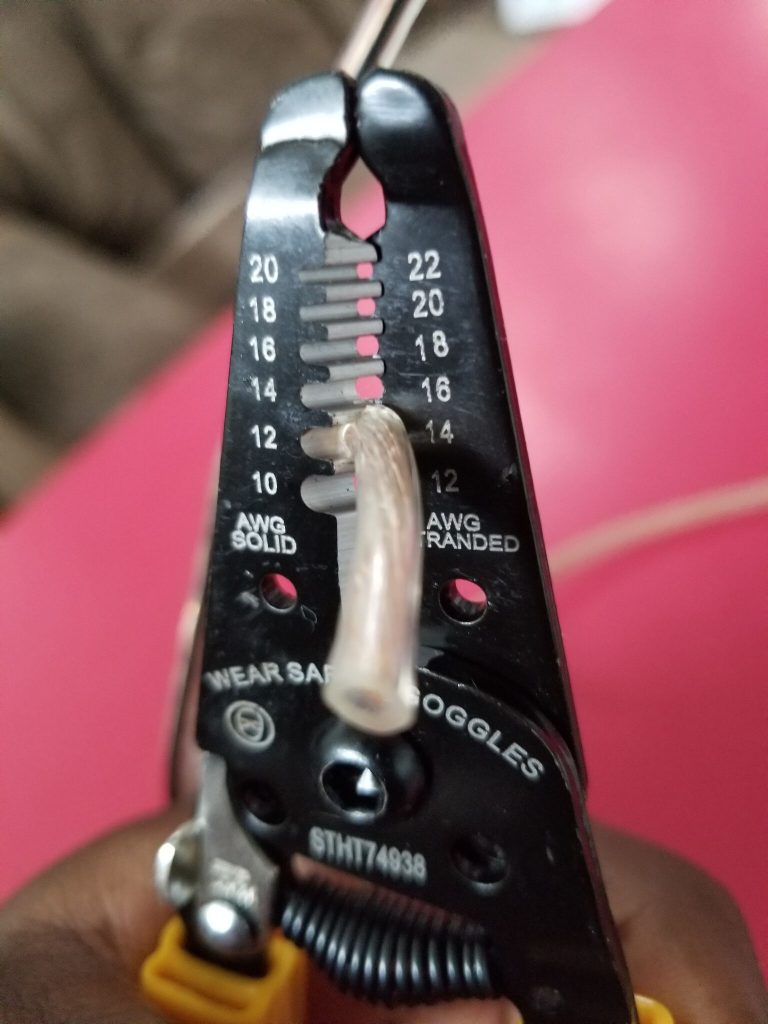
Now take the wire and place it in the appropriate diameter hole of the wire stripper.

Lets say you have 16 gauge wire; then all that means is that you place it in there where it’s marked 16 stranded. Whatever gauge wire you have is where you’ll put it.

Clamp it all the way down, and lock it with that little lever to the left. Then just pull, and it’ll perfectly strip the wire. It may or may not give some resistance but just pull and it’ll give.


Step 2. Attaching the connectors


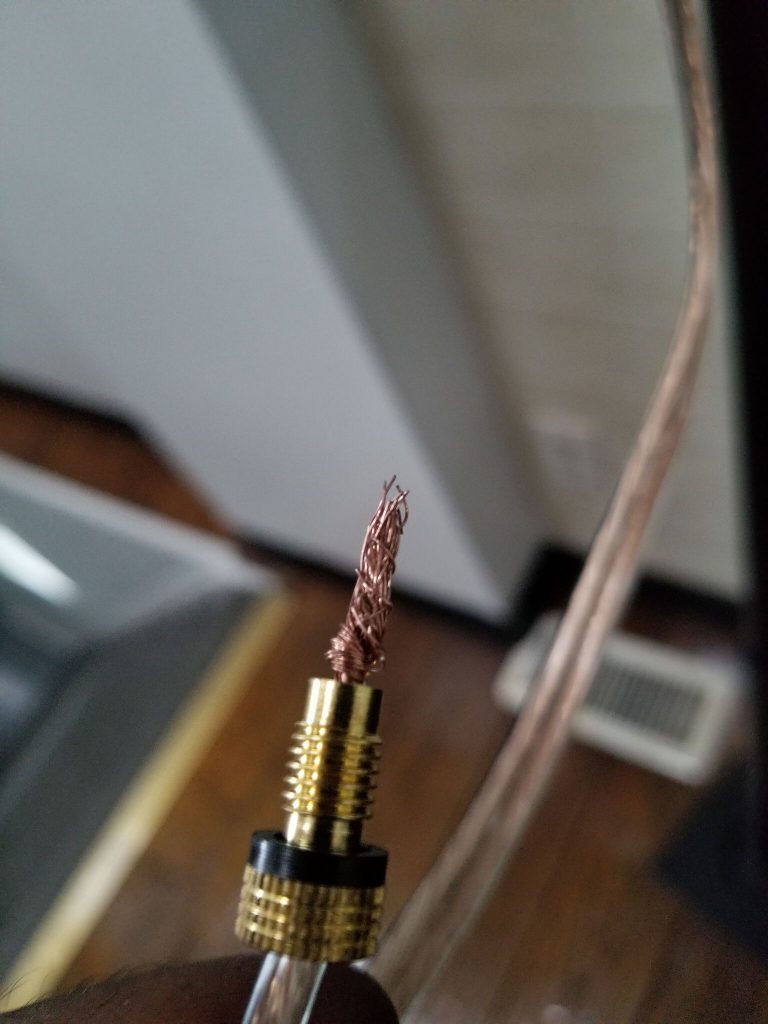
What you’re going to do next twist the gold strands until it looks like this.


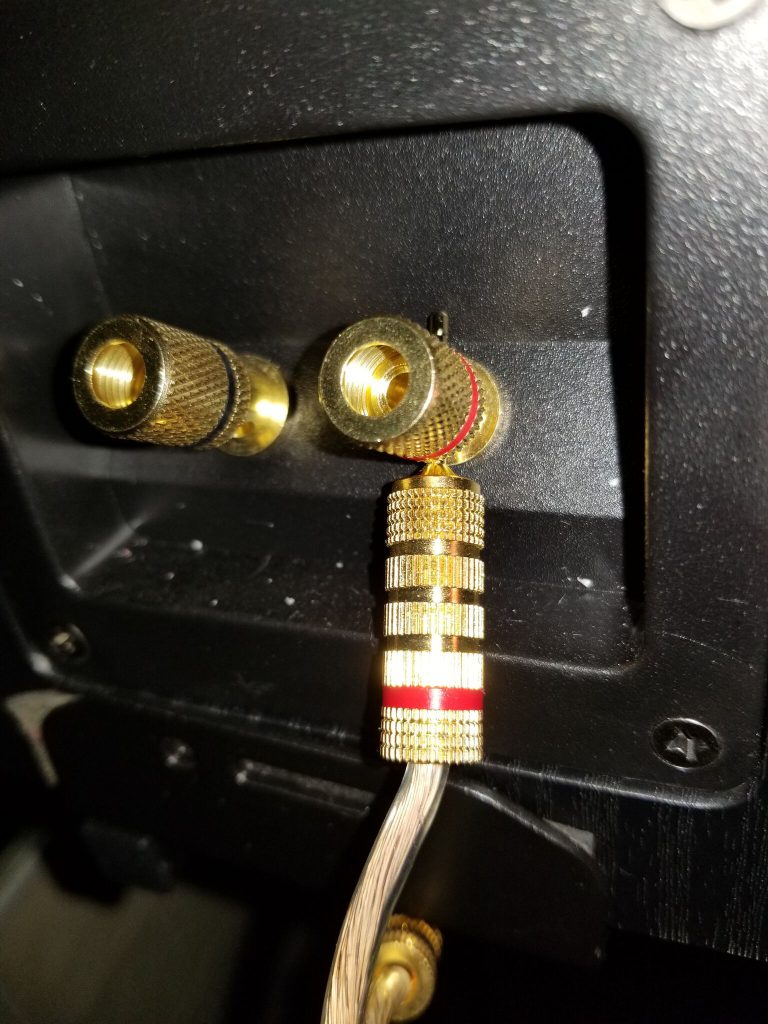
Then you’re going to insert the gold strand bundle into the hole of the pin/banana plug. Make sure you unscrew the connector first so it looks like in the picture


Twist the bundle around until it looks like this.


And then take the cap that you unscrewed before and screw it back on..


That’s it really. Just strip each wire and do the same thing for each one.


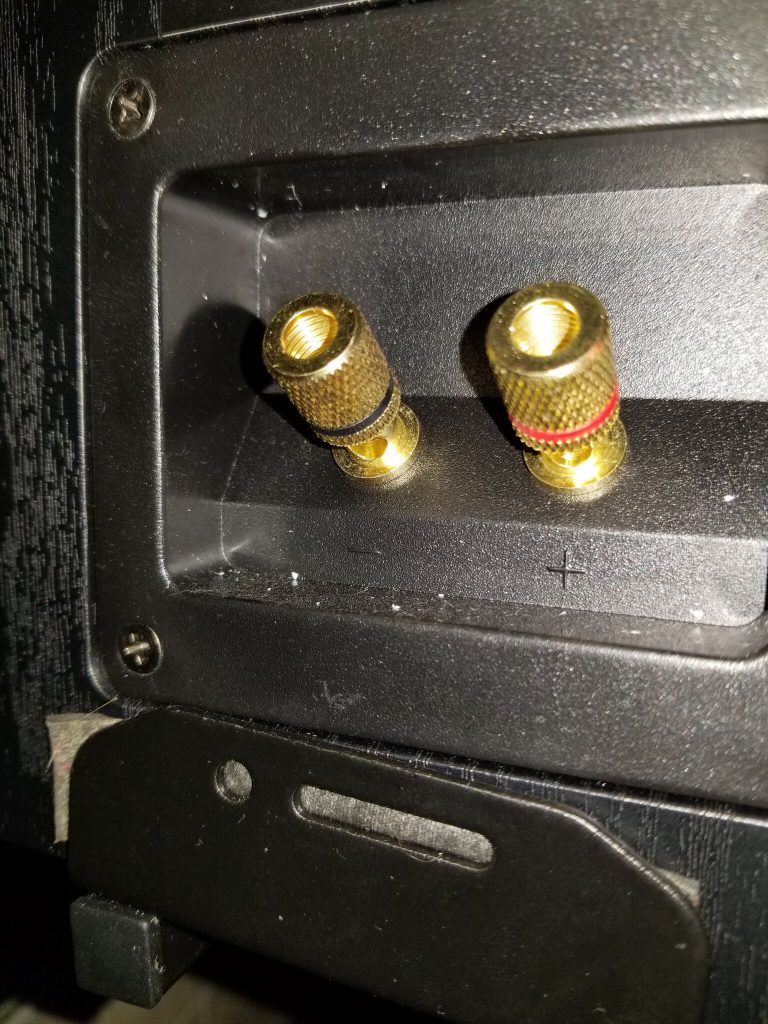
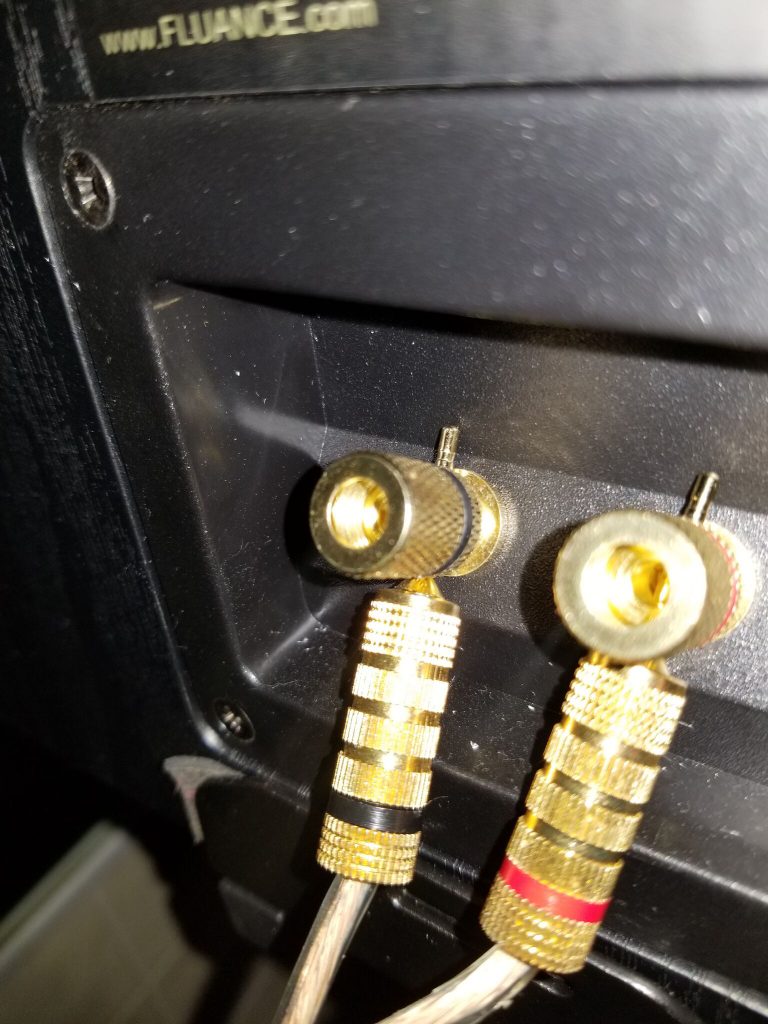
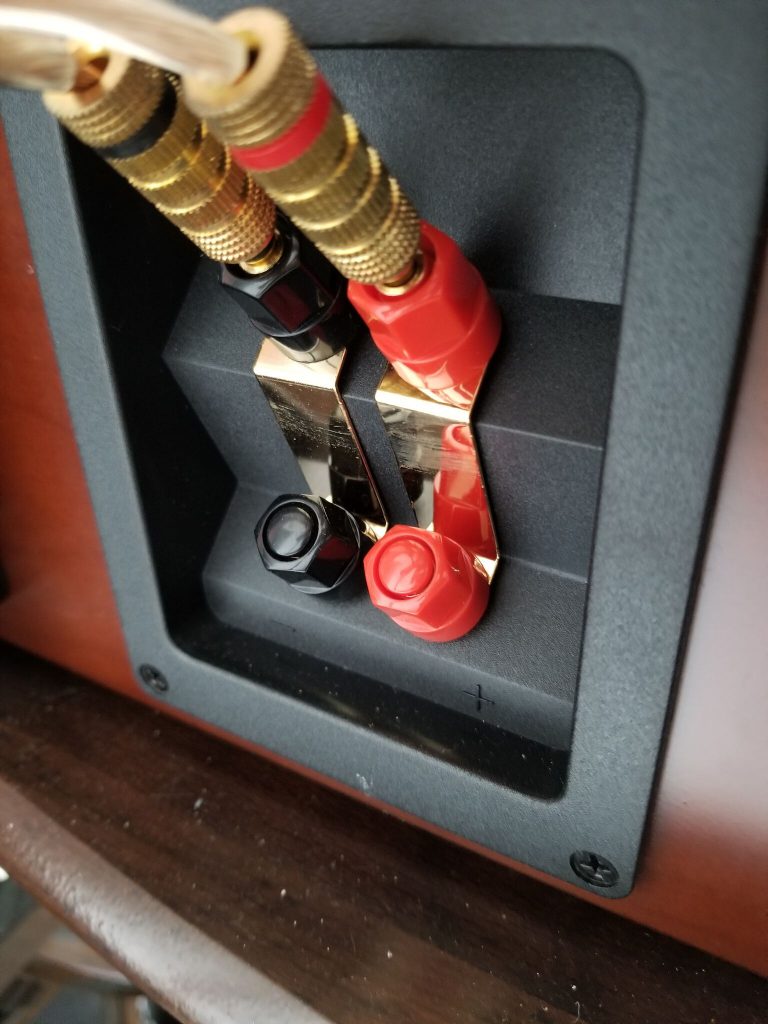
Now these are called binding posts and are where the connectors go into (this is the back of my speaker).

Each speaker or receiver may have a different type, but a lot of times they will have what is called a 5 way binding post which means it can accept any type.

But you may have to unscrew them on the back of your speaker until it exposes a hole


It would then go into this hole, and you’d tighten it back down until it holds the connector.


Remember there’s two of these on one side of the wire that goes into the speaker like this.

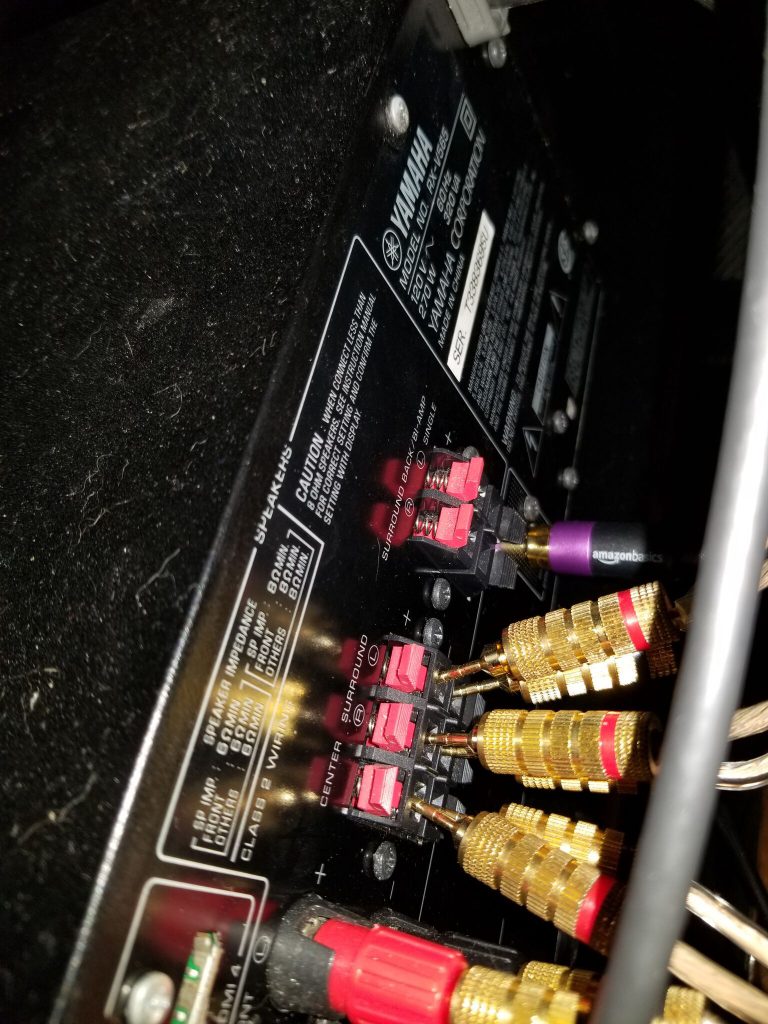
Then on the the other side of the wire, the other two go into the receiver.

Keep in mind that one is negative and one is positive. It doesn’t matter what color you choose to be negative or positive, but whatever color you do choose for each, make sure you stick with the same scheme for each speaker.

That is absolutely paramount to remember.


Notice those other holes that we didn’t plug into though?

You can also use what is called a banana plug to actually plug into the top holes like this. You would remove the cap with something like a paper clip, then plug into it.

Up to you what you choose to do though.


Step 3. Plugging in to the receiver

Once you have all your speakers setup with the connectors on both sides of the wire, now it’s time to connect them to the receiver.

First, make sure the receiver is completely off and unplugged before you do any of this please.

Now let me say this, if you used the pin plugs, then you’ll either connect them 2 different ways depending on your receiver.

You might have to unscrew the post to reveal a hole like shown with my speakers above— in which case you would then place the pin in the hole and screw the thing tight. Like shown above.


Or it might be spring loaded like this, and in that case you would push it to reveal the hole and put the pin in.

On the back of the receiver it’ll tell you where to connect each speaker so you’re not just guessing where to put it. Remember negative to negative, positive to positive.


Hooking Up The Receiver


You’re doing good we’re almost done. 😀

Setting up a home theater receiver isn’t too difficult luckily, you just have to make sure the speakers and devices are connected into the appropriate slot.

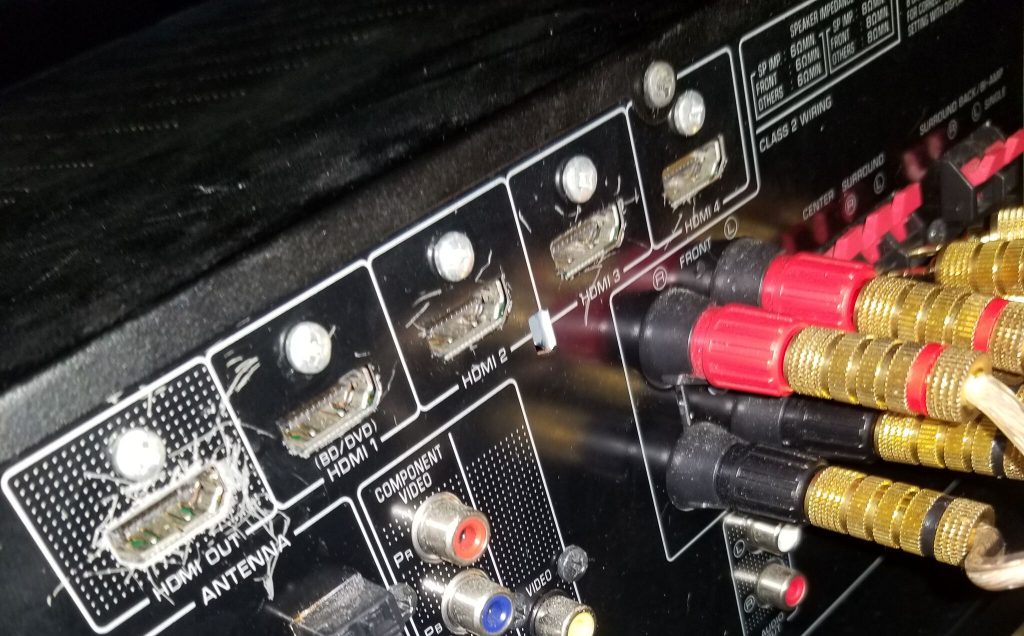
Here’s where you’ll also notice two different types of slots called HDMI outputs and HDMI inputs.

Here’s an easy way to remember the difference.

An HDMI output means when a device is connected into that particular slot, it is sending the signal out to some other device, hence the name out.

That other device receiving the signal will have an HDMI input slot where the other side of the HDMI cable is connected into, hence the input part.

The reason this distinction is important is because one HDMI side will go into the HDMI out on your receiver. The other side will go into the first HDMI input of your TV. This is basically allowing your receiver to process the sound rather than the TV.


Be sure it is set to input 1 on your television. From here, every other device you plan on using will be connected into your receiver, not your TV.


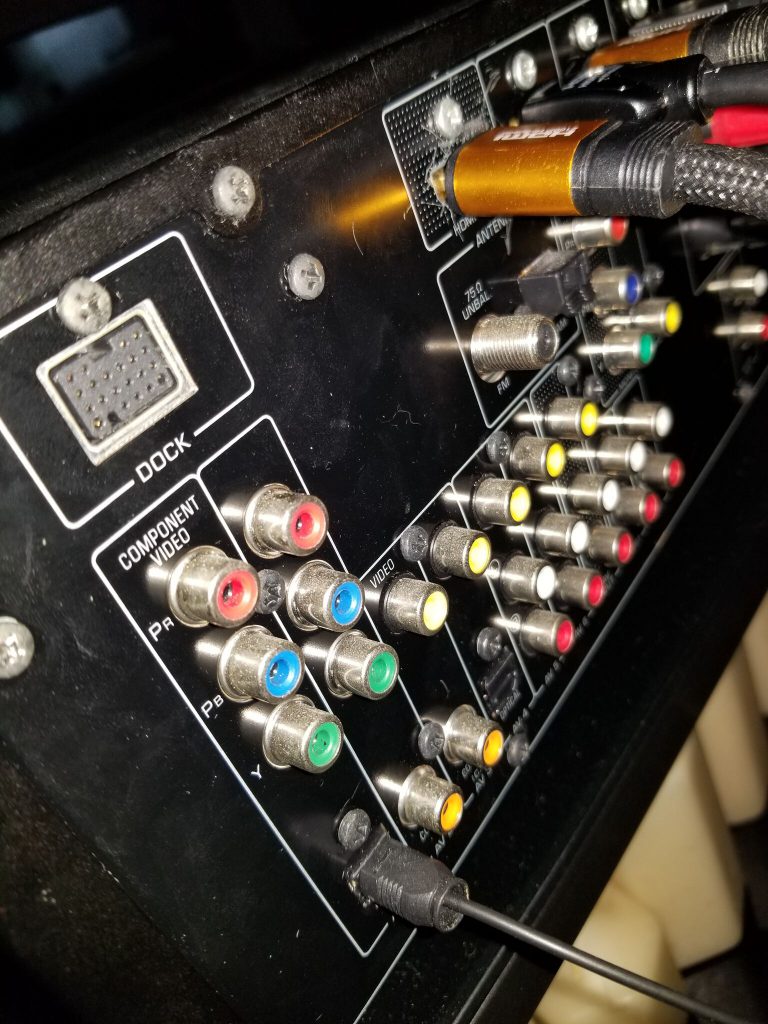
So your TV should only have 1 HDMI connected into it, all the other ones should be in your receiver. just to clarify that. If your DVD player/ whatever device doesn’t have an HDMI, you would have to use an optical cable for the sound like shown in the bottom left of the picture.

If you happen to have an older TV or receiver that does not support something called ARC (audio return channel) then you would need to connect an optical cable from the television to the receiver.

Here’s something important that you also need to know (well besides actually plugging in your receiver’s power cord now after everythings connected.)

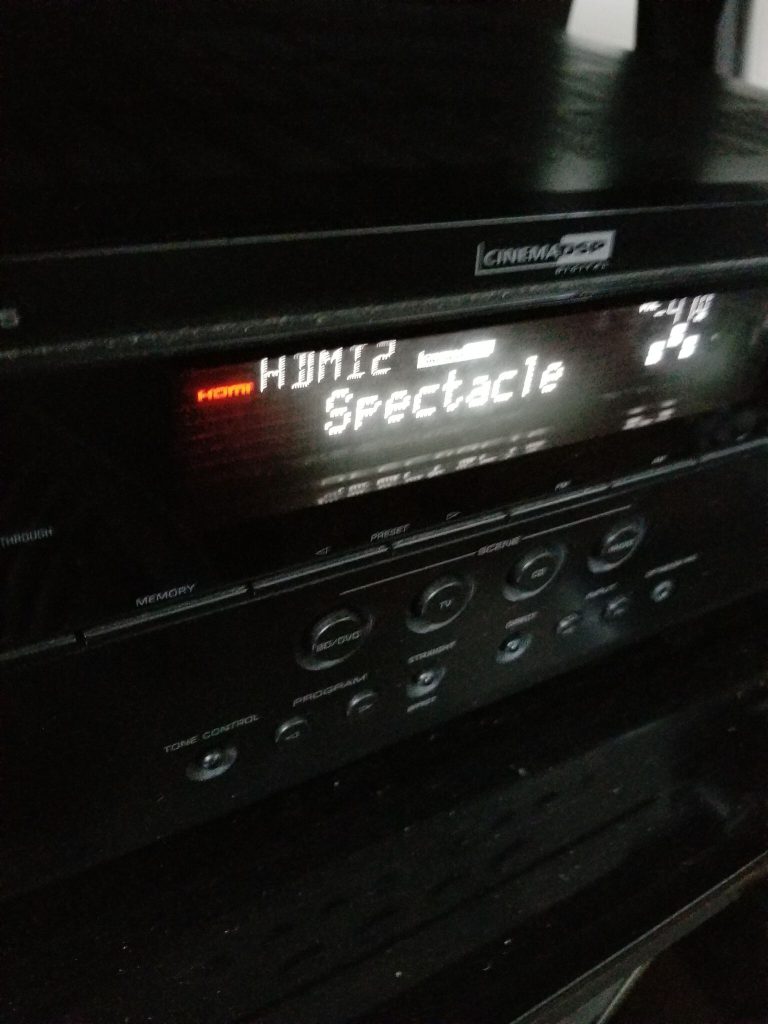
With your new receiver’s remote, you’ll need to change the input to whatever device you plan on using.

So for example if your cable box is connected into the slot labeled HDMI 2 on your receiver, you’ll need to change it to input 2 on on your remote.

Not that hard right?

The device that you use has to be powered on too by the way, otherwise your TV might say no signal.


Subwoofer Placement


Subwoofer placement has to be one of the funnest things because it allows you to directly hear differences even a few inches away. What we’re going to do now is something called the subwoofer crawl.

To save time, the subwoofer crawl basically entails moving around your room to find out where it sounds best.

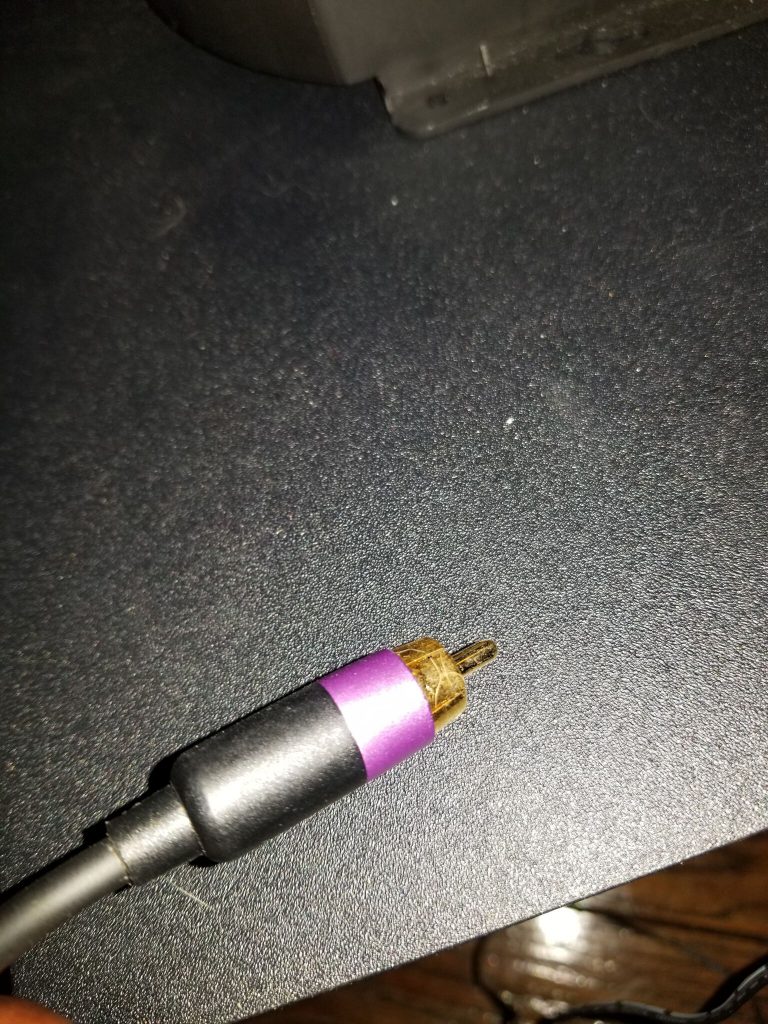
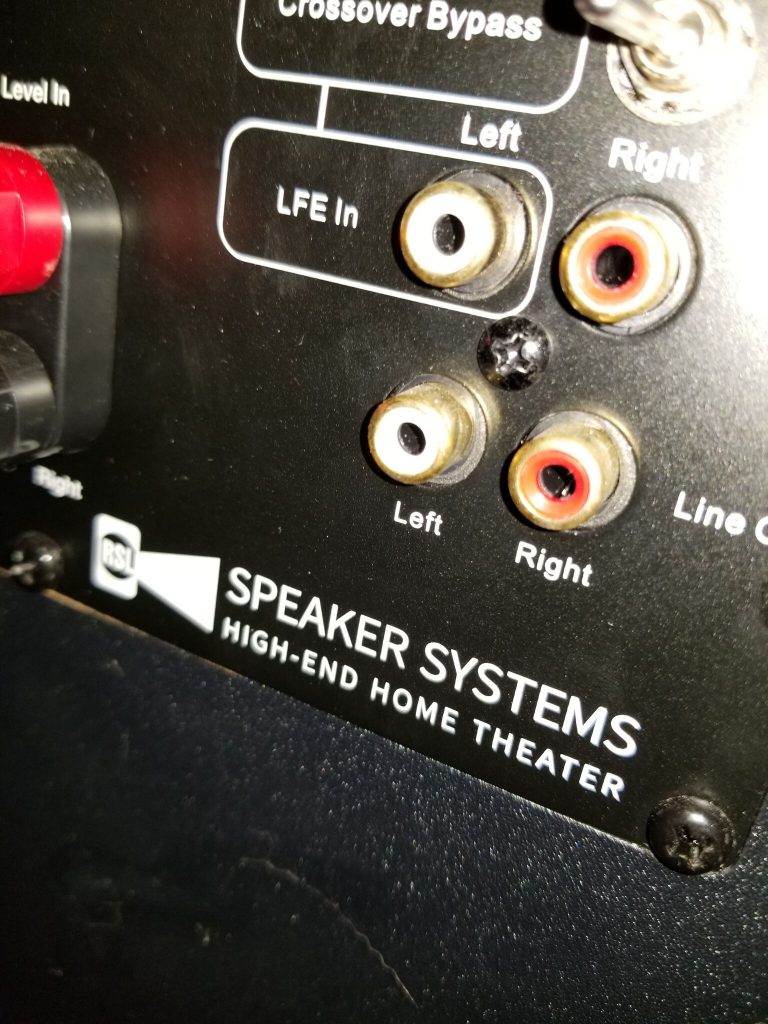
So to get straight to it, what were going to do is plug in our RCA cable, which looks like this, to the receiver and to the subwoofer.

It’ll go into the slot called LFE in, line in, or something similar depending on the sub.


In this picture I show you how to set up a home theater

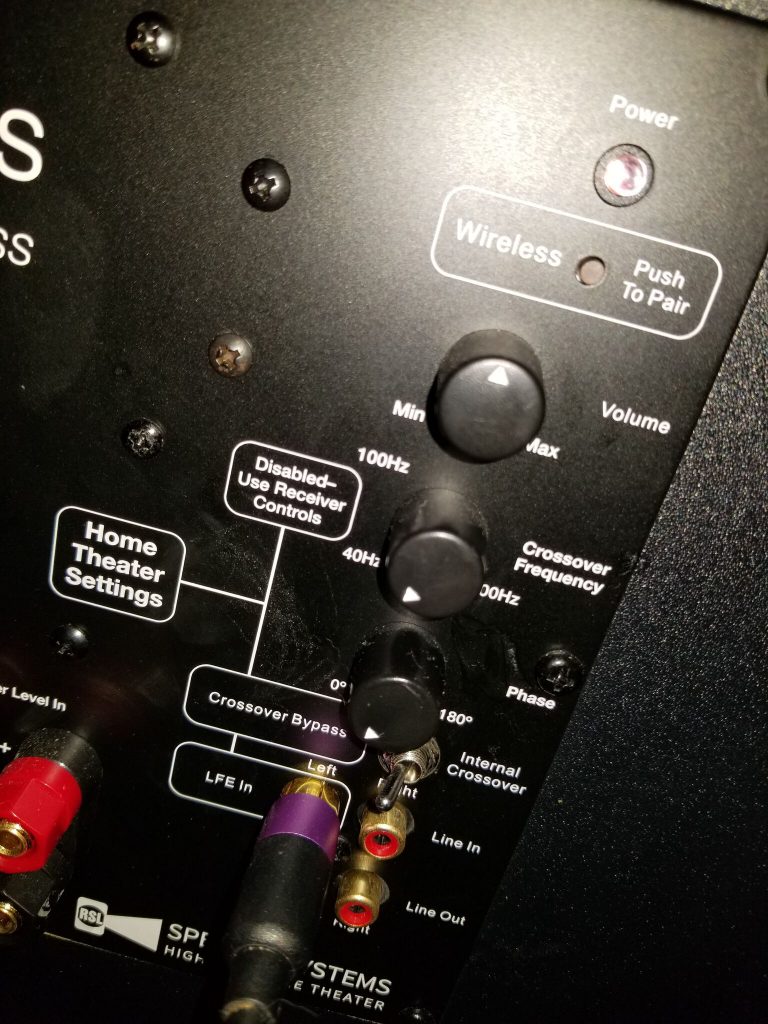
Turn on your subwoofer and turn the volume on the subwoofer knob to halfway. This is also commonly referred to as the gain.

If possible, turn the crossover frequency knob on the sub to where it says disabled; and if it doesn’t say that anywhere, then turn it all the way past 180. This just tells the receiver to do the processing and not the sub.


Next turn the receiver & subwoofer on after plugging them back in, and play something you’re familiar with; be it music, a movie, tv show etc. and move around the room listening for differences in the bass.

In some areas it will sound boomy, and in some areas there will be almost no bass what so ever.

Listen to where it sounds the most balanced to your ears. When you find it, that’ll be where the sub goes. You can mark that spot with a piece of tape or an object.

Then place your subwoofer in that new spot, and listen back from your seating position to see if everything sounds good. If it does then guess what, you’re done, that’s it.

You now have your new system set up, woo!


As a little side note, something else to consider is the addition of an extra subwoofer. Not only will you get more even bass coverage, but a stronger bass output overall.

I talk about all the benefits of using 2 subs below, so definitely be sure to check that out because there’s actually quite a few.


https://easyhometheater.net/setting-up-2-subwoofers


Calibrating Your Speaker (Not Completely Necessary But Generally Recommended)


Now here is the interesting part.

Technically you are done for the most part, so if you don’t feel like doing anything else then by all means enjoy your new setup; I wouldn’t blame you.

This next part is completely optional so it can be done at any time. But if you are someone that does want the best sound possible while wanting to fully utilize your new setup, then stick around for this.

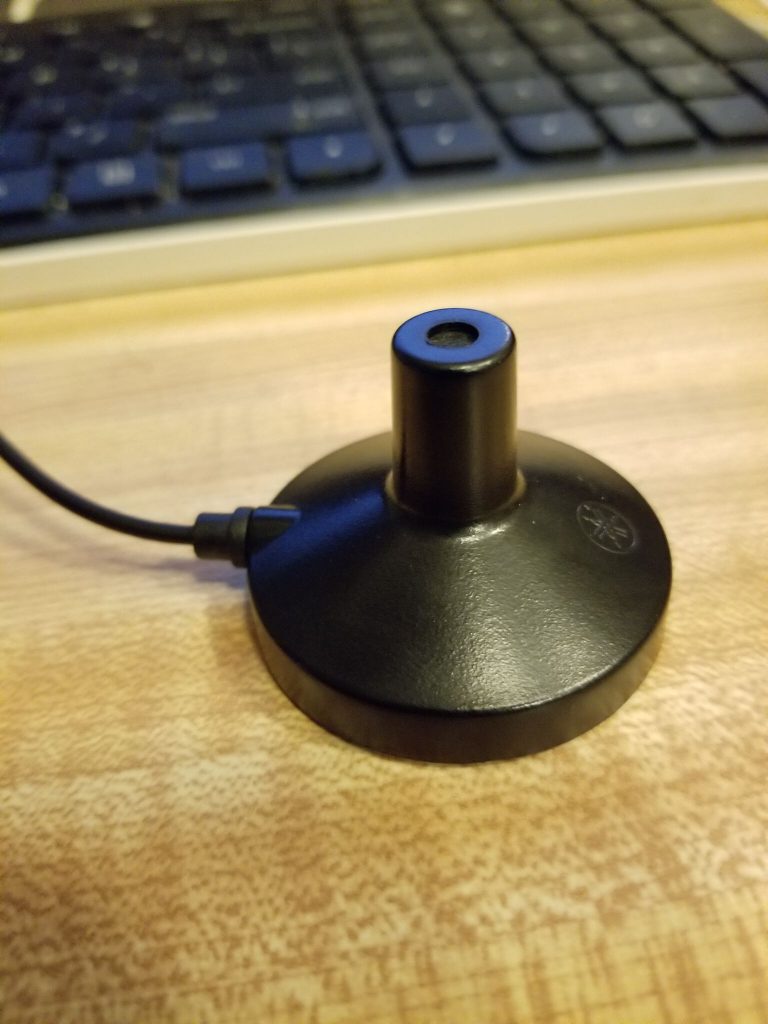
If your receiver came with something that somewhat resembles this, that is what is called an optimizer mic. Like the name suggests, its job is to optimize the sound!

The cool thing is it takes all of the work out, meaning all you literally have to do (after making sure the mic is on a flat surface and your surroundings are quiet) is plug it into the part where it says optimizer mic, calibration mic, or something similar on your receiver, press enter on your remote, and it will automatically calibrate your speakers for you.

Isn’t technology great?

Here’s a receiver that  actually comes with one.

Yamaha RX-V685


Now if you are a little more old school, or your receiver doesn’t have one of these, then fret not there’s still a way to do it, albeit a little more hands on.

You would have to use what is called an SPL meter to measure the decibel reading from each speaker, and manually adjust the volume level for it in the menus.

You would also have to be sure to set the crossover to 80 HZ which basically just means to send all the low frequency sounds to the subwoofer.

Now if that sounds like too much work then you can always get a receiver that comes with a mic, or you can skip this step all together.

I know for me personally, I bought a receiver that had the optimizing mic since I liked that it did the work for me, but again hey, that’s up to you.

Now that you have your new setup all ready to go, tell me about it! I’d love to hear about it and how you’ve liked it thus far; maybe I can even offer you a few more tips!

For example, if with your new set up you notice wires everywhere, then you’ll certainly want to hide them out of the way. Here’s how to do exactly that.

https://easyhometheater.net/hiding-speaker-wire-solutions


Or if for example you find that your speakers aren’t working when you turn the receiver on, then here’s a few things you can do to fix that.

https://easyhometheater.net/why-arent-my-speakers-working


Perhaps even, you’re just curious as to how long your speaker setup is good for?

https://easyhometheater.net/how-long-do-speakers-last


Point is, if you have any specific questions at all in the meantime, don’t hesitate to ask me or even leave a comment below because chances are, someone else may have that same exact question and it’ll help them too.

But that’s it for now folks.

Like I always say, make it easy, keep it simple!


Polk Audio RTI A3 Review; They’re fantastic!

(more…)

A 4K TV? What’s That?

A 4K TV? What’s That?


A picture of a modern television is shown

4K TVs are much more common now, but that wasn’t the case even just a few years ago.

I remember back in 2014 looking at the related videos section and seeing the 4k tag for the first time.

In the bottom right was a resolution slider that lets you toggle the clarity, and besides the new 1440p being listed, there was also a 2160p setting.

Upon trying it, the only thing I noticed was a buffering without playing the video since it was an older computer lol.

I definitely wondered what it would look like, but it wasn’t until a few years later that I got to experience it when I bought my first 4K television.

So that’s what I want to talk about today since I know that by now, you’ve probably at least heard the term 4k or Ultra HD.

Plus I wanted to offer my thoughts on whether I feel 4K TVs are worth it in 2024.

To better understand what 4k is, we also need to understand how the pixels in your TV play a factor with this tech.


Understanding How The TV Pixel Affects Resolution


Why Was 4K Introduced For TVs?


4K Resolution Vs 1080p In TVs


The Future For Higher Resolution Displays


Understanding How The TV Pixel Affects Resolution


Your TV is made up of millions of little bits of information called a pixel.

When supplied with an electrical current, these pixels light up.

Depending on what’s on screen, these pixels have 3 sub pixels that are responsible for displaying one of 3 colors, red, green, or blue.

In combination with dimming and getting brighter at certain times, together they produce the picture quality that you see.

The incredible thing is with that combination of those 3 colors, they’re able to reproduce all of the possible colors you can see with your eyes.

That’s the basic understanding, although there’s variations on this that may add an additional sub pixel color like Quattron & OLED, or technologies like Micro LED & QLED that enhances how they’re displayed.

The number of these pixels present depends on what’s called the resolution.

The higher the resolution, the higher the count of pixels.

One of the most common resolutions today is full high definition or 1080p.

This is where there is 1920 pixels horizontally, and then 1080 pixels vertically, all displayed at once, hence the p at the end.

Believe it or not, the concept of high definition television isn’t new though.

In fact it was being researched decades ago, around the same time color TV itself was introduced!

So why didn’t they just introduce that in the first place?

Well 3 big reasons really; cost, lack of hardware to properly utilize it, and a lack of consumer viability.

It was way too much of a hassle at the time basically.

Long story short, cable companies started to more recently broadcast it commercially, then talks of commercial 4k picked up major steam not even a few short years later.


Why Was 4K Introduced For TVs?


As televisions and projectors increased in size, creators of media content and companies realized the needs for resolutions even higher than this.

They wanted a way to display millions more pixels on screen so that it wouldn’t look blurry on those larger displays.

The issue though was with the way that movies were already formatted, thus they were tasked with creating a work around and ended up calling this new digital video format at the time Ultra HD.

This is where a common mistake is made though since Ultra HD isn’t the full pixel count of 4K resolution if you wanted to be technical.

4k actually is a resolution used for cinemas & editing in digital photography, and comes in at 4096x2160p.

Ultra HD or UHD as it’s so commonly referred to, comes in at 3840x2160p; not a huge difference mind you, but the pixel difference is there.

However being so close in size with a nearly indiscernible difference, they’re pretty much used interchangeably.

It also uses a 16:9 aspect ratio which is now common in content and displays.


4K Resolution VS 1080p In TVs


But are any of these pixel increases in displays actually of any visual benefit?

Especially compared to the standard high definition sets many may still have?

Simply put, yes they are.

Let’s think of it this way; when comparing the two, traditional 4k has a pixel resolution that is 4 times that of HD.

Yes you heard that right, it has 4 times the amount of pixels comparatively.

That by definition, means 4 times the clarity of a 1080p television.

Now how noticeable this is in reality is going to vary from person to person.

It’s also dependent on the size of your TV, since under a certain size (under 46 inches) chances are you won’t benefit from that extra detail too much.

The bigger the screen basically, the greater the need for a higher resolution.

A modern 4K TV doesn’t simply involve a bump in resolution either since there’s other formats that improve the experience as well like high dynamic range (HDR), expanded color, and higher refresh rates.

Personally I’m not one to buy into the hype of things at all, but having a few 4k TVs right now, I can tell you the difference is incredible.

It’s something that you would have to see for yourself to see why it’s so exciting.

Watching a 4k Blu-ray on it is incredibly clear.

So here’s the real question, as of today is a 4k TV worth it?

If you had asked me that same question back in 2014, as cool as it is, I would have said to probably wait a bit for the content to catch up to the standard.

But right now as of 2024? I definitely think so & here’s why.


The Future For Higher Resolution Displays


For a good period of time while UHD was in the implementation phase, there was a real problem, no content!

They had this novel idea, with the promises of a major bump in visual clarity, but there was barely anything to actually take advantage of it.

Then as Netflix, and other media juggernauts and streaming services began to embrace it, the idea of 4k becoming the next big standard gained clout.

Today in 2024, there’s much more content and ways to actually utilize the format.

There’s UHD Blu-ray players, 4k gaming consoles, and even phones now with the ability to capture in 4k.

It definitely seems like a lot of third parties are on board now.

Even some cable companies have started to offer 4k services through ATSC 3.0, though full availability will likely take some time still.

Reason being, besides the financial aspect, being be able to provide a resolution like that takes a lot of power and infrastructure to implement.

However do know that at this point in time, while watching cable TV in this new resolution isn’t as widespread just yet, that time is likely coming.

Couple this along with the fact newer 4k TV’s can stream a lot of your favorite shows in 4k and it starts to make sense.

This wasn’t the case even just last year, however new content is being rolled out what seems like daily.

1080p TV’s are in the process of being phased out, and are much harder to find nowadays, since Ultra HD will eventually be the new standard moving forward.

Something else you may have been wondering is if it’ll still play 1080p and lower resolution content and luckily it will.

They’re backwards compatible, meaning any lower resolutions automatically get upscaled to display on screen so they’ll still play it.

I also recently did an article on some of the best TV’s in my opinion if you’re curious. https://easyhometheater.net/the-best-tvs

What will really be interesting though is seeing how more advanced resolution technologies are implemented since 8K resolution & IMAX Enhanced exists now as well.

I think the future is bright for the implementation of higher resolution displays, and the more display technologies that focus on really enhancing our content in appreciable ways, the better in my opinion.

What’s really exciting though is that higher resolution displays are just one of the many interesting smart home technologies I feel like we’ll see in the upcoming years.


Extremely Common Home Theater Problems

Common Home Theater Problems

Home Theater Problems

(more…)

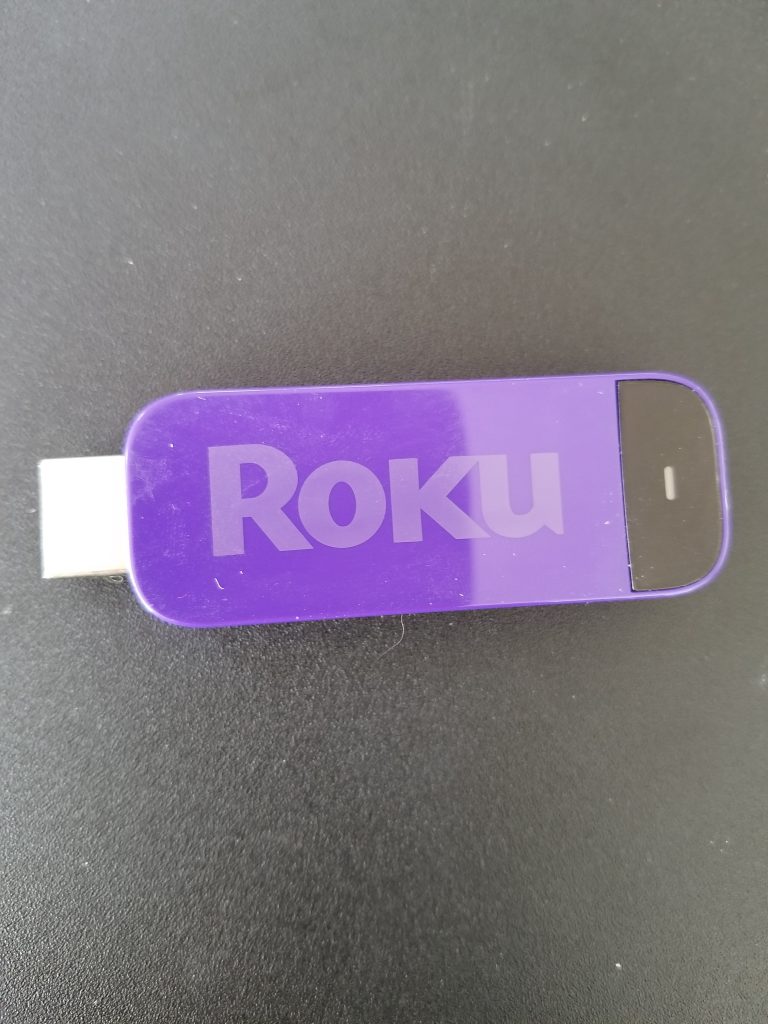
What Is The Roku?

The Roku Explained


What Is The Roku?

Throughout our quest for getting the most out of our home theater experience, inevitably you’ll come across the occasional thing that just makes your life that much easier.

So with that then, no doubt at some point or another you’ve at least heard mention of something called the Roku. Besides the interesting name choice (that sounds so similar to Goku) what is it?

Well that’s definitely a multifaceted question. The short, TL;DR answer? It’s a media streaming device with quite a number of channels and features to keep you entertained for eons.

Long answer?

Well that’ll be the rest of this article!


History


The Different Types of Rokus Available Today


The Roku TV


Is it Worth it


Who it Might Not Be For


Final Thoughts


History


The interesting thing about media streaming devices in general is they really haven’t been around all too long to appreciate. In the case of the Roku and its history, even though the company was founded in 2002, it wasn’t commercially available until 2008.

In 2007 there were rumors that media giant Netflix would be releasing its own physical player however that rumor was quickly dispelled. So, the VP at the time Anthony Wood, decided to use the other company he created as the outlet for doing this; that company was Roku.

Roku stands for sixth, and was the 6’th company he created; pretty cool right? So then the subsequent year, the first-generation Roku was released. Its focus was being a Netflix streaming box.

As you could probably imagine since it wasn’t something that existed at the time, and since everyone knew Netflix, it was a big hit. If you’re interested here’s a really good article on their surprisingly rich history.

https://www.fastcompany.com/3004709/inside-netflixs-project-griffin-forgotten-history-roku-under-reed-hastings


But anyway, as the years passed, additional models were created. In 2010 the HD version of it was released and eventually became the defacto model later that year.

Additional generations of the media player would be released each year either while adding more features like faster processing speeds, Bluetooth and 4k support.

There have been a number of new, nearly annual updates, and with those updates of course comes even more features. Let’s take a look at the Roku Devices you can get as of today.


The Different Types Of Rokus Available Today


In terms of choices, there’s quite honestly a plethora of different models available that all offer novel and interesting features. But what is the best roku streaming device?

Well the answer to that really will depend on what your specific needs are for a streaming device in general since declaring one as irrefutably better than the other all around might not work, especially if someone didn’t want/need the features present in that model to begin with.

So with that being said, let’s take a look at the different models so that way you have an idea of what works for you.

Keep in mind while there might be additional variants that exist, the ones listed below are really the main ones when it comes to tangible differentiating factors beyond  differences in remotes or the type of cord included.


Roku Express


The first one up is the  Roku Express. The difference with the Express is that it now features streaming speeds that are much faster than previous. What that equates to for you is not only a smoother experience, but also takes care of the potential buffering issue you might run into. It offers a 4K resolution at 60 fps (frames per second) so you’re getting full UHD here.

It features an impressive number of channels, shows and movies meaning there’s a good chance you’ll find something you like. Setup is super easy too.

All you need to do is connect the HDMI cord from your television to the Roku. Then connect the power cord from the actual device to a nearby outlet.

Just make sure that it’s as close as possible to the TV, and make sure that the remote it comes with can actually see the player so that the IR blaster allows you to control it. Next you would turn your tv to whatever input you put the HDMI in.

From there, the on screen step by step instructions will have you running it in no time.

Definitely not too hard.

Another new feature is the Roku app, that manages to turn your smartphone into the remote if you’d prefer to control it that way.

All in all, pretty straightforward and as a whole, it’s definitely an improvement with some rather nice features; especially with the faster streaming speed.

Roku Express


Roku Streaming Stick+


The next one is called The Roku Streaming Stick+ The biggest notable difference is that rather than being an entirely separate device that you must plug into with a separate HDMI, it plugs directly into the TV itself. It couldn’t be any easier to setup which that’s a big plus. A big difference from some prior variants is that it supports 802.11ac dual band MIMO (what’s that?!)

For sake of keeping it simple, what you need to know about 802.11ac is that it’s a newer version of WIFI that supports way faster speeds; you can read more about it here if curious,

https://www.lifewire.com/wireless-standards-802-11a-802-11b-g-n-and-802-11ac-816553

Super speed seems to be the theme with the new versions of the Roku though, so that’s reassuring. The really awesome thing about this version is that the remote is voice capable, meaning you can control your tv with it. So, the biggest differences all around is the faster WIFI speeds and voice control.

It offering of 4k resolution at 60fps.

For those unaware, 4k is the next step up from 1080p HD and offers a resolution difference 4 times that of the former. What Is a 4k TV?

That isn’t the only difference though as it supports something just as big arguably; the lesser talked about HDR support. Basically HDR (high dynamic range) is a more natural difference between the bright portions of the screen and the dark, and more closely resembles the way humans see.

Think of a scene in a movie at night for example, where a person enters a dark area and suddenly turns on a flashlight. With HDR, that light would be incredibly bright while everything else remained dark, similar to how it’d look in real life. It adds an additional degree of realism that really enhances the overall experience.

OLED as well as QLED shine when it comes to this.

But yet another big feature it comes with is 4 times the signal range. The reason why this would matter is due to the fact that when setting up your Roku, you ideally want it to be as close as possible to your router.

However the further away you move it, the weaker the signal gets and the more you begin to get those buffering issues. By having an increased signal strength, that just means that it no longer needs to be as close to your router so that affords you an extra dimension of convenience.

Roku Streaming Stick+


Roku Ultra


Then there’s also the Roku Ultra has the same power as the others along with the fact it has a voice control remote. It’s also more like the first one mentioned since it’s more of the traditional, plug it into the TV via HDMI type.

It has a novel feature called remote finder, which tells you where the remote is when it’s lost; how helpful is that?

There’s even a pair of wired JBL earbuds included as well to really make things that much better.


Roku Ultra


Roku Premiere


The Roku Premiere is to put it simply, very similar to the Ultra where the only real major difference is the fact that instead of dual band wifi, it happens to use single band. Other than that, you still get the same awesome features like 4K, HDR, and support for thousands of great shows and movies. The great thing is there’s also support for Disney Plus and Apple TV on all Roku devices, increasing that even further. Plus there’s even an included HDMI cable!


Roku Premiere


The Best Roku TV – TCL 50″ Class 4-Series


I also just wanted to quickly make mention of the fact that  there are also televisions out there that have the Roku functionality built in. These televisions support the same features that the regular streamers have, only difference is the TV is the player itself.

They even comes with the remote, so you don’t have to worry about setting up anything extra. The TCL 50″ Class 4-Series line of TVs is definitely one of the best in my opinion  — including many of the top of the line features like HDR and a high resolution display, making it a great choice when it comes to Roku derived displays.

TCL 50″ Class 4-Series


Who They Might Be For


That brings me into my next point actually, of who they might be for and if they’re worth it. With that, I would have to say absolutely. One feature that they all support is the Roku app. When you download it to your smartphone, it then allows you to use it as the remote.

From there you can manage all aspects of the platform including voice control, watching on your mobile then projecting to your TV, and voice control.

That’s a pretty nice little feature people usually aren’t aware of, but it’s super convenient. I would also have to say it’s worth due to the sheer amount of content available.

There’s a vast number of episodes and movies spread across a multitude of channels. There’s certainly a lot of choice here. Plus it supports a lot of channels that other streaming devices may not support such as Sling TV and Disney+

I personally have a Roku and love it because of the wide variety of entertainment it has. When you sit down and begin finding shows you forgot about from years back, that nostalgia factor is priceless.  Over half a million shows and movies just a simple press away.

Only then, does it really start to dawn on you how much there is to offer here. It’s pretty hard to not be impressed. That and the mobile app I think is a game changer.

If those are things that appeal to you then you might enjoy them.


Who It Might Not Be For


At the same time, like many things in life, it’s not going to be for everybody. Honestly there’s only a few reasons why someone might not want one though. The first reason I could think of would be if you have a shoddy internet.

The Roku is pretty reliant on internet connection, so if yours is particularly slow, then maybe it might not be for you, especially the ones that allow streaming in 4k.

Even then, with the advanced processors they have now, they’re pretty forgiving.

Another downside would be in regards to the content. While there is a lot of free content, some isn’t. But even then, that’s dependent on the channel.

For example, if a show was offered on Netflix, and you were already a Netflix member, then it wouldn’t matter since you’re already a subscriber.

Yet another minor issue is that with the stick version, it tends to protrude from the HDMI slot a little so it isn’t necessarily flush. You also need to set up an account beforehand so that’s something to be cognizant of.


Final Thoughts


Overall, I think the Roku is that definitely adds to the entertainment experience. If you’re even a little bit of a media buff, then there’s a good chance you’ll find it enjoyable.

With hundreds of thousands of movies and shows at your disposal, coupled with a plethora features, it’s excellent in my opinion. I’d definitely say it’s awesome, no doubt about it.


Seriously Though, What Is A Subwoofer?

What Is A Subwoofer?

What Is A Subwoofer
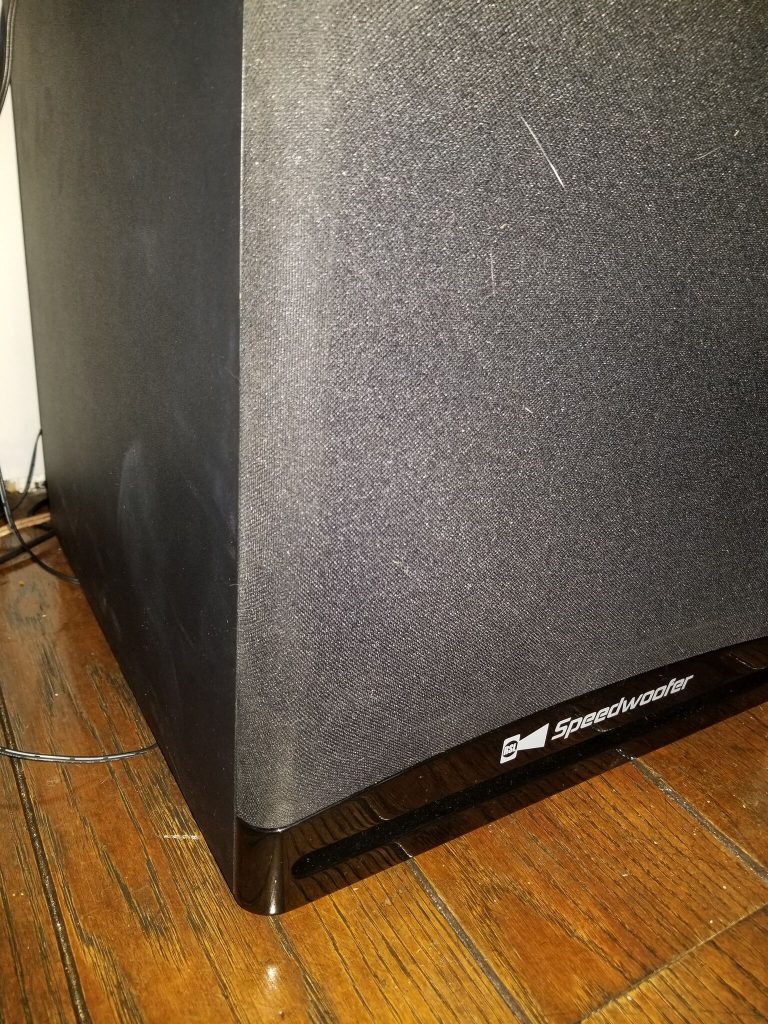
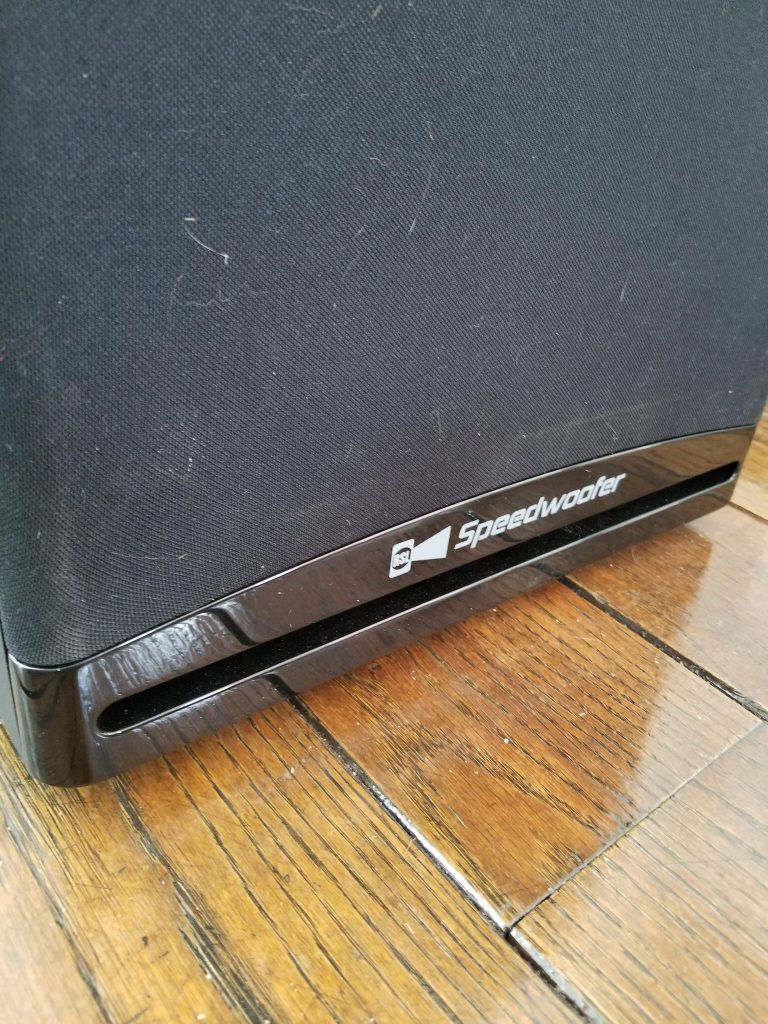
A Picture Of The Speedwoofer 10s, Courtesy Of RSL Speakers


Subwoofers certainly are one of, if not the most interesting component of a home theater experience. They’re definitely a personal favorite of mine that’s for sure.

I mean something whose sole purpose is to produce the sounds you not only hear but feel, surely is breeding grounds for curiosity.

Hmm speaking of which, what is a subwoofer and how do they work? I’m sure some of you have wondered at some point how it’s possible for something so relatively small to be so powerful.

Fortunately, they’re actually a lot simpler than you would initially think.

So today, we’ll be looking into just how these curious boxes of joy work.

A good powerful subwoofer is something that can provide for a very entertaining experience.

When you get an exceptional one, you’ll see what I mean. I’ve actually given my thoughts on a few already if curious.

https://easyhometheater.net/the-best-home-theater-subwoofers


But In addition to that, I’ll also be letting you know what to look for in a good subwoofer, the types that exist, and what to generally keep in mind.

Anyway, without further ado, lets jump right in!


How A Subwoofer Works


The Different Types Of Subwoofers


The Pros And Cons Of Each Type


How To Choose The Right Subwoofer


Why You May Forgo A Subwoofer All Together


Final Thoughts


How a Subwoofer Works


A subwoofer in its simplest depiction consists of 3 parts, the driver, the amplifier or amp, and the enclosure. The driver is going to be the thing producing the sound, the amplifier will be the thing amplifying the sound produced, and the enclosure houses everything (basically the outer box).

https://en.wikipedia.org/wiki/Subwoofer

That’s the simple explanation, but let’s go a little deeper since there is a lot more at play here.

The subwoofer driver can come in many sizes, each with their own characteristics as well as caveats. Bigger is not always better when it comes to subs believe it or not.

Now this is an over generalization, but bigger drivers at least from my experience, tend to go deeper but aren’t as articulate as a smaller one; meaning they may sound boomy in comparison (again over generalization, not always)

The first thing to know about the driver is that inside it is something called a voice coil. A voice coil is a bundle of wire spiraled around a big cylinder inside. This cylinder is called the former (former being the name)

A Picture Of The Speedwoofer 10s Driver, Courtesy Of RSL Speakers

When electricity is fed into the voice coil, a magnet inside interacts with it, and it creates a magnetic field. It then moves the former up and down. (Still with me?)

Since the former is also connected to the speaker cone (that’s the part you see on the outside of the subwoofer itself) it then begins moving. This moving causes a change in air pressure

Voila, with that change in pressure, now you have bass! To make it even easier to understand, when electricity goes to the sub, the driver moves up and down relative to the amount of electricity it gets, that’s really all that means. The more electricity, the more movement from the speaker cone and thus, the more sound.

But sometimes when you’re looking for a new sub, you’ll see mentioning of it being DVC or dual voice coiled. All this means is that there is an extra spiral of coiled wire inside, hence the double part.

Now you don’t need to worry too much about this unless you planned on building your own, but what you should know is that dual voice coiled allows you extra wiring capabilities to match an amp.

Again, this isn’t really something you would have to be concerned with unless you’re building one from scratch so don’t worry.

Speaking of the amplifier, it’s just a device that increases the power of something without getting too technical.

If you’re curious about more on it though here’s a more in depth look on amplifiers: http://www.audioholics.com/loudspeaker-design/understanding-impedance-electrical-phase

Then we get to the enclosure. The enclosure is going to be the outside box that holds the driver and amplifier together (no wonder why they’re heavy lol)

It’s also going to have a huge bearing on how it sounds. The size of the enclosure, the material it’s made of, the shape of the enclosure, the type, and the thickness of the material all play a contributing role. 8-inch, 10-inch, 12-inch, 15-inch, and 16-inch are the most common enclosure sizes.

They sometimes are filled with a material such as cotton to further reinforce the ability to play lower. While there are many different types of subwoofers, there are a few prominent ones you’ll likely encounter in your search that I want to go over.


The Different Types of Subwoofers


The first type of enclosure that you’ll likely come across is called a ported box design.The reason for the name is due to the fact there is a port on either the front or the bottom of the subwoofer box. (It’s often referred to as a bass-reflex design)

So why would that be there you might ask?

Well when a subwoofer produces its bass, it also produces energy.

This energy happens to move a lot of air. When an enclosure has a port, it allows this air to escape and adds to the resulting output of the subwoofer itself.

The location of port contrary to popular belief doesn’t matter all too much though. A subwoofer is responsible for sounds lower than 80 HZ.

80 HZ happens to be the cutoff point for humans to locate where the audio is coming from.

The port size and shape does matter however, because that tends to change the change the amount of air escaped thus affecting the output in general.

The other type of subwoofer you’ll usually encounter is called a sealed box design. This design is also often referred to as acoustic suspension.

Just as the name suggests, the enclosure itself is sealed meaning there isn’t a port. So which one is better? That depends…


The Pros and Cons Of Each Type


There are a few advantages and disadvantages to keep in mind with each design so let’s start with the advantages of a ported subwoofer box.

A big advantage with a ported subwoofer box is that they usually have a lot more output because of their port. The moving of air reinforces the sound and allows the amp to not have to do as much work.

This equates to some big sound with regard to movie watching. Another often overlooked advantage has to do with its internals.

When a voice coil receives a current from the amp and moves the speaker cone, it produces heat. However, with a ported design, air is allotted the ability to move freely in and out. This means that it can run a lot cooler and in turn, prolongs the life of the driver and your sub overall.

However there are some not so good things you should know. Just because something plays louder, does not mean it’s necessarily better.

What I’m getting at is that with the ported sub, since the air is escaping the subwoofer, it is not as controlled as its sealed counterparts tend to be (again just from what I’ve noticed)

For example when I tested music on some of my ported subs against my sealed ones, I noticed that my sealed sub wasn’t as loud as the other, but it was definitely more reserved and controlled.

Another thing to know is that ported versions are usually a lot bigger than a sealed one. So if you are spatially conscious, this would be pretty important to know.

An advantage with sealed subwoofers on the other hand is they have a tendency to control the bass a lot more. They are usually the exact opposite of boomy if anything, producing really tight and accurate bass.

Another advantage they have is that they also tend to be a lot smaller so you have a lot more options as to where to place them.

A big disadvantage though, is that sealed subwoofers definitely do not have the same raw output a ported one does. For any given volume, the ported sub is going to be louder typically.

Some may also find the bass to be a lot more muted too.

However with both of these designs in mind, do note that these are not the sole factors into how they’ll sound for sure when you hook them up yourself.

While the type can be a good indicator, it depends on infinitely more factors like room acoustics,size, and calibration. This is just some of the common characteristics those two tend to have.


How To Choose The Right Subwoofer


So with knowing that, how do you choose the best one? Well first, we have to start with what you plan on listening to primarily. If you plan on listening to music, then a sealed might be a better option.

If you prefer movies, then you might want to go with a ported. However it doesn’t stop there.

Even if you decide you prefer one for music, the type of music plays a role too (here’s where we get into opinion territory ?)

In my opinion I feel that a ported subwoofer is better for genres like hip hop, rock, and house music. It made things all the more visceral and engaging; more fun for certain.

For classical and smooth Jazz though, I liked the sealed better because of its controlled nature.

For movies, that’s a toss up. I’ll be honest, I couldn’t really tell which I liked better. There certainly was a difference present, but for some reason I couldn’t tell which I liked more.

I think I’d lean slightly more towards the ported, but that’s only because of the extra extension on the lower notes.

I think either one is fine for movies though. Now other things to keep in mind are the RMS and HZ.

RMS, or root mean square, is a specification often used to describe the continuous amount of power a speaker has. Keep in mind the higher that this is number is, the better. It’s usually listed after the peak wattage.

Peak wattage is the highest amount of power the sub can produce. While important yes, I’d honestly say the RMS is more important because this will be the power you’ll see more often experience opposed to the peak.

They rarely reach their peak since doing so for an extended period of time would do damage to it.

HZ or hertz is another hugely important thing to know too. The lower the HZ, the lower your subwoofer will reach.

As a good rule to keep in mind, if the HZ number reaches into the 30 range, then you’re good to go. You really want this to go as low as possible. But to go lower, it requires more power.

That’s why you’ll see subwoofers that go super low cost so much because all that power comes at a price. You’ll also want to keep the size of your room in mind.

Now I’ve covered this before, but for large rooms (25 feet and up) you’ll probably want to with a 12 inch or bigger.

From my experience a large subwoofer in a smaller room works fine, but a smaller subwoofer in a big room…meh.

That is, unless you use 2 of them, in which case that changes things dramatically.

https://easyhometheater.net/setting-up-2-subwoofers


Why You May Forgo A Subwoofer All Together


There may even be a certain instances where you may want to forgo a subwoofer all together.

For example, if you were looking for an alternative, what you could technically do is get speakers with a broader frequency response range that can handle some of those frequencies.

Then you wouldn’t have to worry about getting an extra subwoofer and could shift the focus into more capable speakers.

Floorstanding speakers in particular are a great example of this, and some even have the capability to outperform some subwoofers!

https://easyhometheater.net/the-best-floor-standing-speakers


Another thing you could do is use bass shakers.

These are small devices that attach to your seating to give a similar experience of a powerful sub.


Final Thoughts


Hopefully that demystifies a little bit of the topic of a subwoofer along with some of the things you may want to look for.

By choosing the right one for your room, they have the ability to completely transform your movie watching experience making them entirely worth it.

Oh yeah and also by the way, here’s something you may want to try that I’ve always done. If you want a little bit of an extra kick with your subwoofer, what you can do is run it hot; not by too much but just a little.

This basically means increasing the bass a few dB from the prior setting.

What I do after I calibrate my sub is I turn up the subwoofer volume 3 notches or DB (decibels) higher in the receiver.

By basically tuning it at a slightly higher level than what it was initially calibrated at, it adds an extra amount of impact to the bass.


Now I know that means it’s no longer technically “accurate” but from what I’ve personally experienced with each of my subs, it always added that subtle extra kick without overdoing it.

Calibration tends to tame the bass relatively speaking, so by doing that, it feels just right subjectively speaking.

But I don’t know that’s just me, tell me what you guys think though after you’ve tried it. Did it help?

Do you have other questions about something?

Leave a comment and I’ll try my best to help.

Until next time. Make it easy, keep it simple.

What Is Sling TV & What Makes It Great

What Is Sling TV & What Makes It Great


If you’re relatively new to the home theater sphere or even home entertainment in general, then chances are there’s quite a few gems out there that you may not be familiar with yet. One cool thing that I came across though was the concept of media streaming devices.

Now if you’re building your home theater system then you’ll inevitably come across talks of these along with the unique services they offer like Netflix, Hulu, etc..

But before we take a look at a particularly awesome service that I think you’ll like, first off what is a media streaming device?

For those that are unaware, a media streaming device is usually a device connected via USB, Ethernet, or HDMI that when connected to your television, allows you to stream your favorite movies and TV shows.

Some are rather basic, but the more elaborate like the Roku Ultra are entirely controllable by voice.

They’re typically not too difficult to setup, but again each one is different. Speaking of the Roku, I’ve actually covered it in another article if your curious.


What Is The Roku?


By now though you might be asking, well then what is the best streaming service and more importantly, why?

While I would be hard pressed to commit to my absolute favorite (more movies, more problems) I can tell you about one of my more recent favorites, Sling TV, and what I personally feel makes it pretty downright amazing.


Catchy Name, But What’s It About?


So besides the interesting name choice, first off, what exactly is Sling TV? Well Sling TV is a streaming service that was introduced around early 2015.

Now what made this so incredibly different was that it had a primary focus on live TV, rather than the more traditional streaming.

This was a very novel idea because it was something that wasn’t being done at the time. While most are focused on media that is prerecorded, this was introduced with the idea of being able to stream live TV shows.

Not just live TV shows either, but live television channels like ESPN, cartoon network, etc as they’re being broadcast normally.

That’s part of true the appeal of Sling TV, because it allows you to watch live TV at any point in time; meaning you can even watch on the go be it via mobile or tablet.

It also includes recording and playback capability for things you may have missed as well. Now there’s obviously some limitations with it so let’s get into that.

One thing it doesn’t do is play every channel. Then delving even further, the types of channels that you do get, depends on which subscription option you choose. It offers blue which is the lower tier option with less channels, and then the orange service which offers more channels.

Then you can add other specific channels that they offer depending on your preference. This would be a monthly subscription with the amount depending on what you chose.


How Do I Use It?


How does it actually work though; and more importantly, how do you use it? Well for one, you’ll obviously need some sort of Internet connection.

It doesn’t have to be lightning fast, but it generally should be at least decent.

If you’ve streamed video over your internet before without it buffering then you’ll be perfectly fine.

Unlike cable companies which broadcast through satellites and wire routes, this is entirely over the internet which is why I make mention of your connection.

This type of service by the way is called OTT; or in other words, Over The Top service. It’s supported on most major playback devices.

So other than that, if you wanted to use it, all you would do is use the native Sling TV app (or the web page) and go from there. On the basic plan you can stream on one device, and with the upgraded plan, you can stream on 3 devices simultaneously.


Why I Like It


I think this is a pretty nifty (yeah) service though for a number of reasons. Think of it this way, lets say you recently got a new place and money was something that was already tight.

The cost of cable can be exorbitant and even then, how many channels do you actually watch?

Would you want to pay for something you only use half, or maybe even less of?

Probably not.

With this you can choose the channels that you want at your own discretion, meaning you’ll get the most out of it since you’ll have the ability to only watch the things you want.

But here’s the real question, could it be something that could replace a cable service for good?

Absolutely, especially if you’re someone on the go who might not be home all the time which actually brings me to my next point; the flexibility of it all.

Again let’s imagine you’re a super busy person who gets an occasional break every once in a while and you want to watch TV on your tablet or phone. With this, it lets you do just that.


It’s such a convenient option for the people looking for only a select few channels that don’t really want to go the full blown cable route. The number of channels being limited only to what they offer mind you, but I think they have something for everybody honestly.

It’s extremely customizable. You could use it as a supplement to your current cable service, or use Sling entirely by itself, up to you really.

Having a certain level of included DVR capability with live TV shows is also a big bonus.

However there are without a doubt, a few things you must know beforehand as I wouldn’t necessarily go as far as to say it’s for everybody.


Who It Might Not Be For & The Bottom Line


Who might it actually not be for? Well for one, a really big caveat is that Sling TV is only available in as of right now, the United States & Puerto Rico.

While they do offer a few channels accommodating other languages, the service itself is only available in the states. So if you’re in another country, you won’t unfortunately be able to use it.

Whether this changes in the future though truthfully I have no idea.

The next reason it could possibly not be for you is if you have a shoddy internet connection. It goes without saying that if your connection is bad, you’re not in for a good time. It’ll likely stutter, skip, etc so you’ll want to make sure that your connection is solid first.

Yet another reason this may not be for you is something I found out myself. With as much as I like this service, a certain show or movie may be omitted occasionally.

Speaking of the channels themselves, those are always changing too. Something they have today may not be available in the near future. Why this happens, again I haven’t the slightest clue, but it’s something I figured I’d let you know.

If you’re someone who’s generally picky, and you like the feeling of perusing through hundreds of channels, then this might may not be for you as well; there’s certainly much less than that.

The bottom line though is that if none of those apply to you, and you’re someone who likes the idea of being able to access live television anywhere, you might want to give it a look.

For me personally, I find it really useful, so I just thought I’d share it with you.

Definitely let me know what you think in the comments down below.

Until next time, make it easy, keep it simple.

https://www.sling.com