How To Connect 2 Subwoofers To One Receiver

How To Connect 2 Subwoofers To One Receiver
So you heard about the benefits of setting up dual subwoofers, and decided that you were finally serious about creating a truly memorable home theater experience.
Now you need help with figuring out how to connect 2 subwoofers to one receiver.
Well interestingly enough, setting up 2 subwoofers isn’t terribly hard to do, and if anything, the most work lies in actually sitting the subs in the right place.
There’s a few ways to do this though, so lets take a look to see which way best fits your current situation as well as more importantly, why even go dual in the first place.
I’ll even guide you through where to place the subwoofers in the room so that you get the best sound for your particular room.
(Afterwards for more clarity on actually picking a good subwoofer, highly recommend to check out the article below showing you how to choose a good one that also includes my top recommendations for the year)
https://easyhometheater.net/the-best-home-theater-subwoofers
Connecting A Pair Of Subwoofers With A Receiver That Has 2 Outputs

Now before you do any of this, or anything else talked about in the article, you’re going to want to make sure that your seating arrangement is set optimally.
Seating has one of, if not the biggest impact on sound quality, so you’re going to want to make sure that you get this right.
I showed you how to do that in this article.
https://easyhometheater.net/home-theater-seating-ideas
Anyways the easiest way on how to hookup multiple subwoofers would be using a receiver that has 2 subwoofer outputs — though if you don’t have a receiver that has 2 of these, then don’t fret, there are other ways to work around this.
*Skip ahead to the next section if you don’t*
Conversely if you want to make it easy for yourself, there’s an article I did on the various receivers I personally recommend that do have these so you won’t have to do any extra work.
https://easyhometheater.net/the-best-home-theater-receivers
But if you do have one, then all you have to do is connect each subwoofer with an RCA cable (often referred to as a component cable) to the outputs labeled sub 1 and 2 on the receiver.

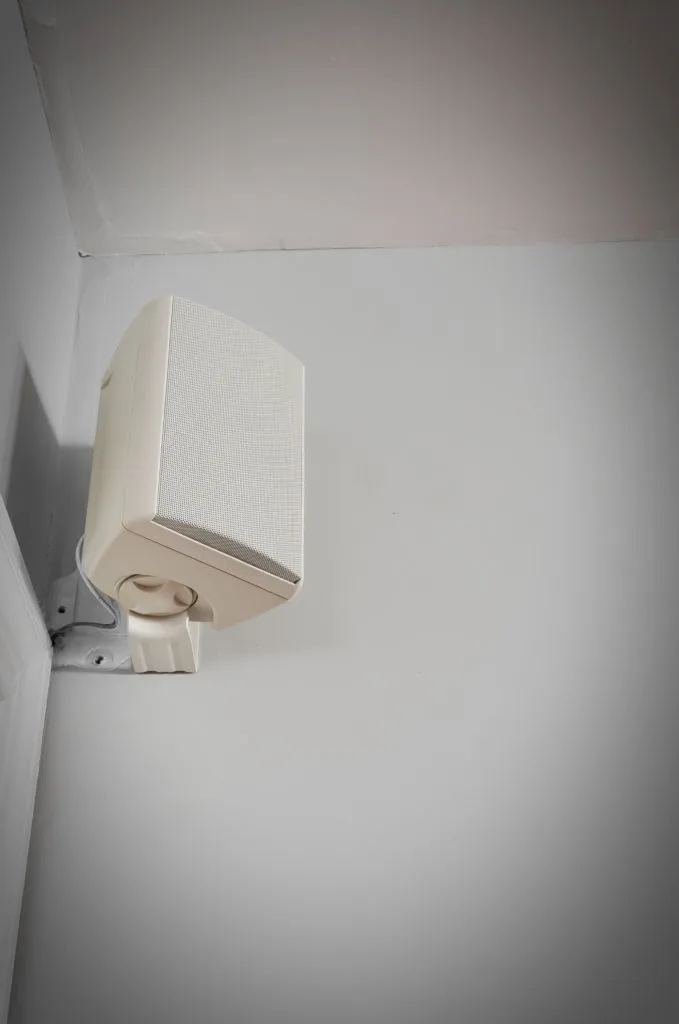
Then on the back of each subwoofer, connect the other side of the component cable into the terminal named line in, or something similar to that. It may even be called LFE In like you see in the picture above.
You just want to make sure it’s in the input basically.
When it comes to which cable to use, I personally use this one.
Cable length is of course important too, so get a general idea of where you would hypothetically want the subwoofers, and measure the distance from the your seating area to each of them. That length is the cord length you’d want to go with.
Make sure that the receiver is also completely off when you’re plugging/unplugging things by the way, since there’s electricity running through it when it’s powered on.
Once they’re plugged in, that’s it, you’re good to go.
Connecting With A Receiver That Doesn’t Support 2 Subs Using An RCA Y Splitter

This method is a little different, but it’s one that I’ve used previously so I can confirm that this works. The first thing you’re going to need is a neat little wire called an RCA Y splitter.
What this does is take a signal from a single source, and then split it into two so that an RCA cable can then be connected to each end.
This can essentially allow you to use 2 subwoofers, even though the receiver may only technically support one by sending two low frequency audio signals to each from that original signal.
Pretty cool right?
This is the one that I use which is also the one that you see in the picture. It’s specifically called a male to female adapter since the end that connects into the device is called male, and the other end that accepts the connection is called female.
Male to 2 Female RCA Adapter Audio

First Method – Connecting The Y Splitter To The Subwoofer
So there’s actually 2 different ways to connect dual subs when using a Y splitter.
Either way is fine, just make sure everything is turned off and unplugged first before doing anything.
But for this method, you might notice in the picture that the Y splitter is actually connected to the sub instead of the receiver.
In this case, the Y splitter goes into the input of the first subwoofer, (labeled line In or LFE In depending on what you have) the two subwoofer cables go into the female ends, (shown in red and white) and the other sides of the cables go into the input of your second subwoofer, and the sub input on the back of your receiver respectively.
Second Method – Connecting The Y Splitter To The Receiver
There’s various methods with regards on how to connect two subwoofers to one receiver and this one involves connecting the Y splitter to the receiver first instead.
First, make sure that everything is turned off and unplugged.
Next, connect the male end of the y splitter into the output on the back of the receiver labeled sub or something similar.
Then, connect the RCA cables for each subwoofer into each of the female ends of the splitter. The other side of the cables goes into the inputs labeled line In, or LFE In on both of the subwoofers — again the particular name depending on what you have.
After that, well that’s it, that’s everything. Turn everything back on and you’re all set.
Connecting 2 Using The Line In Input
Here’s another way on how to connect 2 subwoofers to one amp. Instead of using an adapter to split the signal, what you can instead opt to do is use an RCA cable to pass the signal along from one subwoofer to another.
In order to do this, at least one of the subs has to have both an output and an input.
So what you do is plug one end of the cable into the sub out of the receiver, and the other end into the line in of the subwoofer.
Then you take another cable and connect one end into the line out of that same subwoofer, and connect the other end of the cable into the line In of the second sub.
This is often referred to as daisy-chaining in the audio world.
But after everything is all connected, you’re ready to move on.
Using Wireless Subs
Yet another way to go about using more than one sub is if you know that the subs you’re using have wireless capabilities built in.
Some even have adapters that you can buy that enables wireless capability.
Of course It’s impossible for me to tell if you have one that can do this since I don’t know what you have, but if you do have one that’s capable, just know that’s it possible to use 2 of them.
The Benefits Of Going Dual
So here’s the real question you might be asking yourself, why exactly bother with using 2 subwoofers instead of one?
Well the answer to that is multifaceted since there are actually quite a number of benefits with doing so.
~Smoother Bass Response
The first major benefit of going dual is that you get a much smoother bass response when you use more than 1 sub.
But what does that mean exactly?
Well to give you a better understanding, let’s break down what typically happens when you use only 1.
Whenever you’re watching content, the sound waves from your speakers travel all around the room; reflecting, being absorbed, etc. until they finally reach your ears.
The higher the sound seems (aka the frequency) the shorter in length these waves are.
When you get into the lower frequencies that the subwoofer is responsible for (typically 100 and under) the longer these waves are.
But what happens is that depending on the room, the waves will begin to interact in really strange ways. For example, in some spots, the sound waves will reflect and collide with each other; effectively cancelling itself out.
This is what is known as a null, and this null is what causes a deadzone for bass so to speak.
This means that within that null, the bass will sound almost nonexistent, making it seem like you weren’t using a subwoofer at all.
Conversely, in some spots the wave will double upon itself, making the bass sound many times stronger.
This is known as a peak.
Peaks cause the bass to sound extremely boomy, resulting in a near loss of detail all around. The problem arises when you realize that your seating area may be located in one of these peaks or nulls, and a single subwoofer can have major problems with eliminating all of these from just one location.
When you add a second one, it can help to tame these waves resulting in a much more enjoyable experience in more spots across the room.
~It Can Increase Your Bass Output

Interestingly enough, sound isn’t necessarily linear with how you perceive it.
When you add a second subwoofer, it will provide at the minimum a 3 decibel increase in low frequency output.
While 3db may not seem like a lot, that actually provides an acoustical output that’s double the previous level, meaning technically double the bass
But what’s makes things really interesting is how we actually perceive that sound — because you see, it actually takes at least 5dB before we notice a significant difference, and 10dB before we notice a doubling in sound.
While 1dB is the smallest perceptible change in volume we can detect under controlled conditions and almost imperceptible in normal conditions, 3dB is typically where we tend to notice it a lot easier.
This is due to our ears not only having a flat response, but hearing certain frequencies as louder than the other — even going up by the same volume.
Yeah seriously.
For every 10db that you go up in output, your perception will be that it has doubled in output.
Isn’t that strange?
This article talks about that in more detail if you’re interested in how that all works.
But this increase in power will give you a lot more leeway when it comes output, and is particularly helpful in bigger rooms where you may just need that extra output so that the low end doesn’t seem too weak.
~Less Localizable
Yet another benefit of setting up multiple subwoofers is that the bass is less localizable as a result of that.
Localization is basically being able to tell where a sound is coming from.
This is bad when it comes to subwoofers because they’re supposed to be omnidirectional — meaning the bass is supposed to seem as though it’s coming from all around you and not from any particular direction.
However if you’re able to easily tell which direction it’s coming from, then the immersion is disrupted and it ends up being really distracting.
It’s the opposite of what you’d ideally want for an optimal entertainment experience.
When you add a second one however, it reduces the chances of this dramatically due to the bass emanating from an additional source.
This gives a much more even sound overall which is important.
~Less Strain On Your System
Again the benefits of adding an additional sub to your system are many, and one of the more interesting ones is the fact that it actually alleviates the workload from just having a single one.
I mean think about it, with just a single sub present, that means it becomes responsible for the entirety of the LFE (low frequency effects) channel, meaning all of the bass present in a soundtrack/mix is left to just that 1 sub.
This can put a lot of stress on it over time, especially if played often at higher volumes.
The benefit of another subwoofer though is that you can split the workload between the 2, reducing the strain on them both.
This actually has another hidden benefit of giving you a cleaner bass as well because with the additional power added from a second one, things like distortion and chuffing are also reduced.
Chuffing is the audibility of air passing through the speaker and the more of this that is actually audible, the less clean of a sound you’re going to get.
A really great example of this is if you’ve ever heard a car blasting music with a lot of bass, and it almost sounds like its speaker system is about to break.
That’s a more extreme scenario of course, but same general idea.
Distortion is well, exactly what you’d expect, a disruption in the way the bass is supposed to sound.
With one subwoofer, you typically have to turn the volume up a lot more than if you had 2, and the higher the volume, the greater the amount of measurable distortion in your audio.
So with 2, these issues are mitigated greatly, making the experience a lot more enjoyable.
Where To Place Them For The Best Sound Using The Subwoofer Crawl

So now that you’ve got your subwoofers all hooked up, just like we do with speakers, we’re going to calibrate them. But not in the traditional sense.
We’re going to be using what is known as the subwoofer crawl. Basically, the idea here is we’ll be going around the room listening to where it sounds best.
This is an oversimplification of course, but you get the idea.
Now before you do anything, you’re going to want to make sure that your seating is in the most optimal spot. I touched upon this once before earlier, but it is important that it’s right if you want the best sound possible from your system.
If you’re certain it is then we’ll move on, but for those of you that are not quite sure, make sure that you check out this article on that very subject.
https://easyhometheater.net/home-theater-seating-ideas
~Making A Few Adjustments
Anyways the first thing you’re going to want to do is make sure that both of your subs are set properly.
We’ll start with the crossover setting. This is basically the point where the subwoofer takes over from the speakers. Typically it’s set at 80 Hertz (Hz), but this is usually handled on the receiver’s end.
This means turn the crossover on the back of the sub all the way to the right or the point it states that it’s no longer processing it. It’s different for each one so you’ll have to see what yours says.
Next make sure that the phase is set to 0 or normal. Phase adjusts the delay between the sub and the speakers but this isn’t usually something you’ll have to mess with. Just leave it as is.
Finally the volume control (often referred to as the gain) adjusts, you guessed it, the volume; but again this is usually done on the receiver’s end.
There are a lot of recommendations out there when it comes to the correct setting, but my personal recommendation is to simply turn the knob to the halfway mark. I’ve found that it honestly sounds best there.
Now that that’s all set, we can get right to the action.
~The Crawl
So you won’t necessarily have to crawl (though you can if you want to) but you will want to be crouched low enough so that you’re at the same level you’re typically seated at.
Anyways, place one of the subwoofers at your seating position, and play either music or a movie that you’re so familiar with that you could recite it in your sleep. It should have a decent amount of bass as well.
Now go around the room and listen to the differences in sound.
You’ll notice in some spots that it’s nonexistent while in others it’s way too strong. Find the spot that you think sounds the best and mark that spot with a piece of tape or an object.
Place the sub there and do the same for the other one.
There are different ways to do this, but I’ve personally found doing them one at a time is much easier to manage honestly.
When all is said and done, sit down and listen to how it sounds. If it sounds good then congrats, you did it!
If not, then there’s a few configurations I’ve found that produces decent sound so feel free to try them.
You could place one in the front left corner with one in the back right corner; each of them at the midline point of the wall across from each other, or one on each side of the left and right speaker.
There are more depending on the room, but those are generally safe bets.
Can You Mix And Match Different Sizes And Brands?

But what if you have 2 different sized subwoofers or even ones from a different brand, can you use those?
Technically yes, but you ideally want to match them; at least when it comes to size and type. When you use 2 different sized subs together, one is going to be more powerful than the other, and this could cause issues with giving you a smooth bass response.
Now that isn’t a definite since there’s a lot of different factors at play, but the chances of the bass just generally seeming “off” when you mix and match like this is possible, so I personally wouldn’t. The type is just as important too.
That means if one of your subs is ported, you’ll want both of them to be ported. If one’s sealed, make both of them sealed.
The brand isn’t nearly as important as those first two things, but in an ideal world, you’d be better of with the exact same pair.
https://easyhometheater.net/what-is-a-subwoofer
Why And How Would You Connect More Than 2?
Here’s another interesting question, can you use more than 2 subwoofers?
To answer that simply; yes you can, and there’s actually some benefit to doing so.
While 2 would in fact make your bass smooth across all listening positions, in bigger or oddly shaped rooms, this may not necessarily be the case.
When you introduce a 3rd or even 4th one to the mix, it can help to smooth out peaks and nulls even further, but be careful since it is also possible it could introduce them as well.
Many of the same benefits of going dual exists with more than 2 including further reduced system strain, stronger output, and smoother bass. However you would have to have the space to do this as well, which is why many people may not go this route.
Now connecting 3 or more isn’t that hard as you have a few options. If you have a receiver with two sub outputs, you can use an RCA Y splitter for each one, which would give you a total of 4 outputs.
Or you could daisy chain them all together by connecting an RCA cable into the input, and using another RCA cable to run it from the output of the same one into the input of the next sub; continuing the chain like that.
If you thought movie nights were intense with 1, then try to imagine 4.
It’s simply incredible to be honest.
Final Thoughts
Well that about wraps it up for this one.
Hopefully that helps with how to connect 2 subwoofers to one receiver along with other things you want to keep in mind when doing so.
Like always if you have any questions or you run into any problems, then feel free to reach out and I’ll help you out.
Actually speaking of problems, the following article should help you out if you’ve been dealing with other more general home theater problems, along with another going over a few secret tips to help eke out even more performance from your system.
Before even that though, you’ll certainly want to have a look at the comprehensive guide I created that goes over many of the most common errors that people often make, along with exactly how to fix them.
https://easyhometheater.net/25-of-the-worst-home-theater-mistakes
https://easyhometheater.net/home-theater-problems
https://easyhometheater.net/home-theater-ideas
Until next time; make it easy, keep it simple.