As an Amazon Associate I earn from qualifying purchases. Disclosure

Edifier R980T Review: Compact & Elegant Active Speakers

Edifier R980T Review: Compact & Elegant Active Speakers


The Edifier R980T active multimedia speakers offer quality sound, sleek design, and easy setup. They have adjustable bass and volume knobs, two RCA inputs, and a flared bass reflex port. They respond well to EQ, and are suitable for smaller rooms and desktop PCs.


Check Availability Of The Edifier R980T Active Bookshelf Speakers


This is the Edifier R980T review, an in depth look at a pair of active multimedia speakers that honestly perform well for what they do.

But there’s also a few interesting things you should know before deciding on these particular set of speakers too.

What are they and more importantly, would they be suitable for you?

Well let’s find out!


Features


Active Speaker Design


By utilizing an on board amplifier, the need for a receiver is forgone as its active design allows you to simply plug and play.

Flared Bass Reflex Port


Calibrated with a flared bass reflex port, distortion is reduced resulting in a clean and rich sound.

Dark MDF Wood Exterior


Made of a darker MDF wood, the low key appearance of the 980T allows it to fit in with almost any room setting. Its fully wooden enclosure also helps reduce acoustic resonance.

Compact In Size


Compact in size, these bookshelf speakers are perfect for desktops and smaller rooms.

Adjustable Bass & Volume Knob


An adjustable bass & volume knob on the back allows you to dial in your sound the exact way you want it.

Dual Inputs


Through the usage of 2 sets of RCA inputs, the Edifier R980T can be connected to more than one audio device at the same time meaning you won’t have to keep switching inputs.


Check Availability Of The Edifier R980T Active Bookshelf Speakers


How To Set Up The R980T Speakers


Setting up the 980T is going to depend on where your plan to use them.

If you’re planning to use them with your PC, then plug the 2 RCA cables into the back of the speaker.

The inputs are labeled PC.

Then connect the other part of the cable into your PC’s audio output jack.

From there, connect the included speaker wire from the one speaker into the other.

After that, plug in the power cord, and turn up the volume knob on the back of the speaker.

If you plan to use these speakers with a TV, then plug the 2 RCA cables into the 2 inputs on the right of speaker not labeled PC.

The other end of the cable would then go into the corresponding outputs of the TV.

What’s nice is can also be used with other devices that have a 3.5mm jack since it comes with an RCA to 3.5mm cable.


My Impressions On Their Sound Quality


Honestly, this is where things get interesting because the sound quality of the Edifier R980Ts varies depending on how you use them.

Now right off the bat, I’ll just tell you beforehand that these are near field speakers meaning they may not be suitable for really large rooms.

I’d go with the Edifier R2000DB if that’s the setting you’d need them for.

But for the average to smaller room and/or for use with a desktop PC, these are more than enough.

So how do they sound then?

Without equalization or any tweaks right out of the box they sound pretty decent, but there’s really more to the story than that so I’ll break down my thoughts further.


Their Sound Quality With Music


When it comes to music, the Edifier R980T are actually solid performers stock.

Without touching the bass knob and simply turning the volume up, they’re capable of really great clarity.

High frequencies are represented well, and come through with a clean and articulate authority.

These speakers get pretty loud too, and you’ll be glad to know that at those higher volumes they retain their clarity.

Avoiding being sibilant or twangy when cranked up, the highs are simply present without calling much attention to themselves.

It reminded me of the Edifier P17s in that aspect, with both having that respectable clarity about them.

When turning up the bass knob, the midrange became audible, and was seemingly reserved but clean.

I’d say it’s very neutral sounding if anything.


As for the bass and its adjustability, I was genuinely surprised by how good the implementation of this capability was.

In some active speakers that include this knob, turning it up results in the bass either becoming overbearing, or muddling the sound to the point where you don’t even want to use it.

This isn’t the case here at all thankfully.

When turning it up, it offers a very clean and tight bass that’s genuinely pleasing to listen to.

There’s no distortion, (at least that I noticed) and it’s pretty punchy for a bookshelf speaker.

For me, setting the knob at the 3 o’clock position yielded the best balance between bass and other frequencies, so I’d recommend trying that to see how you like it.

However remember a little bit ago I said the sound quality varies depending on how you use them?

Well I said that because these speakers respond to EQ shockingly well — to the point where they almost seem like a different speaker.

When combined with a proper equalization setting, these speakers absolutely sing, and come to life with a rejuvenated sense of dynamism.

Combined with a good preamp this is taken even further, but even using a few sliders with EQ results in really great experience.

That’s not to say the stock experience is bad, because funnily enough it’s actually pretty good.

I just think the speakers responding well to EQ shows they’re actually capable of a whole lot more than what they initially let on.

It’s really interesting, and if you have the ability to, I’d definitely say try it.

But if not, they’re still really good for music.


Check Availability Of The Edifier R980T Active Bookshelf Speakers


How They Performed With Movies


As far as how they fare with movies, I found them to work just as well in my opinion.

Obviously they won’t give you as deep a bass as using a dedicated subwoofer or anything like that, but they’re leagues above standard internal TV/computer speakers for sure.

Voices were easy to hear, and the overall soundstage was smooth and engaging.

Little details were represented well, and nothing was over done or over bearing.

Really not much to say in this regard that hasn’t been said already.

They’re just a solid performer all around honestly.

Something peculiar though is that the knobs are on the back, so if you want them sitting flush with the wall but want to adjust the sound, you’ll have to move them each time.


It’s a minor thing, but would have been nice to maybe have controls on the front instead.

Still it doesn’t really take much away from the experience as these are definitely a quality speaker.

The R980Ts seemed like a slightly smaller version of the Edifier R1280T, with a similar quality sound.

So the main takeaway here is that if you’re just looking for a set of bookshelf speakers to use in a smaller room that’ll do the job without having to give an arm and a leg in the process to do so, these are a really great choice to go with in my opinion.


Check Availability Of The Edifier R980T Active Bookshelf Speakers


My Thoughts On Their Appearance


One word I would use to describe the appearance of the R980Ts is subtle.

From the dark MDF wood grain finish, to the way the removable clothe grille slopes down ever so slightly, it seems like the main focus Edifier had with this speaker was to provide quality audio in a sleek yet distinctive package.

It’s honestly a really nice albeit low key looking speaker in person.

Towards the bottom there’s a small silvery Edifier insignia, and when removed, the woofer, soft dome tweeter and bass reflex port becomes visible.

On the bottom there’s 4 small feet for added stability, and over on the back there’s a bass and volume knob for additional control over your sound.


There’s also 2 RCA inputs for connecting to your TV and/or your PC.

It’s certainly not a very ornate design at first glance, but given the focus is on the sound with aesthetics being second, it’s still a nice design all things considered.

For those that prefer a more subdued looking speaker that doesn’t call attention to itself, you’ll really like this speaker.


Likes


  • Clean Sound
  • Bass control works well
  • Can be used with more than device at a time
  • Responds well to EQ
  • Subdued appearance


Dislikes


  • No Bluetooth
  • Not suitable for larger rooms
  • Controls on the back


Final Thoughts


Hopefully you’ve enjoyed this Edifier R980T and now have a better idea of whether these are the right set of speakers for you.

Besides their impeccable sound quality, they look great and are a great addition to a home theater.

Highly recommend them.


Check Availability Of Edifier R980T Active Bookshelf Speakers


Specs


Box Contents


2 Edifier R980T Speakers

RCA Cables

3.5 mm cables

Speaker wire

Universal 110V-240V power supply


Inputs/Outputs and Connectivity


2 X AUX inputs

Loaded spring clip terminals for speaker wire


Total Power Output


RMS 12W × 2

Signal To Noise Ratio


≥85dBA


Input Sensitivity:


PC: 700±50mV AUX: 550±50mV (THD+N=1%)

Bass Driver


4 inch (116mm)


Treble Driver


Φ13 mm silk dome

Active/Passive


Active

Frequency Response


70 HZ-20 kHz +/-9db


Dimensions [Per Speaker]


5.5in Width x 8.9in Depth x 7.75in Height

Klipsch Cinema 400 Sound Bar Review

Klipsch Cinema 400 Sound Bar Review


To put it simply, a quality soundbar can be a great alternative to a traditional speaker setup for great sound; especially for those with limited space and/or patience.

Rather than placing speakers all over the room, a soundbar like the name suggests, houses a group of smaller speakers in a horizontal array that projects the sound towards the listener.

Long story short, a good soundbar basically makes the difference between a terrible experience and an amazing one.

So in this Klipsch Cinema 400 sound bar review, we’re going to see whether this is the soundbar that’s right for you.

Without further ado, let’s get right to it!


Appearance


Features


Specs


How To Set It Up


The Sound Quality


Likes


Dislikes


Final Thoughts


Appearance


Check Availability Of The Klipsch Cinema 400 Soundbar


For some individuals, the appearance of a speaker is nearly as important as how it sounds.

Luckily the Klipsch 400 soundbar is a beautiful piece.

What’s interesting here though is the fact that unlike many soundbars that may be made of metal or plastic, this one in particular is made of wood.

More specifically, it’s made of the same exact MDF (medium density fibreboard) wood that comprises their speakers.


More on what that means later, but as far as aesthetics are concerned, the dark wood grain gives the the soundbar a much more premium look.

On both ends of the enclosure, there’s a linear travel suspension tweeter for the higher end sounds, accented by a brushed metal panel up top that houses the controls for the soundbar.

The included subwoofer is also made of the same wood grain, and has its driver situated on the bottom making it a down firing variant.

There’s also a small gold and silver insignia toward the bottom left of both the sub and the soundbar that says Klipsch Reference and is really just a nice little touch.

The middle of the soundbar is wrapped in a soft tweed fabric grille that covers the 2 woofers underneath, giving it a more subdued look.

As a whole, it really is a beautiful soundbar honestly, and would look great in most rooms.

The one thing to keep in mind though is that it’s a little on the longer side at 40 inches and slightly tall at 2.8 inches so this is something you should be aware of beforehand since you don’t want it to block the IR sensor on your TV if it’s placed right in front of it.

Besides that, nothing really to complain about from an appearance standpoint, and it’s even better looking in person than what the pictures show.


Features


Simplistic Setup


Setup is simple with a single HDMI plugged into the TV, allowing you to get into the action faster.

This simplicity enabled by HDMI ARC, also gives you control of the subwoofer & soundbar with just a single remote.

Bluetooth Support


Bluetooth support means you can play any of your favorite content straight from that bluetooth enabled device to the sound bar

Dialogue Enhancement Mode


An included dialogue enhancement mode allows you to boost hard to hear dialogue, allowing you to more closely follow what’s happening in your content

Virtual Surround Mode


The virtual surround mode mimicks a full blown surround speaker setup giving you a virtual surround sound field at the press of a button


Night Mode


A dedicated night mode compresses the frequency range to give you an uncompromised sound quality at a lower volume; helpful for night time viewing

Vertical Light Bar


A small vertical led light bar on the right side provides important information like volume level and source

Minimized Distortion For Cleaner Sound


Klipsch’s signature Linear Travel Suspension Tweeters provide an amazing amount of clarity by minimizing distortion through their utilization of a lightweight rigid material called Kapton

 Unique Tractrix Horn Technology


Klipsch’s proprietary 90×90 Tractrix Horn Technology helps aim the sound at the listener while also reducing extraneous reverb further improving sound quality

High Quality Wood Cabinet


By utilizing the same MDF wood used in their speakers, the Klipsch cinema 400 not only looks premium, but reduces unwanted vibration for a cleaner quality sound.

Class Leading 8 inch Wireless Subwoofer


An included 8 inch down firing wireless subwoofer gives you that deep bass you want for a truly engaging experience

Special Woofers For Better Bass


Special cone woofers are made of fibre-composite and are built to provide quality sound with minimal distortion

Energy Saver


An included auto on/off function saves power by turning the soundbar off after 15 minutes of no signal and turning back on when audio is detected

Wall Mounting Capable


With wall mounting holes on the back and the included screws and brackets to do so, you’re alloted an additional way to setup your soundbar by way of wall mounting


How To Set It Up


Being that one of the features the Cinema 400 prides itself in is its ease of setup, setting up the soundbar is really easy.

In fact, all you have to do is connect the included HDMI cable from the back of your soundbar to your TV, plug in the power cable and you’re good to go.


Should you wish to use an optical cable instead, you’re also free to do so.

You can even use a game console or blu ray player this way by plugging the optical cable into that device and plugging the HDMI cable into your TV.

Luckily there’s not much complication when it comes to setup which is always a nice thing.

It would have been nice if there was an optical cable included though, so that would be something you’d need separately if you wanted to use one with it.


The Sound Quality


When taking a deeper look at this soundbar + subwoofer combo, my main takeaway was that the sound quality is good.

Like really good.

While the included subwoofer does get deep (more on that in a little bit) it’s the soundbar that stands out in my opinion.

The clarity on offer here is incredible, no 2 ways about it.

Whether it’s the Tractrix horn or the material used that makes the difference I’m not sure, but the main thing you’ll immediately notice is just how clear it sounds.

But in saying that, it isn’t a “bright” soundbar by any means, I’d say it has a more neutral sound signature.

Sometimes a speaker can sound almost too clear to the point where it almost becomes sibilant and fatiguing to listen to over time, but this isn’t the case here at all thankfully.

With music, instruments are easily distinguishable and prominent, with guitar strums for example represented with an incredible level of detail.

It really is commendable honestly.

With movies, dialogue is very discernable and the included dialogue booster actually works pretty well.

A nitpick though is that because there’s no dedicated center driver for the midrange, the sound is down mixed from surround sound to stereo so sometimes music could take precedence over the voices in a scene, or vice versa — and at higher volumes I did notice it slightly more.

But it wasn’t often & to be honest this is coming from someone that has heard many systems with an ear for those sorts of things, so the average person might not even pick up on it.

Just figured it was worth mentioning.


But in general when it comes to movies, it does handle things surprisingly well as far as audio quality is concerned.

Be it explosions, tire screeches from a car chase,etc. everything just sounds visceral and real. You won’t be disappointed.

It’s actually a good step up from a good number of soundbars I’ve heard when it comes to its sonic capabilities.

The included surround sound mode does expand the sound field quite a bit too, imitating a dedicated surround speaker setup, but I wouldn’t say it’s quite the same.

However it still offers a more enveloping experience than the stock sound so I’d say it’s certainly worth trying.

Night mode is also handy, and when enabled, I could hear a lot of details at lower volumes so I could definitely see people finding this useful.

It would have been nice to have more virtual sound modes like one for sports or even Atmos, but the ones on offer here work well.

I’ve heard the Klipsch cinema 400 being compared to the Yamaha Yas-209, ATS 2090, or even the Polk Audio Signa S3 in terms of the similarity of their sound, but I’d say this one slightly favors the upper midrange frequency.

If anything the only thing I can liken it to at the moment would be its larger sibling the Klipsch Cinema 600 (a very powerful, albeit larger 3.1 system)

Although there’s small led indicators on the bottom right that denote things like the current volume or source, an actual dedicated led display to provide more information — along with a few more modes & support for more formats like the virtual object based sound format Dolby Atmos for example, would have been a nice additions.

Something also worth mentioning; if you remember how I mentioned earlier that the soundbar being made of the same wood as its reference speaker counterparts was a great thing — and that’s because besides just looking good, this allows it to minimize potential reverb that could muddy the sound.

That means the soundbar has an easier time actually giving a cleaner sound because of that, and it definitely shows.

The clarity is amazing.

The size of the soundbar is also something to note, as its 40 inch long and 3 inch high cabinet means you’ll need some space for it.

You can wall mount it, and the hardware to do so is even included, but just know it’s not a small device by any means.

The same actually applies as far as the subwoofer is concerned.

In fact, Klipsch even makes mention of this by stating that they have the largest wireless subwoofers in the market and this translates to quite simply, more bass.

Now taking a closer look, the subwoofer is also made of the same dark wood grain and houses an 8-inch downfiring driver which is massive for a pack in subwoofer.

The bass of this subwoofer is also noteworthy as there’s some serious power on offer here.


It’s punchy, deep, and authoritative, and not once did I notice any kind of distortion or sloppiness to the sound.

It’s a really fun subwoofer, and honestly when you hear it, you’ll see what I mean.

I can’t explain it but everything just seemed right when gauging its capabilities, and the fact that you can adjust the subs volume level means you can dial in your sound even further.

Keep in mind it’s an 8 inch subwoofer so for those bigger rooms you may want something bigger, but for the average sized room, it works great.

Actually mentioned it already, but the Klipsch Cinema 600 or even the Cinema 800 might work in that particular instance.

The offering of Bluetooth support is an added bonus, and there were no issues with connecting my phone to play music from it.

What I truly do like about this system as a whole and feel others will too is that the sound it produces doesn’t seem disjointed — like there’s just a dose of sound here, and a helping of booming bass separately over there.

Instead everything sort of melds together, and what you end up with is this beautiful fusion of sound that just .. for lack of better words, just sounds good!

Now if your priorities are in wanting a laundry list of features and/or modes, then yeah, this might not be the one for you honestly since it doesn’t have a lot of those.

But if all you do care about is just getting a good quality sound without all the hassle of having to set things up, then quite frankly I would go with this one.

It has the pristine signature Klipsch sound that they’re known for, coupled with a quality subwoofer that just powers through whatever you throw at it.

It seems like their focus was solely on the sound and it really shows.

Simply put, it’s an awesome system overall that I wholeheartedly recommend. ?

Check Availability Of The Klipsch Cinema 400 Soundbar


Likes


  • Crystal clear sound
  • Clean deep bass
  • Extremely versatile in capability
  • Bluetooth Support
  • Beautiful appearance
  • Can be wall mounted
  • Dialogue enhancement feature works well


Dislikes


  • Lack modes of its older siblings
  • No Atmos/DTS:X support
  • No eARC
  • Optical cable is separate


Final Thoughts


Well that about does it for this one.

The best way to quickly sum up this Klipsch Cinema 400 sound bar review is that if you just strictly care about getting good sound and you don’t care about a bunch of features, this is a really solid soundbar with some genuinely impressive sound.

If that’s your main priority, then you’ll really like this one.

Remember, if you happen to have any questions or concerns though, reach out and I’ll do my best to help.

Until next time though my friends, make it easy, keep it simple.


Check Availability Of The Klipsch Cinema 400 Soundbar


Specs


Box Contents


4.5 foot (1.5m) HDMI cable

Manual

Mounting template

2 wall mount brackets with screws and 3m tape

Remote with batteries (2xAAA included)

2 power cables


Inputs/Outputs and Connectivity


HDMI ARC

Bluetooth

3.5 mm analog

Optical digital

Subwoofer Output


Power


100-240V 50/60Hz internal power supply


Max Output


99dB


Frequency Response


35-20KHz


Dimensions


Dimensions for the soundbar:

Width: 39 15/16 inches (101.4cm)

Height: 2 7/8 inches (7.3cm)

Depth: 3 3/8 inches (8.6cm)

Dimensions for the subwoofer:

Width: 11 7/8 inches (30.2cm)

Height: 16 1/8 inches (41cm)

Depth: 16 1/8 inches (41cm)

Weight: 27.5 lbs (12.47 kg)


Klipsch R-52C Review (Excellent Center Channel Speaker)

Klipsch R-52C Review (Excellent Center Channel Speaker)


The Klipsch R-52C delivers excellent sound quality through its horn-loaded tweeter, acoustic suspension, and dual woofers. As a passive center speaker that’s part of the Klipsch Reference series, it has a wide frequency response, high sensitivity, low impedance, and moderate power handling – making it awesome for home theater systems.


Check Availability Of The Klipsch R-52C Center Speaker


I’ve said this time and time again, but a quality center channel speaker can be the difference between a mediocre home theater experience and a great one.

Being that it can be responsible for up to 80 percent of the dialogue, its importance can’t be emphasized enough.

That’s why in this Klipsch R-52C review, we’ll take a look at a center speaker that’s definitely worth consideration.


Features


1 inch aluminum LTS tweeter


Klipsch’s 1 inch Linear Travel Suspension aluminum tweeter (LTS) has the benefit of being able to produce a clearer audio.

By using a light and rigid material called Kapton, it allows the tweeter to provide clearer sound quality without having to work nearly as hard.


Klipsch’s Unique Audio Tech


Using Klipsch’s unique 90×90°Tractrix Horn Technology, the R-52C’s sound is aimed at the listener, while simultaneously reducing artificial reverb caused by indirect sound waves reflected off objects in the room.

The result of its Tractrix Horn Technology is incredible clarity.


Dual 5.25 inch Spun Copper IMG Woofers


The included dual 5.25 inch, Injection Molded Graphite Woofers have the unique advantage of being both light and durable; allowing for a deeper sound with minimal distortion.


Refined MDF Wood Cabinet


With a high quality MDF wood cabinet, extraneous vibrations are reduced for a more accurate sound.


Closed Back Design


The R-52C’s closed back design gives you the freedom to place it wherever without the worry of a suboptimal sound


Check Availability Of The Klipsch R-52C Center Speaker


How To Set It Up


Setting up the Klipsch R-52C is relatively easy and is done like any other center speaker.

Do keep in mind you’ll also need speaker wire since it doesn’t actually come with it. I personally use this one.

But to set it up, all you have to do is cut the speaker wire to the length you need, then strip it using either a wire stripper or a pair of scissors.

Then you can either insert part of the exposed wire through the keyhole in the back by unscrewing the binding post, or connect the wire to a banana plug and simply plug it in to the speaker.

The other side of the wire would go into the receiver.

Here’s some more context for how to do that if curious.

https://easyhometheater.net/how-to-set-up-a-home-theater#wire


Thoughts On The Sound Quality Of The Klipsch R-52C Center Channel Speaker


So let’s cut to the chase on what actually matters, how does the Klipsch R-52C actually sound?

It sounds immaculate in my opinion, so much so that it’s quickly become one of my favorite center speakers.

The mid tones are full bodied with a treble that’s pristine and articulate.

The best way to sum up how they sound would be sparkly.

This is a speaker for the people out there that find it annoying when there’s a loud scene in a movie and have trouble discerning the dialogue from the sound effects.

It does a great job at allowing you to hear the characters’ voices, while remaining cohesive with the sound effects from your other speakers.

One thing I noticed that had a big affect on the experience is the quality of the material that’s viewed with it.

Being that it’s a high quality speaker, if there’s a movie that’s not mixed correctly, it tends to augment the imperfections from what I noticed.

However when viewing content that is created the right way (which is a majority of newer content), the experience is downright incredible.

Voices came through with striking realism, with highs that sparkle, and soothingly deep lows that you’d expect from a quality center speaker.

Not to mention this speaker has a really high sensitivity so you won’t even need that powerful of a receiver to run it.

It also pairs great with the Klipsch R-41M bookshelf speaker that I also reviewed.

So as not to ramble on, in short, the Klipsch R-52C is an incredible center speaker that should definitely be on your radar if you’re looking for something that not only looks great, but performs even better.


Check Availability Of The Klipsch R-52C Center Speaker


Appearance


If you’ve ever owned or seen a Klipsch speaker before, then you know the one thing you can expect is an impeccable build quality, and the R-52C is no different.

As part of the Klipsch Reference Series, it’s certainly a beautiful center speaker.

With an all black reinforced MDF wood construction, cabinet vibration is reduced, resulting in a clearer sound.

The wood itself is dark & textured, and looks really premium even up close.

The removable grille also gives the speaker a subdued look with a metallic Klipsch logo on the bottom.

However the one thing you have to love about Klipsch speakers is their versatility when it comes to aesthetics.

When the magnetic grille is removed, its look is completely transformed, revealing 2 beautiful spun copper drivers with what Klipsch calls it’s Tractrix horn (responsible for the treble) placed between the 2 of them.

The words Klipsch Reference is also printed on the bottom, and is a nice little touch.

What makes it look even more beautiful in my opinion, are the gold facets dotted around the drivers that accent it.

It’s a small detail, but it adds flair for sure.

Overall, It’s hard to describe just how nice this speaker looks in person.

But if you want something that can both make a statement in your living room, or blend in without calling attention to itself, this would definitely be a great option.


Likes


  • Beautiful appearance
  • Great clarity
  • Well rounded mid bass
  • High sensitivity for lower powered receivers
  • Removable magnetic grille


Dislikes


  • Not the smallest thing in the world
  • Mixed usage on older content


Final Thoughts


That about wraps up this Klipsch R-52C review.

In summation, it’s a center speaker that provides the unparalleled clarity that Klipsch is typically known for, while effortlessly pulling the soundstage together in a notable way.

It’s a massive step up from TV/smaller speakers and certainly manages to impress.

Highly recommend this one.


Check Availability Of The Klipsch R-52C Center Speaker


Specs


The specs are as follows:

Box Contents


Center Speaker
Manual

Inputs and Connectivity


5 way binding posts

Power


400 watts power handling

Sensitivity


95 dB at 2.83V/1m

Dimensions


Dual 5.25 inch woofers

1 inch aluminum tweeter

90×90° square Tractrix Horn

7.62 x 18.75 x 7.3 inch cabinet

13.5 pounds

Hiding Home Theater Equipment

Hiding Home Theater Equipment


A picture of a mounted TV with hidden speakers which is just one many examples of hiding home theater equipment.


Placing Your Receiver/AV Equipment On A Wire Rack


Getting Proper Heat Dissipation In The Room


How To Pass-through The Wiring


Tips On Hiding Your Wires


Installing Your Speakers Within The Wall


Using Ceiling Speakers


Using Bass Shakers


Final Thoughts


As great as home theater is, the one thing that can be somewhat of a caveat is the equipment itself.

Typically the better the sound, the more devices and speakers required which can be somewhat of an eyesore to others in the household that might not care for it as much.

So today we’re going to be going over some tips in regards to hiding home theater equipment, so that you can still enjoy a quality experience without the look of things being all over the place.

Let’s get to it!


Placing Your Receiver/AV Equipment On A Wire Rack


When it comes to hiding your av electronics, there’s different ways to actually go about it that range from the simple to the more involved.

Rather than keeping an AV receiver in plain site for example, one way to solve this issue is placing it on a wire rack within a closet so that it’s out of the way.

Similar to the function of a PC server rack, a wire rack for your home theater stuff can be a helpful way to streamline the look of your entertainment room.

Of course if placing it in another room, keep in mind those components in that room would still need proper ventilation to keep them cool.

You may also want to hide the wires to help make things look cleaner, (which can be done in a multitude of ways)

The benefit to placing your equipment on a wire rack though is it’ll allow you to still get to your equipment if need be while also having better airflow in general.

Getting a rack with lockable wheels is preferable I feel, since you can easily move it around when you need to access something.

Here’s a good example of that the works well

Metal Frame AV Cart with Keyboard Tray


While hidden, you still need a way to actually control your components too which is where a separate IR blaster can be useful in that instance.

They typically plug into the HDMI slot of your television and can send the signal back to your devices even in another room

Then there’s also the option of using a wireless HDMI kit that’ll also allow you to control your equipment while it’s out of sight.

In any case, the important thing is you have options when it comes to tidying up your media room, while still having things be functional overall.


Making Sure There’s Some Kind Of Ventilation For Heat


But a huge thing to remember when doing this is that placing some of your different devices on a single AV rack atop one another in a single room is going to generate a lot of heat, since each one will generate heat.

This can cause the room to get hot (especially if it’s small)

The issue with this is that too much heat can be bad for your electronics, as it could shorten the life of your equipment, cause them to enter protection mode, or even fail entirely.

The good news though is that there’s a number of ways to keep your devices cool.

One simple way of course is just making sure the room has access to some sort of ventilation to expel all of that heat.

This can be in the form of fans (be it a rack mount fan or intake fan) or just leaving the door open.

Another way is air conditioning the room.

However you decide to do it, as long as the room stays cool and barring any defects, your equipment should be good for years to come.


How To Pass-through The Wiring


If possible, the TV should be placed on the opposite side of the wall of wherever your AV equipment is placed.

This allows for the wiring process to be much simpler while also covering the small hole where the wires need to be fed through.

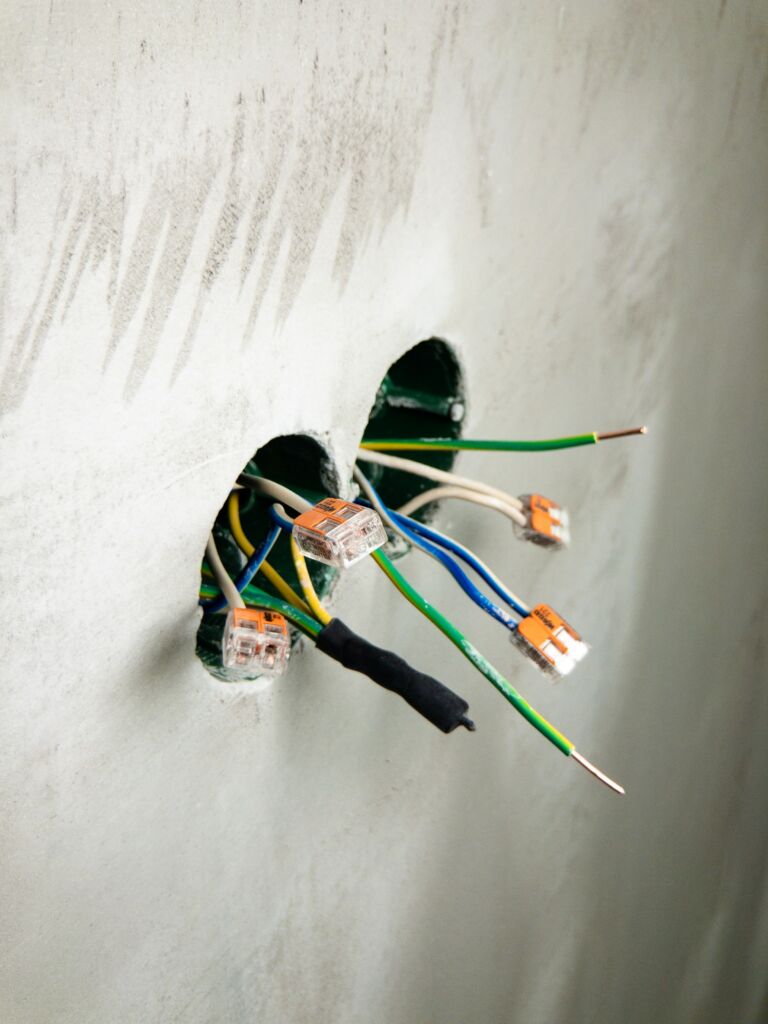
In layman’s terms, what you’ll want to do is cut a small hole in the wall about an inch in diameter, then run the wires through to the TV & your soundbar/speakers.

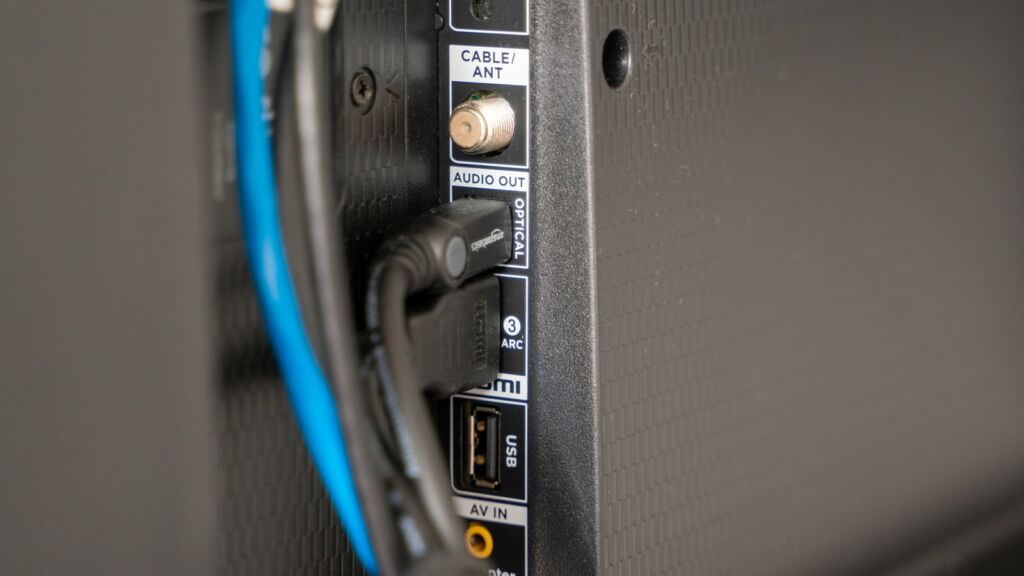
So things like the HDMI cable, speaker wire, and optical cables would be what goes through the hole.

For a refresher on wiring and set up with regards to general speaker setup, this should help.

https://easyhometheater.net/how-to-set-up-a-home-theater


If you’re worried about the cosmetic side about doing that though, what you can also do is use furniture hole-cover grommets to cover the hole so that things don’t look messy.

If you’re running your wires somewhere that’s further away, you still have the ability to run your wires through to the same place.

Do keep in mind that over longer lengths (say 50 feet and longer) latency can become more noticeable.

With speaker wire especially, what can also happen is a reduction in sound quality & volume — hence why thicker wire is generally recommended at longer lengths.

Every 5 feet over 35 feet, go down another gauge in thickness.

So for example, for a 40 foot speaker wire run, I’d recommend a 14 guage thickness. At 50 feet, go with 10 gauge, and so on.

Something else you definitely want to keep in mind isn’t just planning your install for the stuff you have right now, but what you think you might have in 5-10 years.

That way when you do decide to upgrade, it’ll be much less work for you when the time actually comes.


Tips On Hiding Your Wires


When it comes to hiding your speaker wires, how you decide to do this is of course going to depend on how you actually set up your equipment and whether it’s placed inside the wall, attic, etc.

Now I did a comprehensive piece on hiding speaker wires when it comes to speakers that also applies to home theater equipment in general that should definitely prove helpful which you can check out here.

https://easyhometheater.net/hiding-speaker-wire-solutions


But just to add a little to that, the neatest and most inconspicuous way of making things look tidy is wiring through the wall.

That way it’s out of the way, and still retains the original look of the room.

However I’ll caveat that by saying you’d have to have experience with doing that sort of thing before doing that, and if you don’t, having a professional install it for you may be a possibility.

A few retailers offer the option of setting up the wiring and stuff for you when buying your equipment, so that could be an avenue available.

One of the other ways mentioned in the guide linked above like cable raceways still work great if not.

It’s not just the walls though; you could also run the wiring through the attic or even beneath the floor so there’s definitely flexibility here and by no means one best way to do things necessarily.


Installing Your Speakers Within The Wall


Besides a traditional speaker setup, you also have the option of using special in wall speakers for further melding with the room.

But keep in mind that if you do use these, you will need to run the wiring through the walls.

But the added benefit of going with in wall speakers is that they’re a lot more low key and don’t draw attention to themselves nearly as much as a bookshelf/ floor standing variants do — while still providing a much appreciated improvement in sound quality.


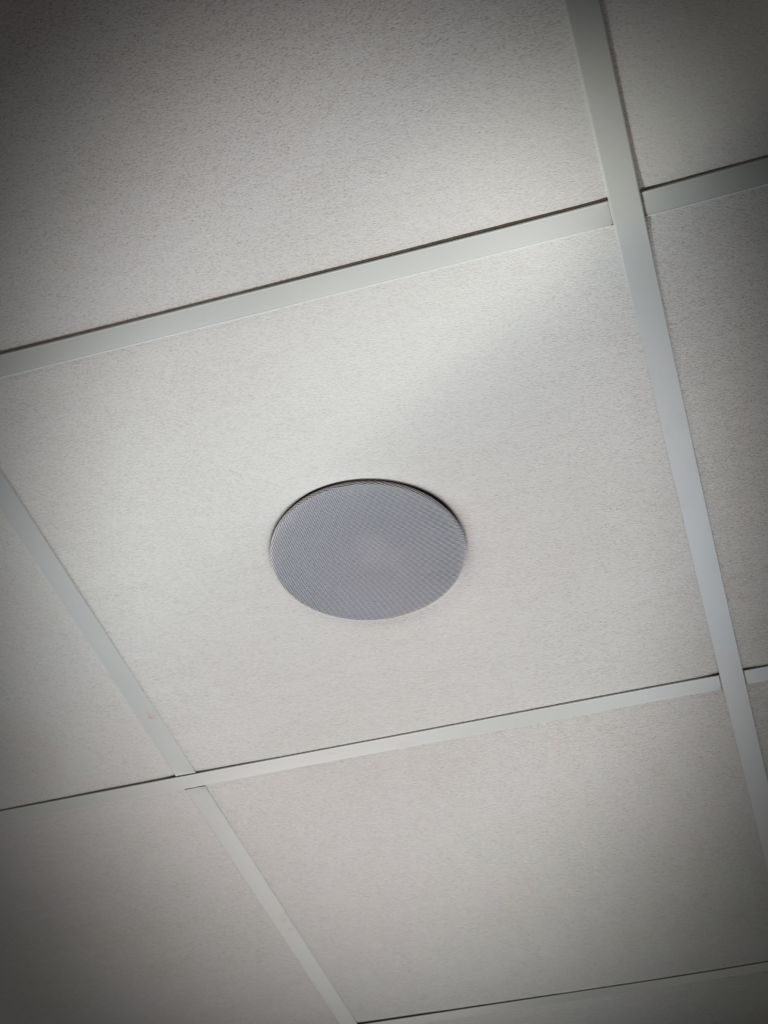
Using Ceiling Speakers


Ceiling speakers are another awesome way to enjoy quality sound while retaining the original aesthetic of the room.

This in depth piece I did on ceiling speakers provides more information on that.

https://easyhometheater.net/the-best-ceiling-speakers#guide


Should wiring for ceiling speakers not be a viable option for you, you always have the option of using height speakers as well.

These are speakers that are installed at or near ceiling level using a specialized mount. That way they’re still out of the way, and can be angled wherever the main seating position is located.


Using Bass Shakers


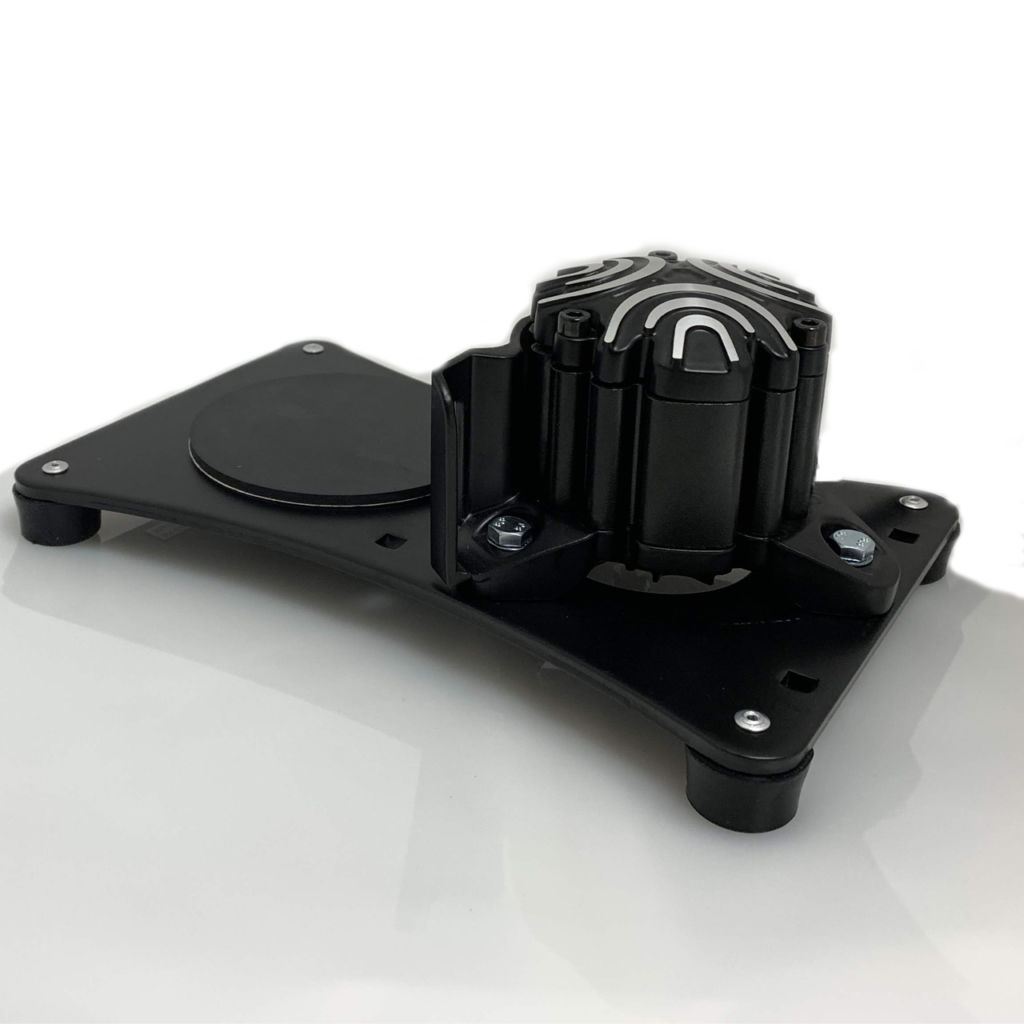
“Image Courtesy of The Guitammer Company”


Lastly, should a dedicated subwoofer not be in the cards for whatever reason, or if you just want to up the tactile feeling without cranking the volume, a bass shaker is a great way to accomplish this.

A bass shaker is a small device that can be installed onto the chair/seat and like the name suggests, provides a more visceral feeling when it comes to bass.

Rather than just hear the movie, you’ll feel it too.

They can be a great way to make things more engaging without the need for a bigger subwoofer, which could annoy the neighbors or simply be in the way due to its size.

Here’s a really in depth piece I did on bass shakers that might help you out if you want to learn more.

https://easyhometheater.net/are-bass-shakers-worth-it


Final Thoughts


When it comes to hiding home theater equipment, there’s obviously a number of different ways you can accomplish this as evidenced above.

Whether it’s simply using a cable raceway to tidy things up, or installing a receiver in the wall, how you go about doing this is dependent on what equipment you have and where you want things to go.

Luckily, there’s a lot of flexibility when it comes to this so hopefully this article was somewhat helpful in offering some suggestions you can use.

But like always, if you have any further questions feel free to reach out and I’ll be glad to help.

Until next time, make it easy, keep it simple.

Majority Bowfell Soundbar Review

Majority Bowfell Soundbar Review


Today I decided to share with you my thoughts on an interesting little soundbar that I happened to come across.

Now it’s not traditional in the sense that it’s not exactly a full size soundbar. It’s actually pretty small all things considered.

However what it’s capable of given its size, is enough reason for you to consider this as a potential option in your pursuit of better sound.

This is the Majority Bowfell soundbar review!


Unboxing/Appearance


Features


Specs


How To Set It Up


The Sound Quality


Likes


Dislikes


Final Thoughts


Unboxing/Appearance


Check Availability Of The Majority Bowfell Soundbar


So the box itself is pretty simple in design. There’s a picture of the soundbar on the front of the box, the name of the unit off to the left, and that’s pretty much it.

Besides some grey and blue accenting on the side and top, there’s not too much going on from a design standpoint. I like it though.

But we’re not concerned with that, it’s what’s in the box that matters.

What you actually get within the box is the soundbar, a remote control, a power adapter, a 3.5 mm to 3.5mm audio cable, (aux cable) 3.5mm to RCA audio cable, an optical cable, and an instruction manual.

Taking a closer look at the soundbar itself, it’s actually pretty nice in my opinion.

The front has a non removable metal grille that covers the majority of the front (had to) and up top is the majority branding.

Then off to the side you have buttons for the volume & power, and a line input to connect an mp3 device or smartphone.

It’s a really small soundbar overall and its extremely light weight adds to that perception. As far as looks go, it definitely has a premium look about it.


Features


Compact Slim Design


A compact and slim design ensures easier placement while taking up less space

50 Watts With A Built In Subwoofer


At 50 watts and a built in subwoofer, enjoy clearer deeper sounds than the speakers typically found in the average TV

Optical Connection


With the option to connect via an optical cable, the Bowfell soundbar can be used with most TVs and monitors

Bluetooth Support


Built in Bluetooth support allows this soundbar to be used with all your wireless devices such as smartphones, tablets, and laptops.

USB & AUX Support


With both 3.5mm and USB inputs, your favorite music and content can be enjoyed from those devices too

Easy To Use Remote


An easy to use remote with large buttons allows you to also adjust the bass and treble to your liking


How To Set It Up


Setting up the Bowfell soundbar is going to depend on how you plan to use it but is really easy either way.

If you decide you want to use it to listen to music, then you can either connect a wireless device via Bluetooth, or connect a media device using the aux cable or USB.

If you want to use the soundbar with your television, then just connect it to your TV via the optical cable and plug in its respective power cable.


The Sound Quality


So how does the soundbar actually sound?

Well right off the bat I’ll say that this is definitely a soundbar meant for medium to smaller sized rooms. I found that in larger rooms it didn’t get quite loud and authoritative enough to warrant using it as the main source of sound.

But it’s pretty obvious that it’s intended use is in those smaller to medium sized rooms given its size.

So then how does it fare there? Well believe it or not it actually does surprisingly well, offering a tangible step up in clarity and bass especially when compared with a TV.

But to get more in depth, I decided to further break down my thoughts into how it handles a few of the most common types of media.


The Sound Quality With Shows & Daytime TV


When watching daytime television with this soundbar, the one thing I definitely noticed was that it actually did a great job with dialogue and voices.

It didn’t sound tinny or hollow — there was actually a good amount of depth to sound which made it pleasing to listen to.

Watching a number different shows produced a similar result, with ambient noise and effects again reproduced surprisingly well.

If your main intention is show watching with the occasional movie maybe thrown in, then this is a solid choice to go with.


The Sound Quality With Music


With music, this soundbar is again, pretty good at what it does. Playing a variety of different music, what I definitely noticed was that intricate little sounds in the background weren’t drowned out by drums or bass, it was all represented equally.

It seemed to maintain a good balance of kick and detail while never becoming too sibilant or muddy.

Now it’s unrealistic to expect this soundbar (or even most soundbars for that matter) to have deep bass rivaling a subwoofer since that’s just not what they were meant to do nor is it really feasible when they’re a small size especially, but it still did a decent job even in that regard.

Despite not being at the level of a dedicated subwoofer, the bass in the Majority Bowfell is certainly better than what comes in a TV. So for music listening, it definitely does its thing.


The Sound Quality With Movies


This is where things get interesting because if you use this to watch movies and you’re in a larger room, I’d maybe consider going with a surround sound setup.

Due to there not being any physical side firing drivers or virtual emulation, there’s not as much directionality as a dedicated system, but that’s not to its detriment when you consider the actual sound quality itself.

In a small to medium sized room, it’s a soundbar that belies its appearance.

Despite its small stature, it can still pump out some serious audio, and that’s especially true when it comes to movies.

Movie watching is a treat with this device as little details and sound effects are reproduced beautifully.

Voices seem full, and make dialogue really easy to hear.

Bass drops aren’t as impactful as they are with dedicated subwoofers, but it’s enough to add another compelling layer of depth to the scene nonetheless.


It’s a world of difference when compared to TV speakers, and this unit is certainly a massive step up.

Plus the added treble and bass controls offers further granularity to really make the sound your own. Bluetooth also worked without a hitch, and connected pretty fast to my smartphone.

Overall then, I’d say if you’re just looking for a soundbar that can provide you with quality sound in a small to medium sized room, then this a good choice to go with.


Likes


  • Great Sound
  • Clear dialogue
  • Small footprint
  • Bluetooth Works Well


Dislikes


  • Not for big rooms


Final Thoughts


Well hopefully you’ve enjoyed this Majority Bowfell soundbar review, a quick look at a soundbar I felt was pretty interesting.

If you’re looking for something to rock a big room then this probably isn’t it but if you’re just looking for a way to get better sound in a normal sized room or bedroom, then it definitely works for that.

Check Availability Of The Majority Bowfell Soundbar


If you have any questions, don’t hesitate to reach out since I’m here for you. Until next time. Make it easy, keep it simple!


Specs


The specs are as follows:

Box Contents


Soundbar
Remote Control
Power Adapter
3.5mm to 3.5mm audio cable
3.5mm to RCA Audio Cable
Optical Cable
Instruction Manual

Inputs & Connectivity


Optical
Aux
USB
Bluetooth

Power


50 Watts

Dimensions


15.28 x 2.13 x 2.83 inches

Weight


1.8 Pounds

Polk Audio Signa S3 Soundbar Review

Polk Audio Signa S3 Soundbar Review


This is the Polk Audio Signa S3 soundbar review, a quick look at a soundbar that not only has great sound quality, but is also a great choice for the more space conscious.

It’s a soundbar that’s feature rich in capability, while also having the performance to back it up. But is it one worth your time in particular?

Let’s find out.


Unboxing & Appearance


Features


Specs


How To Set It Up


The Sound Quality


Likes


Dislikes


Final Thoughts


Unboxing/Appearance


So the box that the Signa S3 comes in isn’t anything too out of the ordinary (well besides it’s peculiar shape of course). It’s all white cardboard with red accenting and has a picture of the soundbar and subwoofer on front.

On top is another picture along with the list of features it touts. It’s interesting shape is probably what’s immediately noticeable though and that’s due to the included subwoofer it comes with.

Opening it up, you’ll see the abundance of styrofoam that safely wraps the contents inside.

In terms of what you get in the box, it comes with a remote, an optical cable, a 1.4 HDMI cable, user manual, warranty information, then the soundbar and subwoofer.

When it comes to looks, this soundbar is pretty low key in a good way.

With just a simple Polk logo on the bottom right, and a black clothe grille that covers the first half of the unit, it’s a soundbar that definitely doesn’t stand out from a visual perspective.

But if anything that’s the point.

Due to it’s slim low profile that helps not block the IR transmitter in your TV, it’s a soundbar that’s designed with sound in mind.

There’s quick controls like volume and bluetooth up top for quick access, and an HDMI and optical port on the back.

It’s also not that long either at 35 inches, so for those of you looking for something that won’t stick out in your room, this might be right up your alley.

The small rectangular subwoofer is also subtle with a plastic cut out emblazoned with the word Polk interrupting an otherwise all clothe grille on the front.

It’s a look that while elegant, would definitely blend in in the average room which a lot just might prefer.

From an aesthetics standpoint, it’s a good looking soundbar overall.


Polk Audio Signa S3


Features


2 Midrange Drivers For Better Midrange


With dual built in 1.25 x 4.4 inch oval midrange drivers, experience a solid midrange for rich vocals and clarity


2 Tweeters For Improved Detail


Dual 1 inch tweeters provide for enhanced clarity in the high end


Voice Adjust Technology


Polk’s exclusive voice adjust technology helps to further enhance audio clarity while augmenting voices in the sound mix making them easier to hear through 3 unique settings


Google Chromecast built in


With built in Google Chromecast, enjoy all your favorite content from your favorite streaming apps


Support For Google Assistant


Support for Google Assistant allows you to control music, volume, etc with your voice


Wall Mountable


With keyholes on the back, this soundbar is wall mountable for even further convenience


Multiple Connection Options


With support for HDMI ARC, optical, and MP3, setup is simple and easy


Bluetooth Support


Or if you want to go wireless, there’s support for bluetooth, allowing you to stream your favorite music and content straight from your phone or tablet


Nightmode For Nighttime Viewing


Nightmode lowers the bass while enhancing the dialogue for better nighttime viewing without having to raise the volume


Music, Movie, & Sports Modes


Included music, movie, & sports modes allow you to adjust your content depending on what your watching with the press of a button, giving you additional freedom to customize your sound


Low Profile Design


Since this soundbar is 2 inches tall, the Signa S3 won’t impede the screen or the IR sensor on your TV, allowing it to blend in without a second thought.


Specs


The specs are as follows:

Box Contents


Optical Cable

Version 1.4 HDMI Cable

2 Power Cords

Quick Start Guide

Warranty Info

Soundbar

Wireless Subwoofer

Sound Formats


DOLBY DIGITAL

DTS

Peak Power


Total System – 160 W

SoundBar – 80 W

Subwoofer – 80 W

Streaming


Bluetoothooth

Google Chromecast

Inputs/Outputs


HDMI ARC

HDMI In/Out- / 1

Optical

AUX

Soundbar Dimensions


Height – 2.2 inches (5.58 cm)

Width – 35.35 inches (89.8 cm)

Depth – 3.26 inches (8.3 cm)

Drivers


Tweeter 1” (25 mm) x 2

Mid-Range 1.25” x 4.4” (32 x 112 mm) x 2

Subwoofer Dimensions


Height – 12.24 inches (31.1 cm)

Width – 6.73 inches (17.1 cm)

Depth – 13.5 inches (34.3 cm)

Weight


20.3 pounds (44.66 kg)

Sound Modes


MOVIE, MUSIC, SPORTS-MODE

VOICE ADJUST

NIGHT MODE

Polk 3D AUDIO MODE


How To Set It Up


Setting up the Signa 3 is very straightforward and simple. You’re given 3 options to do so, via either an optical cable, an HDMI cable, or Bluetooth.

If going the wired route, then one end of the cable would go into your TV and the other would go into the sound bar itself — as long as the TV supports ARC and you’re using the right cable (HDMI 1.4 or later)

If your TV doesn’t support this then you’ll need to use the optical cable in addition to the HDMI cable.

Besides that, that’s really all there is to it.


The Sound Quality


To sum up my thoughts on the sound quality, I separated my impressions by how the sound bar handles the type of content being watched.


The Sound Quality With Shows & Daytime TV


So when watching any type of daytime television what I noticed was that character voices were prominent and the overall sound quality itself was shockingly crisp and clear.

It also got surprisingly loud and there was never a need to crank the volume just to hear what was happening.

It was so clear in fact, that I actually didn’t feel the need to use the voice adjust feature.

I still demoed it for curiosity sake and it definitely made a difference, but voices became overbearing incomparison to other sound effects so I turned off.

Still I could see where this could be useful, perhaps in a movie where the dialogue in the sound mix is really low, but I didn’t use it typically.

If your reason for getting a soundbar is to watch TV, then this one serves that purpose well.


The Sound Quality With Music


Now music is interesting because depending on what you’re listening to, the subwoofer may or may not come into play.

But let’s say you’re listening to something bass heavy, how does the subwoofer fare there?

Actually really admirably. I noticed that it had a surprising amount of kick to it and the bass was heavy yet tight.

The soundbar provided great separation with instruments too, and had a great amount of clarity.

Bluetooth connected just fine and I didn’t have any issues with it. I didn’t expect the Signa S3 to work as well as it did for music, but it’s certainly more than capable when it comes to that.


The Sound Quality With Movies


When it comes to movies, this sound bar is quite frankly, awesome to say the least.

Keeping it short, what I immediately noticed when watching films was that there was a good degree of depth to the sound that provided for a level of immersion that I certainly wasn’t expecting.

The high end has great representation with a noteworthy amount of clarity and the lower end has a good amount of punch during more dramatic scenes.

The bass certainly hits hard, but still maintains itself without ever sounding sloppy.

There is a cut off point where the bass sort off mellows out, but that’s really only with the deepest of notes.

Besides that, it does a terrific job for a soundbar overall, and I have no issues with recommending it.


Likes


  • Great Clarity
  • Deep bass
  • Easy to setup
  • Slim profile


Dislikes


  • No HDMI 2.0 cable
  • Bass mellows out at the lowest end


Final Thoughts


Hopefully you enjoyed this Polk Audio Signa S3 soundbar review and it at least helped somewhat. In short, it’s a great soundbar and definitely worth your consideration.

If you have any further questions don’t hesitate to leave a comment below and I’ll be happy to help.

Until next time make it easy keep it simple.


Polk Audio Signa S3


Klipsch R-41SA Speakers Review: Great For Dolby Atmos

Klipsch R-41SA Speakers Review: Great For Dolby Atmos


The Klipsch R-41SA speakers deliver clear and realistic sound effects from above thanks to their compatibility with object based sound formats like Dolby Atmos & DTS:X. These speakers are also easy to set up, and can be used as modules on your front speakers or wall mounted.


Check Availability Of The Klipsch R-41SA Speakers


What Is Object Based Sound?


As great as traditional surround sound might be, it can sometimes be limited due to the speakers being on a single level plane.

That means the sound they propagate would only travel horizontally.

Should you sit too far above or below that point, the illusion of surround sound can be lost.

Object based surround sound, if installed correctly, can provide a bubble of sound around you; with audible effects from above.


To put it simply, object based sound tracks individual objects in the sound mix to replicate each one separately.

This can provide a much more realistic and believable bexperience overall.

The two most common object based sound formats are Dolby Atmos & DTS-X.

They usually require the usage of ceiling speakers, or in the case of the Klipsch R-41SA, speaker modules that reflect the sound off the ceiling and towards the listener to give the illusion of sounds coming from above.


Features


Exclusive Tractrix horn technology


Utilizing Klipsch’s exclusive horn tweeter technology, experience extremely clear and lifelike fidelity elevating your movie watching experience to incredible new levels.

Linear Travel Suspension


Built in linear travel suspension helps to minimize distortion for better sound quality even at higher volumes.

Kapton Tweeters


At the heart of the Klipsch Tractrix horn technology are the tweeters made of the unique material Kapton.

This is a lightweight yet rigid material that helps the tweeters produce a more accurate sound quality while being more efficient in their delivery.

Injection Molded Graphite Woofers


Injection molded graphite goofers (img) provide rigidity and flexibility allowing the driver to have a lower frequency response in turn providing for richer sound and incredibly low distortion.

Reinforced MDF Construction


A reinforced MDF wood construction reduces cabinet resonance, allowing the sound to be that much more accurate.

Low Profile Magnetic Grille


A removable low profile magnetic grille gives the speaker a more streamlined and aesthetic look


Check Availability Of The Klipsch R-41SA Speakers


Specs


The specs are as follows:

4 inch copper spun woofer

1 inch aluminum tweeter

90×90° square Tractrix Horn

50 Watt RMS & 100 Watt Peak

Dimensions – 13 x 5.75 x 7.5 inches

Weight – 6.75 pounds


How To Set Up & Use The Klipsch R-41SA Speakers


There’s 2 ways to setup these speakers, laying them flat atop your front speakers, or using them as elevation speakers.

They don’t come with wire in the box though, so here’s the kind that I use.

Anyways, if used as surround height speakers, you can mount them on the wall via the handy keyhole slot on the back.

Also important to note that if you’re using them as height speakers for a Dolby Atmos configuration, they should be placed directly above your  speakers since that’ll help provide a more immersive sound.

It’s also possible to add additional pairs to the side and behind you, but I’d recommend starting with placing them upfront first (this is if you’re mounting them on the wall)

Alternatively, if you’re using them as modules and not wall mounting them, simply place them on top of your front speakers with with the logo facing you.

Besides that it’s just a matter of stripping some speaker wire and connecting it into the back of the speaker.

Here’s how to do that if you need a reminder.

For the purposes of this review, I tried both configurations to see how they’d sound which we’ll get into.


Klipsch R-41SA Sound Quality When Used As Elevation Speakers


As elevation speakers, in typical Klipsch fashion, they performed exceptionally with how they sounded.

When watching Atmos content, it was immediately clear to me how much of a difference these height speakers made.

It’s hard to describe in words, but there was just an extra degree of realism that made watching content so much more enjoyable.

From articulate sounds like glass breaking, to more dramatic effects like aircrafts flying overhead, these speakers do a terrific job with making you feel like you’re actually there.

What stood out to me in particular about these speakers though was just how detailed they manage to get.

When I used them as height speakers, I noticed they had an incredible attention to detail when dealing with the audio mix in movies without sounding too bright.

Every detail was produced to an impressive degree, and there were certain instances where I questioned whether it was the movie or the speaker making a specific sound.

Again it’s hard to describe how awesome Atmos content sounds with these without trying it yourself, but they did a great job to put it simply.


Klipsch R-41SA Sound Quality When Laid Flat


When I used them as modules (placing them on the front speakers and reflecting the sound that way) they still sounded great, but not as good as when placed on the wall in my opinion.

The perception of sound effects happening above was still there, but it didn’t have the same precision in special effects like when they were wall mounted.

Obviously it was still way better than not having them at all, but when comparing them to being wall mounted, it’s something I couldn’t help but notice.

It still did a good job with reproducing the Atmos effect, and their fidelity was still really clear. It just sounded more diffuse I would say; like the sense of directionality was lessened.

If wall mounting isn’t possible in your particular case, I still personally think they’re an awesome choice because what they were still able to accomplish when used as sound modules added a lot to the experience.

They made a big difference when it came to immersion — and it’s for that particular reason that I wholeheartedly recommend them.


Check Availability Of The Klipsch R-41SA Speakers


Unboxing & Appearance


When I opened the box, it was immediately apparent that the contents inside were well protected since there was a styrofoam covering layered on top of the speakers.

As for what you get in the box, there’s a user manual, warranty information, and the speakers themselves.

There’s no wiring included so that’s something you’ll need in order to use them.

Here’s the one I use.

When taking the speaker out of the box though, the first thing I noticed was their unique shape.

Unlike a typical speaker, these are sloped since they’re designed to either sit atop the front speakers, or be mounted upwards and used as height surround speakers.

The outside is made out of a textured black wood grain that looked and felt premium with 4 rubber feet on the bottom for better grip.

On the front of the grille towards the top is a shimmery Dolby Atmos branding, and located towards the bottom is the classic Klipsch insignia.

With the grille removed, what was immediately noticeable was the beautiful copper woofer that Klipsch is so well known for — and its tractrix horn tweeter that helps with bringing out higher end sounds.

Also, due to their smaller size, if you decide to place them on top of your front speakers, they won’t take up additional space elsewhere, making them that much more convenient.

Overall, they’re beautiful speakers, and look even better in person in my opinion.


Likes


  • Great sound quality
  • Adds substantially to the movie experience
  • Attractive look
  • Easy to set up
  • Not large


Dislikes


Had to slightly adjust the volume in the receiver to hear them adequately


Final Thoughts


That’s about it for this Klipsch R-41SA review.

In short, they’re great Atmos speakers that are simple to setup, and do a great job with adding an extra degree of dimensionality to surround sound effects in a home theater.


Check Availability Of The Klipsch R-41SA Speakers


Wimius P28 Projector Review

Wimius P28 Projector Review


(Edit: Another model to consider that may also be of interest to you is the Wimius 4K LED Video Projector which is an alternative to the one talked about in this review.


I bring this up because due to its age, actual availability of the older Wimius P28 projector might be variable; but the newer Wimius 4K LED model is just as good as the originally reviewed system.


The original positives mentioned hold true with this one as well, with the added benefit of having a 4K resolution, a brighter output, and low input lag making it an awesome projector)


Check Availability Of Wimius 4K LED Video Projector 


Projectors are interesting devices when you really think about it.

Portable devices with the ability to display an image just as good if not better than some TVs, but also offering convenience by saving you space almost seems like fiction in a way.

But it’s this level of convenience that leads to people preferring a projector in the first place.

So in this Wimius P28 projector review, we’re going to be taking a look at a projector that quite honestly I felt was great when it came to its performance.


Appearance / Unboxing


Features


Specifications


Setup & Install Process


Navigation Of The Menus & Ease Of Use


Picture Quality


Gaming Performance


Likes


Dislikes


Final Thoughts


Appearance/Unboxing


So the one thing I love when it comes to tech is nice packaging and in the case of the Wimius P28, the box it comes in is actually really nice looking.

Rather than just coming in a plain cardboard box, instead what you’re presented with is an all matte black box with a large image of the projector on the front, the logo on the top left, and the model number on the bottom left.

There’s even a handle up top to make it easier to carry.

It’s a little thing of course since it’s what’s inside that really matters, but when attention to detail is paid to just the packaging, it’s typically a good sign that the same is true for the product itself.

Upon opening the box, the projector is wrapped and safely sandwiched between two pieces of protective foam on both sides.

There’s also a box on the side that houses things like the power cord, quick start guide, and remote.

Removing it from the packaging, my first impression of the P28 was that it was lighter than I expected, especially considering its size.

It’s not huge or anything, but at a little over 12 inches long, I thought it’d be heavier.

From an aesthetics perspective though, I thought it looked nice with the large lens on the front and brand logo on the upper right. I wouldn’t say it deviates too much from what the average projector looks like though, but I still liked how it looked.

The good thing about it also being all white and matte is you won’t have to worry about accumulating finger prints on the device so that’s definitely a plus.

There’s also a subtle but glossy white accent that contrasts with the matte finish that helps give it a more layered look than what it’d appear to have at first glance.

There’s also small rubberized buttons that act as quick controls on the top for easy access to adjust the settings which I thought was a nice touch.


Features


The features of the Wimius P28 are as follows:


7200 Lumens Peak Brightness


With a peak brightness of up to 7200 Lumens, you’ll be able to enjoy a very bright and dynamic image.


One Click Brighten Function


If it’s not immediately bright enough, with one click of a button on the remote, you have the ability to brighten the image even further.


10,000:1 Contrast Ratio


With a 10,000:1 contrast ratio, whites look brighter and blacks look darker, giving you a more pleasing and realistic image.


Expanded Color Gamut


A wide color gamut that allows you to see a much more colorful looking image.


50-300 inches Projection Size


At a 5 to 23 foot distance (1.5m to 7m) this projector can display a 50 to whopping 300 inch screen, making your movie nights feel that much more exciting.


Multiple Projection Methods


The P28 supports front projection, rear projection, front projection on the ceiling, and rear projection on the ceiling giving you multiple ways to enjoy your content.


Dual 10W Hifi Stereo Speakers


For those that don’t have external speakers, the Wimius P28 has built in stereo speakers


Eye Friendly


Using advanced LED technology, diffuse reflection imaging provides a pleasing image that’s similar to traditional displays but without the eyestrain and blue light exposure that often comes with it.


4D 50° Keystone Correction


Rather than just being able to adjust the picture vertically, the P28 has 4D 50° Keystone correction allowing you to adjust the image both horizontally and vertically without having to physically move the projector.


X&Y Zoom Function


A 100% to 75% zoom function on both the X & Y axis means you can adjust the projected image’s size without having to move the projector making it that much more convenient.


Ceiling Mountable


4 holes in the bottom of the projector allows it to be ceiling mountable.


Setup & Install Process


When it comes time to setup the Wimius P28, you have a few options.

You can either use mounting screws and ceiling mount it, have someone install it for you, or you can place it on a small table or desk watch your content that way.

If opting for the first option, then this should certainly help. It’s not hard to do, it’ll just take a bit of time.

https://thehometheaterdiy.com/how-to-run-power-to-a-ceiling-mounted-projector


Having it installed for you professionally is the preferable way as you don’t have to worry about wiring or installing something wrong.

Now there’s a few services out there that handle this for you, but it’ll really depend on your area with what you can actually use.

Lastly and definitely the easiest option is placing it on a small table somewhere where it won’t be knocked over but can still project the image with a clear line of sight.

Once it’s there, it’s really just a matter of plugging in the power cord, and connecting the streaming device (such as a Roku) or the HDMI cable or composite cable from whatever device you’re using to the projector.


The one thing that I really judge a device on is how easy it is to use.

Does it take forever to set up or is the setup process a breeze?

Luckily in this case it’s the latter.

Upon hitting the power button, within what seemed like moments I was already getting things adjusted and tweaking my settings the way I wanted them.

Navigating through the menus felt smooth and responsive, and there wasn’t any instances of any hitching that I noticed either. The one thing you’ll probably really appreciate is how streamlined everything is.

There’s no convoluted menus or lengthy descriptions of features, all the menu items are presented clearly and upfront so you know exactly what each one does.

Finding what you need is easy, and is something you’ll likely appreciate when you use it.

Overall, menu navigation is something this projector does right.


Picture Quality


What was the picture quality of the P28 like though?

Honestly it was better than I expected. In summation picture quality was clear, colors popped, and it really just came together for a great looking image.

To articulate my full thoughts though, I broke down it down into smaller subsections going over what I thought about each dimension of the picture quality.


Brightness & Clarity


The one thing I noticed immediately was just how bright it could get right out of the box.

Without even using a dedicated projector screen or black out curtains, everything on screen was super vibrant, and as it turns out, there’s a feature that allows it to get even brighter than that.

I didn’t need to use that since I’m primarily a night time viewer, but I could definitely see this being helpful for those of you that plan to use this in rooms with a lot of sunlight.

Of course that’s not ideal, since you’ll want ambient lighting to be as dim as possible, but it’s certainly still capable.

Clarity was also really good, though I did notice towards the outer edges it wasn’t as sharp as the center.

That’s pretty normal with projectors though, and for a 1080p image, it looked really good.

There’s also mentioned support for 4K content as well, but I suspect that it could mean that it accepts the signal then downsamples it to give you a sharper image since when I watched content the image looked sharper.

Whatever the case, the point is it looked really good and was hard to find any real faults in this area.


Black Levels


Black levels I thought were definitely adequate (in fact better than some TV’s I’ve seen) but they weren’t reference level black.

Dark scenes looked appropriately dark and levels weren’t too elevated, but it wasn’t the darkest I’ve ever seen. Still movies looked great, and for a projector it did a great job.


Color Saturation


Color saturation is another area where I think think projector shines.

Whether it’s gaming, animated movies, or cartoons, colors popped and gave the image a real sense of vibrancy that’s often missed with some projectors.

Now I have no way of knowing what percentage of the color spectrum the P28 covers since it does tout having a wide color gamut, but it certainly looked better than normal, at least to my eyes.

Reds looked deep, blues were gorgeous, and it really just made for a fantastic looking image all around.


Sound Quality


Sound quality of the built in dual 10 Watt speakers were adequate in my opinion.

While they’re adequate in a small room, if you’re coming from using a soundbar or external speakers, you’ll probably want to use those as the ones included here tended to lack bass and midrange that helps make movies that much more engaging.

I would say they’re just a little better than normal TV speakers though.


Gaming Performance


I just wanted to briefly touch on gaming performance as I thought it was worth mentioning. Gaming on the P28 felt pretty similar to playing on a television in that there weren’t any hitches or stutters that I could notice. Input lag wasn’t provided but it felt about average when playing.

That’s a good thing since every millisecond is crucial to helping things feel responsive.


Likes


  • Bright display
  • Beautiful colors
  • Good black levels
  • Great clarity
  • Multiple connection options
  • Ceiling mountable


Dislikes


  • No HDR
  • Built in speakers lacked depth
  • 1080p


Final Thoughts


That about wraps up this Wimius P28 Projector review. In summation, the P28 is a fantastic projector with great overall color saturation, brightness, and awesome clarity that makes it an absolute joy to watch.

It exceeded my expectations and I have no issues with recommending it.

Big thumbs up.


Specifications


Connections – USB x1, HDMI Input x2, VGA Input x2, AV output x1, Audio Output x1

Display Technology – LCD

Image Brightness – 7200 Lumens

Projected Screen Size – 50 to 300 inches (127 to 762 cm)

Contrast Ratio – 10,000:1

Item Dimensions
8.66 x 3.94 x 12.20 inches (21.99 x 10 x 30.98 cm)

Item Weight – 5.51lbs (2.5 kg)

Resolution – Full HD 1080p

Fan Noise – 50 dB

Screw Size For Ceiling Mounting – M4 x 10mm

Keystone Correction – Vertical & Horizontal at 50°

Zoom Function – 75% to 100%


Epson Home Cinema 2250 Projector Review

Epson Home Cinema 2250 Projector Review


(Edit: Another model to consider that may also be of interest to you is the Epson Home Cinema 2350 projector which is an alternative to the one talked about in this review.

I bring this up because due to it’s age, actual availability of the older Epson 2250 projector might be variable; but the newer Epson Home Cinema 2350 model is just as good as the originally reviewed system honestly.

The original positives mentioned hold true with this one as well, with the added benefit of having 4K resolution, a brighter output, and low input lag making it an awesome projector)

Epson Home Cinema 2350 Projector


A large portion of a quality home theater experience not only entails the auditory portion but the visual as well.

It’s that combination of great sound and an incredible picture quality that really elevates the overall mood in the room.

So with that, today I wanted to talk about a projector that does exactly that.

This is the Epson Home Cinema 2250 projector review, a look at a projector that I feel is absolutely fantastic for what it does.

Let’s get into it!


Appearance / Unboxing


Features


Specifications


Setup & Install Process


Navigation Of The Menus


Picture Quality


Gaming Performance


Likes


Dislikes


Final Thoughts


Appearance / Unboxing


So the box that it comes in is pretty standard — made of cardboard with the only real differentiating thing being the picture of the projector on the front.

Upon opening the box, you’re greeted with a quick start guide, 2 remote controls, (with batteries!) the power cable, and of course the projector itself which is housed in protective styrofoam on both sides.

When taking the projector out the box, what you may or may not notice is its slight increase in heft over its predecessor.

Not to say that it’s particularly heavy, but you can tell from the way it feels that it’s premium which is definitely nice.

It’s really the one thing that’s actually slightly distinguishable immediately vs it’s younger brother, the Epson 2150; as that one was just a tad lighter than the 2250.

When it comes to looks though, I’d say it’s a pretty average looking projector — with a large lens on the front and fan vents on the side for air flow and breathability.

The material it’s made of feels like a matte plastic and since it’s in all white, you won’t have to worry about finger prints which is definitely appreciated.

Overall not too much to say about it’s appearance other than it looks good but those looking for sublety probably won’t find that here since it’s pretty noticeable in the average room.


Features


The features of the Epson 2250 are as follows:


 Built In Android TV


Access to all your favorite streaming services without the need for an external streaming media player. Also includes the ability to voice search through a voice assistant.


3LCD Technology


3 LCD technology is actually able to be to display the entire RGB range.

Extremely Bright


With 2700 lumens of brightness, you get an incredibly vibrant picture that’s bright enough to be used in rooms with lots of sunlight.


Built-In 10 Watt Speaker


A built in 10 Watt Speaker which is helpful for those without dedicated sound systems.


Convenient Vertical Lens Shift


Built in vertical lens shift allows you to move the picture without moving the picture.


Easy Set Up


Made for easy setup right out of the box.


Image Enhancing


Image enhancement gives the projector the ability to display smooth images.


High Contrast Ratio For A More Realistic Picture


A contrast ratio of 70,000:1 provides for much better black levels and a realistic image.


HDMI Support


There’s support for HDMI connections with an HDMI port on the back, a MP3 3.5mm audio jack, and a USB 2.0 (Micro-USB) Service Input.


2 Year Limited Warranty


It also comes with a 2 year limited warranty and helpful technical home support for any questions.


Specifications


Resolution – Full HD 1080p

Brightness – 2700 Lumens

Contrast Ratio – Up to 70:0001

Optical Zoom – Manual: 1.6x

Projection Size – 34 – 332 inches / 86.4 – 843.3 cm

HDMI Version – 2.0

Keystone Correction – 30 degrees

Ceiling Mountable

Built-In 10 Watt Speaker

Display System – 3-Chip Polysilicon TFT LCD

Display Refresh Rate – 60 Hz

10-Bit (1.07 Billion Colors)

1.51 to 1.99:1 Throw Ratio

Maximum Throw Distance – 11.1 Feet

Lamp Power – 200 Watts

Expected Lamp Life –
Medium Brightness: 4500 Hours
Low Brightness: 7500 Hours

Operating Temperature – 41 to 95°F (5 to 35°C)

Power ConsumptionFull Brightness: 310 W
Low Brightness: 236 W
Standby Mode (Lamp Off): 0.3 W

Google Assistant Support

Android TV Operating System

Weight – 8.4 pounds (3.81 kg)

Dimensions – 12.2 x 4.8 x 12.4 inches (31.0 x 12.2 x 31.5 cm) Including Feet

12.4 x 4.2 x 12.0 inches (31.5 x 10.7 x 30.5 cm) Excluding Feet


Setup & Install Process


Setting up the projector isn’t too difficult and shouldn’t take long luckily if you’re just planning on putting it on a table or something similar.

For ceiling mounting though, there’s quite a bit more work involved admittedly. I’d recommend looking at this if that’s what you’re looking into.

https://thehometheaterdiy.com/how-to-run-power-to-a-ceiling-mounted-projector/


Also keep in mind there’s always the option of having it professionally installed for you and there’s usually certain tech stores that can actually handle this process for you as well depending on your location.

For example Bestbuy actually has an option for help with different installations so that may be an option too.

If you’re planning on placing it on a table though, it’s literally just a matter of connecting the power cord to the projector, then connecting the HDMI cable from whatever device you’re connecting it with to the projector.


So the one thing that I really liked about the Epson 2250 was how straightforward the menus are.

A big gripe that I have with certain displays is that the menus seem really convoluted and take way too many steps just to perform a simple action.

That’s definitely not the case here.

Just looking at the image section for example allows you to adjust simple things like the brightness & contrast to more advanced settings like frame interpolation and power consumption.

You’re even able to change the display modes which I really like.

Then there’s other submenus available like signal and network to get even more customization and info on your current settings.

Another thing that I certainly feel you’ll appreciate is that the menus don’t feel slow either.

Just tapping the settings button and scrolling through feels quick and responsive to every input.

This I think, is the one thing that really goes a long way in aiding to the total user experience.

Everything just works.

Then if you don’t like your current settings you even have the option to factory reset as well.

There’s a bunch more advanced settings too, but I just really wanted to highlight how responsive the menus themselves feel and how much they add to the overall experience.

Menu navigation is certainly made easy here.


Picture Quality


But what about the picture quality, how good is the picture quality of the Epson 2250 projector?

To be honest, it’s surprisingly crisp. Details in faces and clothing are sharp, and the colors are saturated just like how you’d expect from a traditional display.

The one thing that actually caught me off guard though was just how bright it managed to get even in day light.

Like it can get surprisingly bright which makes for an awesome image in the day time or at night.

The one thing it doesn’t have though is HDR.

However black levels are still great thanks to its impressive 70,000:1 contrast ratio, providing those inky blacks that give you a realistic looking image.

Color saturation was also really good, and it never felt too overdone or lacking. It was right in the middle, giving enough punch where it needs too, but still remaining realistic and grounded.

I happened to use the cinema mode since I think that gave the most tonally accurate results, but for those of you who like a more dynamic image, the other modes might work better.

Either way, the fact that it gives you this choice in the first place should really give you the ability to get an awesome looking image.

Adjusting the lens was easy, and it allowed me to adjust the image without having to actually move the projector anywhere too.

Plus since this is a projector, you get the added benefit of basically deciding your screen size though keep in mind the bigger you go, the darker the image might become.

However I didn’t notice that until using a projected image that was over 150 inches, which I think is more than enough for the average person and probably something you won’t even notice in normal usage.

The Android TV worked great too, and I had no issues with streaming or anything.

What I did notice though was that the built in speaker didn’t have much in the way of bass or lower midrange, so you might want to use external speakers or a sound bar with this one.

Another thing I noticed was there was only 1 HDMI port.

As someone with a lot of devices, this resulted in me having to constantly switch devices and I ultimately ended up using an HDMI splitter.

For someone who only plans on using 1 device then this should be fine, but anymore than that and you might want a splitter for additional devices.


Gaming Performance


Gaming performance was also surprising just because of how responsive and good it felt.

Picture quality was superb of course, but it was the input lag (or lack thereof) that was really noticeable.

Now Epson doesn’t give an input lag number for the 2250 like with it’s predecessor the 2150, but it feels very reminiscent nonetheless.

For the 2150 it had an impressive input lag of about 29.2 seconds, and response time on the 2250 doesn’t feel too far off from that.

I noticed when gaming that the time between moving the analog stick & pressing a button and the character on screen performing an action was nearly instant.

It honestly felt like playing on a normal display.

So for those of you interested in gaming with this projector, rest assured that it’ll perform admirably.


Likes


  • Incredible picture quality
  • Bright image
  • Deep black levels
  • Low input lag


Dislikes


  • No HDR support
  • Built in speaker lacks bass
  • 1080p


Final Thoughts


Well hopefully you’ve enjoyed this Epson Home Cinema 2250 projector review and now have a better idea on whether this is the right projector for you.

In short, it has great peak brightness, deep blacks, and saturated color that all come together for an awesome picture quality but the lack of additional HDMI ports may be problematic for some.

But if that doesn’t bother you, then this is an awesome projector that I have no issues with recommending.

BIC America F12 Subwoofer Review

BIC America F12 Subwoofer Review


The BIC America F12 delivers incredible bass with its 12-inch woofer, 475-watt amplifier, and vented enclosure. It’s a powered subwoofer that can handle a wide range of frequencies, has a high sensitivity, low distortion, and an adjustable crossover. Overall, it’s a great choice for a home theater system.


Check Availability Of The BIC America F12 Subwoofer


The importance of having a quality subwoofer can never be emphasized enough. It’s the one difference that can take your movie nights from just mediocre to absolutely thrilling.

That’s why in this BIC America F12 subwoofer review, we take a look at a subwoofer that not only hits hard and has substantive bass, but also has a certain level of versatility that’s likely to impress you.

Let’s get into it!


Features & Specs


Features:


As for what features it supports, there’s a few interesting ones that I think are worthy of note.


Quality Powered Subwoofer


First thing that stands out about this sub is its capability to get loud if it needs to.

With 150 watt rms and 475 watt peak, this subwoofer can reach levels of 116 db, which to put it in perspective, is live rock concert levels of sound.

So for those concerned with hearing it, rest assured that it can output some serious sound.


Internal BASH Amplifier


This incredible power stems from its BASH designed internal amplifier, which when compared with traditional amplifiers, offers an improvement when it comes to wasted heat and energy utilization.

This combined with its intricate circuitry provides the benefits of incredibly low distortion and a high signal to noise ratio.

That ultimately means you get a better quality sound, hearing more of the stuff you actually want to, and less of what you don’t.


12-Inch Woofer


Something else that’s interesting and truly worthy of note is that this sub has a what BIC calls a 12-inch injection molded woofer that’s also a long throw variant. This basically gives it a very high excursion.

Since speakers and subwoofers produce sound by moving air, a higher excursion gives it the ability to move more air — meaning it can produce more sound and go deeper.

So in this case, the fact that the driver is a long throw variant means the sub has the ability to not only go deeper, but also louder as a result.


Excellent BIC Venturi Port


Another really interesting feature here is the patented Venturi Port from BIC. This basically helps to further minimize distortion, providing a much cleaner sound.


Adjustable Controls


For further customization, there’s also knobs on the back to control the volume and crossover so you can dial in your sound just right.

There’s also automatic signal sensing so whenever the sub senses a signal, it’ll automatically turn on.


Dolby Pro Logic & Dolby Digital/DTS Support


There’s also a toggle on the back that offers support for Dolby Pro Logic & Dolby Digital/DTS, giving you even further choice with your sound.

5 Year Warranty
The BIC subwoofer is also backed by a 5 year warranty, offering assurance in that regard.


Check Availability Of The BIC America F12 Subwoofer


Specs:


The specs are as follows:

Frequency Response – 25Hz – 200Hz

Dimensions – 17 x 14.8 x 17 inches

Weight – 41.2 pounds

Driver – 12-inch injection molded woofer with heavy duty surrounds

Sensitivity – 90 dB

Impedance – 8 ohms

Speaker level and RCA inputs

Magnetic Shielding

Gold Plated Terminals


How To Set It Up


Setting up this subwoofer is essentially the same as any other subwoofer that needs the input of the receiver.

A component cable goes into the back of the sub in the input that says sub in located just under the crossover knob, and the other end of the cable goes into the sub output on your receiver.

It might be named sub out, pre out or something similar depending on your receiver. You’ll then want to turn the volume knob to the 12 o clock position and the crossover setting all the way to the right.

After that, that’s pretty much it.

However for more optimal sound, you’ll likely want to do the subwoofer crawl which I talk about in detail here.


How’s It Sound?


Now for the real question, how does the BIC F12 actually sound? In a word, impressive.


With Music


Long story short, what I noticed with this sub when it came to music was that the amount of bass it can produce is impressive when you first try it.

What’s more, not only is there bass in abundance (which you can adjust of course) but the bass itself is quality.

It’s punchy, weighty, and just super clean overall.

I didn’t hear any distortion, and there was no change in the quality when turned up.

But if there’s one thing I think you’ll truly enjoy about this sub, it’s just how low it actually gets.

Music comes alive with this sub, and it makes the overall experience all the more enjoyable.

No complaints there at all.


Check Availability Of The BIC America F12 Subwoofer


With Movies


I think this sub is even more impressive when it comes to movies not because of how loud it deep it gets, but because of how it performs with the volume lower.

Often times with subwoofers when there’s content playing at lower volumes, distinction between bass notes and frequencies can become a little muddled and subsequently blend together

But what’s interesting here is it felt like that clarity wasn’t lost at these lower volumes, and there was actually tangible detail you could still make out. I consider that a sign of a quality subwoofer and the BIC F12 is certainly that.

It actually reminds me of the Klipsch R-120SW in that regard as they both have that level of precision to them.

At normal volumes, it’s even more thrilling.

Like I mentioned before, bass drops are incredible and it’s just an impressive subwoofer that quite frankly, does the job well.

The only thing that could be seen as a negative in my opinion is how big it is. Like I’ve mentioned previously, this is a big subwoofer at 41.25 pounds so just make sure you have the space to accommodate it.

But even the size can be attributed to the fact that this is a high excursion subwoofer meaning that deep bass is going to come with the tradeoff of an increase in size so it’s not surprising.

Other than that, there’s really not too much bad to say about this subwoofer. Its powerful, deep bass will enrich your movies & music substantially, and when placed in the room properly, it truly comes into its own.

If you’re looking for a sub that can provide good bass when turned up but be delicate and quiet when it needs to, then it’s a good choice in my opinion.


Check Availability Of The BIC America F12 Subwoofer


Appearance


This is a subwoofer from the formula series that definitely has a unique look to it.

Now the outside is pretty unassuming at first when the the grille is on, with an all matte black finish that’s pretty common for a lot of subwoofers.

However it’s when you take this grille off that you see why I say this is an interesting looking subwoofer.

When removed, what’s revealed is a stunning silver bass driver that really gives this subwoofer life. It’s reminiscent of the beautiful copper woofers that Klipsch is so often lauded for, so this is basically a lighter version of that.

It looks really good in person.

Now the one thing I will say about this subwoofer is that it’s actually pretty sizeable at 17 x 14.8 x 17 inches, so you’ll want ample space when you use it.

It’s also really heavy at 41.25 pounds so if possible, you may want to have someone help you if you have to move it. But there’s actually a reason for that heft that we’ll get into a little later.

But overall from an aesthetic point of view, the F12 is a nice looking subwoofer that has the dual capability to stand out or blend it depending on whether or not the grille is on or off.

And given its burly stature, placing it in a somewhat larger room may be best as placing it in a smaller room can make it pretty noticeable.

Regardless though, it’s just an attractive looking subwoofer and I’d say that it honestly looks even better in person.


What’s In The Box/Unboxing


As for what you get in the box, there’s the subwoofer, a manual about the device, and the power cable.

There’s no RCA cable in the box to connect it to the receiver though, so that’s something to keep in mind.

This is the cable I use for reference.

The outside of the box itself is pretty cool with a large picture of the unit on the front, and a few of the main features it touts

Over on the side there’s a detailing of all the different accolades it’s received over the years.

Deservedly so in my opinion.


Likes


  • Powerful Deep Bass
  • Clean output at higher volumes
  • Great bass detail at lower volumes
  • Beautiful metallic woofer


Dislikes


  • Big at 41.25 pounds (I personally don’t mind it, but some might)


Final Thoughts


With that, that’s it for this one. Hopefully you’ve enjoyed this BIC America F12 subwoofer review and now have a more formulated idea of whether it’s the right sub for you.

In summation, the bass is deep but remains articulate even in the most action scenes, and has enough punch to truly invigorate your content.

It’s just a fanatic sub really, no two ways about it.

It just might surprise you.

Check Availability Of The BIC America F12 Subwoofer