As an Amazon Associate I earn from qualifying purchases. Disclosure

Yamaha TSR 700 Review (7.2 Channel 8K AV Receiver)

Yamaha TSR 700 Review (7.2 Channel 8K AV Receiver)


(Edit: Another model to consider that may also be of interest to you is the Yamaha RX-V6A which is an alternative to the one talked about in this review.


I bring this up because due to its age, availability of the older Yamaha TSR 700 might be variable; but the newer Yamaha RX-V6A is just as good as the originally mentioned receiver.


The original positives mentioned hold true with this one as well, like support for up to 8K resolution, 100 watts of clean sound quality, etc., making it an amazing option)


Check Availability Of Yamaha RX-V6A Receiver


In this Yamaha TSR 700 Review, we’ll take a look at an awesome 7.2 channel AV receiver that not only has enough power to sufficiently drive your speakers, but has so many attractive features that it’s just an easy recommendation all around.

For those short on time, long story short, it’s a receiver that does everything you’d want it to and then some.

Compatible with everything from speakers to soundbars, it’s an extremely solid & feature rich receiver that’s great for movie nights.


Appearance Of The Receiver


While not vastly important, the appearance of a receiver can still add to the tangible feeling of actually getting a truly solid product.

With that being said, it’s safe to say the Yamaha TSR 700 completely excels in that category.

What you’ll immediately notice on the unit is the large volume knob directly in the center of the chassis.

It’s definitely an interesting choice being that the volume knob is usually placed to the left or right, but I think it makes the device look really unique personally.

Towards the top left is a Yamaha logo, and towards the bottom right is the TSR 700 branding.

Directly to the right is a physical selector that let’s you navigate the menu manually if you wanted to browse that way rather than use the included remote.

On the faceplate, there’s information regarding zones and pure direct, as well as a really nice looking blue led display when the unit is turned on.

This display shows a bunch of useful information like the current sound profile, source information, and even the current input.

It’s certainly helpful, and provides the kind of quick info at glance that you’d want.

A minor nitpick would be wanting the display to be a little bigger, but it’s nice it has one at all honestly.


The bottom left is where you’ll find the power button, as well as a host of useful connection options like the USB slot, the YPAO mic input, and the headphones input.

With regard to size, the TSR 700 is pretty average, measuring 16.87 x 13.12 x 6.75 inches and weighing 21.6 pounds making it not the biggest receiver in the world, but certainly not small by any means so make sure you have adequate space for it.

Something that might help in that respect is the fact is the antenna can be placed down, so that’s a plus.

As for the receiver’s appearance overall, it’s a very clean yet distinct look, making it effortlessly blend in yet stand out simultaneously.

It’s very contemporary, with an all black aesthetic that allows it to easily fit in with most rooms without calling attention to itself.

Even the knobs feel premium, gliding easily along without feeling plasticky or cheap.

The only thing I did notice was that the shiny exterior picked up fingerprints pretty easily, so you’ll want to keep a dust cloth or microfiber cloth handy.

But other than that, there’s not too much else to say about its appearance.

It’s a really nice looking receiver in person, it’s unique, and is sure to serve as nice piece of eye candy in the entertainment center.


Features


7.2 Channels


With support for up to 7 speakers and 2 subwoofers simultaneously, enjoy top quality surround sound with the TSR 700

Compatible  With Dolby Atmos


You also have option of using 2 overhead speakers for for even further immersion through Dolby Atmos support


Compatibility With DTS:X Audio


By placing sound where it would naturally occur in space, DTS:X is able to create life-like, multi-dimensional audio virtually

Yamaha Room Optimizing Software


A unique Yamaha proprietary sound field creation technology created by combining measured sound field data with digital signal processing optimizes your speakers for your specific room

Enhanced Media & Gaming Features


A collection of enhanced media and gaming features ensures full support for all of your favorite content

8K Support


For those that love to have the most bleeding edge technology the TSR 700 has support for 8K resolutions

Bluetooth & Wifi Capability


The Yamaha TSR 700 is fully Bluetooth & Wifi capable and supports your favorite streaming services and devices

Multi Room Support


Similar to HEOS, the TSR 700 receiver even has the ability to play music in multiple rooms simultaneously through Yamaha’s Multicast controls via app

HDMI 2.1 Support


With 8 HDMI slots, 3 of which are full 40Gps HDMI 2.1 slots, and one supporting eARC passthrough, every current device & format is supported

Sleek Appearance


The TSR 700 sports a sleek appearance, making it a great fit for a wide variety of rooms.


How To Set Up The Yamaha TSR 700


Setting up the Yamaha TSR 700 receiver is really simple. Given the amount of connection options at your disposal, how you set it up is going to depend on whether you’re using a wired connection or streaming.

So to help you out, we’ll quickly go over both ways.

Setting Up the TSR 700 with A Wired Connection


Setting up this receiver through wired methods is done the same way you would with any receiver.

Obviously unplug everything before you connect anything.

Since it’s eARC compatible, all you have to do is plug an HDMI cable from the very first slot labeled eARC into the back of your television, then take a second HDMI cable and plug it into the back of the device you plan on using with it.

After this, connect the speakers/soundbars you plan to use into the back of the receiver.

Then turn the unit back on and turn it to the appropriate HDMI input.


Setting Up The Yamaha TSR 700 Wirelessly


Setting up the Yamaha TSR 700 wirelessly can be done in 2 ways, through wifi, and through bluetooth.

Luckily both ways are seamless and simply involve pairing the receiver through your respective device.


The Sound Quality/ Performance Of The TSR 700


Alright so long story short is the Yamaha TSR 700 actually worth your time?

Well taking into consideration the sheer abundance of features and how they enhance the experience, this is a receiver that’s absolutely worth your time.

When plugging my speakers up with this receiver, what was particularly notable was how clean everything sounded.

The speakers didn’t struggle at all, and when I turned the receiver to those higher volumes, it was easy to tell that the receiver supplied more than enough power to actually drive them properly without distortion.

The virtualization technology that basically emulates height surrounds worked pretty good too, but I wouldn’t say it’s a complete replacement for it.


Certainly use height or ceiling speakers if you can, especially since this receiver actually supports Dolby Atmos and DTS:X.

But the different DSP modes that Yamaha are known for are still here, and allow you to switch sound profiles to your liking.

For example for movies there’s a movie preset available to use, but should you want something a little more dynamic you could change it to spectacle.

There’s a bunch here, and it’s particularly fun to experiment and see how the sound changes with each preset.

It reminds me of the Denon AVR-S760H in that way where you can use the presets and adjustments to get a really custom sound output.

Another thing you’ll really like about this receiver is just how feature rich it is.

The fact that it supports pretty much every modern AV feature means you won’t have to worry about compatibility issues with a certain TV or device.

From Dolby Vision support to low latency mode and VRR for gaming, it really feels like it has everything.

I mean it’s even 8K compatible which is impressive enough as is.

But when you factor everything else it’s able to do, it becomes a no brainer.

It’s really easy to setup too with helpful features like bluetooth working without issue.

There’s also the included optimization microphone included with this receiver that allows you to easily calibrate your speakers for your specific room.

Simply plug it in and hit start, and it’ll automatically optimize your audio for your particular setup.

It’s a simple way to get much better sound quality, and the fact it’s so easy to do is just another plus.

Even in terms of appearance, it’s a really unique looking receiver, and actually looks really cool in person.

It’s not huge, but it’s not a small device either, so make sure you have the space for proper ventilation.

So with all this being said, there’s not a lot I outright dislike about this unit honestly.

I mean maybe it would be nice if it supported IMAX Enhanced, or maybe the display could be a little bigger.

But other than that nothing really comes to mind.

It’s really that good of a receiver.

It’s an all around solid performer and with everything it offers, is definitely worthy of a spot in your home. It’s awesome.


Pros/Likes


  • Provides speakers with abundant power
  • Future proof with support for even 8K
  • Abundance of features
  • Has a unique aesthetic
  • Very easy to set up
  • Bluetooth works effortlessly


Cons/Dislikes


  • Not small at 21 pounds
  • No IMAX Enhanced support
  • Display could be bigger


Final Thoughts


The Yamaha TSR 700 is an excellent receiver, with an abundance of features and enough power to make it an incredible option.

Its performance is top notch, and from this review it’s clear to see why this is such an easy recommendation.

But that’s all I got for now.

Until next time, make it easy, keep it simple.


Specs


The specifications of the Yamaha TSR 700 AV Receiver are as follows: 

7.2-channel AV Receiver with 8K HDMI and MusicCast

Amplifier Section


Channels

7.2 (with two mono subwoofer outputs)

Rated Output Power (20Hz-20kHz, 2ch driven)

100 W (8 ohms, 0.06% THD)

High Slew Rate Amplifier

Rated Output Power (1kHz, 1ch driven)

Surround Sound Processing

Surround:AI

N/A

Cinema DSP

DSP Programs :17

Dialog Level Adjustment

Virtual Presence Speaker, Virtual Surround Back Speaker, Dialogue Lift, SILENT Cinema / Virtual Cinema DSP, Dolby Atmos, Dolby Atmos Height Virtualization, Dolby TrueHD, Dolby Digital Plus, Dolby Surround, DTS:X, DTS-HD Master Audio, Auro 3D

Audio Features


File Format

MP3 / WMA / MPEG-4 AAC: up to 48 kHz / 16-bit, ALAC: up to 96 kHz / 24-bit, FLAC: up to 384 kHz / 24-bit, WAV / AIFF: up to 384 kHz / 32-bit, DSD: up to 11.2 MHz

Pure Direct

Compressed Music Enhancer

High-resolution Music Enhancer

YPAO Multipoint Measurement

YPAO Volume

Adaptive DRC (Dynamic Range Control)

Initial Volume and Maximum Volume Setting

A.R.T. Wedge

Bi-amp Capability

Audio Delay

(0-500 ms)

DA Converter

384 kHz / 32-bit BB PCM5102A

Video Features


HDMI eARC

HDMI Audio Return Channel

HDMI Pass-through

4K120AB, 8K60B, 4K60 and 24GBPS HDMI1-3

HDMI Upscaling

Yes up to 4K

HDMI Up-conversion

HDR 10+

VRR/ALLM/QMS/QFT

Yes (via future update)

Video Adjustment

Connectivity

MusicCast Surround

Wi-Fi  (2.4 / 5 GHz)  AirPlay (Airplay 2) Bluetooth (SBC / AAC), Phono Input, XLR Terminal

N/A

Component Video Input/Output

N/A

Extensive Connections


HDMI Input/Output

7 / 1 (HDR / Dolby Vision™ / HLG and BT.2020-compatible)

HDMI CEC, USB Input, Network Port, Front AV Input USB

Digital Audio Input / Output: Optical

1 / 0

Digital Audio Input / Output: Coaxial

1 / 0

Analog Audio Input / Output

4 / 0

Composite Video Input / Output

N/A

Preout: 2.2-ch

Headphone Output:1

Tuner Section


FM / AM Tuner

Yes (Availability varies by region.)

User Interface


On-Screen Display

Graphical User Interface

SCENE


Yes (8 sets)

App Control


(iPhone / iPad / Android phone / tablet)

Web Browser Control

Remote Control Unit

Zone Control


Zone 2 Audio Output

Preout

Powered Zone

Zone 2

RS-232C Interface

N/A

+12V Trigger Output : 1

Remote (IR) Input/Output

Party Mode

General


Standby Power Consumption (IR only)

0.1 W

Auto Power Standby, ECO Mode

Dimensions (W x H x D)


17-1/8″ W x 6-3/4″ H x 14-7/8″ D (with antenna up:17-1/8″ W x 9-5/8″ H x 14-7/8″ D)

Weight


21.6 lbs.


Polk Audio PSW10 Subwoofer Review

Polk Audio PSW10 Subwoofer Review


The Polk Audio PSW10 subwoofer has good hard clean bass that even performs well at higher volumes. It’s easy to setup, looks good, and handles a variety of content. Best suited for average sized rooms, bass quality was tight & controlled yet powerful — and made for a really enjoyable listening experience. Overall it’s an awesome subwoofer!


Check Availability Of The Polk Audio PSW10 Subwoofer


Features


Timbre Matched For Pairing With Other Speakers


The PSW10 is timbre matched with other Polk speakers meaning it’ll work fine with any of them you choose.

It’s important, since it allows for more cohesive sound between your speakers and the subwoofer.


10 Inch Driver For Quality Bass


The included 10 inch front-firing variant dynamic balance polymer composite driver delivers punchy bass for a variety of content

High Roll Foam Surrounds For Harder Bass


With the inclusion of high roll surround, there’s more excursion meaning the sound quality is improved.

Refined Wooden Appearance


A refined wooden look with a titanium baffle in design allows it to fit in with most rooms

Bass Reflex Port Delivers Clean Bass At High Volumes


A bass reflex port allows the subwoofer to deliver cleaner bass even at higher volumes.


An Intuitive Back Panel


An Intuitive back panel makes it easy to understand for settings adjustments.


Check Availability Of The Polk Audio PSW10 Subwoofer


How To Set Up The PSW10 Subwoofer


Setting up the psw10 is no different a process than any other subwoofer.

An RCA cable from the back of the unit plugs into the receiver.

Then turn the volume knob on the back to the 2’oclock position and the low pass knob all the way to the right.

Finally set the crossover setting on your receiver to 80hz so it handles that frequency range and that’s it.


The Sound Quality/Bass


But what’s the sound quality like of this subwoofer?

It’s hard hitting and punchy for sure.

When I played music, movies, or even games with it, it was really apparent how much oomph it had when handling content.

The bass was tight & controlled yet powerful — and made for a really enjoyable listening experience when using it with the Elite ES10s & OWM3s.

Even at louder volumes it didn’t distort or become boomy.

It maintained its composure and delivered excellent bass which reminded of the PSW111 in that regard.

It had the kind of bass that was fast and deliberate, with enough low end extension to comfortably round out the experience.

From what I noticed, it seemed like a subwoofer that performed better in rooms that were average sized.

For these kind of rooms I felt it particularly shined when it came to bass quality.

In really large rooms it still sounded good too, but it seemed slightly subdued.

It’s 16.2 x 14 x 14.4 in size and 26 pounds in weight like I mentioned earlier, so make sure you have the space for it beforehand.

But overall it’s a really good subwoofer honestly.

There aren’t any major complaints that I have about it truth be told.

It does what a subwoofer is supposed to, and does it well.

The bass is loud, clean, and in abundance.

It handles a variety of content with no issues, and looks great.

Definitely gets a recommendation from me.


Check Availability Of The Polk Audio PSW10 Subwoofer


Appearance


The appearance of the PSW10 subwoofer is simple yet refined.

Taking a look from the front, what immediately sticks out is the Polk logo on the bottom of the black removable magnetic grille.

When removed though, the thing that’s immediately noticeable is the silvery face with the matching driver and port.

It’s really beautiful looking honestly and makes me prefer the look with it off.

The enclosure of the subwoofer itself is a solid dark MDF wood that has a nice wood grain pattern when looked at closely.


Over on the back you’ll find a bunch of different controls for the sub like a phase switch and a low pass filter knob.

In terms of size, it’s actually a pretty hefty unit at 16.2 x 14 x 14.4 inches and 26 pounds so keep that in mind.

It being on the heavier side though isn’t suprising though since the more powerful the subwoofer, the heavier it’s likely to be.

Other than that, there’s really not much else to say when it comes to appearance.

It’s a very subdued looking subwoofer with the grille on, and with it off it certainly stands out — similar to the PSW505 in that regard.

It’s an aesthetic that I think looks really great in person.


Likes/Pros


  • Good hard clean bass
  • Performs well even at higher volumes
  • Handles a variety of content well
  • Easy to set up
  • Looks good


Dislikes/Cons


  • No magnetic shielding
  • Large at 26 pounds


Final Thoughts & Who It’s For


That about wraps this Polk Audio PSW10 subwoofer review.

In short, it’s an excellent subwoofer with great punch, depth, and versatility to really make listening to content enjoyable.

It’s definitely a subwoofer best suited for average sized rooms, so if that’s what you have, it might be a great choice for you.

It’s a fun subwoofer in my opinion that makes movie nights even more fun — making it certainly worth a look.


Check Availability Of The Polk Audio PSW10 Subwoofer


Specs


The specs of the PSW10 subwoofer are as follows:

OVERALL


Total Pieces 1
Electronics Warranty 3 years
Drivers Warranty 5 years
Original Purchaser Only Yes
Carton 1 18″ (45.72 cm) h x 19″ (48.26 cm) w x 19.5″ (49.53 cm) d – 31 lbs (14.06 kg)

SUBWOOFER


Total Pieces 1
Availability US
Orientation Vertical
Height 14.375″ (36.51 cm)
Width 14″ (35.56 cm)
Depth 16.125″ (40.96 cm)
Weight 26 lbs (11.79 kg)
Subwoofer Array Driver Enclosure Type Vented Via Front Panel Flared Port
Subwoofer Array Driver Complement •(1) 10″ (25.4 cm) d (Round) Dynamic Balance polymer composite cone – Subwoofer
Amplifier Distortion <1%
Amplifier Bandwidth 40Hz – 200Hz
Amplifier 220V Availability Yes
Amplifier Type Subwoofer
Amplifier Type 50 watts
Amplifier Dynamic Power 100 watts
Lower and Upper -3dB Limits 40 Hz → 160 Hz
Audio Inputs •Stereo Line Level – (2) RCA
Pair (L/R) Analog RCA
Speaker Inputs (2) Pair of Spring Terminals – Gold-Plated
Audio Outputs –
Speaker Outputs (2) Pair of Spring Terminals – Gold-Plated


19 Ways To Make Old Speakers Sound Better

19 Ways To Make Old Speakers Sound Better


19 Ways To Make Old Speakers Sound Better


As great as home theater is, the problem is that over time, equipment can degrade, worsen, and even fail with age.

Worse still, is that often times there’s things that we unknowingly do that potentially speed up this process.

While speakers typically last for decades, their audio quality may not, and might leave a lot to be desired.

No worries though because in this guide we’re not only going to show you how to make your older speakers sound better, but offer some tips on how you can properly maintain the life of your equipment for many years to come.

Let’s take a look!

(After feel free to check out this comparison between older and newer speakers on which is better)

https://easyhometheater.net/old-speakers-vs-new-speakers-which-is-better


1). Optimizing Placement & Position Of Your Speakers In The Room


Proper room placement for your speakers can have one of the biggest impacts regarding their audio quality.

As a general rule since every setup is different, placing your speakers the same distance away from each other as you are seated can help with their output.

For example if you’re seated 6 feet away, placing the speakers 6 feet apart can help them provide more uniform output in the room.

This kind of placement is what’s known as the golden triangle, as it helps being in the sweet spot for better sound quality & spatial imaging, while reducing delay or overlap in incoming sound waves.

So whatever distance you’re sat from your speakers, try placing them that same distance apart to see how it sounds to your ears.

Also worth noting is you might be able to improve your sound quality further by decoupling the speaker from the surface it’s on.

One way is through speaker stands since by isolating it in this way, it can prevent the speaker from buzzing or distorting when at those higher volumes (as long as they’re optimally placed)

These are stands I think work well in my opinion.

Check Availability Of VideoSecu Speaker Stands


Speaking more on placement though, optimal placement also depends on not just the room itself, but the speaker’s design too.

That means whether they’re ported, sealed, or vented can affect the optimal distance to place the speaker from the wall.

For rear ported speakers, placing them about 18 inches from the wall in my experience tends to help reduce unwanted resonances and room nodes that may color the sound.

I’ll caveat that by saying that is, unless you’re specifically looking to influence the bass of your speakers particularly, in which case you may prefer moving it closer to the wall.

Front ported and sealed versions can often still sound good slightly closer to the wall though it depends on your preferences.

Also using speakers that are timbre matched, meaning using multiple of the same ones within the same line, can be helpful to your audio experience as well.

Another helpful tip is to turn your speakers slightly inwards towards the middle of the room.

Keeping in mind that speakers are directional devices, regardless of the sound waves that radiate outward, their cleanest audio will often come from the waves aimed directly at you.

So by using what’s known as toe in, meaning angling the speaker inwards or outwards, you can get better auditory imaging for a more immersive experience.

It’s definitely worth a try, just keep in mind you don’t need to over do it — just enough to where the grille clothe is pointed towards your seating without actually seeing the sides of the speaker cabinet.


That’s a general idea of how they should be angled but you can play around with this further — that’s just a good rule of thumb to start with.

For better sound, also make sure your front speakers are at ear level when seated.

If they’re too high or too low, it can sometimes sound disjointed — unless they’re surround speakers, which I’ve found can sound great when slightly above ear level.


2). Upgrade Your Wires


There’s also the hypothesis that upgrading your older wires may have a direct influence on the sound you experience.

Now admittedly I’m undecided on this as on one hand I’m of the opinion that a cable is a cable and shouldn’t make that much of a difference.

While on the other hand having personally played around with a bunch of different wires and noticing a slight difference (admittedly much more premium ones) it’s not definitive.

Long story short, it’s something you’d have to try for yourself, but it may make a difference.

Try to opt for copper wires rather than those made of aluminum as they’ll be immune to things like oxidation which do have an effect.

Using wires that are too thin may also affect audio levels, as the signal may not be as strong.


3). Don’t Put Your Cables On The Ground


One thing that is definitive however is that messy speaker wires can make for an unsightly looking home theater.

But did you also know it could be having an effect on your sound too?

To put it simply sound creates vibrations and by them being on the ground, those vibrations inevitably travel through the wires.

This could then in turn negatively impact the sound you hear.

Now there’s multiple ways to ditch the wires, be it making your speakers Bluetooth or even hiding them, but just be aware that unruly wiring (obviously making sure they aren’t tangled too) could be having an indirect effect on how everything sounds to your ears.


4). Bi-Amping The Speakers And/Or Bi-Wiring Them


One potential improvement you can implement if your speakers and setup supports it is Bi-Amping them.

Bi-Amping gives the high frequency and low frequency their own amplification channels which can have multiple potential benefits.

When there’s more demanding scenes that require a lot of power, using separate amplifiers would mean each one would only be responsible for the power to that speaker.

This could put less overall strain on the system if you use separate amplifiers or in combination with a receiver since each would be responsible for that speaker or set of speakers.

Then there’s also the benefit that when actually looking for an amplifier, you won’t be as limited by power since each would be separate.

You can tell if your speaker supports this by looking on the back and seeing how many binding posts it has.

If there’s 4 then it supports it.

You would also need a receiver that supports outputting to separate amps, and you can tell this by looking for one that supports pre outs.

In the case of Bi-Wiring, it separates the treble and the bass components of a speaker into separate entities.

By using 2 sets of wires for each that is then connected to the same amplifier, the idea here is that in theory it should provide better sound quality.

There’s lots of contention on whether this is actually true but personally I’ve noticed a difference so it’s possible you might too.

If it has 2 sets of binding posts, then it supports bi-wiring/amping.


5). Replace Your Connectors


A speaker binding post

Over time, the sound you experience can be affected by oxidation that affects your plugs.

By replacing them, it just might breathe new life into those old speakers.

Just make sure your speakers are actually wired correctly — meaning the positive connections are wired to the positive terminals and the negatives are connected to the negative.

If they aren’t their polarity could be reversed causing them to play out of phase with each other.

Also another interesting tidbit, you can reduce wire hum you might experience from the old connectors to your speaker wires by gently rubbing the pins on the plug with wire-wool.


6). Replace The Clothe/Foam Around The Driver


Over time, the foam in a speaker can actually go bad (usually in conditions with lots of moisture and heat and things like that), causing it to become brittle or fall apart while drivers with a clothe surround can become abraded.

Replacing this material can allow your speakers to perform like they use to.


7). Calibrate Your Speakers Using A Digital Room Equalization Software


Most modern receivers have some form of room EQ calibration that optimizes your speakers’ sound for your particular room by utilizing a small mic.

Calibrating your speakers this way should provide for a better experience all around and may even help with the bass from your speakers that you experience as well.


8). Upgrade Your Receiver


However not all receivers have this calibration software, and so if you find that you have one that doesn’t, it might be time to upgrade your receiver.

Another reason to upgrade your AVR is it might be underpowered for the speakers you’re using it with.

But yet another, almost speculatory reason is that some believe that disregarding DSP modes, the receiver actually has a direct influence on the sound quality itself though whether it’s noticeable depends on a number of factors.


9). A Cut Tennis Ball Placed Under Equipment To Help With Extraneous Vibrations


Here’s a little bit of an unusual method to help with the sound quality of older speakers and equipment; using tennis balls!

So the way to do this would be by first cutting them in half. The amount of these that you’ll need will depend on the amount of speakers/tables, etc. that you’re using.

But when cut in half, place each half under the feet of your entertainment equipment, tables, etc.

The reason for this is because of the fact they’re made of rubber, it’s effective at eliminating extraneous vibrations making it one way to fix the sound quality in a room without having to do things like acoustically treating a room (though that does actually help too)

Just make sure they’re stable before doing this, and for heavier equipment, having more than one person can help.

For larger floorstanding speakers capable of outputting lots of bass, decoupling them from the floor like a subwoofer could help with resonances.


10). Room Treatment Including Using Acoustic Panels


Sony HT-S350 Soundbar Review

Room treatment, is another route you can have a massive effect on your home theater experience and can directly affect your speaker’s performance.

To put it simply, the more reflective surfaces in a room, the more your sound is going to be all over the place, figuratively and literally.

Doing what’s known as a clap test can be a helpful way to figure this out.

Clap once and note any echoes.

Now try to add as much soft and plush material to the room as possible, do that same test and you’ll notice the difference.

Without being too long winded, basically the more soft materials in the room, the more it’ll absorb unwanted echoes which should improve your sound.

Sound proof curtains, acoustic panels, and even carpets help in that regard, but the idea is that you want to minimize the amount of reflective surfaces in the room.

Using a specialized AV rack with your speakers is also a great way to improve audio since they’re specifically designed to reduce sound coloration.

There’s a bunch more things you can do to improve room treatment specifically so here’s some tips on that.

https://easyhometheater.net/home-theater-ideas


11). The Bracing Of The Speaker/Subwoofer’s Cabinet


On the more advanced side of things, should your older speakers begin to leave more to be desired, you can always add internal bracing to them to improve their audio quality.

Internal bracing basically involves adding additional pieces of wood inside the cabinet to improve sound quality.

It’s typically more geared towards something like a floorstander since it’s a bigger cabinet.

Even subwoofers are often internally braced to reduce resonance, and the larger the cabinet volume, the more this becomes necessary for a better bass and audio quality in general in my opinion.


12). Replace The Damping Materials Inside


Something else to keep in mind, especially if your speakers are on the older side, is the material inside may need to be replaced.

There’s a few things to consider in that regard, whatever the speaker happens to be on the inside of the speaker and the material in the area where the woofer is.

The wall behind the driver of the speaker is important to treat acoustically since any reflections from the driver will likely be present there as well.

To remedy this, a few handfuls of thick wool placed loosely behind the driver can help improve audio quality to some degree.

The amount of stuffing you use matters too since if you under-damp the speaker (meaning not using enough soft materials inside the cabinet) the sound can seem somewhat muddy.

Conversely, if you use too much, it can cause the speaker to sound less dynamic.

Speakers that may be older might include less optimal materials for sound quality for the lining of its cabinet which may not give as much clarity (though it depends)

Replacing this lining with a different material though can sometimes make a big difference.

It’ll depend with regards to your particular speaker in terms of sound of course, but those are a few things to keep in mind.


13). Change The Driver Unit


Another way to breathe new life into your speakers is to replace the drivers.

This is obviously a more extreme measure, but opting for a similar driver ensures your speakers will be able to perform like new.

Sometimes manufacturers offer the same exact driver separately, but if not, try to match the new driver as closely as possible with the old one.


14). Make Sure To Remove The Dust


Be sure to dust your older electronics & speakers from time to time as it not only has an effect on the look of your speaker, but its performance as well.

Dust can get in the wires and basically affect your sound.

A microfiber clothe should suffice, but if they’re really vintage, then you can use a gentle wood cleaner to help restore them.

Here’s one that I personally use.

Daily Wood Cleaner


15). Warm Up The Speakers/Equipment First


Another tip you can use is warming up your speakers and equipment for 30 minutes before you use them.

This helps for optimal performance, and gives the components adequate time to warm up.

There’s also what’s known as running in, and although it’s mostly applicable to newer speakers, should you replace the drivers, it’d be applicable here too.


Running in is basically the idea that over a period of a few days or more, the materials loosen up and allows your speakers deliver a better sound than right out of the box (this is also known as burn in)

Now whether this actually true or simply your ears becoming adjusted is up for debate, but it’s worth mentioning.


16). Use Pure Direct Mode/ Higher Quality Source Material


On most receivers is a mode known as pure direct mode, and this basically sheds any extraneous processing or subwoofer bass so that all your left with is the speakers’ pure capability.

This can be a way to guage what they’re capable of, and you may even prefer it.

Adding to that point, using source content with a higher quality bitrate is an easy way to make things sound better almost instantly.

This is because lower bitrate sources have issues accurately representing higher and lower frequencies since it trades those off for the size of the file itself being smaller.

However if there’s lossless encoding, that information is retained giving a better audio quality.

Examples of these often included on Blu ray discs include Dolby TrueHD and DTS-HD Master Audio.


17). Use A Hi-Fi DAC Or External Amp


Should the processing in your receiver be insufficient, using an external amp & or Hi-Fi DAC can be a great way to add some additional power to your older speakers.

The one you use will depend on your particular setup since some are Bluetooth while others are optical, but implementing one into your system can be a great way to step things up.


18). Listen To Your Music With The TV Off


Now this one might sound a little out there, but something that may help with audio quality when listening to music for example, is turning off your display.

Displays can sometimes introduce some degree noise in the signal, and this can in turn effect what you hear depending on how sensitive your hearing is.

So by turning it off, what you might notice is a slightly better quality sound.

It’s an interesting thought for sure, and is certainly at least worth the try.


19). Forgoing Lights Entirely


Building on the previous point, listening to your content in the dark can actually make a potential difference in the sound quality you might hear.

As random as it might sound, when there’s a lack of visual stimuli, you tend to be more attentive to the finer details in the content (though it depends on the person to what degree of difference they notice)

Even former chief scientist of Dolby Laboratories, Dr. Poppy Crum in an interview from 2008 talked about how our brain compensates for the sounds we hear which may be different than how they actually which is pretty interesting in my opinion.

https://venturebeat.com/2013/04/08/dolby-poppy-crum-sensory-superpowers

With that in mind, some companies like Pitchblack Playback even do music listening sessions without any light so the focus is on the audio which might make things sound better.

It’s also a reason why movie theaters dim the lights when it’s time for the actual movie to start (pretty interesting to think about)


Bonus: The Option Of Getting A New Speaker


If all else fails and you just simply can’t be asked, there’s always the option of getting a new speaker all together.

Sometimes, things can prove too difficult to repair and it’s better to go with something new.

It’s ultimately your call but if that’s the case, then here’s 2 articles to help with that.


https://easyhometheater.net/the-best-bookshelf-speakers


https://easyhometheater.net/the-best-floor-standing-speakers


Final Thoughts


As you can probably tell, there’s a bunch of different ways on how you can make your old speakers not only sound better, but ensure they last for decades to come.

Playing them too loud obviously has an effect on this, but you may not have been aware that something as simple as dust can be just as damaging over time.

So if you have an older pair of vintage speakers that you thought you’d never be able to use again, using these tips are great way to get them up and kicking again.

But that’s about wraps things up for now.

Until next time, make it easy, keep it simple!

Logitech Speaker System Z623 Review (2.1 Channel)

Logitech Speaker System Z623 Review (2.1 Channel)


With this review of the Logitech speaker system Z623, I wanted to cover why this awesome little 2.1 channel system manages to punch above its weight in a way, that I feel, makes it a pretty easy recommendation.

So let’s take a closer look and also see if it’s the right system for you.


Logitech Speaker System Z623 Review


The Logitech Speaker System Z623 provides powerful & clear audio quality that makes for an entertaining 2.1 channel experience. It’s a nearfield system best for the casual listener who simply wants something that’s a step up from their TV audio, without taking up the space typically required to do so.


Check Availability Of  The Logitech Z623 2.1 Channel System


Design/Appearance Of The System


The first thing I noticed about the Z623 speakers and subwoofer was how nice they actually looked in person.

It was suprising, but I felt they had a subtle yet refined look about them.

Starting with the speakers, they have a pretty unusual shape; slim at the top and wider towards the bottom.

It certainly helps them stand out, going for a unique design language opposed to the typical monolithic design that’s common.

Up top is a THX logo, and in the middle is a 2.5 inch full range driver covered by a non removable metal grille.

At the bottom is the Logitech logo, and a bass & volume rocker to the right.

The satellite speakers are also two piece ABS plastic with 6 screws holding them together (4 are visible on the exterior)

What was most surprising about the speakers besides their sound, was how hefty they felt for their size.

They’re not giant speakers by any means — but taking them out the package and holding them in the hand, you’ll notice they have a certain heft to them that makes them feel more premium.


They’re not too big either at 7.7 x 4.6 x 5.0 so you won’t have to worry about placement unless you have an extremely limited area.

As for the subwoofer, it’s an all black MDF wood cabinet that looks really good.

It houses an 8 inch, stamped steel basket driver covered by a black metal grille — with a smaller port over on the side for enhanced clarity.

That’s actually pretty unusual for a pack in subwoofer because stamped steel baskets allow them to output deeper bass, and are found on more premium variants.

So to see that here is a welcome surprise.

Also the way the driver and subwoofer port are outlined by this matte plastic makes it look incredible in person honestly.

The subwoofer as far as size goes, is pretty standard fare at 11.2 x 12 x 10.5 inches meaning you’ll likely want to place it on the floor unless you have a really big desk.

From a visual perspective then, the Z623 is an attractive looking 2.1 system; with little details and flourishes that give it a unique aesthetic that works in most rooms.


Features Of The Z623


A Quality THX Certified 2.1 System


Being that this is a certified THX 2.1 system, a relatively hard standard to reach, awesome sound quality is a key focus.

400 Watt Peak/200 Watt RMS System


With a 400 watt peak and 200 watt RMS (35 watts per speaker) you can enjoy powerful sound in even large entertainment rooms.

Integrated Controls On The Speaker


Integrated controls right on the speaker make it easy to adjust your sound and bass the way you want it.


Enhanced Flexibility With RCA & 3.5 Millimeter Inputs


RCA & 3.5 millimeter inputs allow you to connect up to 3 devices; ranging from a game console, to your TV, or even a computer.

This flexibility allows you to have choice with how you listen to your content.

Check Availability Of  The Logitech Z623 2.1 Channel System


How To Set Up The Z623 System


Setting up the Z623 system is relatively simple but will of course depend on what you plan on using it with.

With A TV


Being that this is an active, or self powered system, it skips the need of having to use a receiver with it.

The downside of that of course is the lack of an HDMI slot so you’ll have to use RCA cables.

So to set this system up with your display, you’ll have to plug in the left speaker with the included VGA cable into the subwoofer, and the right speaker connects into it via the included phono plug.

Then connect the red & white RCA cables into your TV from the subwoofer and you’re good to go.

With A PC


Setting up with a PC is pretty similar, but you also have the option of using the included 3.5mm jack if you chose to do so.


The Sound Quality & How It Fares


First Impressions On Sound Quality


So how does the Z623 actually sound?

Simply put, I was blown away by the audio output.

It’s one of the best 2.1 channel systems I’ve heard in a long time.

I wasn’t expecting to like it as much as I did, but the more I listened to it, the more impressed I became.

The bass output was especially impressive, and wasn’t something I was expecting having personally heard separate subwoofers prior.

The bass was hard hitting but smooth, and did so without distortion.

Sometimes with 2.1 systems, you run into the issue of distortion because there’s not enough power to handle the volume.

But this system didn’t have that issue at all.

The bass was tactile, and really made movie, music, and even gaming a lot more fun.

None of the finer details were lost in the mix, and it was able to really showcase its power when turned up.

You can definitely tell why there’s a THX certification here because when it came to the speakers, not only did they get loud, but they handled a variety of content like a champ.

Their treble seemed balanced, the mids weren’t recessed, and when combined with the sub, made for a really enjoyable experience.


A Quick Note


A little tip for you by the way — I found turning the bass knob between the 1 & 2 o clock position to be best as going below that made it feel a little mellow, while going too much past that caused output to feel boomy and inaccurate.

Your experience might vary since it depends on how they’re positioned, and the room they’re placed in, however that was the sweet spot that I found to be a good starting point to go with.

Something worth mentioning is that there’s a lack of Bluetooth support in the base model; so if that’s something important to you, the model with a Bluetooth adapter would be the one to go with.

The lack of an optical port is also an interesting omission so if that’s important to you, then the more premium model in the line, the Z625 would offer that.

Another caveat is that there isn’t an included remote, so if you use this system with your TV, you’ll have to change the volume by hand since most TVs have a fixed audio output and not a variable one.

Not a big deal but it’s something to be aware of nonetheless.

I found them to be better for nearfield and stereo usage with things like a desktop or smaller room.


Overall Thoughts


But it’s hard to personally fault for what it doesn’t have when the essence of the system, and one of the most important things, the actual sound quality, is really good.

I found them to be better for nearfield and stereo usage with things like a desktop or smaller room.

Audio quality is powerful, clear, and offers a cinematic experience that really makes you appreciate it.

If you don’t mind those things previously mentioned, then it’s a great 2.1 channel system to go with.


Check Availability Of The Logitech Z623 2.1 Channel System


Pros/Likes


  • THX level sound quality
  • Hard clean bass
  • Great for movies, music, and even gaming
  • Can adjust the amount of bass
  • Looks good


Cons/Dislikes


  • Proprietary connections
  • Lacks Bluetooth
  • No HDMI or optical input
  • No included RCA cables


Final Thoughts & Who It’s For


It’s a system for the casual listener who just wants something that’s a step up from the typical TV audio that listens to movies, music, and occasionally games from time to time.

It’s an amazing system for what it does, and it genuinely caught me off guard with not only its sound quality, but how powerful this little system really is.

For nearfield use with a PC, or a quality stereo experience in an average sized room, this is a great choice to go with.

If you don’t mind the caveats previously mentioned, it’s honestly a lot of fun.

The Z623 is solid, and I definitely recommend it.

Check Availability Of The Logitech Z623 2.1 Channel System


Specs


The specs of the Logitech Z623 are as follows:

Wired Connectivity


1 x Stereo RCA Input
2 x 1/8″ / 3.5 mm Input
1 x 1/8″ / 3.5 mm Output (Headphone)

Speaker System Channel Configuration


2.1-Channel

Amplifier Power Rating


Front:70 W

Controls


Bass, Power, Volume

Subwoofer Amplifier Power Rating


130 W

Physical Dimensions For Left & Right Speaker:


4.6 x 5.3 x 7.7″ / 116 x 135 x 195 mm

Subwoofer:


11.9 x 10.4 x 11.1″ / 303 x 264 x 282 mm

Weight Right Speaker:


31.7 oz / 900.0 g / 1.981 pounds

Weight Left Speaker:


29.9 oz / 850.0 g / 1.869 pounds

Subwoofer:


14.3 lb / 6.5 kg


Samsung HW-A550 Sound Bar Review (A Powerful Soundbar)

Samsung HW-A550 Sound Bar Review (A Powerful Soundbar)


In this Samsung HW A550 review, we take a closer look at this 2.1 channel system that’s intent on improving upon its predecessors in the T series.

But how does it compare with other soundbars in the series, and most importantly, how does it actually perform?

Let’s find out!

Samsung HW-A550 Sound Bar Review


The Samsung HW-A550 is a fantastic soundbar that handles movies, music, & even gaming with impressive audio quality.
Setup is easy too since it can be done via HDMI, optical, or Bluetooth. There’s even wall mount support and a slim design, making it an easy recommendation.


Check Availability Of The Samsung HW-A550 Soundbar


Design/Appearance Of The Device


As the successor to the T-650, the design of the Samsung HW A550 doesn’t actually deviate all that much.

It measures 33.9 x 2.2 x 3.3 inches and weighs about 4.63 pounds.

This slim design is compact enough to fit under TVs larger than 43 inches which is helpful and makes it a viable option for those constrained on space.

Now in terms of its appearance, I noticed that the exterior of the device looked really subdued; going for subtle detailing rather than full blown opulence.

But it’s when you look closer that you begin to appreciate the aesthetic that Samsung went for that really gives that premium feeling.

The front of the sound bar has a black non removable, diamond pattern magnetic grille that stops before the bottom and sides of the unit.

Beneath the grille is a helpful LED display placed in the center of the unit since there isn’t a center channel.

I noticed that the LED display was bright and easily visible in a bright room.

The display only showed 3 letters at a time though, so messages had to scroll sideways across it whenever I changed a setting.

Chamfered upper corners also bevel towards the top, which I felt gave it that distinctive flair that Samsung soundbars are often known for.

Even though the top of it is made of plastic, it still had an almost brushed metal texture to it that felt really cool.


Plus there was a unique thing I noticed that I felt was worth mentioning — that material helped mitigate fingerprints!

Nothing ruins a nice design like unsightly fingerprints, so you’ll be happy to know that the A550 does a great job in that regard.

On the back of the soundbar was simply where all the connection ports were located.

Do note there isn’t any internal IR tech in it so if it blocks any part of the bottom of your TV, it may not be able to communicate with it.

Or you could always wall mount it since there’s holes on the back that would allow for that.

The subwoofer also has similar design language to the A550, what with its subtle yet refined aesthetic that opts for blending in.

Theres a large reflex port on the back to help with reducing chuffing at higher volumes, along with the pairing button and the connection for powering the sub.

It’s also made of wood which is even better for bass.

The simple design it sports forgoes additional buttons besides the pairing button, and gives it a cleaner look which I think looks good.

At about 11.7 pounds and 14 inches tall, I’d say it’s a pretty manageable and placeable sub (especially when compared with some of the more gargantuan subs out there)

So when it comes to overall looks, the HW A550 easily blends in with most rooms due to its subtle visual presentation, harboring a design language that screams quiet confidence.


Features


Bass Boost For Harder Bass


With an already impressive 250 watts of power from the subwoofer alone, if that’s not enough, enjoy an additional boost in bass with the press of a button


160 Watts For Powerful Sound


Touting a dual driver & tweeter combo, each of the 4 drivers is capable of 40 watts each or 160 in total — which provides for an extremely powerful sound that fully immerses you in the action


Virtual 3D Surround Sound


Utilizing DTS Virtual:X technology, experience a thrilling surround sound experience without the need for external speakers


Great For Gaming


Your gaming experience is completely transformed with synced directional audio that moves with the on screen action, and crosstalk cancelation that minimizes distractions, giving you a gaming experience like no other


Optimized Sound For Various Types Of Content


It’s not only gaming that’s optimized with the A550, but other types of content too including sports, movies, and more


Multiple Connection Options


Whether it’s through wireless with Bluetooth/Wifi, or a wired connection via HDMI, optical, or USB playback for Hi-Res audio, the way you enjoy your content is truly up to you


Full Control With One Remote


With compatible Samsung TVs, streamline control of both your soundbar and television with the included Samsung remote


Wall Mountable


Using the included brackets, wall mounting this soundbar is an option also available to you, providing a true level of convenience


Can Be Used With Additional Samsung Speakers


Should you wish to go for a more traditional setup, the HW A550 can used with additional rear Samsung speakers to further enhance immersion


Check Availability Of The Samsung HW-A550 Soundbar


How To Set It Up


Thankfully, the process of setting up the A550 is pretty easy, and can be done in a wide variety of ways.

Should you wish to go the wireless route, getting things up and running is as simple as pairing the soundbar via Bluetooth, holding the button on the back of the subwoofer to pair it, and adjusting the treble and bass to your liking.

Should you opt for the wired route, you can connect the soundbar with an HDMI or optical cable from your television to the unit.

Something important to note is that this sound bar in particular utilizes ARC instead of eARC; meaning there isn’t Dolby TrueHD or DTS-HD Master Audio pass-through.

Luckily it can still play the most common audio formats like LPCM 2 ch, Dolby Audio, Dolby Digital, DTS, and even Dolby Digital Plus which is utilized by most streaming services.

But as far hooking up this device, it’s very accessible and user friendly which is definitely a plus.


Performance/Sound Quality


So what’s the performance like on the Samsung HW A550?

Honestly, it’s really solid to put it shortly — with great sound and really impactful bass. However my opinion on it is a little more nuanced than that so I’ll explain my experience further.

Performance With Movies


For listening to movies, the A550 is a massive step up from a TV speakers, and it was really easy to see the difference.

Listening to a wide variety of movies from Star Wars to Spiderman first in standard mode, what was immediately apparent was just how versatile this thing is.

Despite not having a dedicated center channel, dialogue still came through crystal clear and highly intelligible.


There wasn’t a need to crank the volume high to understand what characters were actually saying even in quiet scenes.

I know that’s sometimes a complaint with some soundbars, however there’s enough power here to completely avoid that issue.

The overall soundstage just had a certain sense of depth and presence — even though it’s not that big which was a surprise.

Sound effects were crisp and convincing, and it really just made movie watching a treat.

From a surround sound perspective though,  you could still tell that the sound originated from the front of the room.

It was to be expected since there aren’t any physical side firing drivers to remedy that.

Trying the surround sound mode next, I did notice an improvement for sure, but it wasn’t a markedly drastic one. It was a similar story with the Virtual DTS:X mode too.

However there were times were the emulation of the surround sound was actually convincing, so I’d expect it heavily depends on the type of content you watch and even the room.

The good thing about there being different sound modes and settings is you can choose the one that appropriately suits your content, which is really one of the best features you could have when limited by hardware.

I’d recommend sticking with the DTS Virtual:X mode for movies as that had the best balance of everything from what I noticed.

The subwoofer meanwhile had a lot of power and extension to it, and in real action heavy scenes, it delivered the emotional impact you’d expect.

The absolute lowest notes did bottom out a bit, but it’s not really something the average listener would even notice.

The sub managed to deliver clean engaging bass and complimented the soundbar in a way that definitely made the content fun to watch.

So to answer the question, the HW-A550 is great for movie watching.

What It’s Like Listening To Music With The A550


Listening to music is another area where the A550 shines. Pretty much all the accolades mentioned with how it handles movies holds true with music, making a great choice in that regard as well.


The sound signature was really balanced from what I could tell, not teetering in any one specific direction harmonically.

The front 2 channels had good separation when it came to representing all the details in the track, and stereo panning effects were certainly noticeable — making this a solid 2.1 channel experience.

Sonically, music sounded accurate, with none of the important hard to miss details overshadowed by midrange or low end.

The bass wasn’t boomy or muddled at high volumes, and had an authoritative thump that you couldn’t help but want to dance to.

So in summation, for the causal music listening experience, the HW-A550 is a great option to go with.


How The A550 Does With Gaming


The unique advantage that this soundbar has over others is a dedicated game mode for us gamers out there.

Utilizing stereoscopic sound, I noticed how prominent sound effects were, and it was truly a step up if you’re coming from just gaming on a TV or smaller speakers.

I liked that mode because it did a great job with immersion in action heavy sequences without losing any of those important details.

And with HDMI CEC compatibility, controlling things like volume, input, etc is made super easy.

Whether it’s the newest Madden or Elden Ring (love that game) it really does a fantastic job when it comes to gaming performance.

Being that it’s ARC and not eARC though, I’d recommend using the included optical cable if you plan on doing any gaming over 1080p or with HDR as that’ll allow you the ability to use it with 4K content.


My Experience Watching General TV


What about with the most basic thing, how does the A550 do with simply watching TV shows or daytime television?

Well to no surprise, it does a remarkable job handling this type of content too.

Again dialogue was easy to hear even with basic cable, and there wasn’t any distortion or digital noise to make note of.

Here’s a quick tidbit you may find helpful though — for this type of content, I’d recommend using the adaptive mode so you don’t have to fiddle with the settings constantly.

The adaptive mode, like the name suggests, adapts the sound to whatever it is you’re watching – optimizing content on the fly and I found it to work really well surprisingly.

But as far as sound quality in general, everything sounded pristine, so no complaints there either really.

It works really well with everyday television viewing and content in general.


Check Availability Of The Samsung HW-A550 Soundbar


Likes/Pros


  • 250 watt subwoofer delivers clean powerful bass
  • 160 watt soundbar (410W system total) offers incredible sound quality
  • Versatility that makes it a great choice for a wide range of content
  • Great for movies, gaming, music, etc.
  • Ease of use with regard to setup
  • Choice of various sound modes
  • Can be used with external Samsung speakers
  • Bluetooth capability
  • Wall Mountable


Dislikes/Cons


  • No eARC
  • Doesn’t include HDMI
  • USB Port Placement
  • Surround sound effects sometimes narrow


Final Thoughts


Overall, the Samsung HW A550 is a fantastic soundbar that passes nearly every metric upon which a quality soundbar is judged on with flying colors.

It handles movies, music, and even gaming with ease, and is super easy to set up.

The quality of the audio itself is really solid, and because of that, I have no issues with recommending it.

Check Availability Of The Samsung HW-A550 Soundbar


Specs


The specifications of the Samsung HW A550 are as follows:


Color


Black

Number of Channels


2.1

Total Power (W)


410W

Special Features


Compatible with SWA-9100S

Audio Processing


Dolby
Dolby Digital 2ch

DTS
DTS 2ch

Audio Features


Sound Mode
Surround Sound Expansion,
Game,
Standard,
Adaptive Lite,
DTS Virtual:X,
Bass Boost

Wireless Surround Sound Ready


Yes

Number of Speakers


5

Subwoofer Included


Yes

Subwoofer Type


Wireless

AV Decoding Formats

Formats


WAV, MP3, WMA, OGG, FLAC, AAC, AIFF

Connectivity


HDMI In :1, HDMI Out: 1  Optical Inputs : 1, USB Music Playback, Bluetooth, Bluetooth Power On, One Remote Control, Power Consumption


Stand-by Power Consumption (Main)

0.5

Stand-by Power Consumption (Subwoofer)

0.5

Operating Power Consumption (Main)

25

Operating Power Consumption (Subwoofer)

45W(36W : Dual)

Free Voltage

Rated Voltage

Energy Star


Dimensions & Weight


Product Dimensions (W x H x D)


33.9″ x 2.2 “x 3.3”

Product Weight (lb.)


16.3 lbs

Subwoofer Dimensions (W x H x D)


7.9″ x 13.9″ x 11.4″

Subwoofer Weight


11.7 lbs

Package Dimensions (W x H x D)


36.5″ x 17.1″ x 10.7″

Package Weight


21.6 lbs

Shipping Dimensions (W x H x D)


36.5″ x 17.1″ x 10.7″

Shipping Weight (lb.)


21.6 lbs

Accessories


Remote Control

Wall Mount Kit

Battery for Remote Controller

Cable Included : Optical

ENERGY STAR® Certified

Sony STRDH190 Review – Quality 2 Channel Stereo Receiver

Sony STRDH190 Review – Quality 2 Channel Stereo Receiver


The Sony STRDH190 stereo receiver produces crystal clear, 2 channel sound with 100 watts per channel. Its slim design allows for easy placement, and can switch between 2 connected pairs of speakers. Supporting high resolution audio, Bluetooth connectivity, and a phono input, it’s suitable for stereo sound enthusiasts.


Check Availability Of The Sony STRDH190 Receiver


In this Sony STRDH190 review, we’ll take a closer look at a powerful stereo receiver that could enhance your home theater and music listening experience.

With 2 channel support, it can deliver high-quality sound and connectivity for speakers, turntables, TVs, and other devices.

I figured it’d be worth discussing since there may be people interested in stereo sound who aren’t sure which option might be good for it.

So with that said, let’s see what features it offers, and if it’s the right choice for you.


Features


Capabilty To Produce Hi-Res Audio


Support for studio quality sound through High Resolution Audio, allows for better immersion.

Powerful Amplifier Minimizes Distortion


With a hidden amplifier and large capacity power transformer, an impressive amount of impressive power is delivered with 100 watts 2 channel sound.

It also minimizes distortion, and allows for switching between 2 pairs of connected speakers.

Quality Design Delivers Precision Audio


Due to its quality construction, vibrations from external sources are reduced giving you a more accurate sound.

An Aesthetic Low Profile Design


This sleek low profile design gives enhanced placement flexibility.

Analog & Digital Connections


Boasting both analog & digital connections, it’s simple to hook up your retro devices like CD players, turn tables etc.

Or you can use Bluetooth to stream wirelessly.


Bluetooth Standby For Easy Control


With Bluetooth standby, once paired, the device stays paired, and allows you to turn on the receiver with that device.

Built In FM Antenna That Can Access A Radio With 30 Station Presets


A built-in FM antenna that provides access to a radio with 30 station presets, allows you to listen to your favorite channels when you want.


Check Availability Of The Sony STRDH190 Receiver


How To Set It Up


Setting up the STRDH190 is going to depend on how you plan to use it.

Now right off the bat, it’s important to mention that being this is a stereo receiver, there’s no HDMI slots or subwoofer output.

So if that’s something important to you, you may wish to go with another.

Here’s a few ideas in that case.

https://easyhometheater.net/the-best-home-theater-receivers


But if you’re simply looking to connect a few bookshelf speakers to listen to music, here’s how you can do that.


Plugging The Receiver Into Your TV


Though this receiver doesn’t have an HDMI input, it can still be used with a television if it has red & white RCA outputs.

First make sure everything is powered off before connecting anything.

If the TV does have RCA outputs, plug the cables into the appropriate inputs labeled L & R on both the TV and the receiver.

Then connect your speakers into the corresponding black and red terminals for your left and right speaker.

Just make sure the wires aren’t touching as this may cause it to turn off.

You’ll also need speaker wire if you aren’t using Bluetooth since it doesn’t come with any.

This is the one I use.

But after that, turn everything back on and everything should be good to go.

If you’re just using the speakers without the TV, then simply plug the the speaker wire into the black and red terminals.


Using The Receiver’s Bluetooth Capability


If your speakers are active Bluetooth speakers, meaning they have their own internal power, then you can pair them with the receiver which is more straightforward.

To do this, simply push the pairing button until the word pairing flashes on the receiver’s display.

Then pick it from the list of devices in the menu of that device.

After that they should be paired.

You can also then control it with a smart phone or tablet.

As a side note, if you’re the DIY type, there’s also a way you could technically make your speakers or even subwoofer Bluetooth if you chose to do so.

https://easyhometheater.net/how-to-make-surround-speakers-wireless


Performance/Sound Quality


First Impressions On The Sound Quality


The quality of the stereo sound the Sony STRDH190 allowed my speakers to output was really awesome.

From my experience, this receiver provided more than enough power for the speakers that I tested with it.

I tested the Sony SS CS5 and the AudioEngine A1 speakers with this receiver to see how the the device fared with traditional and Bluetooth speakers.


How The Receiver Performed With The Sony SS CS5 Speakers


Starting first with the CS5s, what was immediately apparent was the quality of the stereo imaging that the receiver allowed them to produce.

When using them with all kinds of music, there was no distortion or coloration in the audio quality.

Everything sounded great to my ears — probably because of the STRDH190’s impressive 100 watts of available power for each speaker.

For context, you’d probably reach noise complaint territory before approaching the upper bounds of that overall 200 watts limit.

But the power is certainly there in spades if you needed it.

There weren’t any changes to the audio signature that some receivers may introduce.

Everything just sounded crystal clear.

What was also really cool was the receiver’s compatibility with high resolution and lossless audio formats.

To keep it brief, when using those formats with content that supported it, it allowed my speakers to produce an even higher degree of sonic fidelity that was really impressive.


Connection Performance With The Audioengine A1 Speakers


The Sony STRDH190’s ability to connect 2 different sets of speakers and play both together — or switch between them via zones was also really helpful.

That can be really helpful if you want to listen to 2 different pairs of speakers that might be in different rooms.

Testing it with the Audioengine A1s, I found that the feature worked without issue, and was actually really simple to connect.

Bluetooth connectivity was also a breeze, and turning the receiver on via smartphone I found to be really cool.

With Bluetooth 4.2 and aptX capabilities, the audio quality remained excellent whether it was streamed from my phone, tablet, or computer.

There weren’t issues with latency or the connection either, and listening to music through it showed no discernable drop in audio quality.

The connection remained solid the entire time.

There’s even a headphone jack on the STRDH190 should you wish to listen to your content that way.


Check Availability Of The Sony STRDH190 Receiver


Thoughts On Its Appearance


If there’s one distinguishing feature that Sony branded receivers are known for, it’s their awesome design.

While not massively important comparatively, a good looking receiver can make your entertainment center look that much better.

The Sony STRDH190 certainly continues the tradition.

It’s a stereo receiver with a minimalist design that genuinely looks high end.

The brushed metal on the front of the chassis looks & feels premium, and the matching input selector and volume knobs adds to the aesthetic.

I did notice the knobs felt a little stiff at first, but they felt fine after a little bit of time.

There’s a metallic Sony branding on the top left though, and a helpful black & white display that gives source information on things like the current input.

That display interface was also visible even in a bright room, so that’s definitely a plus.

On the the top & back there’s vents present for proper heat dissipation, and metal feet on the bottom for stability.

Curiously enough, I noticed there’s only 2 metal feet situated in front, as the back half of the receiver uses the chassis itself for stability instead.

On the back you have the typical speaker connection options, and interestingly enough HDMI inputs & outputs aren’t present.

The remote felt pretty standard in the hand, and had the basic settings you’d expect from a pack in remote like input selection, volume, and playback controls.

When looking at the STRDH190 in terms of size, I felt it was pretty normal for a receiver.

Coming in at 11x17x5.2 inches, it’s not the smallest thing in the world but not absolutely gargantuan either.

The low profile design is great at only 5 1/4 inches tall, allowing easy placement in most AV cabinets and entertainment centers.

Plus it just gives the device a sleek look in general.

I felt it gave off a premium first impression that’s appreciated.

If anything, it’s a receiver that feels like it’s meant to last.

With a clean and contemporary aesthetic, I think it’s an attractive receiver that fits in with the look of most rooms.


Overall Thoughts


Something to remember when it comes to this receiver is it doesn’t have an HDMI input or output; meaning unless you use an adapter, connecting a device specifically via HDMI isn’t possible.

There’s also no sub input or wifi barring it from using a wired subwoofer.

Now whether those things are particularly important to you are for you to decide, but honestly weren’t in my case.

The receiver could technically use a bluetooth sub if it was compatible so there’s that.

But the most important thing and what it does particularly well, is it delivers a straightforward high quality stereo experience without the fluff.

It’s a really solid performer in my opinion, that provides excellent output for stereo sound listening.

If you can live without those specific features, and simply want to enjoy great stereo sound, then the Sony STRDH190 is awesome in my opinion.


Likes


  • 100 watts per channel delivers abundant power
  • Clean sounding audio
  • Bluetooth capabilities work great
  • Ability to connect 2 sets of speakers
  • Slim profile allows easy placement of the unit
  • Easy setup


Dislikes


  • Lacks HDMI slot
  • No Wi-Fi
  • No sub input


Final Thoughts


Hopefully you enjoyed this Sony STRDH190 review and it helped you decide whether this is the right receiver for you.

To sum it up, it’s a great performer, and if you’re someone that’s simply looking for something that’ll effectively get the job done with quality stereo sound, I’d definitely recommend it.


Check Availability Of The Sony STRDH190 Receiver


Specs


The full Specifications of the Sony STRDH190 are as follows:

NUMBER OF AMP. CHANNELS


2ch (Supporting Speaker A+B)

SPEAKER IMPEDANCE


6–16 ohms

POWER OUTPUT


100 W + 100 W (8 ohms, 1 kHz, THD 1%)

AUDIO FEATURES


Phono Volume Offset

TUNER FEATURES


FM / Yes
AM/ No

PRESET CHANNEL (FM/AM)


TTL30 (30/- )

INPUT AND OUTPUT TERMINALS


Analog Audio Input (4), Phono input (1), Headphone Output (1)

SPEAKER OUTPUT TERMINALS


A/B

NETWORK FEATURES


Bluetooth Receiver

GENERAL FEATURES


POWER REQUIREMENT
AC 120 V 60 Hz

AUTO STANDBY
Yes

Size & Weight
WEIGHT (LB)
14 lb 13 oz (6.7 kg)

DIMENSIONS

(W X H X D IN)
17″ x 5-1/4″ x 11-1/4″ (430 x 133 x 284 mm)


How Can I Make My Surround Speakers Wireless?

A picture of a speaker in the article called how to make surround speakers wireless

How Can I Make My Surround Speakers Wireless?


Wireless speaker kits and internal power sources are two options to make surround speakers wireless. Kits stream wireless signals like RF, Wi-Fi, or Bluetooth, but may require receivers. Internal sources require rewiring the speaker with a battery, but may offer more power and stability. Each option has benefits and drawbacks.


Check Availability Of Rocketfish RF-WRSK18


Be it intrigue or necessity, the very concept of making your existing speakers wireless may be something you didn’t even think of until now, but realize doing so could make all the difference in adding convenience to your overall experience.

Wires all over the place can be annoying and not to mention unsightly (that’s before considering someone potentially tripping over them)


Ideally you’d want your home theater space as tidy as possible since it makes for a markedly better experience as far as the aesthetics of it are concerned.

But besides hiding the wires, is it even possible to ditch the wires all together, and if so, how would you even go about doing it?

Well the answer to that question is a bit multifaceted so here’s how to make your regular surround speakers wireless along with some other important things to know.


What’s The Difference Between Wired & Wireless Speakers Work And How Do They Work?


Before we dive into why you might want to make your setup wireless, you’re probably wondering well how do wireless speakers work?

So with that, it’s important to understand how wired & wireless speakers actually work since it’ll give some helpful context on everything.

For instance, the term “wireless speakers” is actually a bit of a misnomer since it implies no wires at all, but that’s actually not necessarily always true.

Speakers whether wired or wireless still need 3 things to work, power amplification, and audio signal for the speakers to actually work.

It’s the way they actually achieve those things that makes the difference between wired and wireless.


In a wireless speaker, the audio signal is what gets sent wirelessly to your device whereas when it’s wired, this is done through cables.

Differentiating further, wireless speakers have use their own sources, which are then powered by an external cord since it’s impossible to get that power wirelessly unless they’re also battery powered, and receive their audio signals via IR (infrared light), RF (radio frequency), WI-FI, or Bluetooth.

Wired speakers on the other hand don’t have a built in amplifier or battery, use a copper wire or cable for the audio signal, and get their power from an external receiver.

However there are kits to make them somewhat wireless which actually makes a great segue for why you may want to do so.


Why You’d Want To Make Your Speakers Wireless


There’s actually a few reasons why someone would want to make their speakers wireless, so I’ll detail a few possible reasons why.


Reason #1 Physical Limitations


Perhaps running wires from the back of the room is impossible without them crossing in front of a doorway/ living space and even placing a rug on top doesn’t help.

Or perhaps you feel there’s just not enough physical space in general without the wires posing a tripping hazard so you make the decision to go wireless.

This of course depends on your current home theater seating, but wireless is typically the preferable choice comparatively.


Reason #2 Wires Look Unsightly


Another reason you may want to go wireless is the wires themselves look unsightly.

Maybe you’re renting and can’t afford to drill holes in the walls to hide them, or maybe that level of commitment is a bit much in general so you decide to forgo them in a different manner.

Either way you might decide on this as a way to make your entertainment center look as clean as possible.

Sure you can hide them, but you may want to skip the wires all together.


Reason #3 A Significant Other Not Liking The Clutter


Yet another reason you may be looking into making your speakers wireless is your significant other giving flack for the additional clutter wires bring.


Reason #4 Wireless Capabilities Would Be Convenient


There’s also the reason that setting up wireless surround sound introduces a certain level of convenience that’s hard to go back from once you’ve experienced it.

Using a favorite older speaker with more placement options can be really convenient.


Reason #5 It Just Sounds Like a fun DIY Project


Or perhaps, maybe the reason you’re looking into this is you’re a home theater enthusiast and it just seems like a fun DIY project which is possible too.


Can You Make Any speaker Wireless & Are There Any Limitations?


So can you make any speaker wireless & are there limitations with doing so?

The answer to that is a bit multi faceted so I’ll try to explain as simply as possible.

Since the traditional speaker is passive by design — that is, requiring an external power source and an amplifier, it’s by default there’s always going to be some form of wires involved just because of the simple fact it’s impossible to transmit power.


The only way to make it fully wireless would literally involve adding some sort of internal power source and a bunch of other leg work that would quite frankly be a cumbersome process.

What you can do however, is reduce these wires as much as possible by using a wireless speaker kit which we’ll go over in a sec.

Think of it as a way to allow you to shift your existing wires out of the way rather than getting rid of them entirely.

Again keep in mind that while it is technically possible to make any speaker entirely wireless, the limitation there is it’s a much more involved process that isn’t the most user friendly.

So because we like to make things simple here, we’ll only focus on the surround speakers since the front speakers are already in front of the room and should be out of the way by default.

However if you’re only using 2 speakers ie. stereo, then this guide will be applicable for you as well.


What Is A Wireless Speaker Kit?


A wireless speaker kit is a kit that includes a transmitter and receiver that enables wireless functionality for otherwise passive speakers.

It basically allows you to make your speakers “wireless” in a sense since they wouldn’t have to be connected to the main source device, your receiver.

However there’ll still likely be some form of wire present since the speakers themselves need power to work.

Things could quickly become confusing too when you realize there’s an abundance of options available all with different functionalities, capabilities etc.

Plus it depends on the room you plan on actually using it in too since the range of each could potentially be different.

So to make it easy, here’s what to consider when choosing one along with ultimately, my top recommendation & what we’ll actually be using for this guide.


The Types Of Speaker Conversion Kits


In general, there’s typically 4 types of these speaker kits you’ll come across; ones with built in amplifiers, ones without a built in amplifier (transmits and receives audio signals only), ones that transmit radio frequency signals (RF), and finally those that just transmit bluetooth signals.

What works for you will of course depend on the type of speakers you have (active or non active) your setup, and your needs.


Transmission Range


The transmission range of the kits is also important to consider since that’ll be what directly influences where you can place your speakers.

The most common range is between 100-300 feet from what I’ve noticed.

Some even work when placed behind solid objects or walls (though this range may be reduced), boasting audio compression mitigation through specialized amplifiers.


Ease Of Use


Finally, one of the most important factors when choosing the right wireless speaker kit is ease of use!

What good is all of these features if you don’t know how to use them?

Luckily, the speaker kit we’re using as the basis of this article and my personal recommendation, the Rocketfish RF-WRSK18, makes setup super simple so you’ll be enjoying your surround sound in no time.


What’s The Best Wireless Speaker Kit?


So one of the best wireless speaker kits in my opinion is the Rocketfish RF-WRSK18 due to its accessibility.

The Rocketfish RF-WRSK18 being a lot easier to setup by automatically detecting the transmitter receiver pair is a big reason why I think I like it so much since it’s a lot less work to get things functioning.

The one thing I will say though is that you’ll still need some form of speaker wire for the surround speakers themselves if you don’t already have some which is something to keep in mind.

These are the ones I use.

Luckily it’s not too difficult to get everything working so that’s definitely a plus and the audio quality seemed good too.


Is It Possible To Make Surround Speakers Wireless?


While you could technically modify your speakers to make them fully wireless by physically installing an amp, bluetooth transmitter and power source in each one, it that may be more time intensive, as well as way more complicated as well.

Not something I’d generally recommended unless you really know what you’re doing, understand the risks involved, and understand wiring and soldering.

Still, if you’re curious, there are videos that actually details that process.

But a wireless speaker kit, can provide additional placement flexibility with surround speakers.

Again keep in mind the surround speakers themselves will still be wired, they’ll just instead be connected to that wireless receiver instead which can be placed in the room.

But if using the Rocketfish RF-WRSK18, here’s how to set up the speakers with it.

First you’ll want to take everything out the box and separate the transmitter and smaller receiver into 2 separate piles.


The power brick and cables belong to the transmitter, and the flat wire is the power supply for the receiver.

To differentiate between the 2 so you know which one is which; the transmitter is the smaller unit and would be connected to your av receiver, while the bigger of the two is the wireless receiver that your rear speakers would connect to and can be placed anywhere.

Before doing anything, make sure all of your equipment in your entertainment center is turned off.

Now you’ll want to take the transmitter (the smaller unit) and plug it into the surround left & right slots of the receiver where those speakers would normally connect into.

It’s even color codeded to make it easy.

Just make sure that whatever color you choose for one end of the wire is the one you choose for the other.

Then plug the transmitter into the wall.

Next using speaker wire, connect your surround speakers to the included smaller receiver and plug that in.

Then make sure to switch on both the transmitter and the receiver and turn everything else in your system back on.

Adjust the volume on the back to what you feel is best.

Check for the system in Bluetooth settings in your device, pair it, and you’re good to go.

That’s it! There’s other ways to make to do this but this was the easiest method I could think of.

Some newer receivers even allow you to play bluetooth and wired at the same time so that’s an option potentially available to you as well.


Can I Make My Subwoofer Wireless Too?


If you were wondering if it was possible to make your subwoofer wireless too, surprisingly it actually is.

Similar to a speaker kit, there’s also wireless subwoofer kits made for this exact purpose as well.

Here’s a good one.

DYNASTY PROAUDIO WSA-5TR


You’ll need a Y connector as well for this since the RCA cable would connect into the end of the Y connecter from the slot labeled sub on your receiver, and the 2 jacks of that same connector plug into the transmitter; while the receiver simply plugs into your subwoofer and you’re good to go.

It’s a similar process to setting up 2 subwoofers.

Remember the subwoofer will still need to actually be plugged in with a wire for a power source, but it definitely gives you a wider choice in terms of placement of the subwoofer which is nice.


Final Thoughts


So to sum up everything talked about here today, while yes it’s technically possible to make your wired home speaker system wireless through more complicated means, using a speaker kit can allow for a cleaner setup.

Though there’s the caveat of it being best used with surround speakers, and the fact that you can’t entirely ditch the wires since the speakers still need a power source to work; but it can still be a great way to at least get them more out the way if that makes sense.

But hopefully this at least helps somewhat and you learned something new.

That’s all I have for now. Until next time, make it easy, keep it simple.

Denon AVR-S760H Review (Awesome 7.2 Channel Receiver)

Denon AVR-S760H Review (Awesome 7.2 Channel Receiver)


If the receiver or amp that powers your speakers is under powered, then the full potential of your system won’t be utilized.

That’s why it’s better to choose an avr that not only has the most amount of power within your budget, but also one that actually meets your needs with features.

So in this review of the Denon AVR-S760H, we’ll take a look at what I feel is one of the best 7.2 channel receivers for quality audio.

It has support for 75 watts of power per channel; meaning it’ll have adequate power to suit one’s needs in a variety of rooms.

It’s also a successor to one of the most popular avr lines from Denon.

In short, it’s an excellent AV receiver for home theater speakers in my opinion.

A Quick Overview Of My Thoughts


I liked the Denon AVR-S760H receiver’s user-friendly interface that simplified setup & use. Besides powering a surround sound speaker system with 75 watts of crystal-clear audio performance, there’s also Dolby Atmos & DTS:X support, bluetooth for wireless music streaming, 4K/8K resolutions, 6 HDMI inputs, and other helpful features.


Check Availability Of Denon AVR-S760H 7.2 Channel Receiver


Its Features


7.2 Or 5.2.2 Channel


With support for up to 7 speakers and 2 subwoofers, (75 Watts 2 Channel driven) & 5.2.2 Dolby Atmos surround sound, you’ll be able to enjoy your content with great sound quality.


Denon Audyssey MultEQ Calibration


The AVR-S760H has a capability called Audyssey MultEQ.

MultEQ allows it to measure acoustics in the room and tailor the sound to best suit your content through its advanced calibration system & the included microphone.

Plus it’s also able to utilize the MultEQ-X software format for additional customization.


HEOS Wireless Audio Streaming


Denon’s HEOS app support allows you to connect your speakers to the local wifi network and stream your music wirelessly.


Auto Low Latency Mode & Variable Refresh Rate


The Denon AVR-S760H’s Auto Low Latency & Variable Refresh Rate features minimize screen tearing and reduce judder from frame rate drops; ensuring a smooth picture quality from movie watching to gaming


Multi Room Support


Using the HEOS system, enjoy the ability to build a wireless multi room system to play your content in multiple rooms over Bluetooth simultaneously.


6 HDMI Inputs (3 HDMI 2.1)


6 HDMI inputs, (3 of which are version 2.1) as well as a 2.1 output, gives you plenty of options when connecting your devices and audio components to the S760H.

There’s also 8K upscaling support for all inputs if used with an 8K TV.

Dolby Atmos Height Virtualization Technology


With Dolby Atmos Height Virtualization Technology, enjoy an immersive surround sound that simulates sound effects coming from every direction.


Voice Assistant Compatible


Compatibility with popular voice assistants provide the ability to control the AVR-S760H receiver hands free, giving you a greater sense of convenience with voice control.


Bluetooth & Wifi Enabled


Connect any of your Bluetooth/wifi enabled devices to the S760H receiver and enjoy your content wirelessly.

Support For Latest Formats


Support for many of the latest AV formats is present with Dolby Atmos & DTS:X, Dolby Vision, 8K UHD, HDR10+, 4K 120Hz, VRR, eARC, & HDCP 2.3 support being present.

Turntable Input


The receiver also has an input for use with a turntable, meaning it’s possible to enjoy vinyl sound as well.

Various Connection Options


With a front facing USB port, 2 composite inputs & output, 2 digital inputs & output, and even a coaxial digital input, there’s a variety of connection options


Check Availability Of Denon AVR-S760H


How The Device Is Set Up


The process of setting up the Denon AVR-S760H depends on what you plan to use with it, so we’ll quickly go over how to connect a few common devices to it.

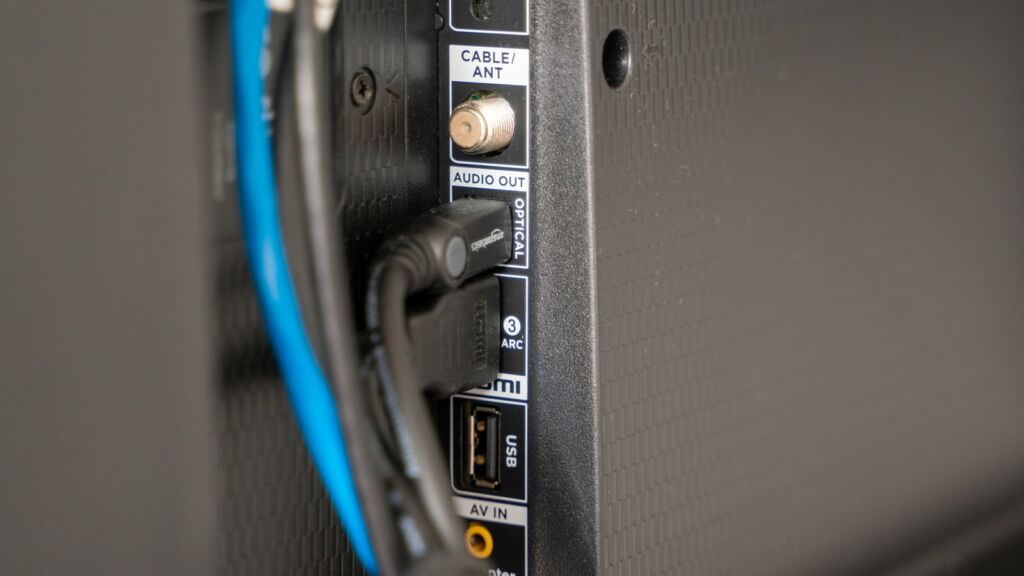
Though before connecting anything, the first thing you’ll have to do is connect an HDMI cable from the slot on the back of the TV that says ARC or eARC.

HDMI is what basically allow passthrough of both sound and video.

If you see an ARC label, that means it can do 1080p with audio, while eARC supports up to 4K & 8K resolutions with higher resolution audio.

If not, then a combination of an HDMI and optical cable may be needed for receiving audio and video.

Projectors may not always include an ARC slot, so using the Denon AVR S760H with one could be slightly different than with a TV.

For example, if you wanted to use a projector, the HDMI would go from the HDMI output of the receiver into the input of the projector.

Then from there, whether using a TV or projector, any additional devices you planned to use would use additional HDMI cables plugged into each input on the receiver per device.

The speakers would plug into the receiver via speaker wire.


Setting Up The Receiver With A Cablebox


Say for example you wanted to connect your cable box to your brand new Denon receiver.

Well the way you would do that is by taking an additional HDMI cable, plugging it into the HDMI slot next to the HDMI ARC slot on the TV, and connecting the other end into the output of the cable box.

Then you’d have to set your input on your remote to match the slot the HDMI cable was in.

So for example if it was in slot 1, you’d have to set the receiver’s input to either HDMI 1, or AV 1 if you’re using an optical cable.


Connecting It With A Video Game Console


Modern day video game consoles mostly use HDMI technology, (Xbox Series X|S, PS5, Nintendo Switch) so the way you’ll hook those up will be similar to the way you would with a cable box.

Plug the cable into the HDMI output on the back of the console, and plug the other end of the cable into the input of the receiver.

The only difference here is since these newer devices support things like high dynamic range & Ultra HD, if your TV doesn’t support eARC to display these new formats, you’ll need to use an optical cable in addition to an HDMI cable.

After connecting the optical cable from the console and the receiver, you’ll also need to make sure you use the correct input so that sound comes through.


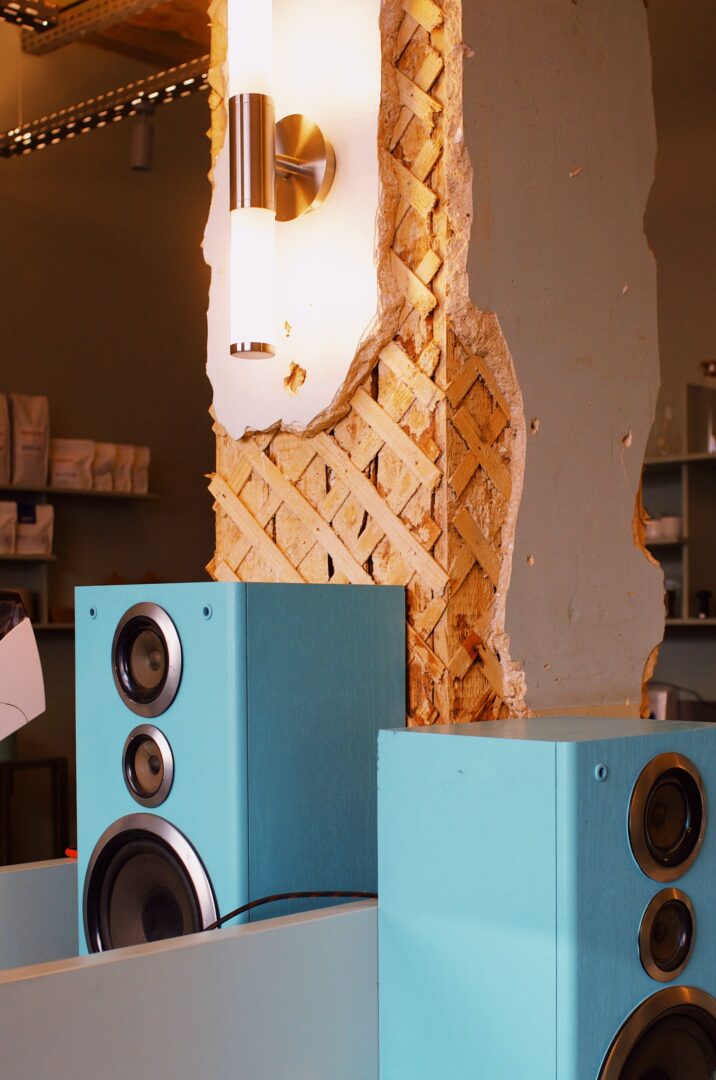
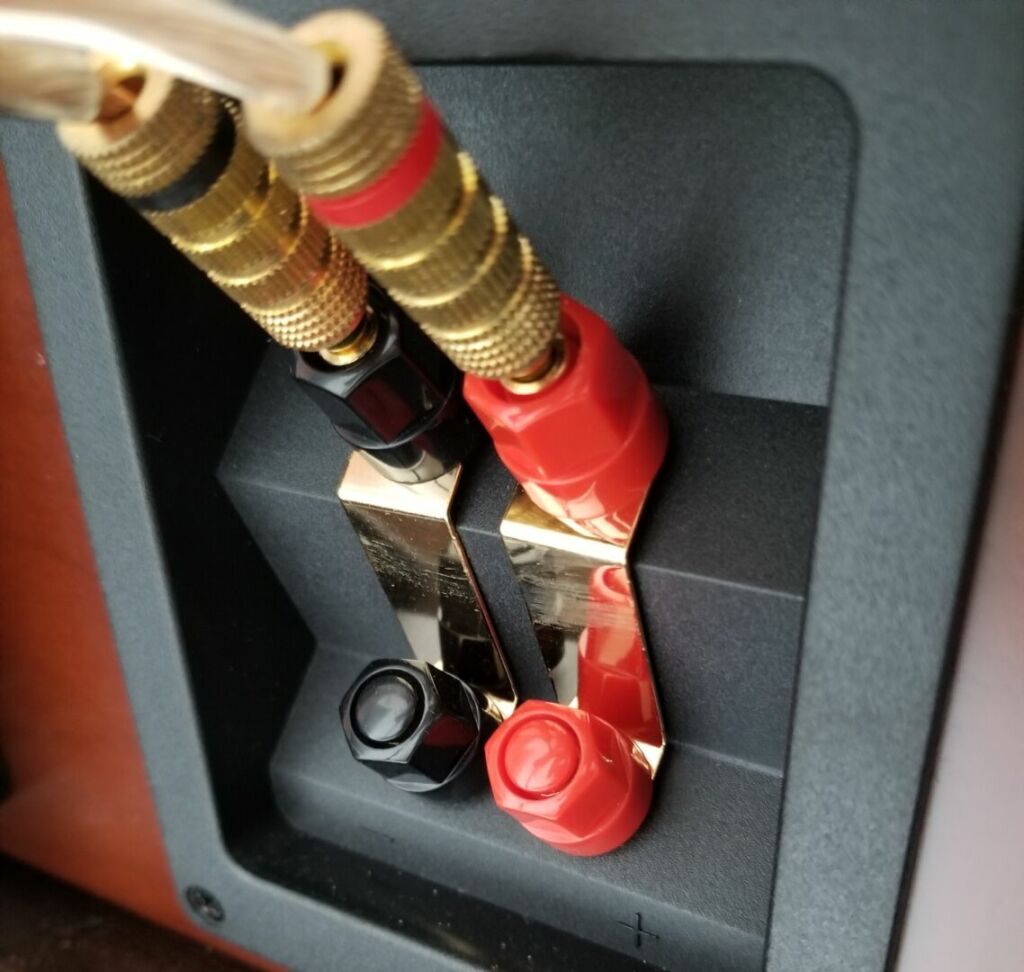
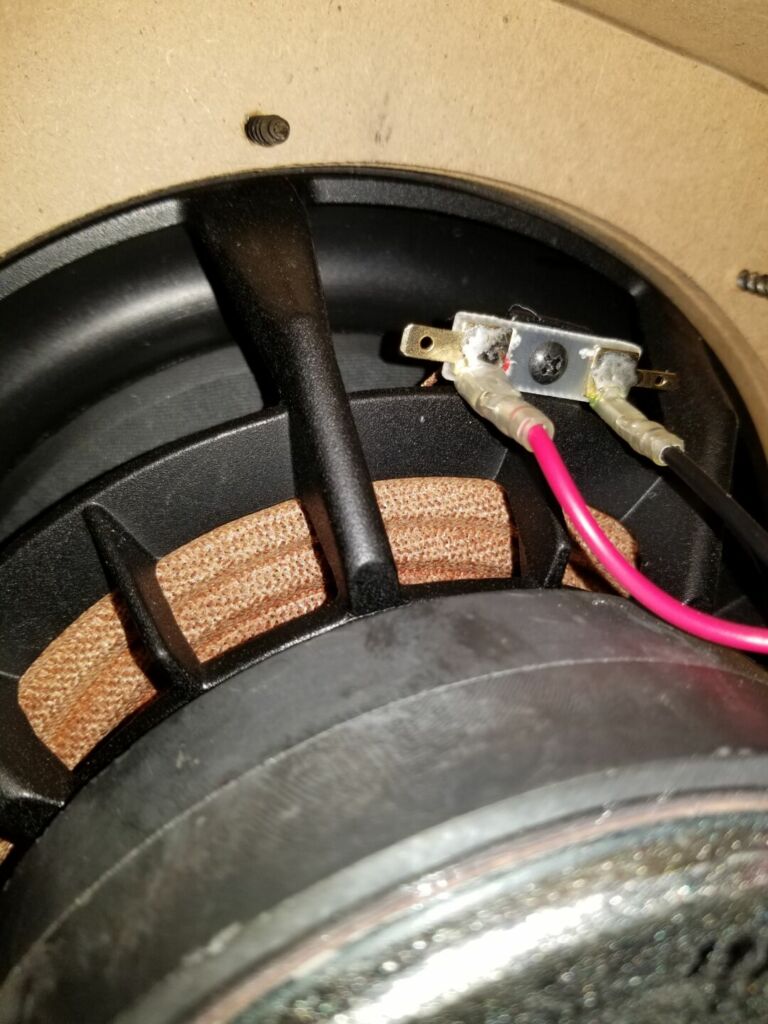
Getting it Connected With Speakers


Connecting your speakers isn’t hard, and really only takes a few minutes since you just need to strip the speaker wire and connect it to the speakers and the receiver.

Here’s how to do that if curious.

https://easyhometheater.net/how-to-set-up-a-home-theater


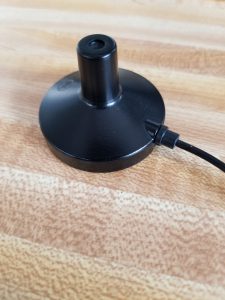
I’d also recommend using the Denon’s Audyssey speaker calibration since it only takes a few minutes, and makes noticeable difference sound quality wise.

To do that, simply plug the included microphone into the receiver, place it on a level surface, and then let the test tones play.

It’ll also label your inputs which you can then change later.


Performance Of The Denon S760H AVR


Initial Impressions


Okay long story short, would I say that the Denon AVR-S760H is actually a good receiver for a home theater?

Yes, to put it simply.

In my review of it, considering both its performance and just how feature rich it is, it’s a fantastic receiver in my opinion.

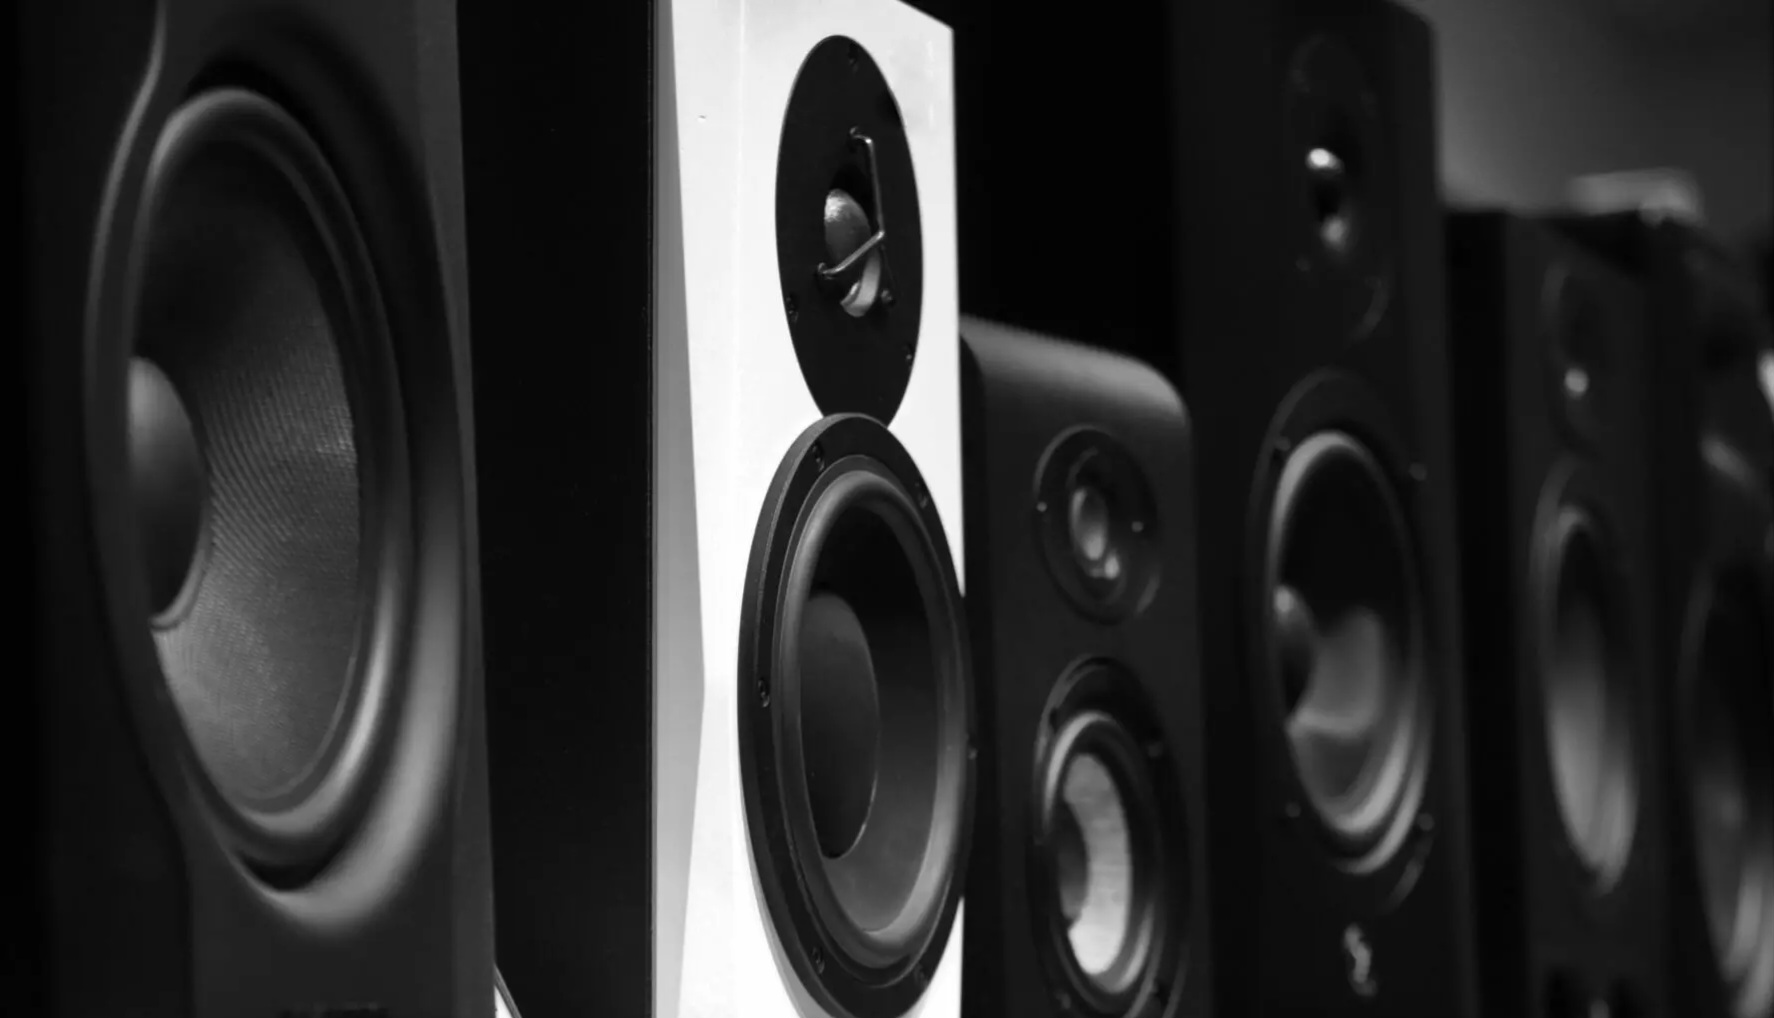
When testing various speakers with it, I’d notice they would have no problem playing loudly without me even having to crank the volume much.


It was definitely reassuring, because it meant the receiver was more than capable of handling a variety of home speakers, including tower speakers.

It handled a 7.2 surround system with ease from my testing, so no worries in that regard.


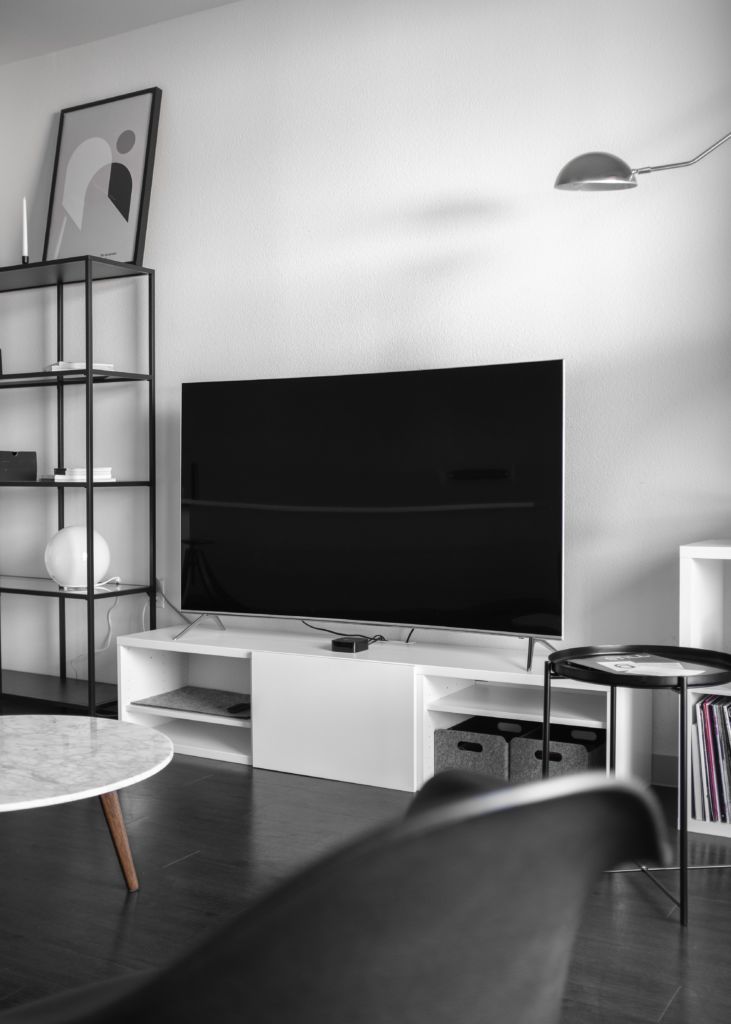
Performance With The TV


The fact that it supports up to 8K resolutions, and 4K/120Hz due to the capabilities of HDMI 2.1, means that while some TVs may not be able to fully take advantage, the receiver is still future proof in that regard.

Its overall performance with my television was solid, and I didn’t experience any issues with connectivity or anything like that.

The receiver simply worked how it should.

I’ve had rare instances with past receivers where there’d be visual glitches that’d show on my screen, but there wasn’t anything similar to that here luckily.

The actual HDMI 2.1 input’s connection was firm too, and it didn’t feel like the HDMI cable would wiggle loose or anything.

Higher resolutions like ultra-hd looked crisp on my TV.


Ease Of Setup


Like I mentioned earlier, setting up the Denon AVR-S760H is luckily pretty simple

Using the device’s built in speaker calibration, I was able to adjust how things sounded.

Simply connect the included mic to the receiver, start the prompt, and it begins to optimize the sound.

To my ears, the difference the sound calibration made was massive, and I could easily tell the improvement in audio quality doing the calibration provided.

What’s nice is it’s really beginner friendly too, and even has visual prompts on screen to customize things further.

For example if you’re someone who prefers a lot of bass and don’t like the level the calibration placed the subwoofer at, you could simply go into the menu and adjust it individually.

The settings & UI are really streamlined, making it easy to understand and navigate.

It’s definitely one of many things Denon overall does really well I feel.


Check Availability Of Denon AVR-S760H


Surround Sound & Dolby Atmos/DTS:X Performance


After adjusting each of the home theater speakers, the level of clarity they had when watching movies was incredible.

The depth of the surround sound effect was immersive, and made watching content a treat.

Voices also sounded great when coming through my center speaker, and I didn’t notice any distortion when turning the volume up.

What really made things fun too was testing the different sound modes since each one would alter the sound in different ways.


It reminded me of the Onkyo TX-NR6050 receiver, since both the Denon and the Onkyo had various ways to customize the sound signature.

For example the Dolby Height Virtualization feature, which basically emulates surround sound without the external height channels, I felt added an extra layer to the content that made the sound experience enjoyable.

As for Atmos and DTS:X performance, those were incredible, and weren’t hard to setup in the receiver.

Though keep in mind the movie you watch has to specify that it uses Atmos or DTS:X formats for it to actually work.

What I especially liked though, was being able to adjust each surround and height speaker’s settings individually since it really allowed for a more custom sound.


How The Multi Zone Audio Feature Worked


Another really cool feature is the multi zone feature.

It basically allows you to have multiple sets of speakers, with separate audio/video signals simultaneously from the same receiver — using the 7 available channels.

So for example, if there were members of the family that wanted to watch different things, you could have 5 speakers playing a movie in one room, and have the other 2 speakers playing something entirely different somewhere else.

Or have 2 sets of speakers playing a different movie per room.

There’s support for up to 3 zones so you can mix and match how you see fit.

It’s a really helpful feature that actually has a lot of utility.

Testing it, it functioned properly, and I didn’t experience any disconnection issues or anything.

There’s even a dedicated smartphone app for controlling the unit from a mobile device, and an app for the audio called the Audyssey MultEQ Editor app.

Both are available on IOS & Android, and allow for further customization of the receiver’s audio and functions.

The Audyssey MultEQ Editor app was easy to use, and it allowed me to further calibrate my audio for an even better experience.


Quality Of Streaming, Bluetooth, & HEOS Connectivity


Being that this receiver has a dual-antenna transceiver for better connections through its Bluetooth and Wi-Fi streaming capabilities, I was pleased with how well it fared in this area.

I felt it was excellent for smart home integration due to its compatibility with other smart devices and products.

Bluetooth worked really well, and it only took a few seconds to seamlessly connect to my phone.

Moving around the room, and even into the next on a didn’t result in any drops in signal.

I think the dual-antenna transceiver helped with maintaining that solid connection which made content sound great through bluetooth.

HEOS Wi-Fi streaming was also simple to setup, and produced a similar result — with music sounding clear through my speakers.

This remained true even when using an additional set of HEOS speakers which provided an awesome listening experience.

Using my HEOS account, I was able to use different music streaming services which I noticed were consistent in their quality audio playback with my speakers.

The quality of the wired connections via HDMI and optical was also solid when using different electronics with it.


How It Fared With Gaming


For the people out there that are gamers, Denon even had the foresight to include an Auto Low Latency Mode (ALLM) and Variable Refresh Rate (VRR)

Long story short, these features help reduce latency so content on screen feels more responsive without stuttering or screen tearing should the frame rate drop.

Playing various games, there wasn’t any frame drops or lag, even in fast paced multiplayer games.

Everything simply remained smooth and snappy.

Performance of HDR & HDR10 with it was also beautiful, and the resolutions were pristine even in game menus.


Thoughts On The Unit’s Appearance


Given that the main job of a receiver is to power the speakers it’s connected to, the appearance of the receiver isn’t always as important.

Typically it’s things like performance, price, reviews, budget, etc that often takes more precedence.

That said, the Denon AVR-S760H still gave an amazing first impression, with its quality design language.

I felt it had a subtle, yet premium look that looked really nice in person.

I noticed the brushed aluminum cabinet did a pretty good job at mitigating fingerprints too which I appreciated.

The large black & white digital display up front showed all of the functions of the receiver like the different sound modes and inputs.


There’s also metallic volume control knobs on the left & right, and the power button & source select button which is pretty convenient.

Under them is a quick select section with buttons for HEOS Music, Blu-ray, and so on.

Beneath that is the jack for using a pair of headphones with it, an optimization microphone port on the left side, and a USB port on the right.

What’s cool about this model is it’s a simple design, but there’s also nuance with the differentiating details like the metallic accents, and small antennas on the back.

With a more boxy look, it retains that traditional Denon aesthetic that their receivers are typically known and respected for.

The bottom line is that it’s a design that blends in rather than calling attention to itself, and I think it’s better for it — something that’ll supplement your room, rather than distract from it.

That said, you’ll want adequate room for it since it’s pretty hefty at 18.95 pounds, and 17.1 x 8.5 x 13.3 inches in size when including the antenna.

That means you’ll want some clearance between the bottom of the TV and the AVR as not to block your view.

Luckily, you can lay the antennas down horizontally without it impacting its wireless quality which is pretty awesome.

Also make sure there’s enough clearance from the wall so it has enough breathing room.

All in all though, it looks nice to put it simply.


Overall Thoughts


So with all of this being said, there’s nothing I really outright dislike about this unit being honest.

It really seems like everything just works.

I mean if I were to really nitpick, additional language support would be nice since it only supports English, Spanish, & French.

Or maybe the fact the included remote isn’t a universal remote and is pretty basic.

But other than that, there really isn’t a whole lot to critique.

It’s similar to the smaller AVR-S650H in that sense, just with support for more speakers.

I mean if you want an avr for use with more than 7 main speakers you’ll need a 9.2 channel receiver or higher; but anything less, this one handles surround sound beautifully.

To put it simply, if you just want a solid 7.2 channel receiver that’s easy to setup, and has solid audio and video quality, then the Denon AVR-S760H is an awesome choice to go with.


Check Availability Of Denon AVR-S760H


Pros/Likes


  • Great Audio Output
  • Abundant power for a 7.2 channel system
  • Support for all the latest formats like 4k, 8k, HDR10+, Dolby, Vision/Atmos,etc.
  • 40Gps HDMI 2.1 slots; 6 in total
  • Audyssey calibration optimizes your speakers for your room automatically with included mic
  • Bluetooth & wifi support
  • Multi zone feature allows you to use multiple sets of speakers with different sources of content simultaneously
  • Looks really nice


Cons/Dislikes


  • Remote isn’t universal
  • Language support only supports English, Spanish, & French
  • No Front HDMI ports
  • Heavy at 18 pounds


Final Thoughts & Who This Is For


In my opinion, the Denon AVR-S760H while being a great receiver, also strikes the perfect balance between number of connections, adequate power, and truly great audio quality.

With a plethora of useful features, should you need something for a 7.2 speaker setup or perhaps smaller, then this fits that standard nicely.

It even has Atmos support for additional speakers.

Simply put, it’ll serve you well in your search for a proficient receiver.

Highly recommend it!

Check Availability Of Denon AVR-S760H


Specs


The full specifications of the Denon AVR-S760H are as follows:


Brand Denon
Model AVR-S760H
Type A/V Receiver
Release Year 2021

AMPLIFIER


Channels 7.2
Certified 4 Ω Performance
Continuous 6 Ω Rated
Discrete Amplification

AUDIO


Audyssey Dynamic EQ
Audyssey Dynamic Volume
Compressed Music Enhancer
DAC AKM
Dialog Level Adjustment
Dialog Normalization
Direct Mode
Dolby Atmos up to 5.1.2
Dolby Atmos Height Virtualization
Dolby Digital EX
Dolby Digital Plus
Dolby Surround Upmixer
Dolby TrueHD
DSD via USB 2-ch Input
DTS 96/24
DTS Dialog Control
DTS Express
DTS Neural:X
DTS Virtual:X
DTS:X up to 5.1.2
DTS-ES Discrete 6.1, Matrix 6.1
DTS-HD High Resolution Audio
DTS-HD Master Audio
Gapless Playback
High Resolution Audio Formats via USB Apple Lossless, WAV, FLAC, DSD
High Resolution Music Playback via USB and/or Network up to 192 kHz
Maximum Channel Processing 7.1
PCM 2-ch/Multi-ch Input
Pure Direct Mode

AUDIO FORMATS


AAC, ALAC, FLAC, MP3, WAV, WMA

CALIBRATION


Auto Speaker Calibration System with Mic. Audyssey MultEQ
Optimized Bass Redirection

VIDEO


3-D Ready
Auto Low Latency Mode Pass-through
BT.2020 color space
Dolby Vision
HDR10
HDR10+
Hybrid Log Gamma (HLG)
Video Signal Passthrough up to 8K
Video Signal Type NTSC/PAL

CONNECTIVITY


AirPlay AirPlay 2
Analog Audio Line Input 2
Analog Pre-Outs 0.2
Apple Product Connection iPod, iPhone and iPad
Apple Siri
Bluetooth SBC
Bluetooth Headphone Transmission
Coaxial In 1
Composite Video Input 2
Composite Video Output 1
DLNA 1.5
Enhanced ARC
Ethernet
Front HDMI
Front USB
Google assistant
HDCP Version 2.3
HDMI Input 6 (1 front)
HDMI Output 1
Headphone Out 6.3 mm
HEOS
Optical In 2
RCA Composite Video In 2
RCA Composite Video Out 1
Remote App – Denon 2016 AVR Remote App for iOS and Android devices and Kindle Fire
Stereo RCA 3
USB Input 1 Front
Wi-Fi
Works with Amazon Alexa

ZONES


Powered Zones 2

MISC


FL Display 1 line
GUI Languages – 3
IP Control for CI
On-Screen Display – Hybrid Graphic User Interface
Quick Select Plus
Remote Controller – RC-1227

RADIO


Analog Tuner FM/AM
Deezer
Internet Radio TuneIn
Napster
Pandora
SiriusXM Internet Radio
Spotify
Tidal

CONSTRUCTION


Color-Coded Speaker Terminals
Front Panel not Metal
Large Speaker Terminals 7
Speaker Terminals 7

POWER


No Sound Power ECO On/Off: 29 W/39 W
Power Consumption 400 Watt
Power Supply AC 120 V, 60 Hz
Standby Power 0.1 Watt

GENERAL


Auto Power off
Dimensions (W x H x D) without antenna 17.1 x 6 x 13.3 inch (43.4 x 15.1 x 33.9 cm)
Dimensions (W x H x D) with antenna 17.1 x 8.5 x 13.3 inch (43.4 x 21.5 x 33.9 cm)
ECO Mode / Hybrid Standby Function
Warranty 3 Years
Weight 8.6 kg (18.95 lb)

SPECS


AM Effective Sensitivity 18 µV
AM Frequency 520 kHz – 1710 kHz
Bluetooth Frequency 2.4 GHz
Bluetooth Version 3.0 + EDR
DSD Sampling Rates via USB 5.6 MHz, 2.8 MHz
Ethernet Standard 100BASE-TX
FM 50 dB Quiet Sensitivity (IHF, 1 kHz, 100% MOD.) Mono: 2.8 µV (20.2 dBf)
FM Effective Sensitivity 1.2 µV (12.8 dBf)
FM Frequency 87.5 MHz – 107.9 MHz
FM Harmonic Distortion (IHF, 1 kHz) Mono/Stereo: 0.7%/1.0%
FM S/N Ratio Mono/Stereo: 70 deciBel/67 deciBel
Frequency Response (Analog In) ‘+1/-3 dB (10 Hz to 100 kHz, Direct mode)
Input Sensitivity and Impedance (Line) 200 mV/47 kilo ohms
Input Sensitivity and Impedance (Phono MM) 2.5 mV
Maximum Effective Power Output (6 Ω, 1 kHz, 1 channel driven, JEITA) 165 W (10% THD)
Phono Distortion 0.03% (1 kHz, 3 V)
Phono RIAA Deviation ±1 dB (20-20 kHz)
Power Output (6 Ω, 1 kHz) 110 Watt + 110 Watt (0.7% THD)
Power Output (8 Ω, 20 Hz – 20 kHz) 75 Watt + 75 Watt (0.08% THD)
Rated Power Output (6 Ω, 1 kHz, 1 channel driven, IEC) 140 Watt (1% THD)
S/N Ratio (Line, IHF-A) 98 deciBel
S/N Ratio (Phono MM, IHF-A) 74 deciBel
USB Terminal USB2.0 5 Volt, 1 Amp
Video Frequency Response 5 Hertz to 10 MHz, 0 dB/-3 dB (Composite)
Video Input Sensitivity/Output Level and Impedance 1 Vp-p/75 Ω (Composite)
Wi-Fi Standard IEEE 802.11 a/b/g/n
Wi-Fi Terminal Frequency 5 GHz, 2.4 GHz


Elac Debut 2.0 B6.2 Bookshelf Speakers Review

Elac Debut 2.0 B6.2 Bookshelf Speakers Review


This is the elac debut 2.0 b6.2 bookshelf speakers review, a quick spotlight on a pair of bookshelf speakers that I feel, are pretty great.

But why’s that, and more importantly, are they the right pair of speakers for you?

Let’s find out!


Appearance


Features


Specs


How To Set It Up


The Sound Quality


Likes


Dislikes


Final Thoughts


Appearance


Check Availability Of The Elac Debut 2.0 B6.2 Bookshelf Speakers


So when taking a look at the Elac B6.2, what’s immediately apparent is its understated aesthetic.

No doubt about it, the speaker definitely goes for a more relaxed look, placing more of the emphasis on performance rather than style.

Designed by Andrew Jones, formerly of Pioneer & Elac, these speakers are the epitome of “there’s more than what meets the eye”

Taking a closer look, the cabinet is made from a dark wood grained CARB2 rated MDF wood, and aside from a small metallic insignia towards the bottom of the removable grille, there’s not too much else going on.

Upon removing this grille, you’re greeted with a beautiful Iooking tight-knit patterned aramid fiber woofer that gives the speaker a more serious look and helps to spice it up.

Above it is a soft dome tweeter and below it is front facing port for acoustic clarity with a smaller logo below that.

It’s definitely a nice looking speaker, but it’s also not something that’s going to stand out either.

That can be either a good or bad thing depending on your preferences but I personally like it.

In terms of size, they’re pretty average I’d say at around 14 inches tall so they’re not small speakers by any means but they’re also not overly sized either.

Overall, if you prefer something low profile that’ll blend in with your room rather than standing out, you’ll like these speakers.


Features


Helpful Front Facing Ports


A helpful front facing port opposed to a back facing one allows you to place the speaker right up against the wall without worrying about unwanted acoustic resonance

Specially Designed 1 Inch Soft Dome Tweeter


Improved from previous iterations, this 1 inch soft dome tweeter now uses what’s called a wide roll surround, which helps the frequency response reach to 35kHz

Specially Designed Woofer


Improved from its prior iteration, this aramid fiber woofer boasts a better frequency response without compromising bass.

Solid Internal Bracing For Cleaner Sound


Internal bracing helps to reduce unwanted cabinet resonance which can alter sound, providing a much more accurate and cleaner sound


Specs


Box Contents


Pair of Elac Debut 2.0 B6.2 Bookshelf Speakers
Owners Manual


Inputs & Connectivity


5-way gold-plated binding posts


Total Power Ouput


120 Watts


Sensitivity


87db @2.83v/1m


Bass Driver


6 1/2 inch Aramid Fiber Woofer


Tweeter


1 inch cloth dome tweeter


Enclosure Type


2- Way Bass Reflex

Cabinet


CARB2 Rated MDF


Cabinet Finish


Black Ash Vinyl


Port


Dual Flared


Crossover Frequency


2200Hz


Frequency Response


44Hz – 35000Hz


Nominal Impedance


6 Ohms


Dimensions


7.69 inches x 14.76 inches x 10.55 inches

Weight


16lbs


How To Set It Up


Being that this is a passive bookshelf speaker, setup of the B6.2 will require speaker wire.

Keep in they don’t come with it so here’s what I typically use.

To summarize, all you basically need to do is cut the wire to the desired length you need, strip the wire, then either attach a connector and plug it in that way, or slide the wire directly into the terminal.

Placement of them is then obviously up to you.

Other than that, that’s really it in terms of setup.


The Sound Quality


The most important thing, how do the Elac Debut B6.2 speakers actually sound?

Well you’ll be happy to know they sound really impressive — and because of their 6 inch drivers improved from their predecessor, the original Debut B6, they deliver a full bodied powerful sound that still manages to retain those delicate details in a way that’s hard not to appreciate.


How They Perform With Music


To first test a speakers true capabilities, I typically like to do it by removing all extraneous factors (center channel, subwoofer, etc) then play a few music tracks from different genres to guage what their strengths are.

What I immediately noticed is that these have a very warm sound. The lower midrange in particular stood out to me.

They’re very punchy and forthright, which is interesting because their predecessor the B6 was similar in tone, but was a little more reserved comparatively.

You can tell there’s a lot more power behind these though, with vocals sounding really realistic and commanding.

They’re exactly like the smaller Debut 5.2 but more authoritative.

Bass is pretty good too, but the lower end of that bass doesn’t extend as deep as a dedicated subwoofer would which is kind of expected.

I’d say it’s present and adequate, but not something you’d particularly get these for.

There’s still hit but not a lot of extension past that if that makes sense since there’s roll off after 44Hz.

It’s certainly a much better bass than a lot of bookshelf speakers though which is a big plus.

The high end is also what caught me off guard because there’s a lot of clarity with these.

They’re crystal clear in that regard. But what’s nice is they aren’t sparkly bright where it gets hard to listen to over extended periods of time.

It just sounds right to be honest.

For music or stereo, they’re definitely a good choice.


How They Perform With Movies


How do they fare with the the more traditional application though, as a part of a home theater setup?

Well after setting them up and listening to them, it’s safe to say they’re stellar in that regard too.

Cranking them up, it was clear to me that not only do they still sound really good at higher volume levels, but they weirdly sound better the louder they go.

That’s not typically the case, but that’s definitely what I noticed here.

No distortion or anything, just pure clean sound.

They also have an incredible sound stage, more so than you’d initially think from just looking at them.

Sound effects seemed to really envelop the room in a way that was extremely immersive, while music and other little details remained easily discernible.

They have a very airy and almost open sound, that really makes you feel like you’re there.

It may have something to do with the fact that these have internal bracing, which reduces cabinet vibrations for better sonic accuracy, and is typically more seen with subwoofers rather than speakers — but it’s inclusion here certainly makes a difference.


It’s also nice that the port is on the front rather than the back because a lot of times when placing your speaker, pushing it too close to the wall just results in a boomy and less than stellar sound.

So by having it on the front, you can place them up against the wall without having to worry about that which helps with space and placement issues.

I will say that because of their clarity though, if the source of the audio you use is bad or lower quality, these will definitely exacerbate those so just keep that in mind.

Also they don’t come with speaker wire so that’s also something to keep in mind.

Other than that, there’s really not much to say else that I haven’t already.

They’re just a really good pair of speakers and if this is one of the options you were considering, I would definitely recommend them.


Likes


  • Big powerful sound
  • Crystal clear highs
  • Works great for music
  • Immersive soundstage
  • Low-profile look

Dislikes


  • No option to wall mount
  • Bass extension roll off after 44Hz
  • No included speaker wire


Final Thoughts


Well that about does it for this Elac Debut 2.0 B6.2 bookshelf speakers review.

In short, if you’re looking for a pair of bookshelf speakers with big powerful sound that can be used for a variety of content and not just a singular thing, then these are a fantastic option.

Check Availability Of The Elac Debut 2.0 B6.2 Bookshelf Speakers


Polk Signature Elite ES10 Review (Great Bookshelf Speakers)

Polk Signature Elite ES10 Review (Great Bookshelf Speakers)


The Polk Signature Elite ES10 speakers deliver high quality audio fidelity & immersive surround effects ideal for home theater systems, stereo, and near-field listening. They’re also compatible with Dolby Atmos and DTS:X formats, and feature Power Port technology for deeper bass.


Check Availability Of The Polk Audio Signature Elite ES10 Speakers


Since the the front sound stage is the most important in a home theater, (the front left & right, center speaker) the correct surround speakers can make a big difference.

So in this review, we’ll look at the performance of these surround speakers to help determine whether they’re the right speakers for your cinematic experience.


Features


High-Res Audio Certified


The ES10s are High-Res Audio Certified, meaning they support higher resolution audio formats for a much higher fidelity sound quality.

Terylene Dome Tweeters


Terylene dome tweeters and curvilinear formers allows the speaker to extend above the human range of hearing, (40kHz) allowing for greater clarity in the frequencies you do hear.

Dolby Atmos & DTS:X Compatible


The Elite ES10 speakers work with 3D object based sound formats like Dolby Atmos & DTS:X, meaning they can be used as height & elevation speakers for a great surround sound experience.

Timbre Matched


Timbre matching is important as it ensures the cohesive blending of sound between your speakers and luckily the Polk Signature Elite ES10 are timbre matched to allow you to mix and match with any speakers in the Elite series lineup.

Dynamic Balance Technology


Through what Polk calls its Dynamic Balance Technology, meticulously optimized drivers and crossovers through laser imaging deliver a more natural and clear sound.

A Port For Better Bass Reproduction


Polk’s signature power port technology is on offer here too; to smoothly funnel airflow from the speaker’s port to your listening area, helping to reduce distortion.

It also extends the area of the bass port, giving a greater surface area to further increase its clean bass capabilities without chuffing.

In fact, Polk states that their Power port technology can tout a 3dB louder bass output than typical speakers.


Included Gold-Plated Five-Way Binding Posts


With gold plated 5 way binding posts, there’s a wide variety of connection options.

Powerful Low Resonance Ceramic Motor Structure


A clever design that also helps reduce resonance gives a more energetic and powerful sound

Anti-Diffraction Magnetic Grille


Minimizes sonic interference, giving a clean sound even when the grille is on.

Solid Build Quality


Due to their in depth engineering process that identifies & eliminates physical and electroacoustic abnormalities before they happen, Polk are confident in their Elite series speaker’s build quality.

Plus an MDF wood cabinet means a fuller and richer sound

Wall Mounting Capable


Wall mounting key holes on the back allows you to wall mount these speakers increasing your placement options.


Check Availability Of The Polk ES10 Speakers


How To Set Them Up


Setting up the Elite ES10 is done just like you would with any other passive speaker.

Keep in mind speaker wire doesn’t come with it so that’s something you’ll need if you don’t have some already.

I use this one for reference.

But basically you would strip the speaker wire, attach the connectors to it, then plug it into the speaker.

There’s 5 way binding posts on the back so any connector would work, or you could forgo them all together.

Should you wish to wall mount them, the keyhole slot and threaded insert in the back would allow you to do just that.

For placing them optimally, I found that they worked best at a height of about 2 feet above ear level seated.

In the receiver I would also set the crossover to 80Hz and the sound signature to small so that the speakers are only responsible for those higher frequency sounds.


Their Sound Quality


Their Solo Performance


Gauging the audio quality of surround speakers is slightly more difficult than traditional speakers as a large portion of the sound mix typically doesn’t come through them.

Bass is handled by the subwoofer, and another portion is handled by the front sound stage.

So the way I like to do my reviews with surround speakers is testing them like a normal right/left speaker by themselves first, then as satellite speakers in an entire home theater system after.

That’s just to see what they can do since different products will have different capabilities.

But upon trying one of my favorite movies, (Pacific Rim) with these speakers & my TV, I was immediately blown away.

The level of clarity in their audio signature was mind blowing, and even more so when keeping in mind they performed like that when they weren’t meant to be a front soundstage speaker.

Every sound, from the mechanical gears & VFX in the mechs, to their lumbering movement as they rushed forward was represented with such pristine detail that it sounded real in the room.

Regarding their specifications, they tout a 78Hz to 40kHz frequency response which helped with their clarity.

Though frequencies that high are inaudible to the human ear, its ability to go that high allows it to handle the frequencies you can hear that much easier.


This was something I noticed; not to mention there were additional sounds I heard that I actually didn’t notice before.

Testing them with other movies was essentially the same story; a high degree of incredibly dynamic & immersive audio with their treble.

Sensitivity was on the lower side at 84 dB so you’ll want a receiver or amplifier with sufficient power to properly drive them.

Bass output was good too, but I’d still opt for using a subwoofer if those absolute deepest notes are important to you.

But it’s good to know these speakers are capable — meaning you could set your sub’s crossover lower for more power in those lower frequency ranges.

Even as a near-field or stereo setup, I think that these would still do fairly well.


Check Availability Of The Polk ES10 Speakers


How They Performed In A Surround System


But as for how they performed with their intended usage, as surround speakers, they were fantastic.

Even with use in a non timbre matched system, these speakers provided subtle yet substantial details that really made movie watching a treat.

It’s really hard to articulate exactly what I mean, but just play one of your favorite movies and you might understand where I’m coming from.

Highs are crisp, and mids are warm & full bodied making for an incredible sounding surround speaker.

I’d easily say they’re worth it in my opinion, with their compatibility with different systems showcasing their versatility.

This is elevated even further when you use them with Atmos or DTS:X enabled content, and is where they really shine. It’s like they make everything seem real.

There was definitely more than one instance where I would hear something and wonder if it was the speakers or real life.

That’s a testament to a truly quality speaker I feel.

Not even to mention they look absolutely gorgeous and don’t take up that much space.

At only 6 pounds, they’re much lighter than some of the other speakers out there that don’t perform nearly as well as this one does.

To cut a long story short, if you’re looking for a high quality surround sound speaker to give you that movie like surround sound, then these are an awesome choice.

They certainly get a recommendation from me.


Check Availability Of The Polk ES10 Speakers


Appearance


So the cool things about these speakers when it comes to their appearance is that they come in 3 colors to match just about every room setting; Walnut, Black, and White.

They’re the smaller variant in the signature Elite series that also includes the ES15 & the ES20 models.

I went with the Walnut because it slightly reminded me of the RTI A3s, but they all look amazing honestly.


To put it bluntly, they’re gorgeous speakers, and look even better than pictures show in my opinion.

With the removable magnetic grille on, aside from a small Polk branding on the bottom, they’re pretty low-key.

However it’s when you remove them that their look completely changes.

An eye catching gold tweeter and driver make for a striking appearance, and the words Polk Audio and American Hifi along with their established date of 1972 is situated on the top.

There’s even the words Polk signature series placed on the drivers themselves.

The fact that Polk places this here I think speaks to their inherent confidence that they know they’re offering a good looking, high performance speaker and it shows.

The MDF wood they’re made of had a nice texture to it too, and made it feel really solid and premium.

In terms of weight, they come in at around 6 pounds — and when in the hands, I thought they struck a good middle ground between feeling solid & not being too heavy.

With regards to their size, they measured 8.39 inches high, 5.39 inches wide, and 6.1 inches deep, so I wouldn’t say they’re large.

Concerning their overall aesthetics though, I’d say the Elite ES10 has a really contemporary design, paying homage to the company’s storied history.

It does this while simultaneously bringing its aesthetic forward in a modern setting.

It’s a fusion that works wonderfully, and makes for a speaker design that’s hard not to admire.


Likes


  • Unbelievable clarity
  • Gorgeous appearance
  • Dolby Atmos/DTS:X compatible
  • Great for high res music & movie formats


Dislikes


  • No included speaker wire
  • 84 dB sensitivity


Final Thoughts


That about does it for this Polk Signature Elite ES10 review.

In summary, these are a great pair of surround sound speakers that manage to add a surreal level of immersion and atmosphere to whatever it is you’re listening to.

Their attention to detail and clarity is noteworthy, and coupled with their ability to play Atmos content, they’re undoubtedly worth your attention.


Check Availability Of The Polk ES10 Speakers


Specs


Box Contents

  • 2 Bookshelf loudspeakers
  • 2 Grille (attached)
  • 8 Self-adhesive rubber feet
  • Wall-mount template
  • Owner’s Manual
  • Online Product Registration

Inputs & Connectivity


5-way gold-plated binding posts

Total Power Ouput


100 watts


Sensitivity


84 dB


Bass Driver


4 inch mica-reinforced polypropylene Dynamic Balance® cone driver


Tweeter


1 inch Terylene high-res dome tweeter


Frequency Response


78 Hz-40,000 kHz


Impedance


8 Ohms


Dimensions


6.18 x 5.39 x 8.39 inches


Weight


6 lbs (13.2 kg)