As an Amazon Associate I earn from qualifying purchases. Disclosure

How To Make A Projector Brighter! (Guide)
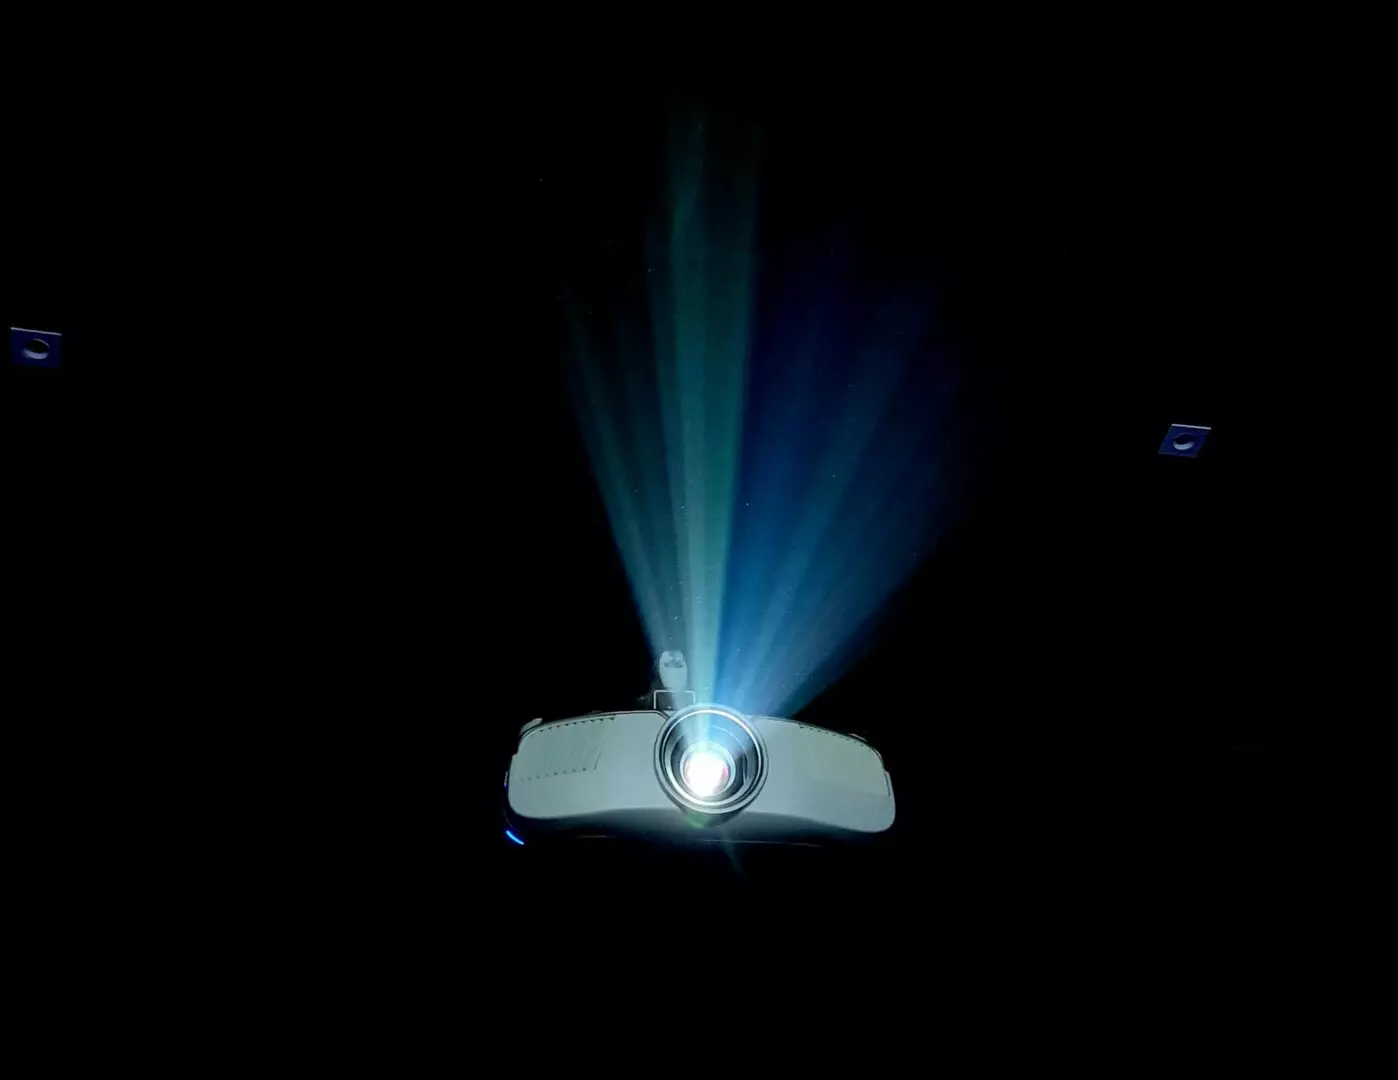
How To Make A Projector Brighter

How To Make A Projector Brighter! (Guide)


How To Make A Projector Brighter

How can I make my projector brighter?

It’s a question you may have wondered at some point, especially if you’ve had your projector for any extended period of time.

While every projector has a limit to the amount of light it can put out, there are still ways you can maximize the capability of your device.

That way you get the best picture quality from it.

So today we’ll be taking a look at a few potential ways to help picture quality while improving the efficacy of light output from your projector.

(After feel free to check out my top picks for home theater projectors for the year.)

https://easyhometheater.net/the-best-home-theater-projectors


How To Make A Projector Brighter


The ways to make a projector appear brighter include putting it on the highest output setting, adjusting the brightness & contrast, adjusting color, cleaning the lens, replacing the lamp, using the right type of screen, eliminating/reducing direct light, and placing it closer to a surface. Doing this can allow for an improved overall luminosity in the image.


Ways To Tangibly Increase Your Projector’s Light Output


Setting It On The Highest Output Setting
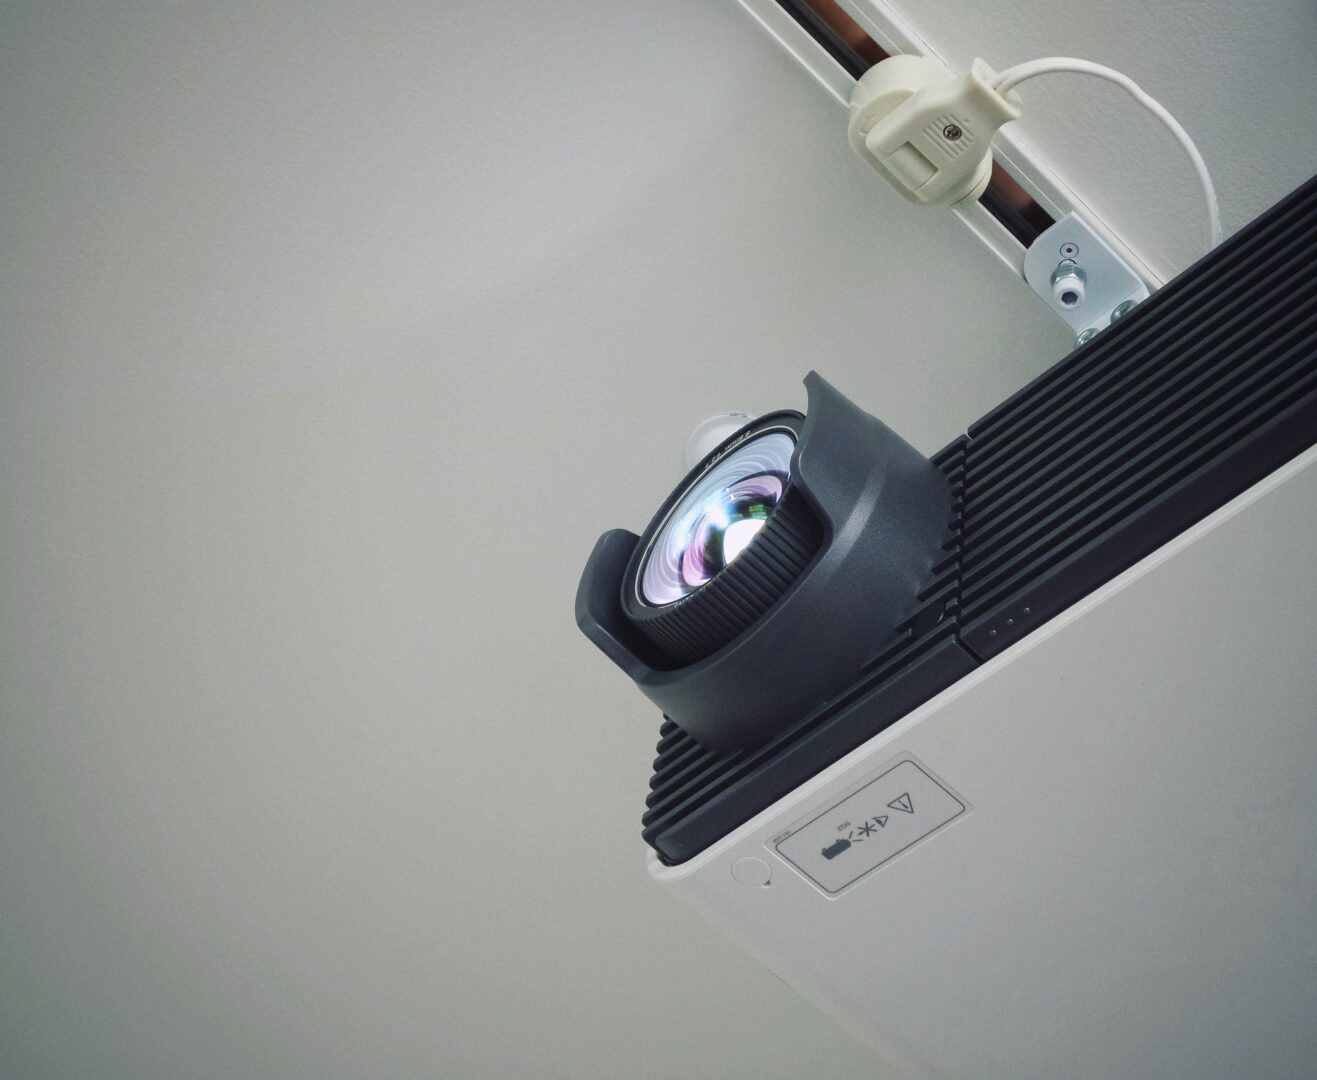

A picture of a projector in a room

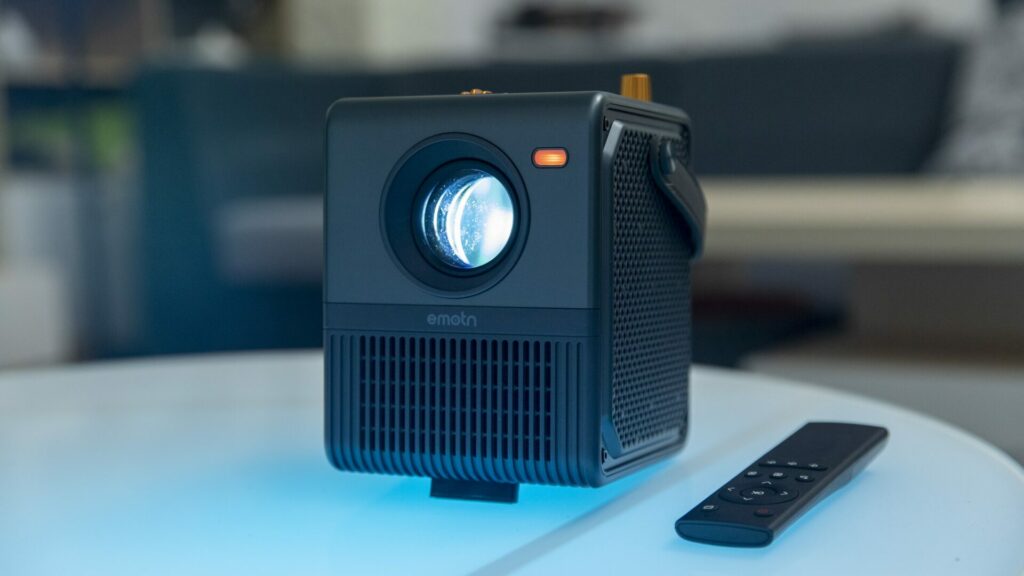
So the first and probably most direct way to increase your projectors light output is to ensure it’s actually set on the correct setting.

Many times manufacturers include some sort of ECO Mode or something similar.

The idea behind that inclusion being that’ll it’ll save power and lamp life over time.

It may even help minimize the fan noise & heat that some projectors tend to produce.

The thing is though, when placed at that setting, it may also come at the expense of duller looking image.

So by going into the projector’s lamp mode and changing it to a brighter preset, you might be able to achieve a brighter looking image.

However I do want to make mention that because the highest setting can also increase fan noise due to heat, you’ll want to make sure the projector is set in a place with plenty of ventilation and/or cooling.

This higher setting can also have an affect on the projector’s lamp life, especially if it’s on for a while.

That’s because it has to work harder when outputting a brighter image so that’s something to keep in mind.


Adjust Black & White Levels For A Better Contrast Ratio


Out of the box, it’s likely your projector didn’t come with its picture calibrated stock.

So with that said, adjusting your projector’s black & white levels in the settings can also yield a brighter and more vibrant image.

There’s many ways to achieve this; either by having a professional calibrate it for you, using a calibration disc, or even using a picture adjustment video online.

Properly set black levels are extremely important since that’s what helps add depth to an image and helps give it that pop.

When set too bright, it can cause the picture to look washed out and lacking.

Remember though, the brightness setting is what actually controls black levels, not contrast.

Contrast is what handles the light values in an image.

So if you’re trying to adjust the black level because it doesn’t look right to your eye, the brightness setting is the one you would adjust.

Conversely, if the light parts of an image look dull, the contrast is the setting you would want to adjust.

You’ll want to adjust it to be as bright as possible without clipping specular highlights in the image (basically making sure you’re not reducing details in the brightest part of the image)

By getting the contrast and brightness levels at the right value, it can help improve the contrast ratio (difference between the brightest & darkest part of an image)

This conveys a more dynamic looking picture quality and makes things appear brighter.

You can also adjust what’s known as the gamma levels, if the projector supports it, to also get a better looking image.


Adjust Color Accuracy
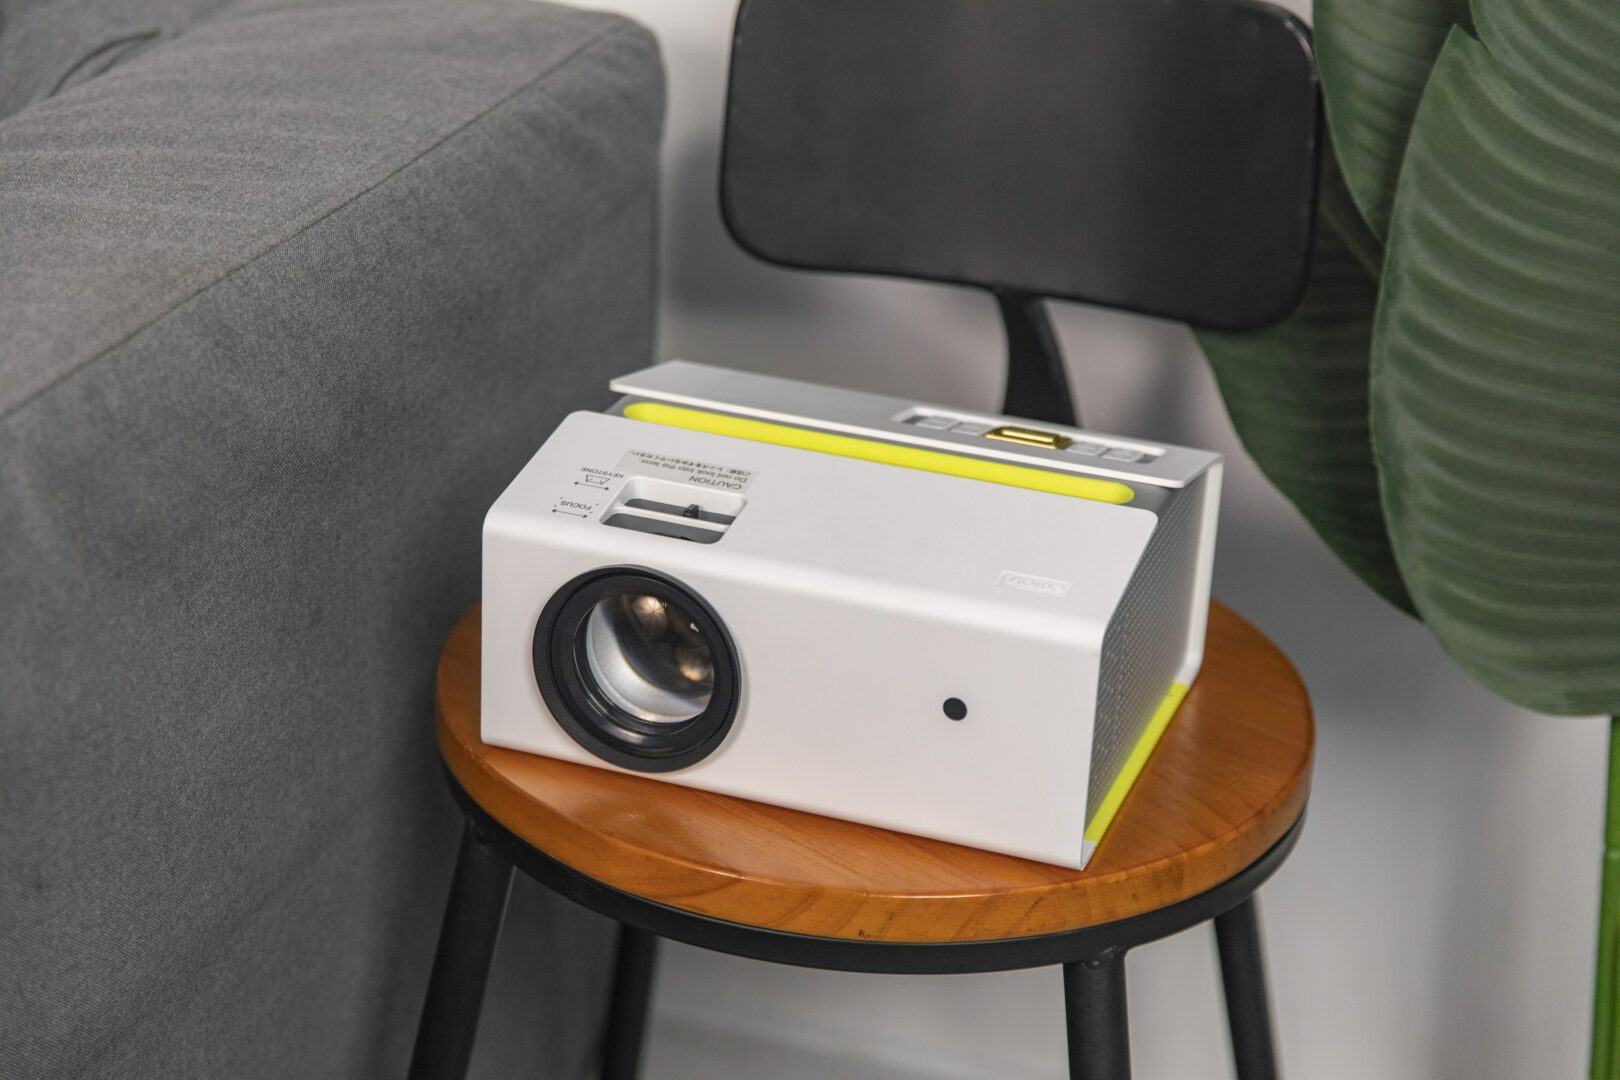

Another thing that can help with the perception of a brighter image is making sure the colors the projector is producing are accurate.

Similar to adjusting black levels or gamma, how colors look on the screen can affect you perceive in image.

If you calibrate colors correctly, it should certainly help the dynamism of the image.

Since every projector is different, I can’t give a blanket recommendation on a specific color setting.

However the middle of the color scale can be a good starting point to adjust from.


Occasionally Clean The Lens


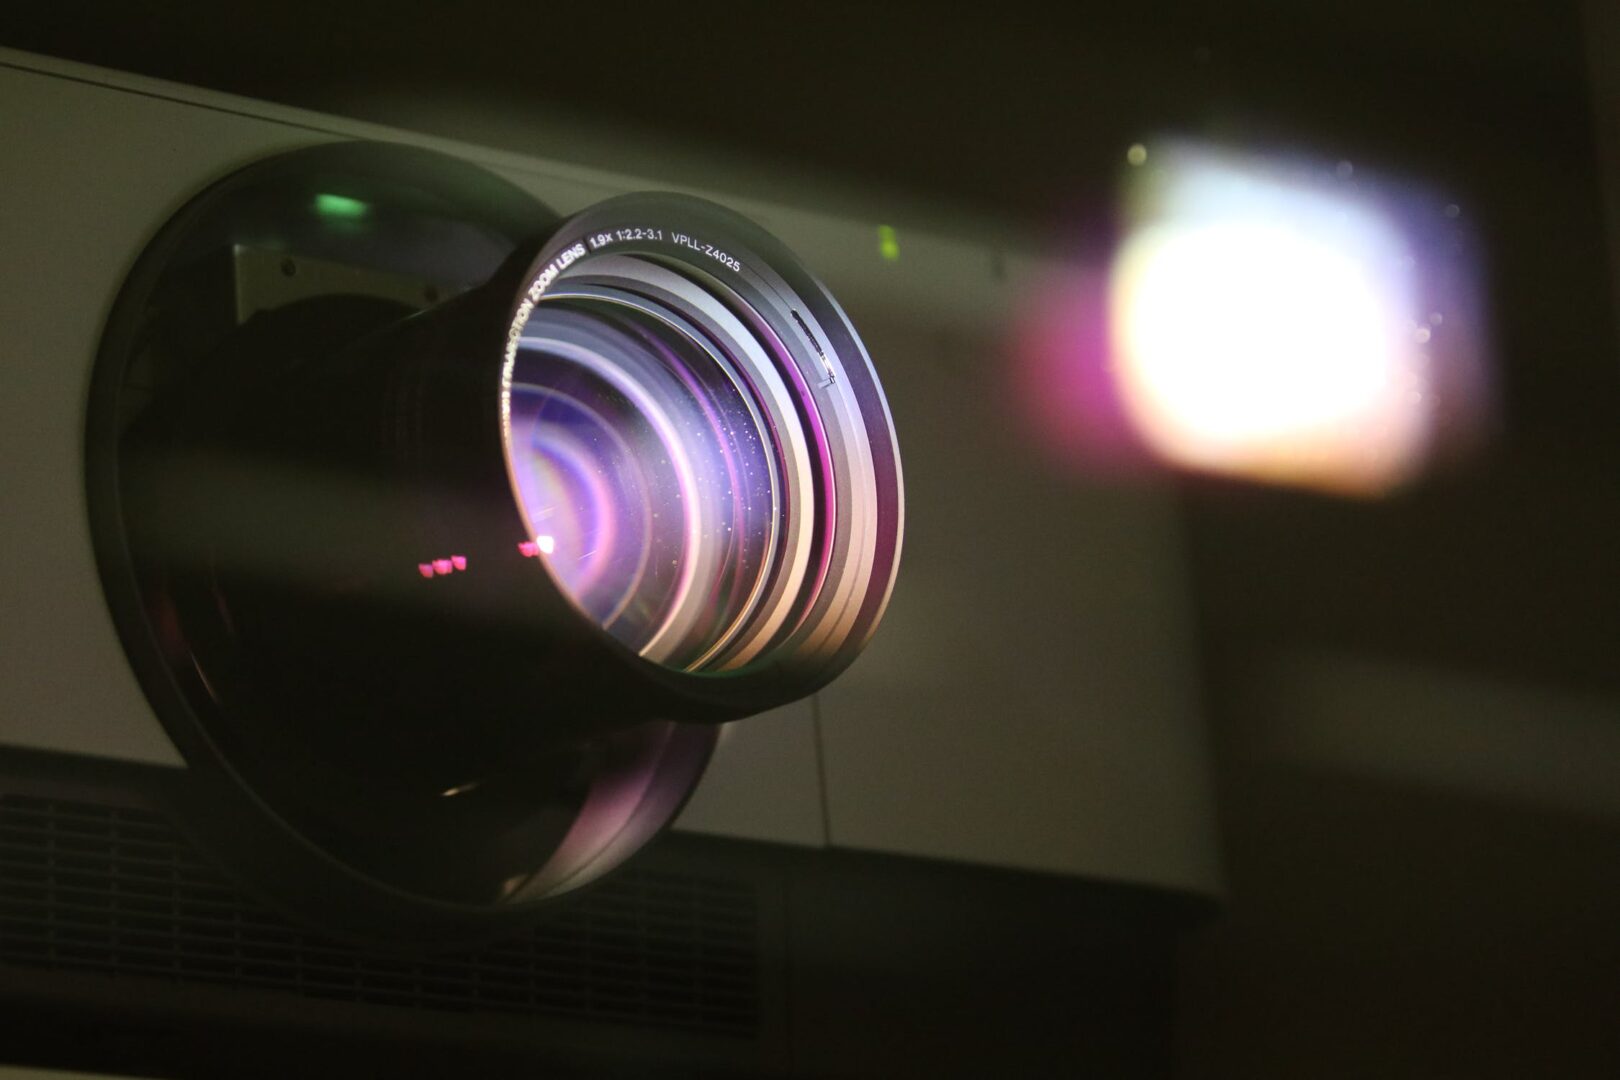
Over time dust might start to build on lens itself.

This may affect how much light it can output and potentially make the image look duller.

Occasionally cleaning the lens is a helpful way to ensure your projector is performing optimally.

Home Theater Maintenance


Replace The Bulb When It’s Older


Over time, your projector’s lamp can dim and if it’s really old, the resulting picture can be a lot darker than if the internal bulb was new.

So if you happen to notice the image isn’t as bright as you remember, it could be possible that the lamp needs to be replaced.


Ways To Better Utilize Current Projector Light Output (External Factors)


Using The Right Type Of Projector Screen
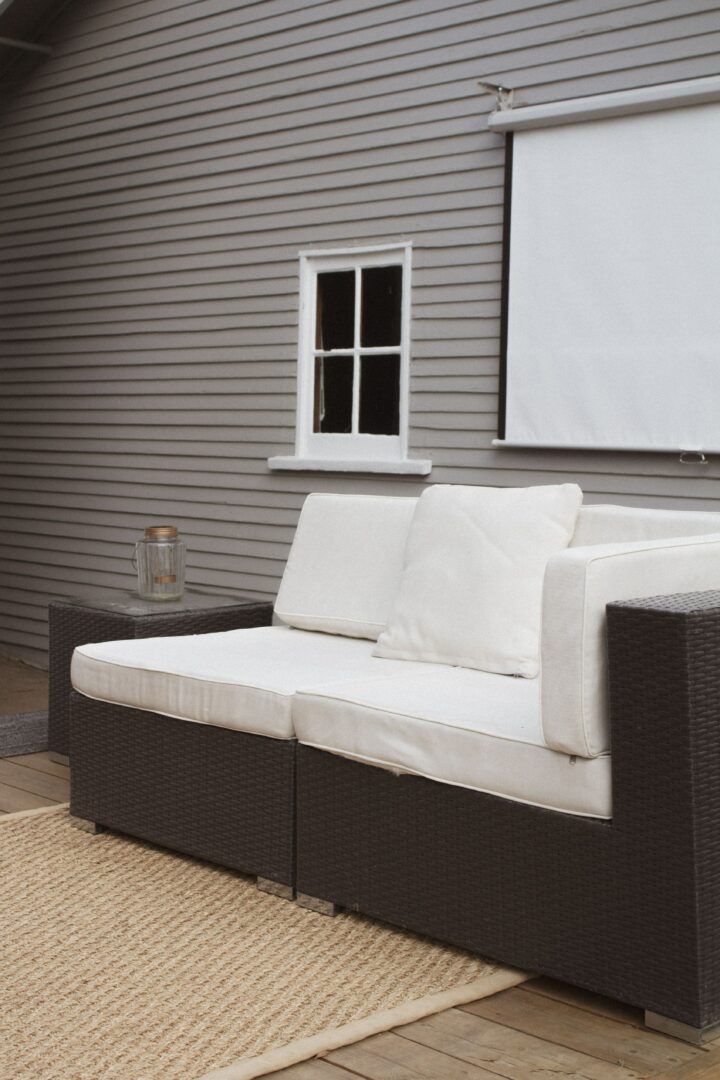

A projector screen

Using the right projector screen can have a dramatic impact on your picture quality, and in turn, the how it looks when actually viewing it.

While there’s many different types with varying materials, in my opinion the best projector screen material is white blackout cloth.

White blackout combines the benefits of having a higher gain, (which allows for a higher peak brightness) while also being non reflective & absorbing ambient light for a better saturated image.


Eliminate/ Reduce Direct Sunlight Or Lights As Much As Possible


Another helpful tip you’ll certainly want to implement is reducing any direct sunlight on the area you’re projecting on to.

A lot of light can wash out image quality, and even a small amount of ambient light can have an effect on how things look.

Using shades or blackout curtains can be helpful in ensuring your room has the optimal conditions with regards to image quality.

Lights in the room should also be aimed away from the screen or wall if possible.

If not, using white blackout cloth like mentioned previously can be helpful in absorbing some of the excess light.


Utilize Projector Paint If Using A Wall For The Image
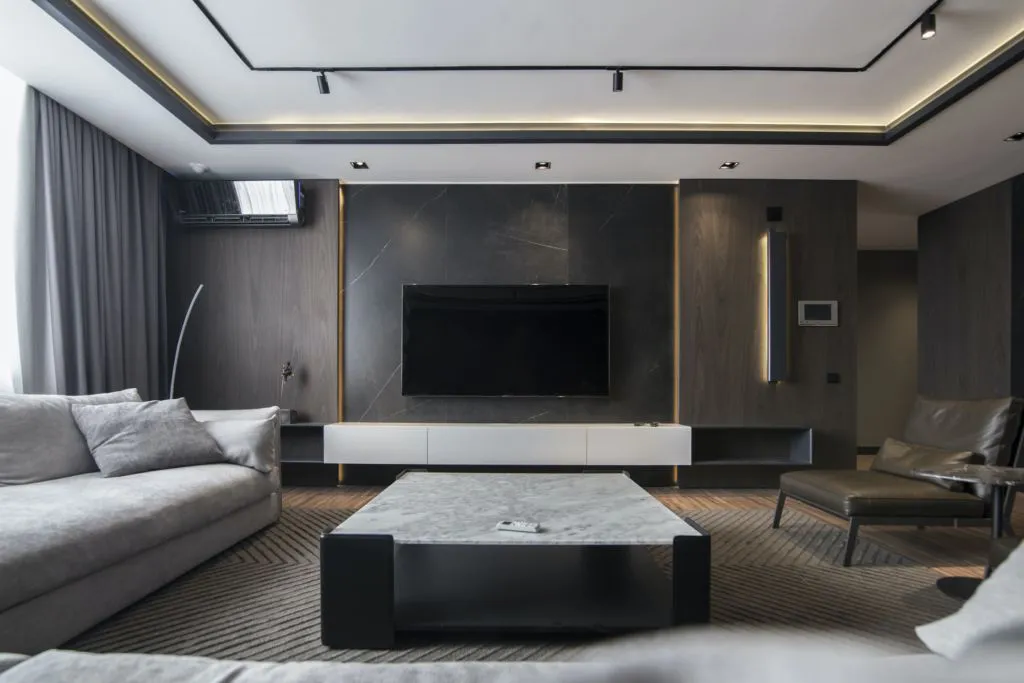

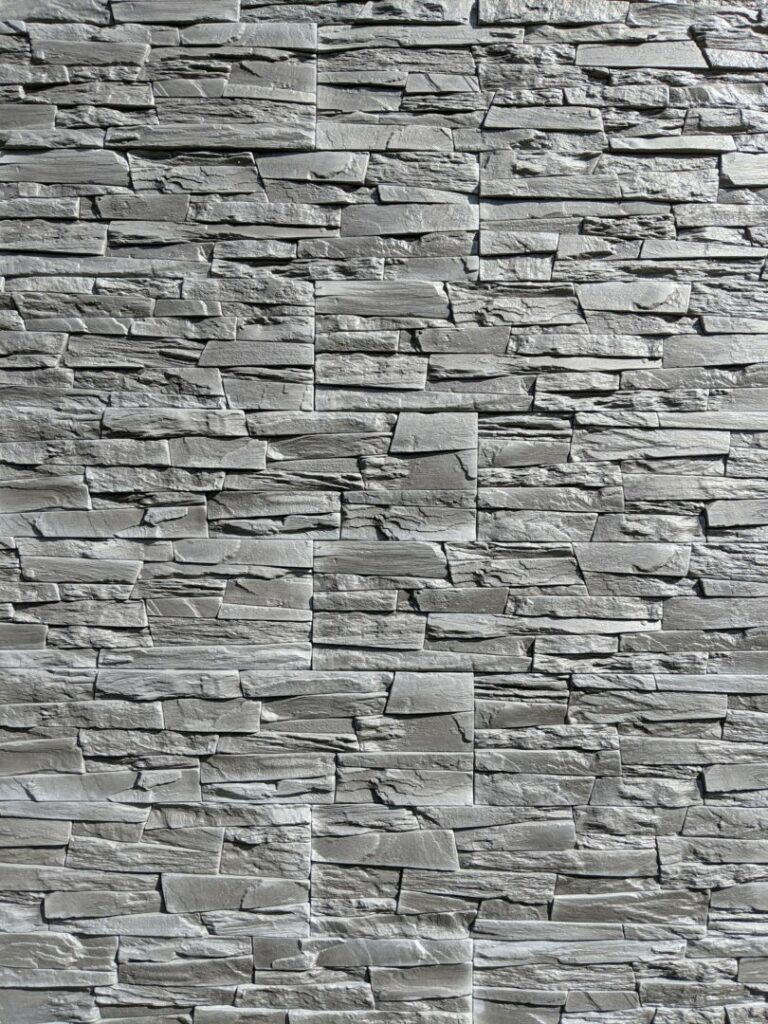
A picture of a gray wall

If you’re not using a projector screen and decide to simply project onto the wall, you can optimize that too.

Using specialized projector paint can help with getting a brighter image from your projector.

The color of the wall matters since brighter colors tend to reflect more light, allowing the image to be more vivid.

Though this comes with the drawback of augmenting excess external light which can drown out the image.

Darker colors avoid this issue since they absorb more light, but they also come with the caveat of producing a darker looking image.

From my experience, grey tends to provide the best balance between reflectivity and light absorption.

Keep in mind though it may be in the middle in terms of actual brightness of the content and depth.

Some projectors even have modes that account for wall color and adjust accordingly.

Also another way to improve perceived contrast ratio is placing felt tape around where the projector is projecting onto since it can help mitigate light bleed (excess light that can wash out an image) and improve perceptible vibrancy.

Vibrancy Enhancing Projector Screen Felt Tape Border


Place The Projector Closer To A Surface


Lastly, another way you can make your projector appear brighter is simply moving it closer to a surface.

A projector can be long or short throw, which basically dictates the size of the image and how close the device can be to a surface while still providing that same sized image.

However if placed too far away outside of its intended distance, the picture can be dimmer than intended from what I’ve noticed.


Final Thoughts


That about wraps it up for this one.

In short there are various ways to increase the brightness of a projector, and in doing so can allow for a much more enjoyable movie watching experience.

From replacing an aging bulb, to using a projector screen, these are various tips that can help your projector perform at its best.

Also feel free to check out my top projector picks for 2023 if you were looking to replace yours.

https://easyhometheater.net/the-best-home-theater-projectors


Until next time though, make it easy, keep it simple!

How To Prevent Receiver From Turning Off (9 Things To Know)

How To Prevent Your Receiver From Turning Off

How To Prevent Your Receiver From Turning Off (9 Things To Know)


How To Prevent Your Receiver From Turning Off

There are multiple ways to prevent your receiver from turning off that includes keeping it properly ventilated & clear of dust, turning off HDMI CEC, making sure wire connectors aren’t touching, using speakers that have a compatible impedance, ensuring the electrical current reaching the receiver isn’t underpowered, turning off the sleep timer, and making sure the wires themselves aren’t damaged.


Here’s an interesting scenario; imagine you’re watching your favorite show when all of a sudden your receiver shuts down out of nowhere.

No warning what so ever, it just completely shuts down.

It’d probably be pretty unexpected right?

Well there’s certain conditions that can cause this to happen (it’s actually happened to me before)

So what I wanted to do today is offer a guide on how to prevent your receiver from turning off and shed a little more light on why it is exactly that this can sometimes happen.

(Before doing anything though, be sure to turn your equipment off before adjusting any wire connections or anything of the sort)


Make Sure There’s Proper Ventilation For Your Receiver


So the first thing you want to do is make sure your receiver has proper ventilation in the area it’s placed in.

Proper airflow is extremely important and if there’s not enough of it, then it’s definitely possible for the unit to turn itself off as a protective measure.

But there’s a few things to note when optimizing for adequate airflow.

Firstly, you don’t want to place anything on top of the receiver.

Whether it’s a speaker, another device, etc, nothing should be placed on top of the receiver as this can directly cause it to overheat.

You’ll notice the top and back of the receiver will likely have ventilation holes/vents that allows air to circulate through the internal circuitry.

However blocking these by placing something on top of them can bring about issues for the device so definitely avoid this.

But what’s just as important is placing the receiver is in an area with a lot of air flow.

For example if you place the receiver in an entertainment center, make sure it’s not a completely enclosed area — while also leaving a few inches on each side for ventilation.


The back of the entertainment center should also be somewhat open to allow the receiver to circulate properly.

Putting a receiver in a cabinet with no breathing room is definitely a big home theater mistake that can be bad for the unit long term and certainly affect how long the receiver lasts.

There should be plenty of space with nothing directly on top or to the side of the device.

Conversely, if you did have to place the unit in a smaller space, you could install an active ventilation system  by way of a cooling or intake fan within that space.


Keep The Receiver Clear Of Any Dust


If there’s excess dust in any parts of the receiver, it could be causing issues since even a small layer of dust can basically be an insulator for the heat the receiver generates.

To get rid of the dust, a canless electronic air duster that uses a power source should be used since unlike a compressed air can, it doesn’t leave a liquid residue which can potentially damage the electronic internals, while still helping to remove dust with dry airflow.

Check Availability Of The Electric Air Duster


Be Aware If The Device Is Overheating & How To Prevent It


Whether it’s from lack of ventilation, accumulation of dust, or some other reason, it’s also possible that your receiver is shutting down because it’s over heating.

A lot of modern receivers, where if the internal circuitry gets too hot, it’ll shut down entirely to prevent permanent damage from

If the receiver feels abnormally hot to the touch then it’s possible that this is what’s happening.

To prevent your receiver from overheating, there’s a number of things you can do.

Placing it on a wire rack for better ventilation, removing the dust like previously mentioned, or even pointing a fan towards the unit to help cool it off.

By simply having proper ventilation and airflow, that can be a good way in preventing your receiver from overheating which may cause it to turn off.

Also never put the receiver near a heat source or where there’s lots of sunlight shining as this can also contribute to overheating.

Something that may prevent this too is using the proper speakers for your receiver since if they don’t adhere to the specifications of your receiver, this can cause issues including an increase in temperature.

Keep in mind that volume can be a factor too as the louder your speakers are, the more the power draw and farther the receiver is pushed.

But if the receiver gets too hot, it can also affect your volume and cause your speakers to become quieter as well.


Check For Handshake Issues With The HDMI Connection


I know personally from experience that sometimes a handshake issue with the HDMI connection can be directly responsible for the receiver inexplicably shutting down.

I’ve found that each receiver and electronics device tends to handle HDMI ARC and HDMI CEC slightly different, and sometimes the chain of events where the devices should work fine together simply don’t.

HDMI CEC basically allows multiple devices connected to the same source to talk to each other so to speak, which in turn allows you to control multiple devices with one remote.

However if this feature is shutting the receiver off try turning this setting off in the settings to see if it helps.

It might be called power off control or device control, or something similar if you don’t see a setting for HDMI CEC.

If that doesn’t help, try using the receiver separately without HDMI ARC to see if maybe this helps.

Devices can be finicky sometimes, so this is definitely something to keep in mind.


Ensure Your Receiver Supports The Impedance Of Your Speakers


Talked about this before but impedance is basically a measure of electrical resistance denoted by a term called Ohms.

The higher this Ohm number, the higher the resistance and less electricity that gets through while the lower the Ohms, the more electricity that gets through.


This is important because every receiver has a specific impedance range it can handle, and if you happen to use speakers that have a higher or lower impedance that’s outside this range, then this can directly cause issues with your receiver.

Check what your receiver is rated to handle and make sure your speakers fall within that impedance range since that’ll say what they’re able to handle.


Make Sure The Electrical Current Reaching The Receiver isn’t Under Or Overpowered


Another possibility is that there isn’t enough current actually reaching your receiver.

When there’s an inadequate electrical current, the receiver may turn itself off as a way to protect itself from getting damaged.

This can happen when there’s a bunch of things that use a lot of electricity that are then plugged into the same place.

In this case, try plugging the receiver into a different outlet to see if it remedies the issue.

This can also affect your equipment in other ways such as your center channel speaker becoming too quiet to hear.

On the other hand, it’s always possible that the receiver could be getting too much current and in that case, trying a different outlet may also help.


See If The Wire Connectors Are Touching


Here’s another fix that just might help, ensuring the wire connectors and wires themselves aren’t touching.

When the speaker wire or wire connectors touch the back panel of the receiver or come in contact with the other connectors, it can short circuit the receiver causing it to turn off.


Make Sure The Wires Aren’t Damaged


Then there’s also the possibility that the wires themselves could be damaged.

Like I previously mentioned, if there’s any part of the wire touching the back panel of the receiver, including individual stands, it can cause it to turn off.

Check to make sure none of the wires are frayed or damaged.

If you notice there is a damaged wire, you can either use a wire stripper to get rid of that particular portion of the wire, or simply replace it entirely.


Check If There’s A Sleep Timer Enabled


Yet another reason your receiver could be turning off is there’s some kind of sleep timer or standby feature enabled in the settings.

These are features designed to power the receiver off after either not sensing an input for a specific period of time, or to turn the receiver off at or after a designated time that’s set manually.

By turning these standby features off, it may help fix the issue.


Final Thoughts


Your receiver randomly shutting off can be indicative of a separate issue, but hopefully this guide was helpful in remedying the issue.

I’ve definitely experienced this myself and know it can certainly be an annoyance to figure out why that’s happening.

From a lack of ventilation to something as simple as a sleep timer being enabled, there can be any number of reasons as to why it may shut off.

It could even potentially mean that something internally failed, and the receiver may need to be repaired or even replaced.

In that case, while I covered some of the best home theater receivers previously, 2 awesome receivers that I would recommend are the Denon AVR-S760H receiver for surround sound, and the Sony STRDH190 receiver for stereo sound.

But that’s it for now. If you have any questions, reach out and I’ll answer to the best of my knowledge.

Until next time, make it easy, keep it simple.


What’s The Difference Between Car Subwoofers & Home Subwoofers?

Difference Between Car Subwoofers & Home Subwoofers

What’s The Difference Between Car Subwoofers & Home Subwoofers?


There are several differences between car subwoofers and home subwoofers that includes impedance, size, excursion, tuning of the enclosure, voltage, bass quality, passivity, and durability. Besides some home theater subwoofers having a deeper bass, they may also utilize more voltage — allowing them to get louder whereas car subwoofers need less voltage.


So we previously noted that there was certainly a difference when it came to car and home speakers, but what about the component that actually produces the bass; the subwoofer?

From music to movies & even video games, it’s the subwoofer that really helps add dimensionality and depth to the content — which I feel really helps when it comes to the overall immersion.

But with that said, subwoofers happen to exist both in the home theater setting and in the car setting.

So then, what’s the difference between car subwoofers and home subwoofers?

The answer to that is honestly a little complex so we’ll just get right to it.


Major Differences Between Car Subwoofers & Home Subwoofers


The Impedance Between The 2 Types of Subwoofers


So the first and probably one of the biggest differences between a car subwoofer and a home theater subwoofer is the impedance.

Without getting too in depth, impedance is basically a measure of electrical resistance in a component and it’s  denoted by a number referred to as Ohms.

The higher this number, the more resistance from the amplifier while the lower this number, the less resistance.

So with that being said, car subwoofers typically have a much lower Ohm rating at 4 Ohms.

This is because car batteries will usually produce a lower number of volts; so to actually get to that higher level of volume, the subwoofer it’s connected to needs to allow more electricity to pass through it.


That means car subwoofers tend to be much more efficient than home theater subwoofers in that regard (though not overall)

Home theater subwoofers usually land around 8 Ohms, (though they can be lower) but get much louder due to the larger current that runs through it.

Due to this higher voltage, home subs have a lower amp rating.

With car subwoofers though the reverse is true; a higher amp rating while having a lower voltage.

Strangely enough, the current in a car subwoofer isn’t steady either since anything that places more stress on the battery like for example revving an engine, can alter the current going to that subwoofer.

This isn’t the case with a home theater sub since it usually stays the same.

Subwoofers for a car are also unshielded so any kind of magnets can directly influence your bass quality.


Subwoofers In A Car Are Better Suited For The Elements


Another difference between the 2 types of subwoofers is their durability.

More specifically, car subwoofers are built to handle much less optimal environments than a home sub is.

Since a car travels through different environments, variability with temperature swings, humidity, electricity, moisture, & sunlight are all factors that the internal components basically have to deal with.


So because of that, these subwoofers have to be built to withstand the elements so to speak.

If a home theater subwoofer were to be regularly exposed to those same conditions, the wood might warp & crack, and the glue might loosen.

That’s not even mentioning the fact that home theater subwoofers aren’t water resistant, which would basically make them last a fraction of the time from the internals being damaged.

So a subwoofer in a car is tends to be more durable.


More Physical Variability In Home Theater Subwoofers


The Difference Between Car Speakers And Home Speakers

Another area of contrast is the physical appearance.

While some car subwoofers can be less subtle with chrome, various colors, neon, etc; there tends to be just as much variability when it comes to home theater subwoofers.

One example of a distinctive looking sub in my opinion is the Klipsch R-120SW which has a copper woofer that I personally think looks really nice.

But since car subwoofers have to fit within the confines of a specific area, your choice will be directly limited to how big or small that car is.

Home theater subwoofers are limited by the room itself, which allows for much more in the way of choice due to that larger space.

The one similarity they do have though is the materials that make up both drivers can be the same; but again that depends on the particular subwoofer.


Car Subwoofers Are Passive Rather Than Active


Yet another difference between these subwoofers is their dependence on an amplifier to work.

Where home theater subwoofers are active subwoofers, meaning they have their own internal amplification and only need a power source by way of an outlet, car subwoofers are passive.

That means the subwoofer in the car has to rely on external amplification to work.

Because of that, while not always, these subs are often less powerful since their only concern is filling your car with bass as opposed to an entire room.

There’s also additional choice between amplifiers to use with your car subwoofer when compared with a home theater sub.


Home Theater Subwoofers Tend To Be Bigger


Something else that sets the 2 apart is their size.

Since home theater subwoofers have internal amplification like I previously mentioned, they tend to be much larger — due to the fact the driver has to push more air to properly fill the room with a fulfilling level of bass.

Car subwoofers, while exceptions certainly exist and can be the same or even larger, they tend to be on the smaller side since they have to actually fit within the car.


Home Theater Subwoofers Typically Have More Excursion & Deeper Bass


A Subwoofer


The final distinction between the 2 types of subwoofers is the sound they produce.

Because of the typically bigger cabinets of home theater subwoofers, the drivers themselves also tend to be bigger.

These drivers often have more excursion (their ability to move) which allows them to produce a much deeper bass.

Since bass waves have such a long wavelength and the walls in a room are thicker than a car’s frame, bass can extend into those lower (sometimes even infrasonic) frequencies.

Those bass waves then escape when the subwoofer is played at a higher volume leading to the audio being audible outside the car.


However because a car sub is smaller & utilizes a smaller voltage, the drivers inside get pushed harder at higher volumes — which can cause it to distort if it’s not up to task (which you’ve likely heard if you ever heard a loud car driving by)

Sure they get plenty loud and can even take advantage of cabin gain (which is the boosting of a low end frequency due to a particular space) however it’s this very thing that can potentially lead to distortion and/or less fidelity in bass quality.

Not saying this is something that always happens though, just that it’s possible depending on the particular scenario.

Plus with a home theater subwoofer you can adjust your seating for the best quality bass while also using room gain for a further increase in output.

In a car, you can’t really do that.

Because of the higher voltage a home outlet will have comparatively (around 110 to 120 volts) these types of subwoofers can also be driven harder; thus getting louder and providing a deeper bass if setup correctly.


Both Subwoofer Types Are Often Tuned Differently


As a side note, there’s another difference that I wanted to quickly mention that comes in the way of frequency tuning.

Subwoofers that are meant for cars are often tuned for playing at specific higher frequencies louder than lower ones simply because it takes less energy to do so.

Though this can certainly vary, I’ve generally found car subwoofers to have a higher decibel output in the 50-60 Hz range.


Since home theater subwoofers make use of the additional voltage and cabinet sizes available to them, this lets them play at pretty much any frequency — really only limited by that particular subwoofer’s ability.

With that said though, home theater subwoofers vary so much that there might be a dB spike at a particular frequency or even none at all.

It all depends.

You can even build your own subwoofer around the specific specification you want it adding further choice.

As another side note, if you’re currently in the process of choosing a subwoofer, I wrote an article that goes over exactly that.

The Best Home Theater Subwoofers


Final Thoughts


Hopefully this helps clarify the difference between car subwoofers and home subwoofers.

Similar to a bass shaker, a car subwoofer can allow you to feel the bass since you’re in such close proximity to it; however a home sub may still have a deeper low end extension with possibly cleaner bass.

It’s for that reason that I wouldn’t really use a car subwoofer for home use since I’ve personally tried that and found the bass quality to be all over the place.

But that’s all for now. Until next time. Make it easy, keep it simple.

What’s The Difference Between Car Speakers And Home Speakers? (Explained)

The Difference Between Car Speakers And Home Speakers

What’s The Difference Between Car Speakers And Home Speakers? (Explained)


The Difference Between Car Speakers And Home Speakers

A while back I did an experiment to see how a car speaker would sound in a home theater setting and long story short, it didn’t sound very good lol.

So today I wanted to expand on that by noting the difference between car speakers and home speakers — which should basically give some additional context on why car speakers don’t tend to perform as well in other settings.

What are these differences though, and why do they make for such a stark contrast between the 2 types of audio?

Let’s find out!

What’s The Difference Between Car Speakers And Home Speakers?


Major differences exist between car speakers and home speakers. Car speakers have a lower impedance that allows them to play louder with less electricity, are built for a much wider variety of environmental conditions than home theater speakers, are physically smaller, and are directly installed in a car’s frame – forgoing the speaker cabinet a home theater speaker would have.


Major Differences Between Car Speakers And Home Speakers


Car Speakers Are Physically Designed Differently


So one of the first differences between car speakers and home theater speakers actually boils down to their fundamental design.

You see, car speakers are actually physically designed differently than their home counterparts.

More specifically, car speakers tend to be specifically made to brave the elements.

Given that a car is mobile and has to travel, it’s likely that the speakers inside will be subjected to all kinds of environmental conditions.

Whether it’s the freezing cold one minute, to the scorching sun the next, the speakers within a car have to be durable enough to last.

That’s not even to mention the potential moisture they have to withstand as well.

Home theater speakers are meant to be placed in temperate dry conditions, and thus can’t deal with varying environmental conditions since they simply aren’t made for that.

In fact, unless they’re an outside variant specifically, placing your home theater speakers in any other type of environment will have a direct impact on how long your speakers last.

In addition to all of this, car speakers also differ in their physicality since they lack the cabinet that a home theater speaker has.

Rather than using a cabinet, car speakers are offered with simply the speaker driver while using the car’s frame itself as the cabinet.

You’ll commonly see these referred to as raw drivers or open air speaker drivers.


The Two Types Of Speakers Are Cosmetically Different


Expanding upon that last point about there being a physical difference between the 2 types of speakers, that dissimilarity also applies when it comes the the cosmetics between the 2.

Being that home theater speaker drivers use a cabinet for their enclosure, this allows them to have significantly more variance when it comes to how they actually look.

From wood grain, plastic, black, white, etc. there’s a myriad of different designs that make each visually distinct.

Car speakers on the other hand are somewhat limited in that regard.


Sure some may have chrome or some other visual flair, but for the most part they tend to look similar.

That’s because the driver, which may or may not be covered with some kind of grille, has to be affixed directly into the trunk or frame of the car itself.


Car Speakers Tend To Be Smaller


However the differences don’t stop there because automotive speakers actually tend to be smaller than their home theater counterparts.

Given that the speaker in a car is placed in a smaller enclosure, the driver is only tasked with filling the cabin of that car with volume — making it a nearfield listening experience.

Home theater speakers on the other hand have to account for different room types all with varying sizes — making them responsible for filling a much larger space with audio.

Of course it’ll depend on the speaker you pick since the size can vary greatly, but in general car speakers are typically smaller.


There’s An Impedance Difference Between The 2 Speaker Types


Lastly and probably the biggest difference between car & home speakers is the impedance difference.

Without getting too technical, impedance is basically the amount of resistance a component presents against the current from the amplifier.

This resistance is denoted by what’s known as Ohms.

Simply put, the higher the Ohm number, the more resistant that particular speaker is.

That means a speaker with a higher Ohm number will take more power to get to the same volume comparatively.


With all that being said, car speakers have a lower nominal impedance than home theater speakers.

They’ll typically be rated at 4 Ohms where as a home speaker might be 6 to 8 Ohms.

The reason for this is a car’s speaker system will have much less voltage than the circuitry in a home.

So in order to get the same level, it has to let more electricity through to produce a satisfactory output.

Where a car battery might be anywhere from 12, 13, maybe even 14 volts; the electrical outlet in a home could be around 110 volts or higher.

That’s why using a car speaker in a home setting isn’t a great idea because it can be too much for the amplifier to handle if that amplifier doesn’t support lower Ohms (not to mention the degradation in sound quality)

There are specialized speakers that may have a lower resistance rating, but in general, home theater speakers tend to be more resistant than car speakers.


Final Thoughts


Hopefully this helped with discerning the differences between car & home audio speakers, while providing more context on why using the 2 interchangeably probably isn’t the greatest idea.

Until next time, make it easy, keep it simple. ?

Onkyo TX-NR6050 Review (Powerful 7.2 Channel Receiver)

Onkyo TX-NR6050 Review (Powerful 7.2 Channel Receiver)


The Onkyo TX-NR6050 is a fantastic 7.2 channel smart AV receiver; delivering 90W/ch of clear and powerful audio to your speakers. It supports stunning 4K & 8K resolutions, exciting gaming features, flexible sound customization, and even 7 HDMI slots — making it a great choice for a home theater.


Check Availability Of The Onkyo TX-NR6050 Receiver


Are you looking for a powerful 7.2 channel AV receiver that handles the latest video & audio technologies?

One that plays up to 4K & 8K resolutions, works with up to 7 speakers, and even supports 3D sound?

Well in this Onkyo TX-NR6050 review, we’ll cover an awesome 7.2 channel smart AV receiver that does exactly that.


We’ll spotlight the features, capabilities, and performance of this exciting HDMI 2.1 enabled device.

Most importantly, we’ll be determining who this receiver is for, and if it’s the right one for you.

(Afterwards, be sure to check out these cool gift recommendations, of which, this receiver happens to be one of)

https://easyhometheater.net/25-awesome-home-theater-gift-ideas


Features


210 Watts Per Channel


With 210 watts per channel with 4 ohms speakers, or 90 watts when used with 8ohms speakers, it’s able to deliver incredibly powerful sound.

Support For 8K


With support for picture resolutions of up to 8K, the Onkyo TX-NR6050 can supply capable TVs with a beautifully clear image.

HDMI 2.1 Support


The fact that the NR6050 supports HDMI 2.1 means it can support the latest image formats like HDR and 8K; as well as high refresh rates like 4K120 & 8K60 with low latency for gaming.

eARC Support


Support for eARC (basically an HDMI pass through) makes setting up this receiver really easy with only needing an HDMI cable (as long as your TV supports eARC)

5.2.2 Support


This receiver has Dolby Atmos and DTS:X support, allowing you to have a 5.2.2 home theater setup.


AccuEQ Calibration


Through what Onkyo calls its AccuEQ calibration, it can account for room acoustics by automatically adjusting each speaker with its included mic for a more optimized sound

AccuReflex Calibration


The AccuReflex calibration adjusts phase timing of height & ceiling speakers making for a more immersive experience — with 3D sound formats like Atmos & DTS:X supported.

Sonos Certified


By being Sonos Certified, this receiver can work with Sonos Home Sound Systems & speakers via the Sonos Port and dedicated app.

Fast Streaming Speeds


The NR6050 has dual band 5GHz/2.4GHz wifi that adheres to the 802.11ac specification; basically making streaming content on it extremely fast.

Multi Zone Support


Utilizing zones, you can watch content on multiple displays simultaneously, even if they’re not located in the same room.


Check Availability Of The Onkyo TX-NR6050 Receiver


Setting Up The Receiver


Setting up this receiver is simple, though it does depend on whether your TV supports eARC or ARC.

That’s because eARC or ARC will minimize the amount of cables you need for setting up the Onkyo TX-NR6050.

To tell if your TV does support it, look to see if any of the inputs on the TV have the words ARC or something similar.

If one does, then you’ll know your TV supports it (most modern tvs do)

From there, take the HDMI cable and plug it into that slot.

Then take the other end and plug it into the slot on the back of the receiver that says main.

After that simply plug your speakers in, plug the power cable in, and that’s it.

Here’s a refresher on connecting your speakers specifically.

https://easyhometheater.net/how-to-set-up-a-home-theater#wire

If your TV doesn’t support ARC however, the setup process would be similar except this time you’ll also use an optical cable to plug into that specific device.


The Performance Of The Onkyo TX-NR6050 Receiver


My First Impressions With The Sound Quality


So how good is this receiver when it comes to performance?

Well you’ll be happy to note it’s really awesome to put it simply.

Using the NR6050 with various speakers produced crystal clear audio quality with no noticeable distortion what so ever.

I didn’t have to turn the volume loud at all to enjoy room filling sound which was assuring.

It drove them with ease, and seemed like it still had plenty of power to spare.

I feel that’s a good indicator of a quality receiver when you can even drive bigger speakers without having to crank the volume, because that means it’s performant enough to handle it.

But my speaker output. and particularly the clarity, was really good with the Onkyo so I was definitely happy with that aspect.

Even when I tried a stereo setup with 2 speakers and no subwoofer, the stereo imaging it allowed my speakers to produce was immersive and entertaining.

In short, the audio quality, whether it was stereo or surround sound, was fantastic.


Check Availability Of The Onkyo TX-NR6050 Receiver


My Thoughts On This Receiver’s Calibration & Customizability


It also comes with a room calibration microphone which, when plugged in, pops up a menu that let’s you automatically calibrate your speakers.

I highly recommend doing the calibration first since I noticed it can make a pretty big difference audio quality wise; and it’s really simple to do.


I found the receiver’s menu really easy to navigate, which made speaker setup a lot easier.

What I felt was really cool though was just how customizable the sound itself was.

You can adjust the volume and crossover frequency for each individual speaker.

But it’s also possible to individually adjust the bass, midrange, & treble — and that’s not even mentioning the various DSP modes the receiver has to further customize the sound.

I felt The THX cinema mode in particular did a really great job with delivering crisp audio through the surround channels.

The level of customizability of the sound signature elevates that immersion factor in my opinion, and makes this receiver a solid choice.


My Thoughts On How Surround Sound/Object Based Sound Fared


What furthered the level of immersion is this receiver’s support for object based sound formats like Dolby Atmos & DTS:X.

Using speaker modules, or even overhead speakers, the support for up to 5.2.2 surround sound made a pretty big difference.

Though I do prefer the extra speakers with 5.4.2, the fact this one can do it at all is still a welcome addition.

When trying both 3D sound formats, I noticed that each speaker had sufficient and satisfying output which definitely made movies exciting.

Even at louder reference level volumes, directional sounds whizzed by with incredible accuracy, and I found myself watching movies longer than I even realized.


What was particularly impressive to me though was how the receiver remained clear at those higher volumes without struggling to deliver enough power.

Its 7.2 channel surround sound performance was pretty much the same story — intense & immersive.

The bass quality when using 2 subwoofers remained impactful, so there were no issues in that regard either.

Using dual Bic America F12s or PSW10s for example, produced a deep and punchy bass that was really a joy to listen to.


My Opinion On Its Multi Zone Performance


Another aspect of this receiver, its multi zone support, is pretty interesting.

Without being too long winded, multi zone basically allows for use of a second display or sound system, at the same time as your main one.

So for example, if you were watching TV in one room, somebody else could be watching a different program somewhere else from the same receiver.

It’s a really helpful feature that gives you a lot of flexibility with what content is playing since it has support for up to 7 speakers.

When trying the multi zone feature, I noticed that it wasn’t difficult to setup and functioned properly.

It’s also worth mentioning that you can only watch 8K60Hz in one room with the other zone being relegated to 4K120Hz (which is still a pretty high resolution)


Besides the support for high resolution audio, there’s also a pure audio mode that removes any processing or effects to give a more accurate representation of the content.

It’s definitely helpful for more professional applications such as mixing, or even stereo sound.

However I tend to prefer a little flair with my audio so I didn’t use it much.

It’s still appreciated that it’s included though, and I can see some people likely finding it helpful.

Check Availability Of The Onkyo TX-NR6050 Receiver


What I Thought About The Streaming Performance


The NR6050 also has various built in streaming services and to keep it short, they worked great.

The connection through wifi was fast, and picture quality was crisp without pixelation when watching content.

Bluetooth also worked fine so there’s not much to mention there either.

There’s also DTS Play-Fi support which basically let’s you listen to music over wifi through multiple smartphones, tablets, and/or devices at the same time in multiple rooms.

When trying DTS Play-Fi, the TX-NR6050 connected fast, and maintained the connection without issue.


Miscellaneous Things Worth Mentioning


My Thoughts When Gaming On It


One thing I really love about this receiver is its performance when it comes to gaming.

Given that it’s HDMI 2.1 compliant, it has multiple gaming oriented features to enhance the experience like ALLM and QFT that reduces latency for more responsiveness.

Using the Xbox Series X and PS5 consoles with it worked like a charm, and I definitely noticed how much smoother everything felt.


Given that these consoles actually support these higher refresh rates and resolutions, it’s awesome to see manufacturers are starting to standardize and even innovate around these standards.

I remember seeing those specific features on the Denon AVR-S760H receiver and being happy, so it’s nice to see here.

The Denon and Onkyo are actually similar in that regard, with lots of helpful features in general.

For the gamers out there, this receiver is a fantastic choice.


Only 1 Optical Input


Probably a minor nitpick that doesn’t necessarily apply to me but still felt was worth mentioning was the fact that this receiver only has 1 optical input.

In the off chance your TV didn’t have ARC suppor, and you wanted to use multiple devices connected at the same time, you’d have to switch between them for audio output which could be a minor inconvenience.

Just figured that was something to note.


Thoughts On The Appearance Of The Receiver


In my opinion, it’s a nice looking receiver that doesn’t stand out too much, but still aesthetically compliments the room provided you have adequate space for it.

With an all black chassis that has an almost brushed metal look to it, there’s a level of silent distinction that makes it look classy.

On the front panel are an array of manual controls for quick control of the receiver.


There’s an Onkyo logo on the top left, with a power/standby button below it.

The pure audio button below provides a pure audio signal without processing when pressed.

Underneath that button is the 3.5mm jack used for connecting a pair of headphones; and next to the jack are the buttons to enable the various listening modes (Movie/TV, Music, Game)

In the center is a helpful LED screen used to relay current information about your content — while a series of physical buttons below control things like the input, Bluetooth, tuner, etc.

There’s also buttons for tone control that includes bass, vocal, & treble.

Then on the right is a USB slot, the input for the optimizer microphone, and a volume dial.

On the back you have the various inputs and outputs that includes HDMI slots, speaker inputs, phono inputs, an ethernet port, etc.

In terms of size, it’s definitely not a small receiver by any means measuring 26 x 16 x 8 inches and weighing 21.7 pounds.

That means you’ll want ample space for the unit to give it plenty of breathing room.


Pros/Likes


  • Support for up to 8K60 & 4K120 resolutions
  • Can connect to 2 screens/sources simultaneously
  • Great sound quality
  • Up to 7.2/ 5.2.2 surround sound
  • 7 HDMI slots (1 eARC)
  • ALLM, VRR, & QFT for low latency/high frame rate gaming
  • Fast Bluetooth & streaming support
  • Easy to setup
  • Automatically calibrate speakers with optimizer mic


Cons/Dislikes


  • Large at 21.7 pounds and 26 inches
  • No 5.4.2 support
  • 1 optical input


Final Thoughts


In short the Onkyo TX-NR6050 is an excellent receiver that I really don’t have many gripes with to be frank.

It does what it’s supposed to, and provides ample power for even those larger speakers.

Plus support for up to 8K resolutions and high refresh rates means it’s a receiver that’ll be with you for the long haul.

As long as you have adequate space for it then I definitely recommend it.

Check Availability Of The Onkyo TX-NR6050 Receiver


Specifications


The specifications of the TX-NR6050 are as follows:

Power supply

AC 120 V~, 60 Hz

Power consumption (operating)

635 W

Power consumption (idle)

65 W

Power consumption (standby)

0.1 W

Dimensions (W x H x D)

17 1/8 inches x 6 13/16 inches x 14 15/16 inches (435 x 173.5 x 379.5 mm)

Weight
21.7 lb (9.8 kg)

Power output (All channels)
200 W/Ch (6 ohms, 1 kHz, 10% THD,1-ch driven) 90 W/Ch (8 ohms, 20 Hz–20 kHz, 0.08% THD, 2-ch driven, FTC)
Dynamic power
240 W (3 ohms, Front) 210 W (4 ohms, Front) 120 W (8 ohms, Front)
THD+N (Total Harmonic Distortion + Noise)
0.08% (20 Hz–20 kHz, half power)
Input sensitivity and impedance
200 mV rms/47 k-ohms (Line) 3.5 mV rms/47 k-ohms (Phono MM)
Rated RCA output level and impedance
1 V rms/470 ohms (Subwoofer pre-out) 200 mV rms/470 ohms (Zone 2/Zone B line-out)
Frequency response
10 Hz–100 kHz/+1 dB, -3 dB (Direct/Pure Audio)
Tone control
±10 dB, 20 Hz (Bass) ±10 dB, 20 kHz (Treble)
Signal-to-noise ratio
106 dB (Line, IHF-A) 80 dB (Phono, IHF-A)
Speaker impedance
4–16 ohms

Differences Between Watching Movies At Home And In Theaters

Differences Between Watching Movies At Home And In Theaters


What Is The Difference Between Watching Movies At Home And At A Theater?

The differences between watching movies at home and in theaters includes customizability of seating conditions, size of the viewable screen, ability to rewind & pause movies, additional snack choices, and the convenience of being able to talk when watching at home. There’s numerous advantages & disadvantages with both mediums.


Have you ever wondered the differences between watching movies at home vs in theaters?

The answer may depend on your personal preferences, but there’s a few objective factors to consider too.


As someone who has a home theater system and has enjoyed watching films at the cinema hall for many years, I wanted to compare and contrast the two experiences.

In this article I’ll share my insights & opinions on both, so you have a better understanding of how they compare in different situations.


The Similarities Between Watching Movies At Home & In A Theater


Surround Sound Can Be Experienced Both Ways


The first similarity between watching a movie in the comfort of your living room vs the cinema is the aspect of surround sound.

If you correctly set up an at home theater room by acoustically treating that room, it’s possible to create a comparable surround sound experience to the movies.

Sure it’s possible the movie theater might utilize more overhead speakers, especially if it’s an IMAX theater.

But even then, object based sound formats like Dolby Atmos & DTS:X sometimes used in theaters also exist at home.

Other sound formats like IMAX Enhanced are meant to give a similar experience to watching in an IMAX theater.

So for the most part, it’s possible to create a surround sound experience that’s pretty comparable to a home setting I feel.


Both Can Be A Great Social Experience


Another great thing about both is the social aspect.

Whether it’s in your living home, or at the cinema hall, watching a movie can be a great social experience.

Imagine experiencing an unexpected plot twist in a movie, or the return of a character in a show.

That can be memorable event for everyone, especially when you’re with good company.

There’s a few times where I’ve personally experienced this, and they’re awesome memories to have.


You Can Enjoy Snacks


Whether you’re watching on the big screen, or on the smaller screen at home, movie night snacks are a great way to enhance the overall experience.

From a bowl of trail mix, movie theater style popcorn, or even ice cream, there’s a wide variety of snacks you can enjoy.


Differences Between The Movies & Watching At Home


However there’s more differences than similarities from my experience, when it comes to enjoying a movie in a home setting vs actually going to the movies.


More Customizability Of Your Viewing Experience When Watching At Home


When watching a movie at home, there’s a lot more customizability in the components that can be used, and the viewing experience overall.

From home theater seats, to bookshelf speakers that match your room color, there’s all kinds of ways you can customize your movie watching.

You could even transform your room to look like a movie theater, making it feel even more immersive.

One way of accomplishing this is through implementing home theater seating.

You could also use streaming services to stream your favorite shows & movies without having to account for travel, the tickets, finding the best place to sit, etc.

Considering streaming content has grown in the past few years with the proliferation of smart televisions/devices with streaming capabilities, it makes sense that more people are also watching their content at home.

Plus there’s no worry of being late or missing the movie when watching at home since it can be played at any time.

You don’t have to travel anywhere, and you can even watch a movie in your pajamas if you really felt like it.

There’s just a level of comfort you can enjoy at home that you don’t necessarily always get at the movies.


You Can Talk More At Home


The great thing about watching movies at home is it’s a social setting where you can talk more since you’re surrounded by people you know and are familiar with.

When you’re at the movies, you have to be considerate of the other viewers and wait to discuss things until after the movie.

Whereas at home, you could freely comment and even pause to talk about something you found interesting or surprising.


Not Having To Factor Cost Of Tickets When Watching Content At Home


Another difference between the 2 mediums is you don’t need to factor the cost of tickets for the viewers of content at home.

At the movie theater, you’ll need a ticket for every viewer that wants to see the movie

But at home, you could have as many people as you want watching the same exact movie.


Enjoy A Wider Variety Of Snacks At Home


With regards to movie theaters, the snacks you can enjoy are really limited to whatever they have available at the stands.

If they don’t have a specific treat you like, then you end up having to pick something else.

At home though, you can enjoy any kind of snacks you want. A veggie platter, nachos, or even pizza is possible.


It’s Possible To Rewind & Pause The Movie


Being able to rewind and even pause the movie is a key difference when watching at home.

I can’t even count the number of times I’ve been at the movies and there’s a scene with inaudible dialogue or an event on screen happens that I wanted to see again.


Being able to rewind to that point or just pausing it to comment on something is a thing you can do when watching it at home.

There’s just a certain level of convenience with being able to rewind the movie that really helps the experience in my opinion.


Movies Can Easily Be Replayed


Stemming from my last point, if you missed something in the movie, or enjoyed the film in general, you end up having to get another ticket to see the same movie.

Whereas at home, you can replay a movie that you own or stream it as many times as you want.

Being able to replay it is definitely a major advantage over the traditional way when it comes to the theater.


Disadvantages Of Watching Movies At Home


However that’s not to say watching movies at home doesn’t have its drawbacks because it certainly does.


The Screen At Home Is Smaller


The advantage that going to see a movie in theaters has over watching it at home, is the theater’s screen size is typically much bigger.


With the screen being so much bigger at a cinema hall than in a living room, it allows you to sit in a wider number of spots in that room.

This can sometimes mean a better viewing angle too depending on the screen — further adding to the immersion.

Though you could use a larger television in a theater room, or a projector to experience the fun of a bigger screen, they typically don’t come close to the size of a movie theater screen.


Typically Less Previews Of Upcoming Movies


Home released movies tend to have less previews so that’s something to keep in mind.

Something I think adds to the joy of going to the movies is seeing all the previews for the upcoming movies you didn’t even know were coming.

It’s a fun surprise to see a preview for a sequel to a movie you used to love, or something new that you think looks absolutely amazing.


Have To Wait To See The Same Movie


Finally the biggest disadvantage to watching a movie at home is you have to for that movie to be officially released to see it.

This time frame for release can be potentially long since it could be anywhere from a few months, to upwards of over a year.

If it’s a new movie that everyone is talking about, you might feel compelled to watch it at a theater rather than waiting for its official release.

So having to wait to see it is definitely one of the biggest differences between the two that I noticed.


Final Thoughts


Hopefully this quick little overview gave you a better understanding of the difference between the 2 experiences along with their similarities, and why someone would prefer one over the other.

Both have their advantages and disadvantages so it really depends on what you particularly find important at the end of the day.

With a little home movie theater diy though & design ideas such as these, you can still create a movie watching experience that’s truly immersive.

Until next time, make it easy, keep it simple.

What’s The Best Material For A Projector Screen? (Guide)

What Is The Best Material For A Projector Screen?

What’s The Best Material For A Projector Screen? (Guide)


What Is The Best Material For A Projector Screen?

Have you ever wondered what makes the images on the big screen so clear and realistic?

It’s the quality of the projector screen.

Besides room lighting, the material of the projector’s screen has a direct influence on the picture quality you experience.

The better quality the material of the projector screen is, the clearer the overall image quality will be.

So today we’ll be taking a look at the various materials that make up these screens, and seeing which is the best for watching your favorite content!

What Is The Best Material For A Projector Screen?


White blackout cloth is the best projector screen material in my opinion as it absorbs light, has the same benefits of a white screen by enhancing white levels, and is useable in darker rooms. It’s a mix of PVC, cotton, and/or polyester coated in multiple layers of foam.


Check Availability Of Yandood Projector Screen Material Fabric


What Aspects Influence Which Projector Screen Materials Work Best?


Projector Type


One of the biggest aspects determining what screen material to use is the type of projector that’s also being used.

There’s many different projector types, such as: short throw, DLP, LCD, LED, and laser projectors.

However, some of those projectors may be better suited for some materials than others.

While a brighter projector can work with both lighter and darker screens, a dimmer projector may work better with lighter screens in some scenarios; depending on other factors.

For example, if you used a high-nit laser projector, which uses a laser light source to produce an image, it would work with a majority of projector screen materials.

But if you used a projector that had a dimmer internal lamp, then thicker materials with a higher gain like white PVC fabric would probably help retain a brighter image.

Here’s some of the best ones in my opinion.

https://easyhometheater.net/the-best-home-theater-projectors


Room Lighting That The Projector Is In


The lighting of the room is also something to consider when choosing the right screen material.

Ideally you want as little light as possible in the room for optimal image quality.

From my experience, if the room has a lot of light, whether it’s from sunlight or lights in the room, materials with ambient light rejection properties tend to work best for projector screens.

This material basically helps dissipate visible light on screen for an overall clearer image.

For darker rooms though, screen materials with a higher contrast and darker color can give the image more depth with black levels.


The Gain


The gain of the material of the projector screen is important since it affects how things on screen look.

To put it simply, gain is basically how reflective the screen is with light that hits it.

The higher the gain, the higher the contrast ratio (the difference between darker and lighter elements on screen)

The tradeoff is that the higher gain limits the viewing angle and visibility of the screen when seated off angle.

Whereas lower gain materials will have a lower contrast ratio, but will have a higher visibility and uniformity off angle.


The Viewing Angle


I already mentioned this, but the viewing angle is something you’ll want to be aware of when choosing the right material.

If your seating position is more off angle, then higher gain and lighter colored materials may work better.

But if you’re seated in the center then there’s a little more versatility with suitable materials.


The Color Accuracy Of The Screen


Different materials have different levels of color accuracy which is important for a more realistic image.

But things like ambient lighting in the room, the capability of the projector, and even viewing angles can also shift how these colors look on screen.

So properly adjusting for all of these factors, whether it’s with the projector’s color settings itself, or the room’s lighting, can provide for a better viewing experience.


How Durable The Projector Screen Is


If you plan on having a projector setup outside, then that screen’s durability is something you’ll want to be mindful of.

If it’s a painted surface that’s acting as the projection surface, then use specialized paint that’s made to also last outdoors.

Also ensure that the surface itself is smooth and not an uneven texture as this can distort the image.

For physical outdoor screens, opt for materials with water proof capabilities, resistance to heat & cold, aren’t prone tearing, aren’t difficult to clean, and have good visibility with sun light.


The Size Of The Projector Screen


Lastly the size of the viewable screen is important when choosing which material to use.

The bigger the room, and the further from the screen you’re seated, the bigger the screen needs to be to remain visible.

And the bigger that screen, the firmer the material of that screen needs to be to remain uniform throughout. 

That’s why smaller projection screens can be more forgiving in that aspect, since it becomes easier to spot imperfections in the image with larger screens.

Then there’s things to consider like the aspect ratio of the screen and the main seating location since these factors affect the shape, width, and height of the screen; as well as the optimal viewing distance & angle for viewers.


What Materials Can Projector Screens Be Made Of?


Projector screens can actually be made of many types of materials & types that includes tension projector screens, fiberglass, textile, paint variants, etc.

There can even be some crossover between types.

So let’s take a look at some of the most common ones, as well as which one is best.


Acoustically Transparent Screens


Acoustically transparent screens are basically a type of screen that allows sound to pass through without light also doing so.

This in turn gives a better picture quality and better sound quality without those speakers being visible.

There are 2 types of acoustically transparent screens, perforated and woven.


Perforated Screens


Perforated screens, like the name suggests, are screens with a number of tiny holes invisible to the human eye, designed to let sound waves pass through it.

It can be made of any number of materials but the most common is PVC.

You’ll sometimes see these used in movie theaters with speakers mounted behind them to improve spatial imaging and immersion.

If a PVC or perforated screen is generally subpar in quality, you could experience any number of visual artifacts, discoloring, and even loss in sharpness.


Woven Screens


Woven is the other type of acoustically transparent screen where a special pattern also allows sound to pass through it.

Similar visual issues to perforated screens can also sometimes be seen in lower grade ones that include double imaging, the moire effect, and subpar color accuracy.

In terms of which is better out of these 2, it’s tough to say because there’s so many different versions of them.

However, both can both work well in the right visual conditions.


Silver Screens


Silver projector screens are some of the oldest, and were basically made with the intentions of being used in a dark room so that it was sufficiently able to augment the light it received for the resulting image.

Unlike grey screens, silver ones have a higher gain value; making them more reflective by nature.

This allows them to enhance white tones in the image for a better contrast, which can help the vibrancy of the image.

Newer ones have made a number of advances when it comes to black levels and color radiance, making them a solid option.


Grey Screens


Grey screens are basically a matte version of the silver screen — with a lower gain value that allows them to absorb more light.

This makes them suitable for brighter and darker environments.

They also have the unique benefits of better viewing angles and white levels for content.


Dark Blackout Cloth Screens


Dark blackout cloth screens are really dark screens made with the intention of improving black levels.


These types of screens are used with projectors that are high powered but typically aren’t used as much as white blackout variants due to the darker picture it may produce.


Painted Projector Screens


When considering the better looking option between a projector screen vs a wall, it can be tricky since there’s quite a few variables that can affect this.

But if you are going to use a wall, you also have the option of using projector paint.

This is a paint specifically made with the purpose of being used with a projector and a surface for a quality looking image.

In this case, you’ll want to make sure the surface you use is somewhat flat in texture, and is the right color for your specific environment.

This should help in that case.

https://easyhometheater.net/does-the-color-of-the-wall-matter-for-a-projector


The Color Of The Projector Screen Material Also Matters When Deciding


Does The Color Of The Wall Matter For A Projector?

Before actually getting into the best material for a projector screen, I felt it was necessary to first ascertain what the best color was first.

That’s because the color of the material also plays a substantial role in the resulting picture quality.

When choosing, there’s typically slight variations of 3 main colors you’ll come across; grey, black, and white.

Each have their own advantages and disadvantages so let’s quickly cover them to see which color works the best when it comes to projector screen installation.


White


A projector screen

White projector screens were actually the first of their kind, having been the standard choice in cinema for a while.

This is because white screens tends to reflect light due to their high gain, allowing to output brighter white levels.

However the problem with these types of screens also stems from their reflectivity.

If the room has any kind of direct sunlight or bright lighting, the screen can reflect that light which can make it hard to see.

Black levels in content can sometimes be elevated with white screens due to the fact that black is the absence of light, and white is the exact opposite — making it hard for it to produce as deep black levels.

Though there are some projectors that can account for usage with a white screen and compensate by making adjustments so that’s definitely something to note.

White screens also sometimes have issues with viewing angles so people sitting off to the sides will might experience a degradation in picture quality.


This is why it’s often recommended that white screens be used in darker settings so that they don’t reflect whatever light might be present in the room.

This is unless you’re using white blackout cloth screens of course; in which case they’ll have the advantages of all 3.


Grey


Grey screens are slightly newer and can be thought of as offering the best of both worlds of both white and black.

While it won’t surpasses white in brightness, or black in color reproduction, it’s still a solid compromise between the 2 in my opinion.

Grey screens can be used in bright and dark environments since it absorbs some of the light, and reflects the other portion.

This improves its contrast ratio when compared with white screens, allowing for deeper black levels.

While grey screens can sometimes portray whiter tones as grey in content, a more powerful projector or lighter screen can help in that regard.


Black


Black screens are a newer color when it comes to screens and are often lauded for their sharp picture quality and accurate color reproduction.

Since black absorbs all light, they can be used in brighter rooms without worry of reflecting light which can also help with viewing angles.

This allows colors on screen to appear much more vibrant, while exhibiting much darker black levels.

However black screens can sometimes have dull white levels if the projector it’s used with isn’t that bright in terms of luminosity.

Now in terms of which is better out of these, I would say that black screens are probably best in terms of vibrancy though white might produce a brighter image.

But for a more well rounded screen that works in a variety of viewing conditions, grey screens are likely best in that case.


The Best Projector Screen Material Is White Blackout Cloth


Remember our original question of what the best projector screen material was?

Undoubtedly, in my opinion, white blackout cloth screens are the best material to use for a projection screen.

While silver and grey screens can be a close second in some instances, white black out cloth is best in terms of its versatility.

Typically matte white in color, this durable material, conventionally made of a combination of PVC, cotton, and/or polyester — is coated in multiple layers of black & white foam that’s designed to not let light pass through it.

This makes it an especially viable choice in areas with lots of ambient light.

Rather than reflecting light like a typical white screen would, it absorbs it.

However,  because it still has the benefits that a white screen would with higher white levels, it can also be used in darker rooms making it an extremely versatile option.

Yandood Projector Screen Material Fabric


Will A White Sheet Work As A Projector Screen?


Yes you technically can use a white sheet as a projector screen, though you’ll want to make sure the sheet itself remains tout and doesn’t wrinkle or bunch up.

Additionally, because the material may not be as thick, you may have to put something behind it to prevent light bleed and maintain a good picture quality for your content.

Though ideally, using a screen or paint is probably the better option.


Can I Use Polyester For A Projector Screen


You can also use a fabric made of polyester with your projector, however the problem with this is it can sometimes crease which can affect the image.

A polyester blend is a better choice since it’ll allow the material to stretch, making the entire surface of the screen uniform.


Can You Use Drop Cloth For A Projector Screen?


Drop cloth can be used for a projector screen as well, especially if it’s made of a thicker canvas like material.

Just keep in mind that the color will dictate what environment suits the screen best.


Best Projector Screen Material For 4K


Does The Color Of The Wall Matter For A Projector?

What if you wanted to watch 4K material, what would the best screen material be in that case?

Well similar to my earlier recommendation, I’d definitely have to say white blackout cloth would be the most suitable for 4K content as it’d allow for the most crisp and dynamic image quality.


Will A Tarp Work For A Movie Screen?


If you didn’t have a dedicated movie screen, could you just use a tarp?

Although you technically could use a tarp for a projection screen, I really wouldn’t advise since its flexibility and wrinkles could cause the picture quality to be uneven and distracting.


What Is The Best Material For An Outdoor Movie Screen?


In terms of outdoor movie screens, the best materials would be some sort of outdoor fabric, canvas like material, or even an inflatable screen.

There’s lots of options though, and the best in those cases would depend on the amount of sunlight, viewing conditions, viewing angles, and seating arrangements.


Final Thoughts


Well that about wraps it for this one.

In short, the best material for a projector screen in my opinion is white blackout cloth since it absorbs light while also maintaining a bright and vivid image — making it the ideal surface to project onto.

Though it depends on your individual viewing environment, blackout cloth tends to look best from my experience.

You can also make your projector brighter through various ways.

Hopefully this helps though and if you have any questions, leave a comment below.

Until next time, make it easy, keep it simple.


Does The Color Of The Wall Matter For A Projector?

Does The Color Of The Wall Matter For A Projector?

Does The Color Of The Wall Matter For A Projector?


Does The Color Of The Wall Matter For A Projector?

Does the color of the wall matter for a projector?

It’s a good question really.

Projectors are a great alternative to the standard television with the innate benefits of having a similar picture quality while being much more portable.

You may even be aware that projector screens are typically used in conjunction with these devices.

However when you decide to skip the screen, and simply project directly on to your wall, does the color of that wall impact the picture quality?

We’ll answer that specific question while informing you of what to keep in mind in this helpful guide!


Does The Color Of The Wall Matter For A Projector?


Yes the color of the wall matters for a projector as this will directly influence the image quality you experience. You can use any color, however grey is typically thought of as best due to its balance between reflectivity and light absorption. This is all dependent on your particular viewing conditions since some colors are best suited to specific environments.


The Texture Of The Wall Matters


A textured wall

So before we get into how color can interact with the image quality, the preceding thing to keep in mind before you do anything is considering the type of wall you plan to use your projector with.

Remember, a projector screen is generally more favorable for image quality due to the fact that they typically have a special coating (that walls don’t have) that helps to improve the amount of light they reflect.

This will end making the image appear brighter.

While you can you can take the simpler approach of projecting on to your wall, it’s usually the less recommended option.

But here’s the thing, the texture of the wall that you use will have a direct impact on the quality of the image you see.

If you run your hand across the wall, it’s possible you might still feel somewhat of a texture even if the wall looks smooth from a distance.

If the wall has a small amount of texture, that’s actually fine since it can help to slightly diffuse the incoming light providing for a more balanced picture.


With smooth surfaces, I’ve noticed when there’s a lot of sunlight it can sometimes reflect off it.

However on the flip side if the wall is too textured, that’s where problems can arise.

When there’s really uneven walls, this can cause shadows to form in various areas – causing the image itself to look lose clarity and luminance.

So long story short, make sure the wall you use isn’t all over the place in texture.


What Color Should My Wall Be For A Projector?


So when it then comes to choosing the best color background for the projector, what color should the wall actually be?

This is actually going to depend on a number of things, but generally speaking, I think opting for some sort of lighter grey when projecting onto a wall tends to work really well in my opinion.

Grey provides the best balance between absorbing just enough light to which could help with viewing angles of your TV, while reflecting enough light to still offer a satisfactory image quality.

A lighter grey is preferable as it’ll provide just enough light reflectivity for acceptable white levels while still offering some of the benefits that a darker tone would.


A general tip is to use the color grey if your projector outputs more than 3400 lumens in terms of brightness, since I’ve found this to generally be around the luminance area where the cone of viewing starts to diminish.


Do projectors Work Better On Grey, White, Or Black Walls?


But will your projected image look better on grey, white, or black walls?

I would still generally say grey; except with the caveat that it depends on your viewing conditions.

For example let’s start with the color white.

Since white has such a high gain, and thus such a high level of reflectivity, it will reflect all light.

This allows them to produce the highest white levels in content, giving a very bright image.

While this works great for home theater rooms where the environment may be dark, this might not necessarily be the case in other areas.

If there’s a lot of ambient light coming from windows and skylights for instance, this light could interact with the image and diminish how it looks both in terms of colors and visibility.

White also has the least forgiving viewing angles due to its reflectivity.

That means if you have seating that’s positioned off to the sides and off axis, you’ll might get a worse image quality in those positions.

Last but not least, since black is technically the absence of light, the color white will have more trouble accurately reproducing the deepest black levels which could leave the image looking less dynamic overall.


Now with the color black, since it absorbs all light, this tends to give the highest viewing angles even over grey; and gives the colors on screen more pop.

However, the drawback with using the color black is that depending on the capabilities of the projector, the projected image on a black surface may not be as bright comparatively.

A grey surface tends to balance the advantages and disadvantages of both though tones of white may appear slightly grey in lower power projectors.


Will A Projector Work On A Colored Wall?


What if your wall isn’t grey, black, or white?

What if it’s a wall of a different color; will a projector work on a different colored wall?

Luckily yes it will.

In fact, some projector makers include some sort of mode or modes that’ll account for reflectivity or tone of the wall, and adjust color levels to give a more accurate image.

Even if your projector doesn’t have this feature, just consider the shade of the wall.

Is it a darker or lighter shade?

That’ll give you an idea of what conditions your projector will work best in and the kind of picture quality you’ll experience with that particular wall.


Do You Need Special Paint On Wall For A Projector?


Now what about the paint itself, does it need to be of a particular kind?

Ideally, for the best picture quality, yes.

There actually exists a type of paint specifically for use with projectors.

This projector screen paint is made with the intention of optimizing viewing quality.

There’s all kinds of shades and colors, but the kind that’s best for you is really going to depend on the kind of room you plan on watching your content in.

An extremely bright environment might find black to be the best color for an adequate projected image, whereas the typical darker home cinema room might find white more favorable.

Another helpful piece of advice is to outline the perimeter of your viewing wall with a dark border since that can help augment the perceived contrast in your image, making it look more vivid.

It can also temper any potential light bleed, which can distort the presentation of your image.

Projector Screen Felt Tape Border


Final Thoughts


Does The Color Of The Wall Matter For A Projector?

So in summary, yes the color of the wall or background you use matters since this directly influences the image quality you experience.

Grey is typically chosen because it offers the best balance between picture brightness and viewing conditions.

However there are some instances where a white or even black surface may be the better choice.

Keep this in mind and you’ll be enjoying fantastic picture quality in no time.

But that’s all for now.

If you have any questions then definitely ask, and leave a comment below letting me know your thoughts.

Until next time.

Make it easy, keep it simple. ?


Should You Put Acoustic Panels Behind Speakers? (Explained!)

Should You Put Acoustic Panels Behind Speakers?

Should You Put Acoustic Panels Behind Speakers? (Explained)


Should You Put Acoustic Panels Behind Speakers?

Yes acoustic panels should be placed behind speakers to help smooth out the sound quality in the room. That’s the best location to reduce reflective sounds coming from the part of the room with the highest pressure — which is often the front.


Check Availability Of Acoustic Sound Panels


Should you put acoustic panels behind speakers?

It’s a question you may not have thought about until now but realize there may be some benefit in doing so.

Acoustic treatment is a topic not emphasized enough in home theater I feel — so today I wanted to give you a guide on not only what that entails, but how you can ultimately implement acoustic treatment for better sound.

Plus I’ll be explaining the benefits of placing sound panels behind your speakers.

There’s a lot to cover though so let’s get to it.


What Is Acoustic Treatment


Acoustic treatment to put it simply, is the implementation of some sort of object or configuration made with the purpose of diffusing or absorbing sounds in a space.

These treatments can come in many forms, and it isn’t uncommon for some spaces to need a combination of solutions to achieve sound quality that’s optimal for that particular space.

Bass traps and acoustic panels are 2 of the most popular implementations.

Taking the time to properly ensure a room is a acoustically treated is a great way to effectively improve audio quality.


Why Acoustic Treatment Is Important


Why Acoustic Treatment Is Important

Acoustic treatment is important because it can literally mean the difference between a sound that’s underwhelming and one that sounds absolutely amazing.

Often times this is something that tends to be skipped, but even in a home theater that already sounds great, this can help to elevate it to the next level.

There’s typically 3 forms of sound that you’re trying to treat when doing this process; reflections, reverberations, and resonance.


Although all 3 are important to mitigate, reflections, at least in my opinion, are the most egregious and crucial to deal with.

One of the most common reflections that occur are called SBIR (speaker boundary interference response)

This is a form of acoustical distortion that happens when a speaker is close to some sort of boundary which includes walls/floors, & even the ceiling.

The reflection from this hard surface then creates a delayed mirror image of the sound that emanates from that speaker.

These are most common in the lower frequency and can lead to an uneven sound where some parts of the room are boosted while other parts are quiet.

What makes it worse is there can be multiples of these reflections depending on the amount of speakers/subwoofers you have.

These can lead to lobbing, comb filtering, etc which can disrupt the level of immersion you experience.

However, suprisingly enough, it’s actually possible to over do it and do too much treatment to the room which can lead to the room sounding smaller than it really is.

Finding the right balance where there’s still a slight amount of liveliness but not to the point where there’s an echo is key.


Ways You Can Implement Acoustic Treatment


Using Acoustic Panels


You may have seen these used by recording artists or streamers, but basically acoustic panels are a great way to help reduce reflections in the room and improve sound.

They absorb unwanted frequencies and reverberations that can typically cause an echo.

By dampening unwanted noises, these panels are an easy way to improve audio characteristics of a room.


Made from any number of various types of light weight foam or fiberglass, sound waves travel into this material and get trapped — reducing the amount that actually reflect back into the room.

Since this foam works off of air movement, it travels through the material and creates friction, which changes the energy and slows it down.

That leads to absorption.

These panels are typically effective for smaller bookshelf speakers and monitors.

It’s important to keep in mind though that they aren’t the most effective at absorbing the unwanted low frequency sounds that larger speakers and subwoofers emit.

That’s where bass traps come in.


Implementing Bass Traps


Dealing with lower frequencies can be a lot more difficult due to the sheer size and energy these particular sound waves carry.

This causes them to be omnidirectional, meaning it travels in every direction irregardless of the direction the speaker driver is facing.

But to make it simple, you can think of bass traps as an effective way at dealing with these issues in the lower frequency response.

Bass traps are acoustic energy absorbers that help with room modes caused by standing waves.

These standing waves can cause dips or peaks in the sound you perceive — so by implementing bass traps, you can enjoy a smoother listening experience.

You’ll want to place them in corners since that’s usually where bass waves gather.


Reducing Floor Reflections With Carpeting


Hardwood floors are a primary candidate for first reflections, and can be a main contributor to reduced sound quality.

By using thick carpeting or rugs, you can reduce these reflections.


Using Thick Drapery For Windows


Similar to hardwood floors, windows are another reflection point due to their hard surface where waves can often reflect off of.

Using thick sound absorbing curtains or drapery is a great way to take care of these.


Integrating Low-Noise Split Air Conditioning


Low noise split air conditioning is another way to ensure proper sound quality in the room.

By using these in combination with other tips talked about here, you can prevent sounds from leaking or entering through air ducts and vents.


Implementing Helmholtz Resonators


Helmholtz Resonators, while not typically used in the household setting, are basically a small circular apparatus with varying use cases and can sometimes help with sound.

They can be helpful in dealing with different frequencies depending on their specific shapes and size.


Installing Ceiling Clouds


Ceiling clouds are pretty cool in my opinion since they’re a way to acoustically treat a larger room.

They’re usually placed in larger rooms from the ceiling, and help with the sound waves that may reflect up there.

They come in many different styles and materials.


Using Acoustic Sealant On Cracks & Crevices


Another thing to keep in mind is that sounds can escape through even the most minute of cracks and crevices.

This can alter the acoustics of the room more than you’d initially think.

Acoustic sealant is a useful remedy to this, and can be used to further isolate and lessen the transmissions of sound through things like corners and windows.


Identifying Reflection Points With The Mirror Test


Finding places where soundwaves from your content might be reflecting can be identified by using what’s called the mirror test.

Basically while sitting in the main listening position, someone else would walk along the wall with a small mirror until you see the speaker in the mirror.

Have them mark that spot with a small piece of tape.

That’s the main reflection point of that specific speaker.

You’ll want to do this for each of the main 3 front speakers, and place panels at each of the marked spots.


Using Diffusers


Diffusers are helpful in that they can help reduce soundwaves to achieve a better acoustic balance in a room by dampening it.

This can be a good balance since acoustically treating to much can lead to the room sounding too quiet if over done.

They can be helpful for keeping a space sounding more lively, and can be used in combination with sound absorbers.


Where Should Acoustic Panels Be Placed? & What To Keep In Mind


Taking Into Account Height Of The Room


The height of the room will have an influence on where acoustic panels should be placed.

However the higher the ceiling and more irregular the shape of the room, the more complicated things get.

As a general idea, you’ll want to place each panel on opposing walls in pairs around the perimeter of the room.

If you figure 2 for each speaker in a 5.1 channel setup, then that equates to 10 panels being effective.

However that can, and most likely will vary but it’s just a general idea.

For example, placing panels where 2 surfaces meet, or in dihedral corners, is a good way to further isolate the sound to just that specific room.


Spacing Of The Panels


Spacing of the panels will obviously depend on how large they are, but also what you’re using them for.

In a recording studio for example, panels should cover nearly 100 percent of the wall.

However in a typical home theater, they’ll be used much less.

A helpful tip is to keep at least 1/2 an inch to an inch of space behind fiberglass sound panels.

The reason for this is the sound waves will travel through the panel, go through the air gap behind it, hit the wall, then go back through the panel in the other direction.

This effectively allows it to mitigate these sound waves even further.


Bigger Rooms With Higher Ceilings


Elongated rooms, rooms with irregular shape, and ones with high ceilings will likely require a different level of treatment than a smaller room.

This is because as sound rises, it spreads out and reflects downward though it is possible that the sound wave can also not have enough energy to do this, and simply dissipates.

This happens when the frequency is lower, or when the ceiling is really high where it can’t reach it.


If it’s a longer room, it’ll also require more panels due to their simply being more surface area for waves to reflect off of.

Ceiling clouds like we talked about earlier can be a helpful apparatus in improving the acoustics.

Even though all ceilings are technically reflective, the higher that ceiling is, the more necessary treatment may become.


Placing Panels Behind Speakers


What about behind speakers like in our original question, should panels be placed there?

Well here’s what to remember.

The front of the room, in the area that’s between your wall and your speakers is typically the highest pressure area in the room.

This is because not only do these front firing speakers fire their sound forwards, they also emit indirect sounds from the sides and back of their cabinet.

From there, early reflections as they’re known, arrive at your ears soon after the main sound from your content.

This can mess up imaging and articulation in the small details.

So by placing sound absorbers behind the speakers, it helps to mitigate this issue.

A common descriptor you’ll see on panels is something called their NRC rating.


The NRC rating (noise reduction coefficient) is basically a quantification of how well a material does with reducing and/or absorbing sound.

It’s measured on a scale from 0.0 to 1.0 and the closer towards 1 the NRC rating is, the better it is at absorbing that sound.

How Important Is Timbre Matching Your Home Theater Speakers?


However, you want to make sure the panels or device you use (such as bass traps) interact with pressure waves and not air waves/movement.

That’s because the lower frequencies are pressure waves and are what usually causes the issues.

But if you use something that deals with air movement, this can potentially hamper sound quality since the higher frequencies from your speakers might be affected.

This is where diffusive panels can also be helpful as they simply act to reroute the sound rather than get rid of it.

As to which is the better application really depends on your room as a combination of the two may be best.

You can always try moving the speaker closer and farther from the wall to see how it interacts with it, but you’ll likely still want to implement at least one kind of treatment in this particular area.

Without a version of sound treatment, some level of distortion will always be present.

So to answer the original question, panels work great when placed behind speakers to put it simply.

However that’s actually not the only place they should go for optimal sound quality.


Behind The Television


Similar to the reasons given for speakers, you should place panels on the side and if possible, behind the television as well.

Sound waves can collide or interact with each other to a high degree, and by implementing these panels here, they can help to improve your sound quality.


How Many Acoustic Panels Do You Need?


The number of panels you need depends a wide variety of factors.

But to generalize, 2 for every speaker is a good starting metric to guage things (but again, that’s dependent on the room)


Diffusion Or Absorption Behind Speakers?


So should you use diffusion or absorption behind speakers?

If it’s a panel or technology that deals with pressure, then absorption typically works best.

Otherwise it may be smart to go with panels that offer diffusion.


Do Acoustic Panels Actually Work?


As long as acoustic panels are implemented properly, using the aforementioned & subsequent tips in this article, acoustic panels absolutely work.


What Acoustic Panels Are The Best?


There’s so many types of panels that it really depends on the type of panel, the material, room size, speaker count, etc.

These are the type of panels I use.

Check Availability Of Acoustic Sound Panels


How Do You Mount Acoustic Panels?


With regards to how you mount acoustic panels, that again depends on the type you’re using.

A lot of times though, there will often be an adhesive back on the panel where they can be simply attached to the wall.


Final Thoughts


So hopefully this clears up whether or not acoustic panels should be placed behind speakers.

To summarize, yes they absolutely should, along with being placed on areas surrounding to help smooth out the sound quality in the room.

Sound waves tend to reflect, resonate, & reverberate — and if you can properly place these panels in the right spots in the room, these should be greatly diminished.

Until next time, make it easy, keep it simple.

PHEANOO P15 Soundbar Review

PHEANOO P15 Soundbar Review


Hey everyone hope you’re all doing well.

I’m sure you’ve already gathered from the title what the focus will be today.

This is the PHEANOO P15 soundbar review, a look at a 2.1 channel soundbar that actually manages to impress with its abilities.

But what does it offer and is it the right soundbar for you?

Let’s find out!

PHEANOO P15 Review


The PHEANOO P15 is an awesome 2.1 channel soundbar system who’s latent performance belies its stout appearance. It’s a great fit for the casual listener who isn’t concerned with surround sound but still desires quality audio. Surprisingly proficient bass, easy setup, and Bluetooth capabilities make this an easy recommendation!


Check Availability Of The PHEANOO P15 Soundbar


Appearance


When taking a look at the PHEANOO P15 soundbar, the first thing you’ll probably notice is just how small it is.

At only 16 inches across, it’s a really compact soundbar.

In fact, PHEANOO states that it’s about the size of a keyboard which I feel is a fairly accurate assessment.

In terms of design language, it definitely goes for a simplistic yet practical approach.

On top of the device you have your manual controls for the Bluetooth, volume, play/pause, & the power with a small PHEANOO branding above that.

There’s a black metal grille that wraps part way around the chassis, and the soundbar itself is made of plastic.

It feels solid though, and while not heavy, it still feels quality.

The same can be said of the subwoofer; which at height of about 14 inches nicely compliments the soundbar.

On the back is the connection inputs that include optical, auxiliary, USB, and HDMI ARC.

There’s really not much else to say from a design standpoint to be honest. It’s a small, low key looking soundbar that definitely blends in a majority of rooms.

In fact, there’s a good chance you might even forget it’s there until you hear it.

So to summarize, aesthetically speaking, it’s a really nice looking soundbar.


Features


Bluetooth 5.0 Support


With support for Bluetooth 5.0, enjoy all your favorite music and content wirelessly from your smart device.

Easy Setup


The Pheanoo P15 is easy to setup thanks to its multitude of connection options, and even turns on & off when the TV does.

140 Watts Of Power


With 140 watts of power, enjoy room filling sound

Included Subwoofer


With an included subwoofer, deep bass helps to elevate the experience.

3 Different Sound Modes


3 different sound modes, dialogue, movie, & music allow you to tailor your sound to your content.

Helpful LED Indicator


A helpful LED Indicator automatically dims and can be turned off by pressing the button denoted by indicator on the remote.

Can Be Wall Mounted


The P15 can also be wall mounted for even further convenience

Small Size


At 3.8 x 16 x 2.9 inches and about 10.41 pounds, this soundbar easily fits in a variety of entertainment setups.

Includes Connection Cables


The cables you’d need to connect the soundbar are present and include an HDMI cable, 3.5mm to RCA audio cable, and a power cable.


How To Set It Up


Setting up the P15 is really simple thanks to its multitude of connections.

If you wanted to connect it to the television, thanks to HDMI ARC, all you would need to do is connect the HDMI cable into the input labeled HDMI ARC on your television.

For Bluetooth, simply press the button and pair it with your smart device.


Check Availability Of The PHEANOO P15 Soundbar


Sound Quality


So how does the PHEANOO P15 actually sound though?

Really clear.

In fact, it caught me off guard because I didn’t expect it to put out the level of sound it did at such a small size.

It wasn’t so much the sound quality since I figured it’d probably sound decent, but the sheer volume it can reach.

This thing can get loud, and didn’t seem to distort much at higher volumes.

Though I did notice the mids seemed to become more subdued at higher volumes.

But I have more thoughts when it comes to the sound so let’s dive deeper.


Its Performance With Music


With music, the soundbar really shines I feel like — and provides a fun level of dynamism that really brings songs to life.

In the music mode in particular, I noticed that the mixture between bass and treble was balanced, which made it a real joy to listen to.

Instruments sounded articulate with a clarity that didn’t fatigue in extended listening periods.

Vocals sounded lifelike and immersive, adding emotional layering to songs.

The bass is what stuck out the most though as it had incredible levels of impact and offered spectacular depth.

It didn’t distort or sound boomy either. It was just good clean bass.

I liked that this subwoofer was wired too because sometimes wireless subs can lose connection or cut out.

With this one, you don’t have to worry about that.

I will say though I do kind of wish it would have had the ability to extend the wire length via RCA rather than proprietary solution it uses.

There is a separate extension cable from PHEANOO though it’s separate.

But given the integrated one is 7.5 feet, it’s likely enough for the average entertainment setup.

Bluetooth also worked perfectly, and I didn’t experience any issues with connecting.

Audio quality using it was solid, and the range seemed to be about 32ish feet.

Even the remote was simple to use and worked fine although it didn’t come with batteries (it uses AAA)

Music in general though was a highlight.


With Movies


Movies I have to say are also really enjoyable with this soundbar.

Now it’s not going to outpower a dedicated surround sound home theater or anything like that.

But for the average listener that just wants to watch movies in the typical sized room, then it’s definitely a solid option.

The bass in particular again was the star as it gave depth to movies in a way that I was genuinely surprised.

It definitely seems to punch above its weight.

But that sentiment goes for the soundbar too.

When it came to speech, it represented dialogue in a way that easily surpasses the average TV speakers.

One of the worst things is having to rewind because you didn’t hear what someone said.

Luckily these help avoid that.

Dialogue sounded natural, and didn’t impose itself above the other frequencies.

It all seemed like a balanced presentation.

Even delicate sounds in the treble range were detailed and blended nicely into the mix.

Now it can’t replicate the experience of surround sound though since the sound only emanates from the bar itself — so if that’s a concern that’s something to keep in mind.

But the quality of the sound that is there is honestly really solid.

I would say that the P28 has more range in the low end though due to it being more powerful with 160 watts, but the P15 still does its thing.


With TV


If you’re looking into this soundbar because you need something to replace your TV speakers, this is definitely a good choice.

Just watching TV with this compared with the integrated speakers feels like a massive step up despite it’s small stature.

Dialogue is crystal clear, and makes something like sports feel immersive.


Check Availability Of The PHEANOO P15 Soundbar


Pros/Likes


  • Great Sound Quality
  • Deep Bass
  • Easy Setup
  • Bluetooth 5.0
  • Can Be Wall Mounted
  • Small at 16 inches


Dislikes


  • Can’t extend wired sub range
  • No granular DSP control
  • No batteries in remote


Final Thoughts


To summarize everything, the PHEANOO P15 is an awesome 2.1 channel soundbar system who’s latent performance belies its small appearance.

Deep bass and proficient audio playback makes it a joy to listen to, and is finds its groove in small to average sized rooms.

Check Availability Of The PHEANOO P15 Soundbar


That about wraps it up for this one though.

Until next time.

Make it easy, keep it simple.