The Best Ceiling Speakers For 2023-2024

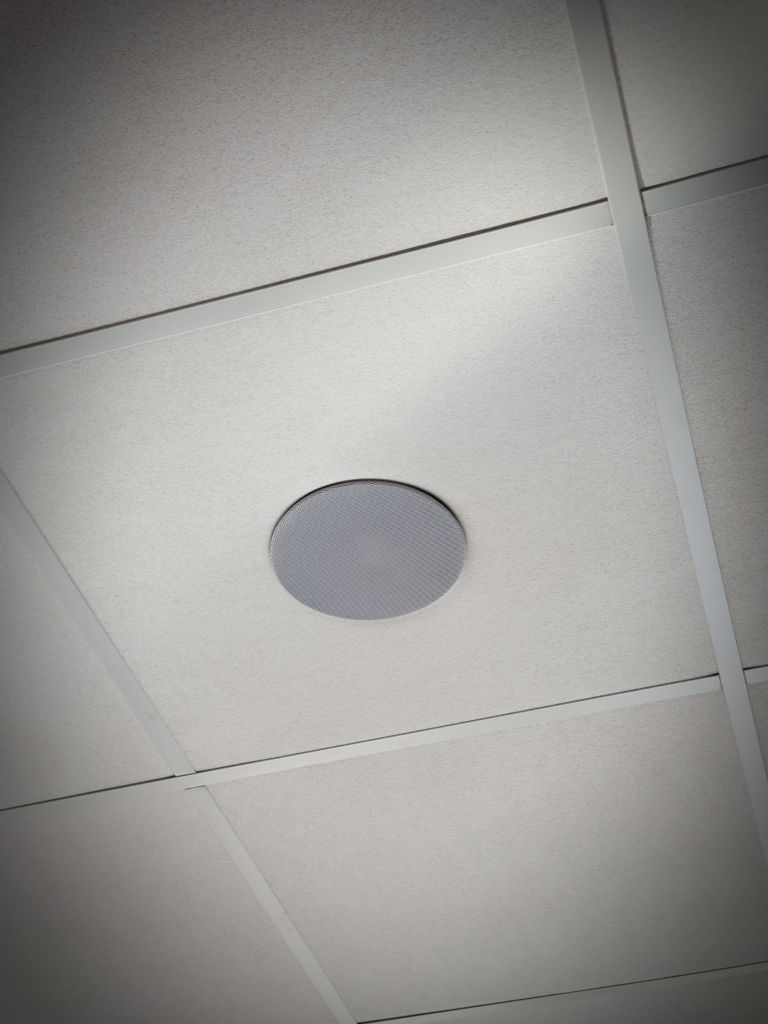
A picture of one the the best ceiling speakers for 2019

The Best Ceiling Speakers For 2023-2024


A picture of one the the best ceiling speakers for 2020-2021.

How’s it going? Really hope you’re having a great day.

Today we’ll be doing things a little differently by taking a look at some of the best ceiling speakers for 2023-2024.

But wait, why in the world would you want a speaker there?

Better yet, are they worth it compared to the traditional kind?

Maybe, maybe not. Time to find out! 😀

The list of the top picks for the year are directly below along with an depth guide explaining ceiling speakers under that.

There’s many amazing ceiling speakers in general, so the ones on this list are simply a few of the many good ones that also exist out there.


The Best 4 inch – Yamaha NS-IC400WH


The Best 6 inch – JBL Professional Control 26C 6.5-Inch


The Best 8 inch – Polk Audio RC80i 2-way


The Best 10 inch – Bic 250W 3-Way 10”


The Best Weather Proof – OSD Audio ICE600TTWRS


Decision Guide


The Best 4 Inch – Yamaha NS-IC400WH


When it comes to smaller sized speakers that still pack a punch, one of the first that immediately come to mind is the Yamaha NS-IC400WH.

Despite the fact that the woofer is only 4 inches, they still manage to go plenty loud, providing crystal clear sound.

These are perfect for smaller rooms because when fully installed, they only have a 3.3 inch profile in depth which is about the same as an average downlight.

That means they won’t effect the look of the room too much, but will still give you the sound you’ve been looking for. This is especially helpful for rooms where larger 6.5 or 8 inch models would be too large.

The fact that they have a paintable and removable speaker grille via magnets allows them to seamlessly blend in with whatever environment you decide to place them in.

One of the best features about these though is the fact that they’re touted as easy to install which I’m sure you’ll certainly appreciate. That means less time fiddling with things and more time watching.

Given that they’re only 1.8 pounds, that also means they can be supported by a much wider variety of ceiling types compared to heavier kinds. Plus there’s even a back cover that helps protect it from dust and moisture, so there’s no worries there.

All around it’s just a solid choice.


Pros


  • Great sound quality for smaller rooms
  • Light at 1.8 Pounds
  • Back cover helps protect it from dust and moisture
  • Easy to install
  • Paintable


Cons


  • Only goes down to 95 Hz, so you’ll need to use these with a subwoofer
  • Not the best for large rooms


Overall, if you need a ceiling speaker for a smaller room that’ll do the job and do it well, then the Yamaha NS-IC400WH certainly does that and then some.


Yamaha NS-IC400WH


The Best 6 inch – JBL Professional Control 26C 6.5-Inch


Now let’s say you have a normal sized room and you want something that’ll really make your movie night memorable.

If you’re looking for something that’ll work perfectly in the average sized living room or family room, then the JBL S26C is certainly a great option.

These have 6.5 inch drivers, and can reach a sound frequency of about 75Hz.

There’s also rubber surrounding these drivers which not only allows it to minimize distortion at higher volumes, but provides you with a much tighter and cleaner bass all around,.

Then on the high end, you also have a .75 inch titanium tweeter for those crystal clear highs.

The 26C also has a paintable grille and faceplate so no worries about it not matching or sticking out. The fact that it’s paintable means you can match it to whatever room it’s placed in.


Pros


  • Sound quality has depth and clarity
  • Swivel mount allows you to aim the projection of the sound
  • Distortion is minimized even at high volumes
  • Can be painted to match décor


Cons


  • May still want to use a subwoofer with these


In short, if you’re looking for something to go in a mid sized to even slightly large room, the JBL 26C is certainly suited for that.


JBL Professional Control 26C 6.5-Inch


The Best 8 inch – Polk Audio RC80i 2-way


With regards to 8 inch ceiling speakers, the Polk Audio RC80I is a great choice for that size range.

You know, of all the ceiling speakers I’ve heard, this is one of the very few that could really be used entirely without a subwoofer.

Yes you heard that right.

Going down to 35hz (possibly lower depending on your room) this thing hits incredibly hard when it comes to the bass.

But what’s really impressive is how clear it is too.

Be it movies, music, etc. it handles it all beautifully. Everything is just so full bodied and articulate which makes watching anything with it a real treat.

They’re definitely not small and weigh about 4.3 pounds, but for the larger room where you want something that can belt it out, this is definitely it.

The best part is that it retains all the useful features of its smaller counterparts like a swivel tweeter so you can aim the sound, paintable grilles so they blend in, and rubber surroundings to minimize distortion while still being able to go louder and deeper.

If you’re looking for something for a large room, then I feel as though this one fits that criteria.


Pros


  • Can be used without a subwoofer due to it’s large 8 inch driver
  • Moveable tweeter allows you to project the sound anywhere
  • Paintable grille
  • Excellent sound quality


Cons


  • Large at 10.38 pounds and 8 inches


As long as you have the room and don’t mind the size, the Polk Audio RC80i is absolutely incredible.


Polk Audio RC80i 2-way


The Best 10 inch – Bic 250W 3-Way 10”


Now this is a behemoth of a speaker, no 2 ways about it.

With an outer diameter of 13.5 inches, you’ll want to make sure that you have the space for this one.

But if you do, the Bic 250 watt is probably one of the most mind blowing speakers I’ve heard in a long time.

I mean just look at the name. It’s rated at 250 watts meaning this thing can go super loud.

The fact that it has a rated sensitivity of 90db means it can also get louder while using less power.

It’s a 3 way design as well, meaning it has a separate woofer, midrange driver, and tweeter for a more accurate and realistic sound.

The woofer is a 10 inch heavy duty woven fiber driver that is able to put out a clean bass without any distortion issues even under high volumes.

But what’s particularly impressive about it is the fact that it can actually go down to 24 Hz!

To put that in perspective, that’s lower than a lot of dedicated subwoofers in a normal home theater.

Absolutely insane!

That means you’ll easily be able to run these without the need of an extra sub which is a plus.

The midrange driver is also woven fiber and is 2.5 inches in diameter while the 1 inch liquid cooled titanium domed tweeter rounds things out.

But what’s also great about them is that they pivot, meaning you can aim the sound wherever you want; even if you’re not directly under it.

That’s particularly useful as that opens up many more options in terms of placement. It’s really impressive when a speaker manages to combine deep bass with crystal clear highs, and this one does that flawlessly.

Everything just sounds full and rich.

If you need something with some true power behind it, highly recommend this one. It’s amazing.


Pros


  • Ability to go down to 24Hz means you can easily use it without a subwoofer
  • 3 way design provides a very realistic sound quality
  • 1 inch tweeter and 2.5 inch midrange drivers that pivot, allowing you to aim the sound
  • 250 watts provides true power
  • 90 db sensitivity allows it to get louder with less power


Cons


  • Large at 13.5 inches across
  • Requires a ceiling depth of 5 ¼ inches


Again, providing you have the room, this has the power to completely transform your movie nights. It’s definitely a great speaker.


Bic 250W 3-Way 10”


The Best Weather Proof – OSD Audio ICE600TTWRS


Now let’s say you need something that’ll be fine indoors, outdoors, wherever.

Maybe you’re not too sure yet, but you want something that can easily stand up to the elements.

In that case, the ICE600TTWRS by OSD Audio fits that standard. The fact that it’s weatherproof means it can be placed in high humidity or damp environments like bathrooms, kitchens, or even  patios, giving you a plethora of placement options.

What’s really cool about this one though is that it has a dual voice coil design. This basically allows it to give stereo sound while only using a single speaker meaning you could actually place a single one of these in a room and still get stereo sound.

How cool is that?

It has dual 1 inch dome tweeters that can be aimed anywhere in the room, and a 6.5 inch Kevlar woofer that gives it a high durability and low distortion even at high volumes.

Speaking of volume, this thing also packs a wallop with an impressive 150 watts meaning it’ll do just fine even if you do decide to place it outdoors.

Plus the driver is also lined with a material called santoprene which helps with its ability to withstand extreme cold and heat — while also helping to improve the speaker’s durability as well as sound quality.

It’s even touted as having an easy installation, which is always huge thumbs up.

Overall it’s just a really solid speaker that’s hard to find fault with honestly.


Pros


  • Ability to withstand extreme cold and heat
  • Can be placed in damp or humid environments
  • Can provide stereo sound from a single speaker
  • 150 watt output allows it to get very loud
  • Kevlar woofer lets it play clearly at those higher volumes
  • Dual 1 inch dome tweeters that pivot
  • Easy installation
  • Great sound quality in general


Cons


  • Still requires a subwoofer for the lowest bass

When it comes to looking for a quality weatherproof ceiling speaker, I feel like this is among the best when it comes to that. It’s a solid offering that’s built to last and sounds great.

Highly recommend it.


OSD Audio ICE600TTWRS


What Is A Ceiling Speaker?


A ceiling speaker is as the name would suggest, a passive speaker that’s specifically designed to sit within the ceiling while projecting the sound downward toward the listener. This is done via means of a wired connection to an external amplifier or receiver.

They’re definitely interesting because unlike a typical speaker, it isn’t completely necessary for the driver itself to be placed in a large cabinet like with a bookshelf or even floor standing variant.

Instead when placed in the ceiling, the ceiling itself actually becomes the enclosure (though you can still specifically create one for it, however we’ll get to that in a little bit)

Funnily enough, even though these have been around for a while now, they didn’t really catch on commercially until quite recently.


That’s for a number of reasons.

One major reason why it wasn’t too popular at first was due to the fact that the price wasn’t consumer friendly — and so was really only relegated to high end set ups or in places of business (think PA systems in a school for example)

It wasn’t until more recently when companies began to realize this where we saw an increase in general adoption of these.

Another pretty big reason why these also didn’t really catch on until the last few years has to do with the actual sound quality. In comparison with normal speakers, the ceiling variants weren’t exactly stellar to be honest, often sounding tinny or harsh at louder volumes.

However this has changed drastically as of late because now not only is the sound quality relatively equal; in some instances it’s actually better than the traditional type, which is a complete 180 compared with how they use to be.

They also were much more complex to set up then they are now, so that definitely helped as well.

So here’s the real question though, are there any actual real world advantages to using these when compared to let’s say a bookshelf or floor standing speaker?

In a word, yes. There certainly is.

In fact, there’s actually a bunch, which just might make them the more enticing option to go with.


What Are The Advantages Of Ceiling Speakers Over Traditional Types?
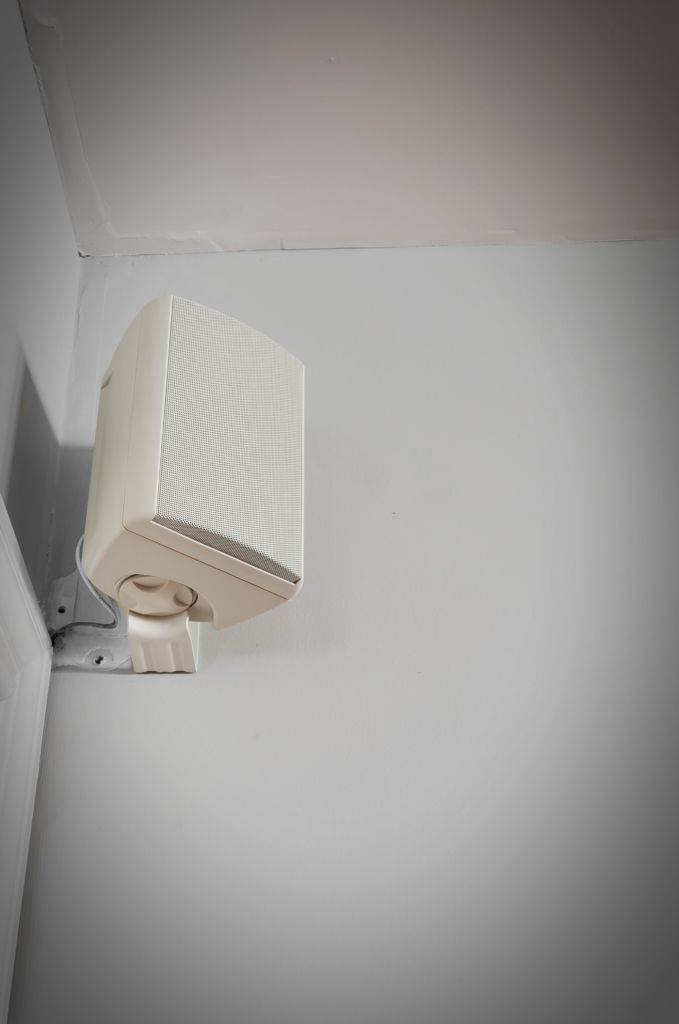

A bookshelf speaker mounted up at a height near the ceiling

From the name alone, you would probably think of ceiling speakers as just some niche or luxury thing, but they actually have some real world use that might give them a place in your home.


~They Save You Space


So the first major reason why you might want to go with them instead is the space saving factor. Due to the fact that they are placed in your ceiling, that means that they’ll physically be out of the way; thus saving you a lot of space in the end.

This is especially helpful if your main listening area is a smaller room and you’re already pressed for space as is. Using these pretty much circumvents that entirely while still giving you the same enjoyable experience.

It’s also helpful if your significant other isn’t too fond of having speakers being all over the place, so there’s always that too.


~No Messy Wires All Over The Place


While sticking to the theme of decluttering, the next advantage that these offer is pretty similar to the previous one, and that’s the added benefit of not having wires all over the place. Now while I did do an article on ways you can actually hide them, why not go a step further and never have to worry about doing so in the first place.

So not only do you save space, but you also don’t have to worry about tripping over unsightly wires.


~Allows You To Maintain The Aesthetics Of Your Room


This one’s a secondary benefit of the first two, but it’s still a welcome one nonetheless.

If you’re fond of the way your room looks now, and don’t really want to change anything about it in the form of speakers and the like, then a pretty nice little benefit is that you still get to enjoy surround sound goodness without having bulky speakers messing with your feng shui.

Why choose between having quality sound or a nice looking room when you can have both?


~Natural Room Acoustics Give Your Sound A Boost


Another advantage to using these kinds of speakers is that due to the fact they don’t have an enclosure or speaker cabinet, the ceiling itself then becomes the enclosure. This allows you to take advantage of the room’s natural acoustics.

If done right, it can actually provide you with a pretty nice bass and treble boost giving you a much livelier sound.


~Less Interference With Objects In The Room Gives You A Purer Sound


In that same vein of improved sound quality, yet another benefit that these offer is less interference.

Since speakers on the ground project sound forward usually, that sound ends up interacting with everything in the room in some way shape or form; with some parts of the sound wave being absorbed while others bounce around.

So by the time the sound actually reaches your ears, it’s a modified version of what the director probably intended for you to hear. Ceiling speakers minimize that greatly since the sound wave doesn’t travel as far, giving you a much purer sound.

Just remember that things like seating and what’s actually in the room itself plays a huge part in your overall experience too.


~Support For Dolby Atmos


Here’s a pretty major draw to these as well; the support for Dolby Atmos.

Now if you’ve never experienced Atmos, then oooh boy you’re in for a treat. It’s honestly a game changer.

Basically it’s an object based sound format used in overhead speakers that allows for sound to become omnidirectional, meaning it can come from anywhere; even above you.

But it’s not just that — the fact that it’s object based means it can provide for some pretty hyper-realistic sounds. So if for example it were raining in a scene, it would calculate and account for each individual rain drop falling from above as it hit the ground.

It’s pretty mind blowing truthfully.

https://easyhometheater.net/dolby-atmos-vs-dts-x


How Many Different Types Of Ceiling Speakers Are There?


Now when it comes to the number of types, they tend to come in quite a few shapes and sizes that each have their own appropriate applications.

In terms of shape, you’ll most commonly come across 2 distinct ones, round and square shaped.

Most people go for round ones since those are more common than square, but the shape doesn’t really matter when it comes to sound. It’s just a matter of aesthetical personal preference.

For example in an abnormal room with a lot of angles or skylights, a square frame may provide a better fit.

But in a normal room, either or would be fine, so again it won’t matter too much.

What will matter however is their size, and they tend to come in 3 different sizes; 4 inches, 6 inches and 8 inches (though this can vary)

Keep in mind that that size measurement isn’t for the speaker itself, but rather the actual cone inside.

That means that the total speaker size can be a little larger than the listed measurement. It’ll be helpful to remember this (especially if you’re still in the planning stages) since you’ll obviously want to make sure that you have enough space.

That being said, there’s a specific use case for each size speaker.


~4 Inches


4 inch models are compact and less obtrusive than their larger counterparts. If keeping the look of the room the same is important to you, then these are a good option to go with.

But do keep in mind that due to their smaller drivers, they won’t be able to go as loud or as deep as the bigger models can.


~6 Inches


6 inch models are the speakers that offer the best utility because they’re not incredibly large, yet can still deliver a much deeper sound than 4 inch variants.

They’re definitely the best bang for buck when it comes to still being able to hide the speaker while not compromising on actual sound quality.


~8 Inches


However if looks aren’t important and you want the best possible, then the 8 inch model is your best bet. They will typically have the deepest low end and most dynamic audio range.

But this does usually come at a premium so that’s something to keep in mind. They’re also not small, so they will be pretty visible should you choose to go with them.


What To Look For In A Quality One?
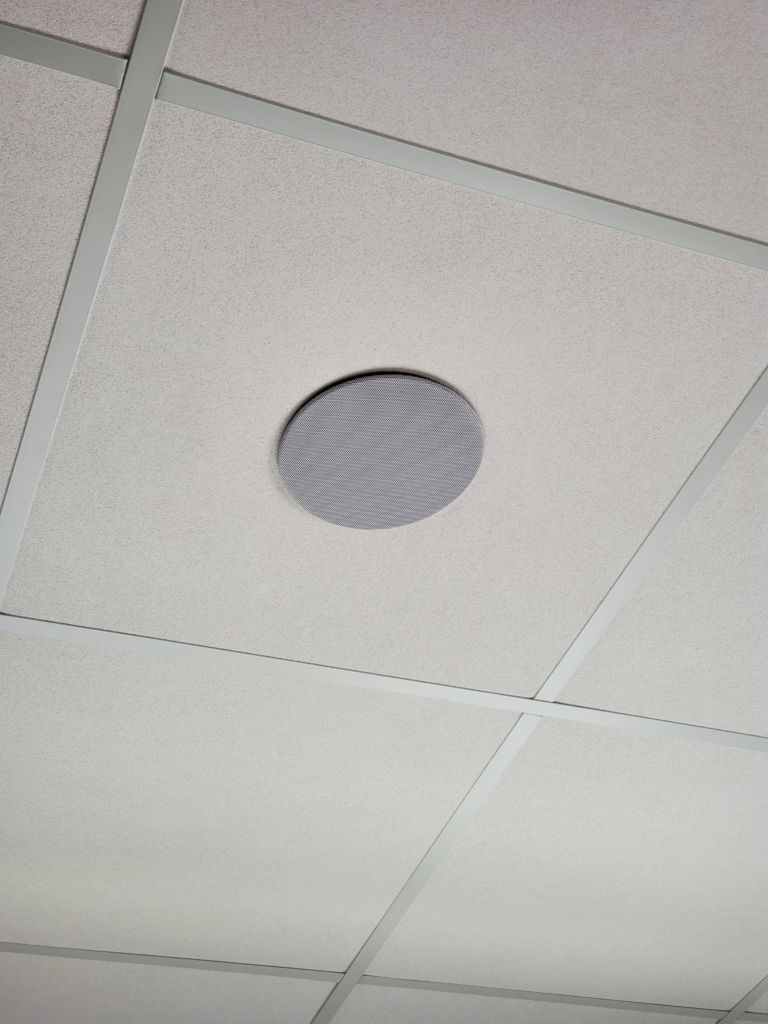

So now that we know they come in various shapes and sizes, what exactly should you look for when it comes to getting a quality ceiling speaker?

Well there’s quite a few things to really keep in mind if you plan on getting something that will actually last you.


~Safety


One of the most important things, if not the most important thing, is safety.

Make sure that the wire you’re getting is specifically designed to be compliant with building and fire regulations.

If you’re getting someone to set everything up for you then you won’t have to worry about this, but again don’t buy just any old wire. It should specifically be for this purpose.


~Budget


Budget is obviously important and will likely be one of the biggest factors in your decisions. So decide on a budget beforehand and work within that.

Remember though that this is something that you probably don’t want to skimp on since that might mean taking a hit when it comes to sound quality. So just be cognizant of this.


~Frequency Response


Another pretty important metric that may influence things is the frequency response. This is basically a measurement of how high and low a speaker can go.

The broader the range the better.

You’ll usually see this denoted by 2 different numbers on the right and left. You want the left number to be as low as possible (since this is a measure of the low end) and the right number to be as high as possible (a measure of the high end)

That way you end up getting the most dynamic sound possible.


~The Amount Of Power/Wattage


Wattage can be pretty important too since that’s a measure of the highest amplified output or in other words, the loudest it can go.

Obviously you’ll want this number to be high, but if you can shoot for speakers that have a wattage of at least 90, then volume should be solid in a normal room.


~The Sensitivity Rating


Another somewhat similar thing to look for is the sensitivity.

The higher this number is, the easier it’ll be to power with your receiver; meaning it’ll take much less power to function than a speaker with a low sensitivity.

The lowest you’ll want this number to be is 85 since anything lower will be much harder to power and may result in you having to turn the volume up to the point the audio starts clipping.

So anything 85 and up is what you’ll want ideally (with the higher the better)


~A Speaker That Pivots


What should also be really be high up on your list of necessities is getting ones that are adjustable after installation.

This is especially important because the sound will be projected downwards, and whatever happens to be directly under it (such as hardwood floors or carpets), will undoubtedly have an effect on the sound.

Of course this is unavoidable since it interacts with nearly everything in the room, but being able to aim the tweeter will allow you to get the clearest sound in your specific seating position, even if that position isn’t directly under the speaker.

So if during your search, you happen to come across one where it says it has a tweeter or driver that pivots, then this is what that means.


~Easy To Install


Something that’s easy to install is a plus too, and manufacturers typically make it abundantly clear on either the packaging or item description when this is the case since they’re aware that this is something we would all would prefer.

The less work the better.


~Durable/Weather Proof


You also may want to look into one that’s not only durable in construction, but has some kind of moisture resistant coating, covering, or something like that. This would allot you many more placement options without ever having worry about damaging your speaker.


~Ability To Be Painted


If you really want the speaker to blend in though, yet another thing that could prove helpful is getting one that allows you to paint its grille so that it matches whatever room it’s placed in.

Just because they’re in the ceiling doesn’t mean they have to be an eyesore, so ones that allow you to do this pretty much negate that concern.


~Size & Weight Of the Speaker


The size and weight of the actual speaker is also really important because that’ll usually dictate where it can be placed.

For example if your ceiling is made of drywall, then obviously you won’t be able to get one too heavy or large without it potentially falling. Whereas if your ceiling is made of a more solid material like wood or concrete, you won’t have that issue.

Since most ceiling speakers come with their own mounting materials denoting what materials they can and can’t be placed in, this makes things infinitely easier for you.

However sometimes additional things may be required as well; so if you do set your sights on a particular one you like, make sure that you’re aware of what it needs for installation beforehand.


~Capability Of Stereo Sound


Also depending on your particular usage, you may be interested in one that is capable of stereo sound. If you have a smaller room, this can definitely be helpful because it would allow it deliver stereo sound from only a single speaker which certainly saves space.

These are known as 2 way designs, but there are speakers that have 3 and even 4 way designs, giving even more dynamism from a single source.


~Something That Looks Good


Finally get one that you think looks good!

Obviously I can’t definitively say what looks good or not since that’s completely subjective, but don’t just settle on a speaker that has good specs.

Get one that you actually like the look of and think will look good in your particular room. This might include things like a low profile, smaller bezels, etc.

If it fits your style then get it.


How Many Should You Go With?


Now the amount of speakers that you should go with is going to depend a few things like the size of your room, how large the speaker itself is, what you plan on using it for, etc.

Keep in mind that the smaller the speaker & the bigger the room, the more of them that will be required to get a balanced and pleasing sound. If you have too few speakers and they’re too small, what will happen is you’ll be required to turn it louder just to get to the same volume as opposed to if you had an extra or two.

Plus it wouldn’t be the most pleasing thing in the world for listeners in close proximity either — and might even be distracting since the less of them that you have, the less of a surround sound effect that you’ll get.


Are They Permanent?


Here’s a good question, say you change your mind down the line and decide that you want to instead opt for a conventional system, is it permanent?

Well technically yes and no.

Yes because you’re cutting holes in your ceiling when you’re installing them, and no because you can always undo their installation; you’ll just be left with the holes in your ceiling that you’d need to patch.

So my advice is to make sure that this is something you want to do 100 percent first beforehand, since it’d honestly be a pain to have to undo everything; especially if you had them professionally installed.


How Often Do You Have To Replace Them?


Just in case if you were wondering whether or not these would need to be replaced often or even semi often, the answer is definitely not. Unless they’re defective and somehow short out, you won’t really have to replace these at all.

That being said, keep in mind that the field of audio is always evolving and manufacturers are always coming up with new and exciting ways of innovating on already existing technology.

So just like with normal speakers, it is always possible that a few years down the line an iterative upgrade is introduced that brings some new novel features.

But that’s just the nature of the beast when it comes to technology, so it isn’t something that I would personally worry about (unless you have to have the latest new shiny thing, and in that case.. hey it’s your call)


Where Should You Install Your Ceiling Speakers?


You’ve seen all the benefits that ceiling speakers offer, and whether or not they’d be something you’d be interested in, now question is — where exactly is the most optimal place for them to be installed?

See the great thing about these types of speakers is that they really can be placed anywhere; save for a few exceptions.

Unless they’re weatherproof, you won’t want to place them in environments that are too hot or too cold. This could cause them to malfunction which is obviously no good.

You’ll also want to avoid placing them too close to each other since that could ruin the surround sound effect.

A good rule of thumb is placing them at least 6 feet apart from each other, and equal distances away from the wall of the room going lengthwise.

If you think you won’t be able to place them at least 6 feet apart due to size constraints of the room, then going with a single stereo speaker in the middle of the room also works.

Also unless they have a tweeter that can be aimed like we talked about earlier, make sure that they’re actually installed where your seating position is since the sound will be projected downward and it’ll be wasted if you’re not in the vicinity of them.

Other than that, the rest is really up to you.

Place them in the room where you do the most content viewing. Or if you’re feeling really ambitious, get multiple and have a multi room setup. There’s no shortage of placement options which is why I personally really like them.


How Do You Install Ceiling Speakers?


Here’s one of the more pressing and important questions, how do you install them?

To explain it fully in length would probably take an entirely separate article, but do note that while you certainly can do it yourself, it will be a very involved process and you’ll likely need to set aside a few hours to install them correctly.

But there are plenty of helpful videos that actually details the process.

My suggestion is that if you’ve never done this before though, and don’t feel comfortable, then having a professional do it for you is definitely an easier route.

For example, there are stores that have a service where you can schedule an appointment where a professional comes to your house to map everything out for you, and recommends the best way to go about setting things up based on your room, speakers, and a bunch of other specifics.

Even better is that from there, as long as you actually have the speakers in hand, they can come back another day to install them for you.

That way you don’t have to go through the process of installing them yourself, and in less than a few hours you’ve got yourself an incredible new entertainment system.

How convenient is that?

I’ve used it before and the guy that came was super helpful. Funny thing is, he pointed out a few things that even I didn’t notice at first.

They aren’t the only ones that do this though, since I know that a lot of places or even people offer these kinds of services. It’s really going to depend on your area in regards to which of these you’ll be able to utilize honestly.

But if you’d rather have it done cleanly and quickly, getting a professional to do it is certainly the easiest route.


How Do You Uninstall Ceiling Speakers?


For whatever reason if you do decide to change your mind and want to uninstall them, then can it be done?

Well like we mentioned before they’re a pretty permanent addition, but if you were determined enough, you would just need to make sure everything is unplugged from the receiver before undoing all the wiring and removing the speakers; reversing the process you used to install them essentially.

But just remember the holes in the ceiling from the speaker would still be there unless you managed to patch them up.


How Do You Remove Ceiling Speaker Covers?


This is something that’s less talked about, but over time dust can accumulate inside the speaker grille.

That’s why it’s a good idea every few months or so to remove them in order to wipe any excess dust out.

But how do you remove these covers?

Well one way I like to do it is with something really thin like a paper clip. If you straighten out one end of a paper clip, you should be able to wedge it in between and slowly but surely work your way around the speaker until you’re able to remove the entire thing.

Be gentle doing this of course, since you don’t want to bend or scratch it. But with a little patience, it’s certainly doable.


Are They Okay To Use In A Smaller Room?


Let’s say you were thinking about using these in a smaller room like a bedroom or spare room; would it be a good idea?

The answer to that is absolutely.

Even in smaller rooms, ceiling speakers have their utility — maybe even more so considering they would actually save you more space compared to a traditional 5.1 system. Plus you wouldn’t have to get as many due to the smaller area, while still reaping the benefits of surround sound.

It’s a win win honestly.


Anything Else You Should Keep In Mind?


There’s also a few other things that might be useful to keep in mind.

Like I mentioned earlier, the type of wiring you use matters.

Besides making sure that it’s specifically labeled for in wall use, the thickness of the actual wire is also important.

While 16 gauge is the standard, over greater lengths, a thicker wire is needed to carry the same signal without losses in quality. That’s why I’d recommend going with going 14 or even 12 gauge just to be on the safe side.

With that in mind, again make sure that it’s specifically listed for in wall use. A good indicator of this is if states that it’s UL listed and CL2/CL3 certified.

Also be aware that the wiring is away from any power cords or other wiring in the wall because that can actually cause interference, which can affect sound quality.

While on the topic of wiring, something else you may not be aware of is that if you do plan to use a single speaker, you’ll need to run 2 sets of cables, not just 1. It’s actually a common mistake, so just giving you the heads up beforehand so you don’t do the same.

That is, unless you use something called 4 core/conductor speaker cable which does allow you to use just 1 cable.

Another thing you may want to be aware of is whether the speaker you’re looking to get comes with a back box.

What is that?

Well it’s an enclosure that covers the speaker driver either fully or partially that’s specially engineered to improve sound quality, clarity, and volume. It even manages to minimize sound leakage, so you won’t annoy the neighbors during your 2am jam sessions.

They usually come with one included, but in the rare chance that it doesn’t, you can still DIY with a few materials.

Here’s an awesome article that explains exactly that. https://thehometheaterdiy.com/do-in-ceiling-speakers-need-a-backbox/

Last but not least, ceiling depth matters since that’ll be a big factor in what you’re able to get. At the very least you’ll want a few inches of clearance so that it’ll actually fit in there.

Anyways that pretty much covers everything in regards to helping you to know what to look for.

So with that, that about wraps it up for this one folks. In my opinion, these are the best ceiling speakers for 2023-2024.

Hopefully now that after reading this, you’ll be able to make your own informed decision in terms of what to look for even if none of the above choices are right for you.

I know that they’re not as simple to set up as a standard home theater system, but I’d argue that ceiling speakers not only offer greater utility, but the same sound quality while saving you space.

They really are awesome honestly.

Until next time my friends, make it easy, keep it simple.


The Best Home Theater Projectors For 2025

The Best Home Theater Projectors For 2025


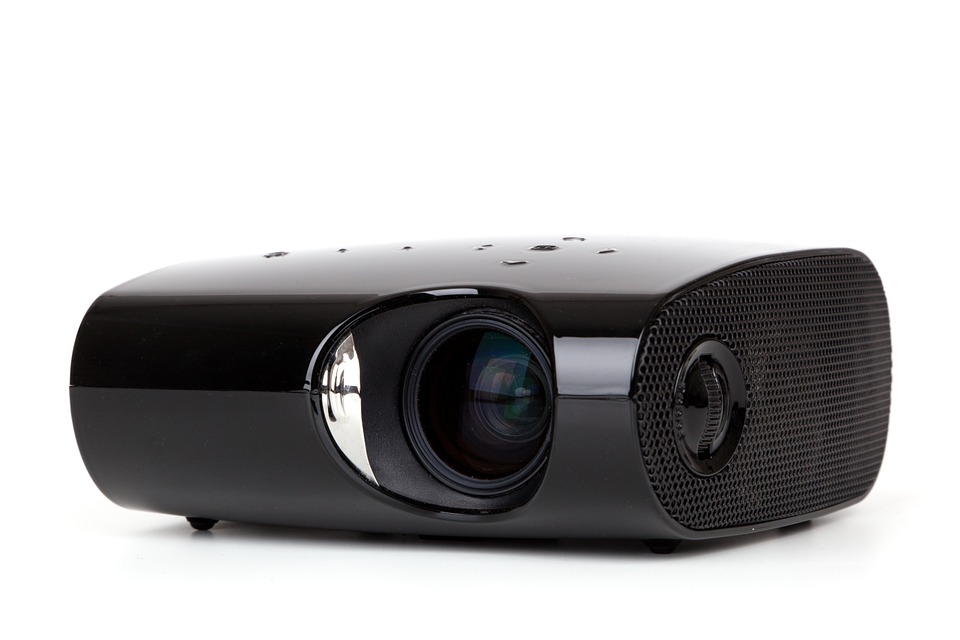
best home theater projectors 2023

Today we’ll be taking a look at some of the best home theater projectors for 2025 in my opinion.

If you’ve been looking around but couldn’t really decide what to go with, then this list should help.

No doubt there’s lots of quality ones out there, and a truly good can really enhance the home theater experience.

A new projector can also make for an awesome gift idea, so these are some of my top picks for the year with a decision guide below to help.

Besides covering some the top rated home theater projectors currently available, we’ll also cover what to look for, how to set one up, and a bunch of other stuff.


The Best Short Throw – Optoma GT2000HDR Compact Short Throw


The Best One For 1080p – BenQ TH575


The Best One For 4K and HDR Support – BenQ TK700


The Best One For Gaming – Optoma UHD35STx


The Most Portable – ELEPHAS Mini


The Best Choice For Bright Environments – AILESSOM Native 1080p


The Best For Audio – AWOL Vision LTV-2500 Pro


The Best High End Choice – Sony – VPLVW695ES


Decision Guide 


The Best Short Throw – Optoma GT2000HDR Compact Short Throw


Perhaps you want a compact projector for smaller spaces that still provides a great picture quality.

If that’s the case, then a solid choice would be the Optoma GT2000HDR.

Why is this though?

Well a few reasons.

The first reason why this might be the one for you is it gets really bright which is great since you can use it in a variety of lighting conditions.

It’s rated at 3500 lumens which is super impressive, and makes for a really bright picture.

You also get the big screen experience since it can display up to 120 inches from only 4 feet 4 inches away.

That makes it awesome for smaller spaces since it can be placed closer to a wall while maintaining awesome clarity.

Speaking of which, it supports a crisp 1080p image and supports HDR for a more vibrant image.

What’s also cool about this projector is its 300,000:1 contrast ratio.

This difference between light and dark elements on screen allows for a dynamic image with great black levels.

Plus with fast response times for gaming, it’s a pretty well rounded projector

Lastly there’s the 2 HDMI inputs, & a USB port for updates or external multimedia devices.

Pros


  • Great picture quality at 1080p
  • 3500 lumens provides a bright image
  • Provides an up to 120 inch image from 4 feet 4 inches away
  • Small & light at 4.49 x 10.79 x 8.5 inches & 6.61lbs
  • HDR 10 & HLG support
  • Fast response times for gaming


Cons


  • No VGA port


All in all, it’s a fantastic little projector and I think it does a great job when it comes to picture quality.


Check Optoma GT2000HDR Compact Short Throw Availability


The Best One For 1080p – BenQ TH575


In terms of the best full HD projectors, this is a great option.

One of the major reasons for that comes down to a superb picture quality.

It’s rated at 3800 Lumens, meaning it’ll be plenty bright even in well lit conditions.

That means no worrying about the picture getting washed out from sunlight since it has the horsepower to really crank up in visibility.

It also has a 15,000:1 contrast ratio for better black levels.

This makes your movie nights that much more immersive.

What’s really cool about this one is the fact that it’s short throw, meaning it’s great for smaller rooms too and not just large ones.

In fact from 10.8 feet away from a surface, it has the capability to produce an image that’s 100 inches across.

That’s pretty impressive.

Even better, it can go up to 300 inches, so even in the biggest of rooms it should more than suffice.

One reason you may actually consider going with this one as well is if you were heavy into gaming.

It has a 16 ms input lag which to put it simply, is incredible.

This basically means the delay between a button press and what you see on screen is minuscule.

It’s just an all around great performer, hence why I feel it’s a great unit at the 1080p range.


Pros


  • 3800 Lumens meaning it can get bright even in sun baked rooms
  • Picture quality is clear and colorful
  • Short thow design allows it to produce a 100 inch screen 10.8 feet away with support up to 300 inches
  • Support for wired connections like HDMI
  • 15,000:1 contrast ratio allows black levels to appear deep and rich


Cons


  • No Bluetooth


Overall, it’s just an all around solid device.

Highly recommend it.


Check BenQ TH575 Availability


The Best One For 4K and HDR Support – BenQ TK700


Now we’re getting into the heavy hitters.

So now let’s say you were looking for a higher resolution model that’s capable of 4K, HDR, the works.

You have a lot of options so what exactly do you go with?

In my opinion, I feel that the BenQ TK700 is an awesome projector in this particular range.

Why?

Quite simply because the picture quality on this one is incredible; you’d have to see it to believe it.

It can project 100 inch image from 8.2 feet away, and a 150 inch one at 12.3 feet.

It’s fully 4K HDR compatible, so any of your 4K Blurays or ultra high definition content is going to look breathtaking with this one.

This is further helped along by the fact that it’s a 10 bit device.

Basically, that means it’s capable of displaying over a billion colors in content that supports that expanded range.

This means your picture would not only look colorful, but be more nuanced as well since it can display more shades and gradients.

As a result, content looks much more lifelike and realistic.

That’s especially helped by its 16ms response time at 4K which drops to an impressive 4ms at 1080p.

That’s great for gaming.

Combine that with the ability to go up to ANSI 3200 lumens in brightness, and you have yourself one incredible package.

Plus with eARC support, there’s passthrough for immersive 7.1 channel surround sound or Dolby Atmos.

It’s honestly one of my personal favorites, so if you’re looking for something quality to replace your television, this would be it.


Pros


  • Picture quality is gorgeous
  • 4K HDR Capable
  • Ability to go up to 3200 ANSI lumens in brightness
  • 10 bit color means it can display over a billion colors
  • Great black levels
  • Celling mountable
  • Typical inputs like HDMI, etc. means it works with all of your devices


Cons


  • Color settings may need to be adjusted initially

Overall, this is certainly among the best out there in my opinion. Content looks incredible on it.


Check BenQ TK700 Availability


The Best One For Gaming – Optoma UHD35STx


Let’s say you’re really into gaming and need one that’ll give you a great picture without introducing a bunch of lag.

In that case, I’d highly recommend the Optoma UHD35STx.

What’s awesome about this one is that it supports from 60 all the way to 240 Hz — meaning gaming on this one will look silky smooth whether it’s on PC, or the next gen consoles.

At 1080p it has an impressive 240Hz at 4.2 ms response time.

The great thing about all of that is that it’ll feel incredibly responsive since the delay between when you press the button and what happens on screen will be infinitesimally small.

But what’s also great is that the actual picture quality is amazing too.

It supports 4K as well as HDR, so you’ll be getting the same image fidelity as a traditional display.

This is especially true since it can go to a whopping 3600 lumens.

That’s bright enough to even be displayed in bright lighting, so you won’t have any issues when it comes to actually seeing things.

There’s also HDMI support so your Xbox Series X, PS5, or Switch will have no issues working with it.

All in all, it’s absolutely the best choice for gaming in my opinion, and is still solid for movie watching as well.


Pros


  • Great picture quality
  • HDR and 4K support
  • 4.2 ms response time at 1080p
  • Can do up to 240Hz at 1080p
  • Ability to go up to 3600 lumens means it can be placed in even the brightest conditions
  • Support for PC or gaming console connectivity


Cons


  • No HDMI 2.1 meaning no 4K 120Hz support


Check Optoma UHD35STx Availability


The Most Portable – ELEPHAS Mini


What if you’re somebody who’s always mobile, but still want the ability to watch content on a bigger screen wherever that may be.

Surprisingly, there’s actually a lot of options out there.

One of the best I feel in this category is the ELEPHAS Mini.

Being that it’s only 1 pound, you’ll have no problems moving it around since it’s so small and lightweight.

But don’t let its small size fool you, it still manages to pack quite a punch with 3500 lumens in brightness.

That’s plenty bright enough to still give you a crystal clear image.

Plus that 6000:1 contrast ratio allows for deeper black levels.

It also has the ability to connect with your phone via wired connection; so things like Youtube, Netflix, or even your own videos will work just fine here.

What’s cool about this one is that it has a special heat dissipation design that allows it to stay cool even after hours of use which is really helpful.

It supports screen sizes from 80 inches all the way up to 200 inches — so you’ll still have the ability to display a gigantic image like other larger projectors.

This while still retaining that novel sense of portability.

The reason why I feel it’s best in terms of portability is even though it’s compact, you’re not losing out on image quality which is extremely important.

Things still look colorful and clear, meaning you still get to enjoy the fidelity of your content.

If the ability to move around while still getting a nice image is important to you, then this is a solid choice.


Pros


  • Light at 1 pound so can be moved easily
  • Clear image quality
  • Bright picture at 3500 lumens
  • Contrast ratio of 6000:1 produces deep black levels
  • Can connect to your smartphone to play content that way
  • Screen size is adjustable from 80 to 200 inches


Cons


  • No HDR or 4K
  • No Bluetooth


Check ELEPHAS Mini Availability


The Best Choice For Bright Environments – AILESSOM Native 1080p


So what if you have a room that gets a lot of sunlight, and you need something that can give you a bright and colorful image even in the day time.

Well you’re in luck because the Ailessom native 1080P projector gets plenty bright.

It has the ability to go to a jaw dropping 20000 Lumens, which means it can display an image in even the most sunlit rooms with ease.

It has the ability to shrink or zoom the picture via keystone correction so that you don’t have to physically move it around, and can create a screen size up to 450 inches big.

A movie night with that kind of screen would be transcendent to say the least.

But what’s even better is the fact that not only can it create a very large image, it creates a high quality one as well.

While brightness levels are of course great, black levels are also impressive.

With an 12000:1 contrast ratio, image fidelity looks incredible.

Plus with things like Bluetooth, 2.4G & 5G WiFi, and HDMI, you can connect to your game console or other media device.

There’s even dual built in 5 watt hifi stereo speakers built into the projector itself so you get great sound without the need for external speakers too.

It’s an extremely solid choice especially if your typical viewing environment has a lot of light.


Pros


  • Incredibly bright at 20000 lumens
  • Built in dual speakers
  • Up to 450 inch screen size
  • Bluetooth & WiFi capability
  • 12000:1 contrast ratio provides exemplary black levels
  • HDMI compatible


Cons


  • No HDR


Check AILESSOM Native 1080p Availability


The Best For Audio – AWOL LTV-2500 Pro


If you’re looking for a projector that also provides great sound for the average room, the AWOL LTV-2500 is a commendable choice.

The first reason why I feel like it’s such a great choice is due to the fact that it’s an ultra short throw projector capable of displaying a 100 inch image from only 9.8 feet away.

That’s super impressive when you consider that a lot of other projectors out there placed that close would give you a much smaller image than what’s provided here.

That means there’s a lot more diversity in not only placement, but seating as well since you’ll actually be able to sit closer while still getting the same benefit.

The fact that the screen is adjustable from 80 all the way to 150 inches just makes things that much better.

But what’s really cool about this one is its the first ultra short throw projector that’s also a center channel speaker since it can be used with their 4.2.2 Thunderbeat surround system.

Or you can forgo the center speaker capability and use it like a traditional projector in combination with an existing surround setup.

It’s just nice that there’s versatility with how it can be used.

Another major draw to this one is the fact that it’s quiet when running due to the triple laser design.

This not only affects audible noise, but helps with providing richer colors and a more consistent image.

Speaking of images, thanks to its native 2500:1 contrast ratio, it’s able to deliver great overall picture quality.

Black levels look deep & rich, and the colors just pop.

It’s able to reach a peak brightness of 2600 peak lumens meaning you can place this in dark or light environments and it’ll do just fine.

It’s even fully 4K HDR capable, and does a fantastic job with that too.

I didn’t even mention the fact that it’s fully 3D compatible and comes with a pair of active shutter 3D glasses for your movies at home.

It just all comes together for an extremely impressive package hence why if you can, it’s an incredible option.


Pros


  • Picture quality is superb
  • Full 4K HDR capability
  • Can display over a billion colors
  • 3D capable & includes active shutter glasses
  • Ultra Short Throw delivers a 100 inch image 9.8 feet away
  • Displays a picture size of 80-150 inches
  • 2600 peak lumens brightness makes the picture pop
  • Native 2500:1 contrast ratio for dynamic image

Cons


  • Heavy at 21 pounds
  • Large at 23.6 x 13.9 x 5.7 inches


Check AWOL LTV-2500 Pro Availability


The Best High End Choice – Sony VPLVW695ES


Now what if you’re in the market for the best of the best and the sky is the limit.

You basically want something that’s no holds barred, no compromises, and has all the bells and whistles.

Well turns out you again have a lot of options.

Now while I’m sure there are other high end choices that are awesome, the one that I recommend to you is the Sony VPLVW695ES.

This has everything you would expect from a high end offering; 4K, full HDR compatibility, you name it.

But what’s particularly interesting about this one is the fact that it’s IMAX Enhanced.

IMAX Enhanced is a relatively newer certification for home theater products that basically means they passed rigorous testing to ensure that they can deliver the highest quality picture and sound possible; giving you the full IMAX experience at home.

Long story short it makes a huge difference, and is one of the best in terms of capabilities.

It even allows you to customize the settings and save up to 5 different custom picture presets at a time which is very helpful.

If you want something that’ll surprise you with impeccable picture quality this is a great choice.


Pros


  • IMAX Enhanced provides an unprecedented picture quality
  • Ability to save 5 custom presets at a time
  • Ultra HD resolution, HDR, and expanded color
  • 1800 lumens means images will be bright and colorful
  • 350,000:1 contrast ratio gives beyond excellent black levels
  • 3 Chip design provides better color accuracy


Cons


  • Heavy at 37.48 pounds
  • Large at 25.24 x 21.69 x 12.48 inches


Check Sony VPLVW695ES Availability


The Basics Of A Projector (What They Are)


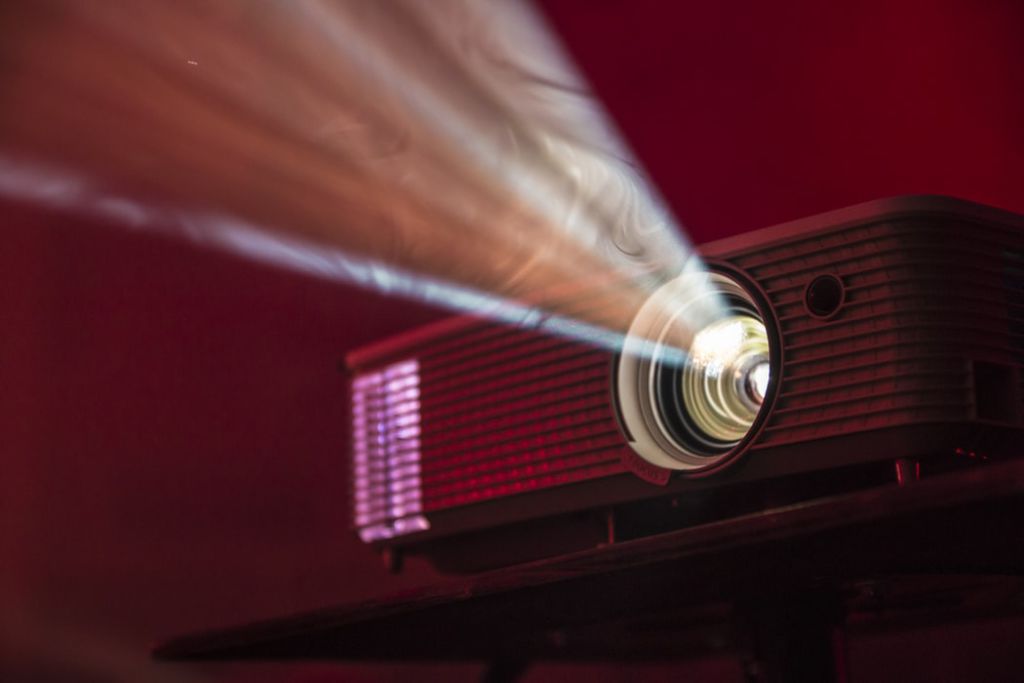
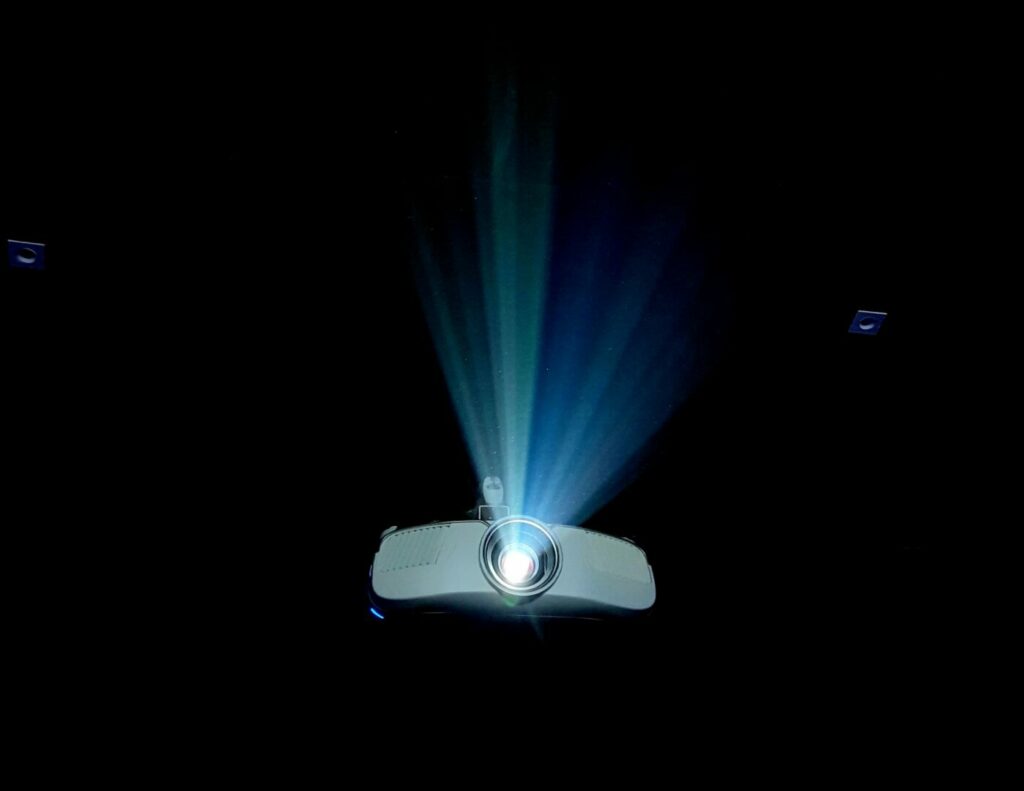
a light beam from a projector is shown

A projector is a device that projects an image onto a surface.

This is done via the travel of light through a specialized lens, filters, and potentially mirrors depending on the type.

But they’re interesting devices when you really think about it.


Convenient, sometimes portable devices that when quality, have the ability to display an image just as good if not better than some TVs.

That while also saving you space.

It almost seems like fiction in a way.

But it’s that level of convenience that leads some people to preferring a projector in the first place.

For example if you were looking to build a quality home theater, a projector can be one of those things to really make it feel truly cinematic.

Some of the highest rated home theater projectors can even replace a TV if they’re able to get bright enough while also maintaining solid black levels & color accuracy.

To measure that brightness though, the industry uses 2 different terms; lumens & ANSI lumens.

Lumens are represented as a number, and the brighter it is, the higher that number will be.

ANSI lumens also use a number to measure a projector’s brightness, however it’s calculated according to a specific criteria — making it more accurate.

https://en.wikipedia.org/wiki/Lumen_(unit)


When They Were First Introduced & Why


Now believe it or not, the first instance of a projector came about in 1879 by Eadweard Muybridge and was called the Zoopraxiscope.

It used moving glass discs to create the illusion of motion.

An updated version came in 1888 by the Lumiere brothers, with their first subsequent film debuting in 1894.

This was the version that’s similar to the ones used today because it was the first to combine a motion picture camera with a projector.

They were created so a group watching could experience these images, but now in motion.

Of course a lot has changed since then, but it’s still impressive to think that the modern projector has had such early origins.

https://en.wikipedia.org/wiki/Movie_projector


What Are The Advantages To Using A Projector?


Something important to note is that there are actually quite a number of advantages to using a projector over a more traditional display.


Easier To Transport


One awesome advantage is that they are often much easier to transport than say a television set due to their more compact size.

This can definitely make them a more enticing option if you’re someone who travels a lot.

Or even if you’re someone who rearranges their home a lot, this would probably be the better choice to go with since it would make things a whole lot easier.


Customizable Display Size


A projector screen

One really cool benefit that projectors have is that you can pretty much change the screen size at will.

Instead of watching at 70 inches, today you might feel like watching a movie on 120 inches.

Move it back a little, make some adjustments, and done.

Now you’re watching on an even bigger screen.

It’s this quality that’s particularly unique to projectors that make them such a joy to have.

Of course keep in mind each one will have its own specific limits with its screen size and resolution, but the fact that you can even have a variable screen size to begin with is pretty awesome.

Definitely something you can’t do with a TV.

If you buy a TV that you think is big at first, but get that upgrade itch when the bigger shinier models come out later, you’re kind of out of luck.

I know I’ve personally bought displays I thought were huge at first but then later down the line regretted not going bigger.

This essentially circumvents that problem entirely.

You can have the size you personally want whenever you feel like it.


Potentially Less Eyestrain


Eyestrain is a particularly troublesome condition where the eyes become fatigued, which can lead to red eyes, tearing, headaches, & a bunch of other uncomfortable symptoms.

A number of things can cause it, but one of the biggest causes is excess light emission; especially in environments where it’s dark and you’re looking at a bright screen.

But a pretty cool advantage that projectors have is that they have the tendency to actually help reduce eyestrain during extended viewing periods.

This is due to their nature.

Because projectors project an image onto an object first before the light from that image makes its way back to your eye, it’s much less stressful for it.

That’s because the human eye is much better at dealing with reflected light opposed to when it’s emitted.

The light the typical display puts out can be stressful for your eyes over extended periods because the particles themselves are being emitted directly into your eyes.

Add in a dark environment and the issue is only exacerbated.

So if you’re one of those people that watch a lot of movies at a time for longer durations, this may be yet another reason to choose to go with one.

Eyestrain can also stem from trying to focus on images that are too small.

However since you’re able to adjust the screen size to your liking, this type can be mitigated, giving you a much greater viewing comfort.


Same Picture Quality


A common misnomer with projectors is that they have an inferior picture quality to their TV counterparts.

A few years ago this may have been a valid argument when the technology simply wasn’t there; especially at a consumer level.

High end ones may have existed that were great, but they weren’t attainable for the average user.

However major improvements have been made in the industry since then with 4K and even 8K projectors finally existing at the consumer level; coming equipped with all the bells and whistles you may have been recently accustomed to like high dynamic range, expanded color, and even smart features.

Of course the feature list is going to depend on the one you get, but with a quality projector, the picture quality might be on par or even slightly better than a lot of regular displays.

Plus there’s also ways to improve a projector’s image even further if set up correctly.

So if you were worried that you would be taking a hit to picture quality when jumping on board with getting a projector, you can rest easy knowing that won’t be the case at all.


Better For Larger Or Smaller Than Average Rooms


A projector screen on the wall of a large room

Let’s say you have a room that’s so large, even an 85 inch TV wouldn’t cut it.

While you could go with an even larger physical display than that, the jump in price would likely be substantial for a quality one.

Even then, you still might not find one big enough to satisfy you.

So what can you do?

Well a better alternative would definitely be investing in a projector in this case.

That way you’d get the variable screen size to best fit your room, and you’d be able to go much bigger than you’d be able to otherwise.

It’s a win win.

Interestingly enough, this also applies to the other side of that sentiment too.

Let’s say for example you have a room that’s smaller than average and you still want a big screen experience.

Rather than having a TV that’s physically too big for the room, you could use the projector (which would also come in a much smaller form factor) to achieve the same thing.

That way you’re not missing out on anything and still get to enjoy your content the way you want to.

Plus it saves space so you still have room for your other decor.


What Are The Disadvantages


However there are disadvantages to using one too.

Surface Texture & Color Can Impact Projected Image Quality


Keep in mind that if you’re planning to use a projector, make sure that the image it’s projecting is onto a smooth surface.

If it’s rough or filled with irregularities, that can affect color accuracy and black levels.

Using a smooth surface can be the major difference between uniform looking image quality, and content that’s distorted.

Also, the color of that surface matters too.

To put it briefly, the color you should use depends on your specific viewing conditions.

Here’s more on why that is along with what I like to use.

https://easyhometheater.net/does-the-color-of-the-wall-matter-for-a-projector


The Internals Need To Be Cleaned For Dust More Often


Another issue is that compared to a TV, you’ll need to clean your projector more often for dust.

Since it has a filter & other intricate parts, if it accumulates too much dust, it could cause ventilation issues.

Maintaining a projector is important for both the device’s longevity, and enjoying your content at its best visually.


There’s Typically Fewer Inputs Comparatively


Compared to TVs, projectors typically have less inputs like HDMI & optical inputs

If you use multiple devices for streaming or playing games, then you may have to switch them often unless you use a receiver or an external device for additional HDMI inputs.


Panel Alignment Inside The Projector Can Shift Over Time


Over time, the panel alignment inside the projector can shift which can cause issues for how your content looks.

If the image looks crooked, it can be corrected in the settings or physically.

While a TVs picture quality also degrades over time, it isn’t affected by alignment.


What Are The Different Types Of Projectors?


Now like I alluded to earlier, the type and even model of projector you decide to go with will influence your experience.

But before we get into what to look for in a projector, we should take a look at what actually exists out there first.

That way you have a better idea of which may be the best fit for you before deciding within that type.


LCD


LCD (Liquid Crystal Display) projectors are the modern versions of the ones used in the mid 1900’s (which were CRT derivative).

The way that they work is pretty interesting.

The light which is emitted by an internal lamp, is then passed on to a series of mirrors that reflect only certain colors.

From there they go through a panel which is able to further control things like brightness, saturation, etc.

These lights are initially separated into the colors red, green, & blue — similar to a display’s pixel.

The lights are then recombined and then shown as an image.

All of this happens in an instant.

These types of projectors tend to very small and portable — making them enticing for average household use.


DLP


You can think of DLP versions as a more advanced form of LCD ones.

They tend to come in one-chip or three-chip variants.

Each chip contains millions of mirrors that each bounce around light thousands of times per second.

Each mirror can be thought of as a pixel since they behave much in the same way; that coupled with the fact that there’s so little space between each of them as well.

With 1-chip models, they’re able to produce up to 16 million total colors.

Sounds like a lot right?

Well a three-chip model can produce up to 35 trillion colors.

Yes you heard that right.

Trillion.

By being able to process individual beams of RGB simultaneously, it has the added advantage of being able to show an astronomical amount more.

What’s the point of being able to produce that many colors though?

Well the more colors that a display or image can produce, the more nuanced it can be when it comes to things like shading, skin tones, and fine details.

This all comes together for a much more life like image.

With that many, you can be pretty confident that it’s going to produce some pretty fantastic images.

Developed by Texas Instruments, DLP projectors use a tech known as Digital Micromirror Device to handle light.

However these single chip versions are only able to process a third of the white light that comes in on their own.

So to show a full color image, they use a color wheel.

While only 1/3rd of the listed light capability will actually be displayed in the image with a 1 chip projector, a 3 chip version is able to show 100 percent of that same light.

But like you would expect, these do tend to come at a premium compared to their 1 chip counterparts, and especially their LCD counterparts.

These 3 chip versions are also physically bigger, making them less portable.

https://www.seebigtv.com/dlp-projector-basics.php


LED


The main difference with LED versions is that instead of using an internal lamp as the light source, an internal array of LEDs are used to do the same thing.

This actually has a number of advantages such as allowing it to run cooler, be physically smaller, consume less energy, and be more accurate when it comes to color.

The only tradeoff is that they tend to not be able to get as bright as the other types.


Laser


One of the newest variants available, laser projectors are interesting because instead of using a lamp or even LEDs, lasers are used to project an image directly.

Now even though these have been around technically since about 2002 for industrial use, it wasn’t until about 2015 where these were commercially available.

Due to the fact it can recreate any wavelength of light, these have the ability to create the widest range of colors.

Not only that, but they also tend to have bigger contrast ratios, and better long term durability as well.

They do tend to be more on the premium side though from what I’ve noticed.


LCoS


LCoS (Liquid Crystal On Silicone) is pretty much a hybrid of LCD and DLP technologies.

Found typically on high end models, it combines a lot of the greatest features of both into one.

These tend to be quite premium when it comes to features.


How Do I Choose The Projector That’s Right For Me?


So by this point you might be thinking well these all sound awesome, but how do I know which is right for me?

I mean what’s the best projector for a home theater?

Well in order to answer that, there’s a few things that we have to keep in mind.


Where Do You Plan On Placing It?


First thing that immediately comes to mind in terms of one of the biggest influences to your decision will be where you plan on placing the projector.

Will it be placed in a well lit room or a dark one?

Perhaps even placed outside?

If you plan on placing it in a room with a lot of sunlight or even outside, then you’ll probably want to go with an LCoS or Laser type.

That’s because these tend to get the brightest, and so will be the most visible in these types of rooms.

On the flipside, if you planned on placing it in a darker movie room, then you’ll probably want to go with LED or Laser types as these tend to have the best contrast ratios and will provide better black levels.

That means the picture will look much more life like and pleasing to the eye.

For a room that’ll be dealing with both kinds of lighting conditions, then I’d suggest LCoS or Laser because these will offer the best versatility in these instances.

But these are just generalizations since the capability of the individual device is what matters.


The Lumens Brightness Is Also Important


The next thing you’ll want to consider is the lumens brightness of that projector.

A home theater projector should have enough lumens to remain visible in the conditions it’s placed in.

For a really bright room, I’ve found that 3500 lumens tends to provide a bright enough picture in that type of setting.

For normal or darker conditions, while lumens are still important, I’ve found that things like content ratio and color depth matters more for image fidelity.


The Throw Ratio Matters


Another factor you’ll want to consider is the throw ratio of the projector.

This basically tells you how big the image will be at a specific distance.

It’s extremely important to keep in mind because the throw ratio of one unit might produce an image that’s bigger at the same distance as another one.

This matters because if you’re already pressed on space or in the middle of planning your own home theater, you’ll want to know to know how much wiggle room you have to physically move it around to get the image you want.

It’s also important when you want to permanently install it somewhere because that’ll be the permanent image size when you place it.

Yet another reason throw ratio matters is if you’re trying to have a certain screen size at a certain distance.

For example let’s say you have a specific seating arrangement 10 feet away from the front of the room, and you want one that’s capable of producing a 100 inch screen at 12 feet away.

If you get one that displays a 150 inch image at that same distance, you’ll be in trouble since the image will be way too big and things will look distorted.

So the 3 types you’ll primarily come across are ultra short throw, short throw, and long throw projectors.

What helps in cases where there’s not much room for movement is a projector with ultra short throw capability.

This basically allows it to be placed really close to a surface but still produce a wide image.

Definitely helps if you’re planning on placing it in a smaller room where it’s about a foot away from a wall.

For an average room, a short throw projector works a few feet from the wall.

For a larger room, if it’s around 10 feet or farther, a long throw ratio produces a larger image at that distance.


Lens Zoom


Something else you’ll want to keep in mind when picking the one that works for you is the amount of lens zoom it also has.

Lens zoom, like the phrase implies, allows you to adjust the size of the image without actually having to move the device itself.

It’s usually denoted by a number; so if you see one listed with 2.0X zoom, that means you can adjust the picture to be twice as big as before in the same exact spot which can be pretty helpful.


Getting One With Keystone Correction Will Make Things Easier


While on the subject of zoom actually, another feature that may come in handy is Keystone Correction.

Keystone Correction allows you to correct an image that looks crooked to the viewers when it’s off angle or even perpendicular to the screen.

While almost every projector has that feature now a days, some still don’t.

So it’s worth mentioning that if you’re in the market for a new one, note whether it’s capable of this.


Aspect Ratio


Aspect ratio is basically how the image will look on screen given the height and width proportionally.

The reason this is important is different movies and shows are shot in different aspect ratios.

Some might be 16:9 and others might be 21:9; which means the image might look different depending on how the content was filmed.

This is where those black bars at the top and bottom of the screen come from during movies (often called letterboxing)

It’s basically a result of trying to correctly fit an image to a screen that’s a different aspect ratio than what the movie was shot in.

What you ideally want to look for is a projector than can display a bunch of different aspect ratios so that you can always have a correct looking image.

Otherwise you might end up with a picture that’s either too small or one that’s distorted to the point where it looks stretched.


One With Wifi Capabilities


If you prioritize things like wireless streaming and screen mirroring your phone, then you might want to look for one with wifi capabilities.

This can give you greater control over how you enjoy your content.

Wifi also allows you to use less cables for a more organized looking setup.


Figure out Where Your Priorities Lie


You’ll also want to prioritize when it comes to features; you know, which features are most important to you?

Do you want 4K and the most colors possible, or do you want one capable of the darkest blacks to make the image really pop?

There’s a truckload of fancy features out there like HDR, wide color gamuts, 4K, the list goes on.

But at the end of the day, what matters most is which of those is most important to you.

When you can list all the features you’d want beforehand, then it makes your search for the perfect projector that much easier.


Your Budget Is One Of The Most Important Factors


Price of course also matters, so setting a specific budget beforehand can make deciding a little easier.

That being said, keeping your budget slightly flexible is recommended since you may encounter something perfect for you that’s ever so slightly out of what you were planning on spending.

In that same token, this is going to be something that you’ll likely be spending years with, so compromising isn’t necessarily what I’d suggest.

You don’t want a few months to go by and you end up feeling underwhelmed or wishing you had gotten the better model.

Keeping this in mind will help in choosing the one that’s right for you.


Should You Choose A Projector Over A Television Or Monitor? My Thoughts


Here’s the real question, should you ditch your monitor or TV in favor of a projector?

It’s a tricky question to answer because there’s instances where the TV might be better, and then there’s situations where the opposite might be true.

For example, if you’re trying to get the biggest image possible (at least anything over 82 inches) then you’ll probably want to go with the projector in this case.

Under that, then the TV might be a better choice.

But that’s not to say that anything smaller automatically means you should disregard projectors either since they have their utility in smaller rooms too.

They probably have more utility in a smaller room because you could technically still get a big screen image while also taking up less space.

Like I said before, image quality isn’t really a concern anymore since some are pretty much on par with some of the best TVs.

It also depends on whether you plan on running the device continuously or not since some aren’t designed in that way.

If you do, then opting for the TV would be better.

But with that being said, there’s a few more reasons I can think of to purchase a projector instead of a TV.

I had mentioned this one earlier, but portability is a factor to consider.

If you’re someone who travels a lot, and/or changes the setup in their home a lot, having a projector can be advantageous because it’ll be much easier to transport.

Plus because it’s physically smaller, it provides you with more placement options.

That, and the benefit of an adjustable screen size is invaluable in comparison.

It’s like getting a bunch of different TVs in one.

On top of that, they’re easier on your eyes than a traditional television since they use reflected light to display an image.

So if you’re someone who’s susceptible to eye fatigue, this can be a great reason to get one.

Their level of convenience brings up another major reason why you might want to also get one; it’s safer.

What do I mean by that?

Well if you have a lot of pets or even smaller children around, there’s always the off chance that they could knock the TV over.

But because a projector is much smaller and can be mounted or placed out of the way, this removes that possibility.

Now you can technically mount a television too, but it might be a little harder to do.

But to be fair, TV’s do have the luxury of convenience comparatively since you’re more likely to be familiar with setting one up than a projector.

In some cases, it can be an easier experience overall.

Interestingly enough, that’s actually a perfect segue into the next question..


Is It Hard To Set Up A Projector?


So let’s say that you decide to get one, how hard is it to setup and get working?

Surprisingly it’s not difficult to do at all, it’s just going to depend on the kind you get and where you plan on placing it.

This article is pretty helpful when it comes to this.

https://www.lifewire.com/set-up-video-projector-4118669


Just keep in mind that like a TV, you’ll want to optimize your image settings too before watching your content.


What Else Do I Need To Set One Up?


So with other things that may be needed, it’s highly dependent on your individual use case.

But let’s break it down further.


A Projector Screen Is A Safe Bet


The one thing you’ll likely need most is a projector screen.

Here’s an article that details all about that.

https://easyhometheater.net/what-is-the-best-material-for-a-projector-screen


Basically, a projector screen is made of a special type of material (often times a type of fabric) that displays the received projected image in a way that allows it to act like a traditional display.

These are especially helpful in bright rooms because the contrast between the image and the material will allow it to appear brighter and more visible.

There’s a wide selection to choose from since they come in a bunch of different colors, materials, and types.

Some come on a stand, while others can be placed on a wall and are fully retractable.

This means that there should be one out there for everybody.

Projector On A Stand


A projector screen can make the image quality look better than if it were reflected onto a wall.

That said, you could still achieve a great picture with wall projection if the wall is a suitable color and texture.


Blackout Curtains May Help


The next thing you may want to consider getting are blackout curtains.

These function exactly how the name would suggest, and block out any external light — providing you with a dark environment.

They’re especially helpful if you have a display that can’t get as bright since it’ll allow that display to appear brighter than if it were in a lighter setting.

It’ll also give you better picture quality too due to the lack of distracting light that may wash out the image.

Plus they just look cool and help give your room that authentic feeling movie theater experience.

These are the one I’d personally go with.

NICETOWN Bedroom Blackout Curtains


You May Want A Projector Mount


Another thing that you may need is a projector mount.

The thing to keep in mind is that projectors need a clear line of sight between them and whatever they’re projecting onto.

If this isn’t possible in your particular room, or find that people will often have to walk in front of it, then you may want to consider mounting it to the ceiling so it’s out of the way.

Luckily, it isn’t difficult to install, and the instructions typically come with it.

The one listed below is a really good one to go with.

VIVO Universal Adjustable Mount


A Universal Remote May Just Come In Handy


The last thing you may want to go with to simplify things within your system is a universal remote.

I’ve talked about these before which I’ll link to below, but basically having a universal remote makes things infinitely easier for you since you won’t have to keep switching between a bunch of different remotes.

One remote, and you can control all your devices.

Once you get the chance to use one, you’ll be shocked at what you’ve been missing all this time.

https://easyhometheater.net/the-best-universal-remotes


A Spare Bulb Or Two Depending On The Type


Projectors tend to have what’s known as a lamp life; which is basically an advertised suggestion of how long it’ll last before it either dies or begins to dull (somewhat similar to a television)

The larger the number, the longer it’ll last before needing a new bulb.

So if you’re aware beforehand of the kind you’ll be getting, then it wouldn’t hurt to pick up the corresponding bulb for that model.

That way you’ll have spares ready to go.


Can You Use A Projector With A Computer?


Here’s an interesting question that a few people out there may also be wondering, is it possible to use one with a computer or a computer monitor?

The answer to that question is yes.

Of course how you do this will depend on the type of projector being used with the computer, but typically it can be achieved with a VGA or an HDMI cable if it’s somewhat newer.

Some even allow you to connect wirelessly via Bluetooth, so there’s no doubt that you’ll have a variety of options at your disposal.

Here’s an article that shows you how to do so.

https://www.wikihow.tech/Connect-a-Projector-to-a-Computer


Final Thoughts


Well guys, that about wraps it up for this one.

So hopefully with what all we’ve talked about today, you’ve got a better idea of what features you’d prefer when it comes to choosing the best one for you.

Also hope I did a well enough job explaining what projectors are, and why you’d potentially want to go with one.

Until next time, make it easy, keep it simple.


Other Awesome Home Theater Websites

In this picture a TV is shown which is one of many topics covered by a few of the other awesome home theater sites talked about in this article.

Other Awesome Home Theater Websites


In this picture a TV is shown which is one of many topics covered by a few of the other awesome home theater sites talked about in this article.

Hope you’re all doing well.

This is going to be a really short one, but what I wanted to do today was briefly highlight a few other home theater websites that I think do an awesome job at not only explaining things, but also do so in a fun way.

There’s probably a bunch of good ones out there but I just wanted to let you know about a few of the best ones that I’ve at least come across so far that you might find helpful too.


https://www.svsound.com/blogs/svs


Besides making awesome subwoofers, SVS is a site where you can learn a lot about home theater in a way that isn’t overly complex or anything like that. It’s an awesome resource, and certainly worth checking out.


https://techcrunch.com/


Leaning more on the technical side of things, Techcrunch offers expert insight in not only home theater, but technology based topics in general. It’s a site you’ll definitely want to stop by.


https://hometheaterreview.com/


High in quality with their reviews and content, this is an amazing site for home theater and tech in general in my opinion.


https://www.techlicious.com/


A site recommended to me by one of my readers, it’s comprehensive and informative while getting straight to the point.

You can tell that the writers there know their stuff with the clear abundance of great information here.

For sure this is one you should check out.


https://www.imaxenhanced.com/


More specific, but for everything to do with IMAX Enhanced, this is an awesome resource to get caught up to speed on what exactly it is.


https://www.technologytelegraph.com/


An awesome resource for not just home theater, but technology as a whole. Definitely check this one out.


https://metrahometheater.com


This is a very informative site that does a good job of looking at things from the perspective of both a consumer and an audio professional. With over 20 years of experience, they definitely know a thing or two.. (definitely an understatement). No doubt you’ll find it incredibly useful.

Plus they have some insanely innovative products that really sets them apart from the others. Again, DEFINITELY recommend checking them out.


https://avsforum.com/


I like this site because besides offering stellar reviews and well detailed explanations, there’s an awesome active community that shares the same love for home theater. You’ll likely learn a lot there as well.


https://hometheateracademy.com


Happened to come across this site through one of my readers and to put it simply, it’s the epitome of quality. Definitely a lot of insight here and you can easily tell the author has a lot of knowledge & passion on the subject. Highly recommend it.


https://hometheaterhifi.com/


These guys are practically OG’s in the home theater world, having been around for many years. In fact, this year actually marks their 25th anniversary in publication. To say that they’ve been at it for a while would be an understatement.

Having actually started out as a magazine way before the internet was popular, they’ve helped to make home theater mainstream.

I’d give them a look as their reviews are always in depth, and the information they provide is definitely useful.


https://www.soundandvision.com/


It wouldn’t be an accurate list without including these guys. Sound and Vision is another one that’s been around for many years. They are highly respected in the home theater sphere for their extensive knowledge and experience on just about anything to do with the hobby.

Again their reviews are top notch, their information is well researched, and the topics they cover is far reaching.


https://lordsofgaming.net


Mentioned this prior, but another dimension of home theater that’s becoming increasingly more prevalent is gaming.

Besides being a massive home theater aficionado myself, as a gamer, this is a site I can recommend that’s not only full of talented writers giving the latest in gaming news, but also individuals passionate about entertainment in general.

Certainly give it a look.


https://www.lifewire.com/


Lifewire is a pretty all around website that focuses on all kinds of things within the tech world. But they also have some pretty helpful articles when it comes to home theater as well.

I like that that not only explain things clearly, but also include pictures to help visualize what they’re talking about. Highly recommend giving their stuff a read.


https://www.cnet.com/


Even if you aren’t a complete tech nerd, at one point or another it’s likely that you’ve at least heard of CNET. While it would be hard to classify the exact type of website CNET actually is, they’re primarily a technology and home theater type of site.

What I like about it is they tend to cover topics from a lot of different perspectives, so it isn’t simply black and white with them. I’d give them a look since their tech guides are really good.


https://wooferguy.com/


This one is a lot more specialized, but if you’re into subwoofers specifically, then this is a great site to check out. Essentially everything you could possibly ever want to know about a subwoofer, you’ll find here.

There’s a lot of great detailed information that’s sure to prove useful. It’s safe to say this guy knows his stuff.


https://themasterswitch.com


I really like the way the things are done on this site. Whether it’s a detailed review on speakers, or a solid explanation regarding the proper setup of your wiring, you can always count on a lengthy and well explained article going into great depth on said topic. It’s really impressive actually.

Plus there’s such a wide range of topics that it’s hard not to find something extremely useful. If anything, DEFINITELY give these guys a look.


https://thewirecutter.com


This site is pretty awesome since they do a good job of explaining things in layman’s terms making it easy to follow along. Plus there’s a good number of reviews and guides that’s sure to help plenty of people.


https://worldwidestereo.com/blogs/wws-underground/tagged/articles


This is yet another instance of a group that’s been around for decades, long before the internet. There’s a wealth of information there that covers quite a lot (only makes sense given they’ve been around since 1979) I’d certainly recommend checking them out


Well that’s about it for now folks. I just wanted to cover a few of the other sites out there that do a good job with explaining the topic of home theater that you’ll likely appreciate.

Again, this isn’t all of them since it would be impossible for me to find them all, but this is just a few of the good ones I’ve personally come across.

Hopefully you’ll find them helpful. On a side note, if you aren’t already, be sure to follow Easy Home Theater on Twitter, Facebook, and Pinterest since I post updates and other things there that don’t always make it here, including things to come. I’ll link those below.

But other than that, that’s all for now and I’ll catch you in the next one.

Like always, make it easy, keep it simple.
 

https://www.facebook.com/Easyhometheater/


https://twitter.com/easyhometheater/


https://www.pinterest.com/easyhometheater/


Exploring Blue Light In The Context Of Home Theaters

Is Blue Light Harmful To The Eyes?

Exploring Blue Light In The Context Of Home Theaters


Is Blue Light Harmful To The Eyes?

Hey how is everyone today?

Today we’re going to be covering an extremely important subject; so important in fact that it just may change how you look at the world (quite literally!)

We’re going to cover a pretty interesting topic; blue light in the context of home theaters.

Whether you’ve heard of it or not, blue light is something that’s subtle yet constant in our every day environment.

I do want to preface this though by stating that by no means is any of this meant to be taken as medical advice since I’m not a medical professional of any kind.

This article is based on references to external research.

And it’s research that can change since our understanding of things can change.

I also give my opinion on said research along with personal anecdotes from a home theater perspective.

But with with that being said it’s going to be an interesting one so let’s get right into it.


What Exactly Is Blue Light?


A picture of a computer screen is shown.

So what exactly is blue light?

The answer to that question is tied with how we perceive the visible light spectrum.

All of this spectrum, often referred to as the electromagnetic spectrum, is measured in what are known as nanometers (abbreviated nm), and goes from 380 nanometers (on the blue side) to 700 nanometers (on the red side)

So to make it simple, blue light is the visible light ranging from 380 to about 500 nm.

You’ll also often see this referred to as HEV, or high energy visible light, and makes up about a third of what you see. Sometimes you’ll see it broken down even further into blue violet and blue turquoise light, but it still falls under the same umbrella.

Now the weird thing about the light spectrum is that the closer you get to the red side of things, the longer the wavelength of the light ray and the less energy it has.

Where as the closer you get to the blue side, the shorter the wavelength and the more energy it has.

Does that remind you of anything?

Sound waves!

A picture of the light spectrum

Just like with sound waves, the longer the wavelength, the less energy it’s going to end up having. But as it gets shorter, that energy is concentrated, and that concentration of energy corresponds with a change in the color.

So by the time you’re on the blue end of the spectrum, those waves are already carrying a lot of energy. These are sometimes called blue-violet or even violet light.

However light doesn’t stop there and continues on in both directions.

But this is beyond what the human eye can perceive.

When you extend past the visible red light rays, you get electromagnetic waves often referred to as infrared. These waves give off heat but are invisible to the naked eye.

An example of this would be a heating lamp. You can’t see the heat given off obviously, but you can feel it. What you can see is the red light emitted. The heat doesn’t actually come from the red light though, but rather from the invisible infrared light.

On the opposite end, once you travel past blue and violet light, you’re going into the invisible radiation territory. These waves should seem more familiar as these are what’s known as Ultraviolet (UV) rays.

These have the most energy.


Where Does Blue Light Come From?


Now where exactly is it all coming from you ask?

Well, everywhere!

Computer screens, cell phones, LED lights, etc. are all sources of blue light. The biggest source by far though is our very own sun.

Pretty interesting right? But think about it.

If you’ve ever been outside for a few hours on a really hot day, and you didn’t pack sunscreen, chances are you’d run the risk of sunburn. This is actually from the excess of UV that you’d be exposed to; and as we mentioned earlier, Ultraviolet radiation falls under the blue side of light.

So since the sun is literally a giant ball of energy, it only makes sense that it would be the biggest progenitor of that kind of light. That being said, with our recent advances in technology, it’s quickly taking a backseat.

Due to the rise of appliances and devices like televisions and smartphones, people are not only starting to spend more time in doors than out, but also more time in front of these screens.


Are There Benefits To Blue Light?


Again this isn’t medical advice so by no means should it be taken as such. It’s simply my view on things.

But with that said, there are some speculated benefits to blue light that do make it important from what I’ve noticed.

There’s even research is suggesting that special UV LEDs may help with vitamin D production.

Other studies have found potential benefits like increased mental clarity, improved cognitive function and better memory.

https://brighamhealthhub.org/blue-light-boosts-alertness-study-shows/.

As you probably gleaned, getting enough blue light seems important for proper function.

But what happens when you get too much?

Well there’s differing views on that actually.


Is Blue Light Bad For You?


So the answer is tough since the research is always evolving.

A lot can happen according to it, key word being can, since it’ll obviously depend on any number of external factors like age, health status, etc.

When dealing with overexposure to this kind of light, one of the more common things seems to be eye strain.

Eye strain can be in the form of fatigue, burning, watering, redness, you get the idea.

But because of the fact that blue light has such a high energy, it’s diffuse, meaning it’s kind of all over the place. You’ll commonly see this problem exacerbated with digital screens which show multiple images per second to produce motion.

This stresses the eye out since the human eye can’t focus on a single image, and it isn’t great at blocking this type of light out to begin with.

So when you’re looking at a screen for any long period of time, there’s the claim of the potential of visual fatigue.

This is why 100 percent UV blocking sun glasses can be effective when you’re outside since they block the UV light trying to get through to the eye.

It’s also why when watching a movie in a dark room, it’s recommended to have at least some sort of ambient lighting nearby to minimize this.

Another thing that can happen is it seems too much could disrupt your sleeping pattern.

https://www.sleepfoundation.org/bedroom-environment/blue-light

Over exposure to light at night may suppress melatonin levels, which is the hormone responsible for proper circadian rhythms (your internal clock) This lack of the important hormone can lead to bad sleep quality.

That’s why it’s recommended to get proper light exposure in the day time because it helps you to be more alert.

At night, that’s not necessary, and you should want to minimize it as much as possible.

But again, with our society so deeply ingrained with technology now, that’s become much harder to do, and is much easier said than done.

A picture of an LED screen

Moving on to the more serious side of things, one condition that I’ve noticed stated that overexposure to blue light can cause is macular degeneration. This is a deterioration of the eye, and can lead to decreased eyesight and even blindness.

There have been studies that link excess blue light with misaligned circadian rhythms and other conditions.

https://www.ncbi.nlm.nih.gov/pmc/articles/PMC5473809/

So yeah, it definitely seems like blue light is a multi layered topic.

From what I’ve noticed, it seems like the research is not definitive since it’s such a new topic so it doesn’t seem like things are particularly is set in stone.

There’s a lot of differing views on on what its exact effects are on the human body.

https://www.aao.org/eye-health/tips-prevention/should-you-be-worried-about-blue-light

Still, even what evidence we have now is enough at least be aware of what it is since the impacts of it seem to vary a bit.


Is It Possible To Tell If There’s Too Much Blue Light?


Is it possible to tell if you’ve been getting too much blue light exposure?

Well headaches, burning eyes, lack of focus, and even trouble sleeping could potentially be signs according to some from what I read.

https://www.healthline.com/health/blue-light-headaches

If you notice that lately you’ve just been feeling fatigued and like you can’t sleep, it could be blue light according to the research.

https://pmc.ncbi.nlm.nih.gov/articles/PMC9424753/

Think about what your current night time habits are too.

If you find yourself checking Instagram or watching Netflix right before bed, it might be over stimulating your brain and preventing you from getting the restorative sleep your body needs. The combination of light and moving images might do the exact opposite by keeping you awake.

Then there’s the flipside where there’s the question if you can minimize your exposure.


How Can You Reduce Exposure To It?


There seems to be things you can do to reduce your exposure to it according to research.

https://academic.oup.com/sleepadvances/article/1/1/zpaa002/5851240

One really cool technique that I like to use when looking at a screen for a long time is the 20 20 20 rule.

This rule basically states that for every 20 minutes you’re looking at a digital image on screen, look away for 20 seconds at something 20 feet away. This can help minimize eyestrain since it acts as a soft reset for your eyes.

I like to use this when I’m watching shows or even gaming on my home theater.

Another thing that could help is changing your nighttime habits.

Since prior mentioned research proposed that excess light at night could affect melatonin levels which then affects your quality of sleep, one thing you can do is limit all electronics 1 to 2 hours before you go to bed. This might help with feeling more relaxed and falling asleep.

So if you’re having movie night with your home theater setup, having it earlier in the evening may be worth considering.

One of my favorite ways to limit my exposure to blue light is using what are called blue light blocking eyeglasses. These glasses have specially made lenses that like the name would suggest, are designed to filter out a large portion of blue light.

Even certain smartphones nowadays have built in blue light filters that help as well. Check to see if yours does too.

They have a number of potential uses including reducing eyestrain when staring at a computer or phone screen for long periods of time, and protecting your eyes from UV light when you’re outside though their efficacy depends.

There’s a bunch of good ones out there in my opinion but I’ve found these to be pretty good in the regard.

Blue Light Blocking Glasses


Of course you also have the simple option of just taking a break every once in a while if you do find yourself looking at a screen for hours.

Getting up to stretch every once in a while for few minutes might help with feeling better.


Anything Else I Should Know?


Well we’ve went over a lot here today but just to recap, blue light is just about everywhere, with the biggest source being our sun. However since we’ve now become so accustomed to our devices, this is rapidly changing.

Did you know that over 80 percent of adults reported to using a device for more than 2 hours a day?

That’s a pretty huge number, which is probably likely to increase in the coming years.

So according to that, a large portion may be impacted by blue light in some way shape or form; making it an extremely important subject.

And chances are, a majority of those impacted probably haven’t even heard of it before. Or they have, but haven’t really given it much thought.

The bottom line is this; given its potentially hazardous nature when in surplus according to some research, it’s at least something you should be aware of. The research might be contentious right now, but it’s still something worth keeping in mind.

From what I’ve personally experienced, I could understand why, especially when I’m looking at a screen for too long.

But the problem is blue light is also something that’s beneficial to us too according to research; which is why it’s not such a clear cut subject.

What you should takeaway from this article is that while we may not know all the details behind blue light, there are things that could help.

Find yourself in front of a computer screen hours on end watching shows or gaming?

Sit an arms length away and lower the brightness.

A picture of a desktop screen

Watching a lot of movies on your new TV & surround setup?

Try reducing the glare by minimizing lights around and overhead.

Even doing things like increasing text size might help with eye strain, and turning electronics off an hour before bed could help with sleep.

Light blocking glasses like I mentioned earlier might help too.

I mean a topic like this is especially important in a hobby like home theater where we have so much fun with our toys and in front of our screens, that we don’t actually stop to realize how much time we spend doing so (me included)

But with that folks, I feel like that about wraps things up for now.

Until next time, make it easy, keep it simple!


Polk Audio OWM3 Wall Speakers Review (Immersive Performance)

This is the polk audio owm3 review. In this picture, the speakers are shown.

Polk Audio OWM3 Wall Speakers Review (Immersive Performance)


This is the polk audio owm3 review. In this picture, the speakers are shown.

The Polk Audio OWM3 speakers produced clear & crisp audio with a wide dispersion design that further enhanced immersion. Fantastic as surround speakers, their output was detailed & nuanced — making for an entertaining experience. Due to their unique shape, they could also be wall mounted in a variety of ways.


Check Polk Audio OWM3 Speakers Availability


Their Features & Specs


A picture of the side of the polk owm 3 box detailing all the different ways it can be oriented

A particularly interesting thing about these speakers is their placement capabilities

In fact, there’s about 7 different ways they can be placed.

Let’s say you have an abnormal wall where one side is flat, but the other side angles outward.

With the OWM3s, you could place them lengthwise, width wise, or even along a corner to fit that situation.

They even have individual shelf mounts to cradle the speakers, allowing them to sit upright if you didn’t want to hang them on the wall.

On the specifications side of things, these speakers feature what Polk calls a Dynamic Composite Cone Driver.

This 4 ½inch driver is made of polypropylene, which makes it lightweight yet stiff — allowing it to play at high volumes without distorting.

The 1 inch fabric dome tweeter included also allows it to nail those high notes as well.

Their frequency response goes from 100Hz-22,000 kHz, they can handle 20-100 watts, and have an 8ohm impedance.

They also have a sensitivity of 89 dB.


There’s also 5 way binding posts included which allows you to wire them however you want to — be it via banana plugs, pin plugs, etc.

The speakers also have an acoustic suspension enclosure & what Polk calls Capacitive Coupling Bass Technology for a deeper bass.

Improving a speakers bass can sometimes be challenging, so it’s nice to see that tech used here.

In terms of their actual size, they come in at 7 inches wide, 10 inches tall, and about 4 1/8 inches deep which is pretty slim.

The OWM3’s slim design is helpful for wall mounting them — since they don’t stick out too much if you decide to position them a different way.

There’s also a 5 year warranty which is helpful.

They also happen to be timbre matched, meaning they’ll sound good with speakers from the Polk line.

They’re also only 4 pounds each which makes wall placement easier.

On the back, there’s even two cross shaped key holes for the speaker to rest on if you decide to wall mount them differently.


Check Polk Audio OWM3 Speakers Availability


Setting Up The Speakers Was Pretty Straightforward


Now like I alluded to before, how you orient your speakers may differ from mine since not every room is the same shape.

In my case, all I had to do was secure the screw into the wall, then align the speaker so that the screw went into the keyhole.

This allowed the speaker to comfortably rest against the wall.

That was after I installed pin plugs on the wires to run the wire sideways since I wanted the speakers flush with the wall.

But in terms of the overall setup and installation process though, it was pretty straightforward.


The Speakers Had Great Sound Quality


a picture of the top of the box

The upper frequency ranges were really clear, and the sound effects these speakers produced were realistic and immersive.

I found that setting them about 2 feet above my ear level seated gave the best result with providing a quality soundstage in my home theater.

If you’re planning on using these to watch movies by the way, then a subwoofer for the lower bass aspect also helps.

But as surround speakers, the OWM3s shine in my opinion.

When I used them as surrounds with the Signature Elite ES10s and a PSW10 subwoofer, sound effects to the sides and back (ordered another pair for rear surrounds) were enveloping and engaging.


They certainly enhanced my listening experience with whatever content was on screen.

Be it video games or movies, surround effects were detailed and nuanced — yet remained loud enough to really create an appreciable difference.

I noticed that when some speakers deal with surround sound content, there sometimes isn’t a huge enough difference to really even notice it.

But these speakers handled surround effects beautifully which made listening really engaging.

For example, I had these speakers playing during a movie with guests over, and during it there was a time where they’d ask me if I heard a noise.

I told them it was the effects from the speakers to which we all laughed about how convincing it seemed.

In my opinion, that’s a sign of good speakers.

Basically, I say that to say this; if you’re looking for a great surround speaker that’s extremely versatile, then this is without a doubt a great choice to go with in my opinion.


Check Polk Audio OWM3 Speakers Availability


I Noticed They Were Well Protected When Unboxing Them


So when you first open up the box, you’ll immediately notice a bunch of stuff on top.

This includes information regarding the warranty, a little setup guide, a pamphlet detailing the different orientations that the speaker can be set, and adhesive bumpers.

I think the fact that they included a booklet showing all the different ways the speakers can be set is a cool addition, since some may not be aware they’re capable of being positioned that way.

Under the styrofoam inserts are the speakers, wrapped in plastic and sitting in their own little space.


They Had A Nice Looking Appearance


When taking the speakers out the box, I noticed they weren’t too heavy and were pretty compact themselves.

I personally felt their shape was pretty cool too; with a rectangular front, and somewhat curved back that goes inward.

The material is a hard matte plastic with a very slight texture to it that felt nice.

They have a removable grille as well for those of you that like to visibly see the drivers.

In terms of the drivers themselves, there’s a midbass driver in the middle, and a soft dome tweeter right above it.

There’s also the subdued Polk branding debossed on the bottom.

I personally got mine in black, but they also come in white as well.

Overall, it’s a simple yet attractive design that looks good in person.


Likes


  • Works great as a home theater surround sound speaker
  • Directional surround sound cues were amazing
  • Can be oriented many different ways including horizontal and vertical
  • 5 Way Binding posts allows you to use any connection type including banana and pin plugs
  • Relatively small meaning it’ll fit in a good number of locations


Dislikes


  • Stand can be a little tricky to fit on


Final thoughts


Overall, there’s not much to dislike about the Polk OWM3, but there’s certainly a lot to like about these speakers — and that’s definitely the draw here.

These are fantastic surround speakers that gets loud despite their small size.

To summarize, they’re definitely worth it, and are currently a part of my own sound system which says a lot.

If you’ve been looking for an awesome surround speaker that has great sound quality, then this one is a solid choice.

Check Polk Audio OWM3 Speakers Availability


How Can I Watch TV Without Cable?

How Can I Watch TV Without Cable?


How can I watch TV without cable?

This might be a question you’ve asked yourself at least once at some point; especially if you’re here reading this now.

Whether you’re on the go, or just fed up with your monthly bill, there’s a whole host of reasons you may be looking to cut the cord.

But is it possible, and if so how?

Well, I’m here to tell you that not only is it possible, that’s actually what we’ll be going over today.

I’m going to show you a bunch of ways that you can skip the cable box while still enjoying all your favorite shows.

Let’s get to it!


Figure Out Exactly What It Is You’re Looking For


What Are Some Reasons You Might Want To Look At An Alternative To A Cable Box


Using Digital Streaming Services


Using Dedicated Streaming Devices


Using an OTA Antenna


Using A Mobile App


Figure Out Exactly What It Is You’re Looking For


So before anything, you’re going to want to obviously figure out what it is that you’re looking for.

More specifically, you’ll want to go with something that accommodates your exact situation. For example if you’re never really home, but only watch SportsCenter when you are, then it wouldn’t make sense to get a subscription service with 200 other channels you wouldn’t use anyway.

You’ll want to figure out the details early on so that way you get the most bang for your buck with the content you’ll actually want.


What Are Some Reasons You Might Want To Look At An Alternative To A Cable Box


There’s certainly a number of reasons why you may want to look elsewhere for your particular content needs, especially since it’s not a one size fits all application.

What’s right for someone else may not be what’s necessarily right for you. So that being said, here are a few good reasons it might be time to look elsewhere for your content needs.


If It Is No Longer Affordable


If you find that you’re eating Ramen 3/4ths of the month and notice a decent amount of money going to cable, then yeah, it just might be time to switch.

If you’re currently paying way more than you’re comfortable with monthly, then don’t worry, you’ll take comfort in knowing that there’s a lot more options out there that might be a much better fit for you.


If You’re Rarely Home


Another reason you may want to look at some other alternatives is if you’re a busy person who isn’t home a lot, but still want to watch some of your favorite content while on the go.

No point in paying for cable if you’re not really there to make the most of it.


If You Only Watch A Few Channels Out Of The Bunch


If you find that you only watch a few particular channels out of the potential hundreds of channels you may be paying for now, then that would be a good time to start looking at some alternatives as well.

That way you’ll only be paying for what you actually use, and not what you don’t.


Using Digital Streaming Services


Digital streaming services are a good alternative, one because of how varied they are, two because of the convenience and flexibility that they offer, and lastly because they can be a much more manageable way of getting all of your favorite content.

Plus digital media is here to stay, and will likely become even more integral parts of our lives as time goes on.

So in short, they’re a great way to get everything you love in a single place. But you may be asking, okay well what streaming service is right for me?

Or better yet, is a streaming service the right fit for me?

To answer that, we’ll have to take a look at some of the most popular options and what they offer to determine if any are right for you. I’ll include a link to each so you can see the most current pricing.


Netflix


Netflix is probably one of the most popular online services around nowadays.

Virtually a household name, and heralded as the thing that ended Blockbuster, Netflix is a favorite because of the sheer magnitude of content that they have (including their very own original shows and movies as well)

It’s pretty hard to go wrong due to that fact, and would be a solid choice all around.

What’s great is that there’s no commitment, meaning you can cancel anytime, and you even get the first month free to try it out and see how you like it.

Pretty awesome right?

Netflix


Hulu


Here’s another great option that can serve you well.

Like Netflix, there’s no hidden fees, contracts, or anything like that. But what’s interesting about Hulu is their new feature where you can watch live TV as well.

That makes it a great fit for the person who’s, let’s say, trying to watch the big game if they’re not home and caught at work. Of course it’s not just limited to sports, but you get the gist.

From Animal Planet, to CNN, you’ll find a wide variety of live TV channels available at your disposal.

Plus with the free trial that you get, you can try it out to see whether they have what you like. I’d highly recommend it.

Hulu


Vudu


Vudu is a little different than the other 2 mentioned on the list.

While they have over 150,000 movies and shows to watch, you only pay for what you want. That means that there’s no subscription monthly.

What’s also pretty cool is that they have quite a big selection of free content, so chances are you’ll find something you like. I know I personally think it’s pretty cool.

Vudu


Youtube TV


Who knew that Youtube also offered a way to watch live TV anywhere? Well they do.

With over 60 networks available, all with live content, this can be a great choice for those of you on the go or even at home. No commitment, meaning you can also cancel at anytime, and you get 6 accounts per household so everyone can watch their shows.

There’s even a built in cloud DVR with unlimited storage, which allows you the ability to record as many shows as you could possibly want.

Plus the best part, no need for a cable box!

Youtube TV


Direct TV Now


As you can see, there’s no shortage of options, and Direct TV Now is another good one. With HBO included with new signups, Direct TV Now is a great choice to go with if your primary concern is thee ability to watch live television.

Plus there’s no annual contracts or anything like that, meaning you can cancel at anytime. There’s a good amount of on demand content as well, so this may definitely be something to consider if you’ve been looking to cut the cord.

Direct TV Now


Sling TV


Sling TV offers you a way to watch TV anywhere without the cable box.

But what’s different here is that you only pay for the channels you want; meaning you won’t be stuck with a bunch of stuff you don’t even watch.

Plus, there’s a lot of channels for other languages like Spanish and even Arabic, so there’s something here for just about everybody. Definitely recommend you check out the article I did on it since it expands on why I feel it’s worth it.

https://easyhometheater.net/understanding-how-sling-tv-works


Sling TV


Using Dedicated Streaming Devices


A picture of a roku stick

Using a dedicated streaming device is another great way to enjoy your content. Think of it as simply a device specifically made to stream or display your favorite content.

The stuff offered can be built into the device itself, or it can utilize popular streaming platforms all in one place. Plus it’s not uncommon for some to include promotional subscriptions for a time so it’s definitely another thing to consider.

You might wonder if you can already stream digitally, then what’s the point of getting a physical device that pretty much does the same thing?

Well that’s just it; if you don’t have a smart TV with the capability to download apps like Netflix or Hulu, you won’t be able to watch it there at all (kind of a bummer right?)

That’s where streaming devices come in.

These allow you to enjoy your content on the big screen without any of the hassle. They come in a variety of shapes, and are usually pretty small luckily.

This is by no means exhaustive since there’s so many that exist, but here’s a few to give you an idea.


Roku


The Roku is probably one of the most popular devices, and for good reason.

It offers a plethora of movies, shows, and so on. With some models that plug directly into your television, and others that serve as their own sort of set top box, the Roku is something you’ll really want to look into.

It’s hard to describe exactly why without writing an entire page, so I’ll just leave this here so you can see exactly why for yourself.

https://easyhometheater.net/what-is-the-roku


NVIDIA SHIELD


The NVIDIA Shield is also a good option to go with.

Not only is it an exceptional media player with support of all the latest TV technologies like HDR and 4K, it’s also a fully functioning high powered gaming console with hundreds of available titles. It’s pretty much in all in one device that’ll give you hours of entertainment.

You’d really have to try it for yourself to see how awesome it is.

NVIDIA SHIELD


Using an OTA Antenna


So this may be an option for you if you watch a little TV from time to time but aren’t a big time viewer.

If you’re over the age of 25, then chances are you remember those bunny ears on televisions back then that you’d have to move around to a certain position to get the picture clear enough to watch.

However did you know that antennas are actually still around?

You may have thought they were lost to time, but they’re actually alive and well strangely enough. Not only that, but there’s actually high definition & 4k versions available now as well.

Known as an Over The Air (OTA) Antenna, these devices allow you to access a number of channels that are broadcast across the air.

Now which channels and how many is going to of course depend on your location, but you still should be able to access a decent number of them. While not as robust as some of the other options, an OTA antenna is still a viable option due to its sheer simplicity.

There’s no placing things on your roof or figuring out different wiring; it’s really just a matter of plugging it into your television and that’s it (though there are indoor and outdoor kinds, the ones mentioned here are indoor).

Plus it’s free TV, so that a pretty big benefit.

Amplified HD Digital TV Antenna


https://www.lifewire.com/over-the-air-antenna-3276138


Using A Mobile App


Making use of a mobile app is another great way of watching TV without needing anything else but a smartphone or tablet.

Now of course this sort of relates back to streaming services, since a lot of those same services have a dedicated app, but it’s still a great one to consider as well.

Plus there’s even apps dedicated to specific genres like the MLB app for baseball and CBS for entertainment.

Depending on whether you have IOS or Android, there may be slight differences in the choices available. But for the most part, a lot of the apps should be the same.


Final Thoughts


Well hopefully this was helpful in answering that age old question of how you can watch TV without cable. Each person’s situation is different, and sometimes standard cable just isn’t the most viable option to go with.

But as you can see, there’s certainly no shortage of options available to you. What’s more amazing is that these are just a few of the many that exist out there; with new ones being created all the time.

So hopefully this aids you in finding out what’s best for you, and if you even need to cut the proverbial cord so to speak.

Anyways, that’s pretty much it for now.

Until next time, make it easy, keep it simple.


25 Of The Worst Home Theater Mistakes

25 Of The Worst Home Theater Mistakes

25 Of The Worst Home Theater Mistakes


25 Of The Worst Home Theater Mistakes

Truth be told, I’m happy to finally be making an article like this; highlighting 25 of the worst home theater mistakes that exist out there.

There’s certainly a bunch, so I wanted to be sure to cover the most important things you’ll definitely want to avoid doing along with what you can do instead.

Think of this as an ultimate guide so to speak.

Trust me, I’m not exempt from any of these either; and in fact, they’re actually based off my own personal experience from over the years (essentially where I got the ideas)

What’s really interesting is a few of these I didn’t even realize until a short while ago, meaning you may likely be doing the same thing even now!

So the goal today is not only making sure that we avoid these, but making sure you get the best bang for your buck no matter what system or speaker you have.

These tips will range from beginner mistakes, all the way to things even experienced people may not have known.

So strap in, and let’s get to it! 😀


1.) Not Taking Into Account The Importance Of Room Type And Seating Position


2.) Not Making Use Of HDMI


3.) Not Getting Any Output From Your Speakers Due To Setting Things up Wrong


4.) Not Calibrating Your Speakers


5.) Setting Your Speakers In The Wrong Spot


6.) Setting Bookshelf Speakers Sideways


7.) Using Center/Left & Right Channel Speakers That Are Too Small


8.) Using Outside Speakers Inside


9.) Mismatching Speakers From Different Brands


10.) Using Ceiling Speakers As A Surround System


11.) Turning The Volume Up Past 0 db


12.) Using Speaker Wire That’s Too Thin


13.) Setting The Subwoofers In The Wrong Spot


14.) Turning The Subwoofer Volume Too Loud


15.) Using Subwoofers Out Of Phase


16.) Placing Your Receiver In A Cabinet


17.) Not Taking Into Account The Lighting Conditions Of The Room


18.) Placing Your Display In A Less Than Ideal Place


19.) Using A Display That’s Too Small For The Room


20.) Not Optimizing Your Display


21.) Not Turning On 4k Support In The Settings Menu For A Samsung TV


22.) Using The Wrong Aspect Ratio


23.) Not Setting The Cable Box To 1080p Or Its Highest Setting


24.) Using HDR+ On Actual HDR Content


25.) Setting Display To PC Instead Of RGB In A Gaming Console


Bonus: Not Using A Surge Protector


Bonus#2: Using Only 1 Set Of Wires With A Stereo Ceiling Speaker


Bonus#3: Setting Your Speakers To Large Instead Of Small In The Receiver Settings


Final Thoughts


1.) Not Taking Into Account The Importance Of Room Type And Seating Position


A picture of a living room

Whether you’re in the planning stages of your new home theater system, or looking to improve upon what you already have, undoubtedly the single most important factor that will influence how your setup sounds the absolute most is the room that your using.

Why though?

Well it has to do with the properties of sound itself.

Sound travels in waves; where the higher pitched a sound seems, the shorter and faster that particular wave travels, while the lower pitched a sound is, the slower and longer that wave is.

These waves travel throughout the room, reflecting off of some surfaces and being absorbed by others before finally reaching your ears.

Now here’s why the room type plays such an important role. When a room has a lot of reflective surfaces such as hardwood, marble, etc, the sound is continuously reflected, with some of the waves even interacting with each other.

When this happens, it can cause the sound to seem almost harsh, especially when turned to moderate volumes. This not only limits your speakers’ full potential, but may also lead to ear fatigue.

To combat this and make sure that your speakers are performing to the best of their capability, you’ll want a lot of soft padded material in the room.

Why?

Because soft material helps to absorb excess sound waves, leading to a much clearer and articulate sound. It also has the added benefit of helping your subwoofer sound better as well.

So take notice of what your particular room is like, and try to add as much furniture and objects as possible since it’ll help improve sound, as well as reducing potential echoes which are especially problematic in bigger rooms.

You you could also implement sound panels which tend to help.

https://easyhometheater.net/should-you-put-acoustic-panels-behind-speakers

Of course seating position is a close second for a number of reasons, so you’ll want to optimize this as well. When you don’t do this, you may again be limiting the full potential of your system, so taking the time to make sure your listening position is just right will make a world of difference.

If you’re not sure how to do that though, I did a fantastic article on how to get the best seating no matter what kind of room you have so definitely make sure that you check that out as well.

That way you’ll be on your way to surround sound nirvana in no time.

https://easyhometheater.net/home-theater-seating-ideas


2.) Not Making Use Of HDMI


Here’s one you might not even realize, HDMI cables are pretty important if you’re trying to have the best home theater experience.

Why you ask?

Well besides the fact that more and more devices are moving to solely HDMI each day, it also offers the best sound quality comparatively with other cables.

HDMI is actually an acronym that stands for High Definition Multimedia Interface and was released in the early 2000’s as a successor to DVI, the previous default standard.

It brought with it a host of improvements including higher bandwidth (meaning the ability to transfer more information at one time) and more utility since it reduced the amount of wires one needed to actually set everything up.

Eventually, support for more advanced technology was introduced in further iterations including, 4K and HDR support. But using an HDMI cable not only provides the best quality sound, it also saves space since it has the ability to carry both audio as well as visual information, making it a sort of all one cable.

Even if you don’t have one or your receiver isn’t compatible with another device through HDMI, you are able to use a what’s known as a Toslink (or optical) cable for the sound instead.

Sure it won’t be as good quality sound, but it’s not that dramatic of a difference so don’t worry about missing out on a ton. As far as which one to go with, they all pretty much do the same thing so worrying about a specific brand isn’t really necessary.

As long as it says that it’s a high speed cable, you’re good to go. If you’re curious more about how they work or even which ones I personally use, then I’d suggest checking this article I did talking about exactly that.

https://easyhometheater.net/hdmi-cables-explained


3.) Not Getting Any Output From Your Speakers Due To Setting Things up Wrong


No sound being output due to setting your speakers up is an issue a lot of people can relate to since it’s probably one of the most common.

So why exactly does this happen and how can you avoid it?

Well there’s a few different ways.

When you’re setting up your home theater for the first time, you of course want to make sure that all of your speakers are connected with the appropriate speaker wire into the correct spots in your receiver.

Putting the left channel speaker into the center speaker slot or something similar can cause issues so make sure that they’re in the appropriate places.

However where the biggest problem usually arises when attempting to get external devices like blu ray players and cable boxes working with your speakers.

As a general rule of thumb, any modern television should have what is known as an ARC input (audio return channel) This basically allows the receiver to process all of the sound while the TV is only responsible for the picture.

Not putting things in the right place can certainly cause an issue when it comes to audio output.

So what you do is place one side of the HDMI cable in the slot named ARC on your television, and the other in the Arc slot on your receiver.

Then you take another HDMI cable, and insert one side into the next input on your television, and the other side into the back of whatever device you’re attempting to use.

This will allow the device to work with your speakers; that is if there’s an ARC input on your receiver as well as your TV.

While there definitely should be, there’s always exceptions, so if one of the two doesn’t seem to have one then don’t worry, all hope isn’t lost. In this instance you’d just need to use what’s known as a toslink (or optical) cable to connect the two.

Also make sure that you change the input on the TV to the correct one too otherwise you won’t get a picture.

If you’re still having issues, definitely check out the article that I did that talks about this very thing and how to properly set things up step by step just in case you may have missed something.

https://easyhometheater.net/why-arent-my-speakers-working


https://easyhometheater.net/how-to-set-up-a-home-theater


4.) Not Calibrating Your Speakers


This is something that people either don’t take into consideration, don’t fully understand the importance of, or simply don’t bother doing, but calibrating your speakers is one of the most important things that you can do when it comes to getting the most out of your stuff.

Why is that exactly?

Well think of it this way, let’s say you’re a professional Nascar driver and you want to beat the other drivers.

Would you simply slap anything together and hope for the best?

Or would you pick the best parts that you can and fine tune them to be as synergistic with one another as possible to get the best possible result.

Random analogy I know, but it’s the same principle when it comes to speakers. You’re going to want to fine tune them if you want to get the best sound possible from them.

But how exactly do you go about doing this?

Well there’s actually 2 different ways that you can. The first one is one that I use and personally recommend; which is letting the receiver do so automatically.

You see, some receivers actually come with what’s called an optimization microphone, which essentially does all of the work for you.

All you do is plug it in, set it at ear level on a flat surface, and it does all of the advanced calculations like distance, delay, etc. for you.

It’s a really handy little tool that I can’t recommend enough.

For example the Denon AVR-S760H 7.2 channel receiver calibrates your speakers this way, tuning them to the specific acoustics of the room.

Now the second way to do this would be using what is referred to as an SPL meter to actually do so manually.

But keep in mind it would not only take longer doing it this way, but also be more prone to human error as well which is something to keep in mind. Here’s a list of good receivers that include the mic too and an article on a few ideas to further optimize what you have.

https://easyhometheater.net/the-best-home-theater-receivers


https://easyhometheater.net/home-theater-ideas


5.) Setting Your Speakers In The Wrong Spot


Just like calibrating your speakers is important, the spot where you physically place them relative to your seating position is just as important.

This is another one of those things where you wouldn’t expect it to make a huge difference, but it actually does.

So starting with your left and right speaker, what I personally recommend is not placing them any closer than 6 feet apart but also no further than 12 feet.

Placing them too close together gives a narrow soundstage, making it seem like the sound is coming from a specific spot in the room (which kind of defeats the purpose since it’s supposed to be you know, surround sound)

Placing them too far apart has a similar effect, allowing you to be able to tell which speaker is making a specific sound which is the exact opposite of what you want.

So try to stay within that 6 to 12 foot range when setting them.

The center speaker would then of course go directly in the middle of them. Ideally you also want all three to be at around ear level as this gives the greatest effect.

If you can’t achieve this with your personal setup, then going a little above ear level is fine, just try to avoid going below it if possible.

Now with regards to the surround speakers, you’re going to want them to be at least 2 feet above ear level if possible and directly to the left and right of the seating position.

This isn’t set in stone of course, but it is what I’ve personally found to sound the best, so see how it works for you.

Also if you’re running a 7.1 setup, then setting the back 2 speakers at or above ear level is perfectly fine. Just make sure that the rear speakers are at the same height as the surround ones.

You’ll also want to be at least 4 feet away from the back wall otherwise you won’t get a good surround effect.


6.) Setting Bookshelf Speakers Sideways


This is a weird one, but it is something that I’ve seen people do.

Again this is one of those personal preference things since sound is subjective, but I’m of the idea that placing a bookshelf speaker sideways is not something that you want to necessarily do.

The main reason why I’d say this wouldn’t be the best idea is due to the fact that the typical bookshelf speaker has drivers that are set up in a specific configuration known as a vertical dispersion design.

This basically means that when placed correctly, the drivers sit atop one another and emit sound that way, hence the vertical part in the name.

However when you place a speaker that’s meant to be placed right side up horizontally instead, it has the tendency to throw the sound off.

I can’t exactly articulate what it sounds like, but if you try this you may hear a difference; and not for the better.

So just make sure that they’re placed standing up unless they specifically state that their meant to be placed sideways. Here’s an interesting read that explains why this makes a difference.

https://www.soundandvision.com/content/dispersion-show-and-tell


7.) Using Center/Left & Right Channel Speakers That Are Too Small


Here’s one that I’ve certainly done in the past without immediately realizing it.

With that being said, there’s a chance you may be too.

Using a left/right or center speaker that’s too small for the room is a pretty common error.

Maybe the individual doesn’t particularly notice it, or perhaps their significant other doesn’t want speakers that take up too much space.

Whatever the case, if possible, you’ll definitely want to avoid this because you’ll undoubtedly end up sacrificing sound quality.

So how can you tell that what you have is too small?

Well actually a few ways.

The first way that’s a surefire way to tell is if during movies or shows, you have a hard time discerning dialogue unless the volume is set extremely high.

Not only is this a sign that the setup is inadequate for the room, but more specifically, it’s a sign that your center speaker in particular is in need of an upgrade.

The center speaker is arguably the single most important component, so skimping out on that is going to end up leaving a lot to be desired; not to mention you’ll struggle to hear dialogue unless it’s cranked really high.

Speaking of which, another way you can tell that the speakers are too small for the room is if you have to set the volume really high to hear anything.

If you find that you’re needing to set the receiver volume to -10 just to hear the content, then it’s almost a given that you’re due for an upgrade.

Not only could doing this potentially damage the speakers in the long run, but the closer you go to 0, the more distortion you’re introducing into the content as well.

So if you’re having to set it that high just to be able to make out what’s happening, then audio quality is unfortunately being sacrificed even if you don’t realize it.

I know when I personally upgraded to something more fitting to the room, it was like night and day. Getting the right one for your room really can make all the difference honestly.

If you turn up the receiver volume and find that content just sounds hollow or tinny, then that’s another good sign that either things are set up wrong, or your speakers are vastly underpowered for the room.

If this is the case, and you’re not sure what speaker would be the right choice for your room, no worries, I’ve got you covered.

These two articles should definitely help with your decision making process, so make sure that you have a look if you want a few suggestions in that regard.

https://easyhometheater.net/the-best-bookshelf-speakers


https://easyhometheater.net/the-top-10-center-channel-speakers


8.) Using Outside Speakers Inside


This is another one that I can say that I’ve done in the beginning; which is using speakers meant for outside, inside instead.

Now you wouldn’t think that something like this would matter, but in actuality, they’re a lot different.

Many people may be of the assumption that a speaker is simply a speaker, but it’s a little more complicated than that.

The reason why they’re so different is that a speaker that’s meant to be placed outside tends to favor the treble side of the sound spectrum.

Why?

Well when a speaker is placed inside a room, the sound of course reflects off of all the objects in the room while it’s travelling to your ear. The higher frequency sounds have a much easier time doing so since they move so much faster than lower frequency ones.

However when placed outside, lower frequency sounds have a harder time traveling than their higher frequency counterparts.

Simply put, it takes a lot more energy to produce a lower tone, so speakers made for outside get around this by favoring the higher tones so you can actually hear it. You probably wouldn’t notice it outside though, since that’s what they’re made for.

However when you use one inside, it can definitely cause things to sound sibilant. Speakers created for the outdoors also tend to be made of plastic or some other material instead of wood, so this makes a fairly big difference too.

So long story short, use home theater speakers inside, otherwise the sound won’t exactly be stellar. Hopefully that makes sense since I tried to make it as easy to understand as possible.

But for those of you out there that are still curious about the specifics, then this is a good read.

http://www.explainthatstuff.com/sound.html


9.) Mismatching Speakers From Different Brands


I’d say that mismatching different brands is probably one of the most common mistakes that people make.

Be it getting a few different speakers from a garage sale, being gifted a few from a friend, or even just buying one and then another; you’ll want to be sure that you avoid doing this.

Why?

Well it has to do with not implementing what is known as timbre matching.

In short, timbre matching is where speakers of the same model and brand are used to get the most even sound.

The reason you want to avoid mismatching is that each manufacturer has a certain sound signature that differentiates themselves from one another.

One brand might tend to favor bass, while another brand might favor mids.

Mixing and matching is going to end up causing your sound to be all over the place, with no real sense of actual cohesion.

Since there can be variation in sound within the same brand and even line of speaker, imagine the variance when you use an entirely different brand.

So yeah, definitely make sure that they match. Even if this isn’t fully possible, at least make sure they’re all of the same brand since at least that way they’ll be somewhat similar.

Do that, and you should be good. Just try to get ones from the same line if possible.

Here’s a little more on timbre matching and why it’s so important.

https://easyhometheater.net/how-important-is-timbre-matching-your-home-theater-speakers


10.) Using Ceiling Speakers As A Surround System


This one’s definitely on the bizarre side of things, but in case it isn’t obvious, using ceiling speakers as a surround system is definitely on the list of things that you shouldn’t do.

You’d think that knowing this would be a given, but I actually had a friend do this and I was shocked to say the least. Their reasoning was that they didn’t have the space for bookshelf speakers, so they decided to do it this way.

If you find that you don’t have the space for a typical surround system, then at least go for a sound bar that’s capable of emulating this. Using ones made for the ceiling in this fashion is going to severely limit the quality since it wasn’t designed to be used this way.

Not only will it seem off, but the perception of surround sound itself will likely be lost.

So yeah, don’t do this.

Here’s an article on soundbars that lists a few capable of replicating that surround aspect.

https://easyhometheater.net/the-best-sound-bars


11.) Turning The Volume Up Past 0 db


Here’s something that I could see being a common misnomer when first entering into the audio world, and that is that going up past 0 dB in volume on the receiver.

Before explaining why it’s such a bad idea to do this, we first need to actually understand what dB even means. dB stands for decibels, and in the most basic terms, is a measure of how loud something is.

Now without getting too complicated, human hearing is extremely vast so using measurements in the form of decibels allows us to standardize different levels of volume so that we have an idea of exactly how loud something is.

But what’s interesting is that it isn’t a linear relationship.

A noise at 20 decibels and a noise at say 40 decibels is described as being a jump of more than 10 times.

If a noise then goes up to 60 dB, it’s noted as being 10 times louder than 40 dB and 100 times more so than 20dB.

Seriously, how weird is that?

So then what does all of this have to do with the receiver though, and why is it bad to go past 0?

Well if you haven’t noticed, the volume on a receiver is shown as a negative number, more specifically -dB. The reason for this is that it refers to what is known as reference level.

Reference level is basically a universal audio standard used when making content. It’s what allows sound engineers to mix content without confusion by having a single understood standard.

So when you have the volume at say -30dB, it’s basically telling you that it’s 30 decibels away from reference level. The negative number is just a denotation of how many decibels away from reference level you are.

The problem arises when you go above reference.

Normally a positive number is a good thing, but here not so much. The farther above 0dB that you go, the more distortion you’re introducing into the sound (not to mention it’d be pretty freaking loud by this point)

But not only is distortion an issue when reaching these levels, you also run a few more serious risks like receiver potentially overheating and short circuiting, the drivers in the speakers warping or even breaking, and even hearing loss if it goes from a quiet to loud scene at that level.

Needing to go that high is usually a sign that your speakers are not powerful enough for the room, or that they’re incorrectly calibrated.

Settings in the actual receiver could be an issue too since there’s one called DRC (dynamic range control) which sort of mellows the difference between the highest and lowest sounds, meaning an explosion and a line of dialogue would be around the same volume.

This is particularly helpful for night time viewers, but not so much if you’re watching in a normal setting.

Check to see if that’s on and if it is, you might want to turn it off if you’re not in a quieter environment. Hopefully doing so should remedy the issue.

Here’s a really good read by the way if you’re interested in the specifics of human hearing.

https://geoffthegreygeek.com/understanding-decibels/


12.) Using Speaker Wire That’s Too Thin


This is one of those mistakes that’s really easy to make since it isn’t covered nearly enough.

You would think that any speaker wire would do the job since it’s merely responsible for transmitting information from point A to B.

While true, there’s slightly more to it than that.

The major variable in that sentiment is the distance that information has to travel before reaching the destination. The longer the distance, the thicker the wire has to be to do the job adequately.

Speaker wire thickness is typically referred to by the AWG number (American Wire Gauge) and more specifically, is measured in mm (millimeters)

The strange thing though is that the lower this number is, the thicker the actual wire is. The reason for this has to do with the amount of resistance to an electrical current a wire possesses.

The smaller the wire, the more resistant to a current it is and thus, the higher the number will be.

On the other hand, the thicker the wire, the less resistant it’ll be due to there being more area for the current to travel through. This of course gives it a lower number.

For distances that 50 feet and less, you’ll typically want to with go with 16 gauge wire as that usually works the best. If you had a much bigger distance, say something like 100 feet, using that same 16 gauge wire could potentially experience issues due to the distance.

What you find when you use wires that are too thin for the distance they’re being used for is that you typically need to turn the volume to a higher setting just to get the same output had you used one that was thicker.

That and quality of the sound might take a hit as well. For those longer distances 14 and in this case even 12 would likely be applicable.

But for the average living room, you’re fine sticking with the standard 16 gauge. Though going thicker won’t exactly hurt anything, it wouldn’t really be necessary either.

This is the one that I typically use that should work great for you as well (unless you’re the one with that 100 foot room, in which case you’ll likely want to go bigger)

Also, just in case you need help with actually hiding the wires themselves so that you’re not tripping all over the place, I’ve got you covered.

16-Gauge Speaker Wire


https://easyhometheater.net/hiding-speaker-wire-solutions


13.) Setting The Subwoofers In The Wrong Spot


A picture of me explaining how to do the subwoofer crawl

Another huge mistake that I see a lot of people make (myself included initially) is that setting the subwoofer wherever in the room is perfectly fine.

This isn’t true at all.

While it’s true that you might get lucky with great placement right off the bat, there’s likely a place in the room where it’ll sound better.

Now I’ve talked about this many times before, but the placement of the sub can be the difference between things sounding perfect, and sounding like there’s no bass present at all.

This has to do with what are known as peaks and nulls.

As sound waves travel throughout the room, they interact with everything in it, including themselves. In some spots, these waves will double upon each other which is what we call a peak, causing things to sound boomy and bloated.

In other spots however, they completely cancel each other out leading to a lack of bass in that spot. These are known as nulls.

So how do you predict where these happen?

Simple answer, you really can’t; at least reliably anyway since every room is different.

However what you can do is minimize the instances of them, as well as making sure your specific seating area doesn’t fall within a peak/null through a variety of ways; one of the most important being the subwoofer crawl.

This is basically where you place the subwoofer in your seating position, and go around the room to find where the bass sounds the bass before placing it in that exact spot.

Another way of combating these is by adding an additional sub to your setup.

If you aren’t sure about the best way to do this, or if you’re simply looking for tips on how to optimize your bass fully, I highly recommend you to check this as this should help out immensely (not to mention it’s a good read in general)

https://easyhometheater.net/setting-up-2-subwoofers


14.) Turning The Subwoofer Volume Too Loud


Since the importance of the subwoofer is generally understood by now, I’m pretty sure you’re fully aware of the importance of setting it up right as well.

What I mean by that is like your speakers, your subwoofer should also be calibrated.

Like I mentioned earlier, even though it’s possible to do this manually, having the receiver adjust things for you is probably the best course of action.

However there is something that I didn’t touch upon and it’s something that’s just as important.

If you look on the back of your sub, then you’ll likely notice a bunch of knobs with one of them being the volume setting.

A huge mistake that a lot of people make here is assuming that the volume knob (also referred to as the gain) should be turned up all the way up.

While the gain knob does adjust the volume, turning it too high can cause the subwoofer to sound boomy and distorted which is the opposite of what you want.

Also playing it too loud can cause it to stop working which isn’t good.

Once the gain knob is set, you shouldn’t mess with it again. Should you need to adjust the volume of the sub again in the future, it’s best to do so on the actual receiver where you can fine tune things with a greater granularity.

But where should the knob actually be set then?

I’ve found that it sounds best with either the knob set in the middle at the 12 o clock position, or at the 1 o clock position.

Even the 2 o clock position is still acceptable if you like a little more oomph. But turning the knob any more than that and the low end starts to overshadow the content, which should never happen.

So just set it anywhere from the 12 and 2 position, and you’re golden.


15.) Using Subwoofers Out Of Phase


A picture of the LFE In input and phase control on the back of a subwoofer

Another knob or switch you’re likely to notice on the subwoofer is one called phase.

This is a setting that basically switches the polarity of a subwoofer by adding a delay to the incoming signal, thus causing it to be either in or out of phase.

But why exactly would someone want to do this?

Well if you have a large room with 2 subwoofers with one in the front of the room, and one towards the back, it’s possible that one of the subwoofers could seem to be playing before or after the second.

So by hitting the switch on one of them and adding a delay, it can cause them to sound more in sync with one another.

The setting can also allow a better integration between the sub and speakers so that things sound a bit more cohesive.

However this is personally one of those things that I’m a little ambivalent on because in theory it should make a world of difference but in practice, I’m not to sure how effective it is.

I’ve had much better results with either turning the volume of the subwoofer up or simply moving it, so I’m not too sure about the efficacy of this one.

I would at least say try and see what difference you notice and if all else fails, you can always move it to a different location or adjust the volume like I did.

Just don’t make the mistake of having a subwoofer that sounds completely separate from your speakers since it’s a sign that something may be set wrong.

Everything should blend together ideally.

Here’s a little more on phase and polarity if you’re curious.

https://www.mtx.com/library-phase-discussion


16.) Placing Your Receiver In A Cabinet


Putting your receiver in an enclosed space, especially a cabinet, is definitely falls under the list of things that you never want to do.

This is honestly one of the worst you could probably do when it comes to home theater errors.

An AV receiver has ventilation holes on the top, and or sides which allow air to freely flow through it. This air allows it to stay cool since the electricity that it uses causes the circuitry to heat up.

However what happens when you put it in a small space with no air is it has a much harder time with ventilation which can cause it to overheat.

What happens if it overheats?

Well a number of bad things could potentially happen.

It could possibly short circuit and break.

If it’s sitting on a softer surface like plastic, it could melt it.

Then the worse thing that could happen is if it gets hot enough, you run the risk of potentially starting a fire.

This is why it’s extremely important to put your receiver in a place that’s well ventilated and open.

You’ll often see informational notices on packaging emphasizing the importance of doing this, and that’s the reason why.

Another big no no by the way, is placing things on top of it as this can cause the same hazards mentioned before and can impact how long the receiver lasts.

As long as it’s in an area that’s open and visible, you’ll be good to go.


17.) Not Taking Into Account The Lighting Conditions Of The Room


A picture of ambient led lighting on the back of a flat screen tv

I think lighting conditions is certainly one of those things that wouldn’t immediately come to mind necessarily when thinking about ways to best optimize your home theater experience.

But make no mistake, the lighting in the room can make a pretty big difference. If you typically watch your content in rooms with a lot of open windows and light, then beams of direct sunlight on the screen is probably something you’re pretty use to dealing with.

But having the screen in direct sunlight is preventing you from getting the best picture quality without question.

https://easyhometheater.net/home-theater-paint-color-ideas#Taking Into Account The Lighting Of The Particular Room


If physically moving the television is out of the question, then light blocking curtains are probably the next best option.

They’ll block out those harsh rays, preventing your image from becoming washed out; especially since a dim setting provides the best result in terms of picture.

Also try to not place any direct sources of light such as lamps opposite of the screen since it’ll have a negative effect on picture quality; not to mention it also being overly distracting.

Conversely if you’re somebody who watches content in a dark environment most of the time, then eyestrain is a very real possibility due to the fact that the screen is so much brighter than its surroundings.

Even if it doesn’t seem necessarily bright bright at first, watching for hours in that kind of environment can still cause visual fatigue.

What you can do to combat this is add ambient lighting to the room. The soft glow of a lamp on a low setting for example, can help with this tremendously, giving the room a unique sense of character.

You can even add an LED lightstrip to the back of your TV that allows you to control the intensity, color, etc. all with the press of a button on either the included remote or your smartphone.

I personally use one on my TV, and I can’t get enough of it honestly. It’s really awesome in person, so no doubt that you’d like it too.

WONTEX Blackout Curtains


Music Sync Color Changing LED Strip Lights


18.) Placing Your Display In A Less Than Ideal Place


A picture of a TV on a stand

Similar to the lighting in the room affecting picture quality, where you place the display matters a lot as well. Ideally, you don’t want to place it near or opposite a window because it’ll simply get washed out from over exposure of sunlight.

But more so than that, where you place it is also going to dramatically affect the viewing the viewing angle as well.

The viewing angle in simple terms, is basically the point where the picture looks best. So if a display is touted as having great viewing angles, that means that sitting off a little to the left or right won’t influence how things look on screen as much.

But in that same vein, you ideally want your seating position to be as close to the center of the display as possible.

This is because directly in front is where the content will look best. It’s important keep in mind that the more off axis that you sit from the television, the more the picture quality will degrade, hence why being in a direct line of sight of your TV is so important.

The of height of the set matters a lot too. If possible, try to have it anywhere from eye level when seated, to 2 feet above when seated. Any more or less than that, and I’ve found that things start to go downhill.

Another thing that I want to emphasize is to not put the television around heat sources or above a fireplace. I know that that’s a popular place for displays to be placed, but overtime it can have a negative effect on the circuitry so just keep that in mind if you do.


19.) Using A Display That’s Too Small For The Room


This is something I’ve seen far too often. Whether it’s something that’s unintentionally ignored, or merely disregarded, you don’t want to neglect going with a TV that’s appropriately sized for your room.

Going with something to small is going to cause problems with reading text and actually seeing what’s happening on screen.

Conversely, going with one too big is going to end up taking up too much space and be way too close.

So how can you tell what size screen is the right one to go with for your room?

What if I told you there was a calculator that could tell you exactly that.

Turns out there actually is.

Simply enter the size of the TV you currently have, or the distance you plan on sitting from the display and it’ll tell you exactly what the right choice is for you and why.

It’s super helpful and a tool that I often use myself.

Keep in mind that bigger screens, especially newer ones, will be 4K which gives you a 4 time boost in resolution.

This means you can technically sit closer without compromising picture quality, so the size you go with doesn’t necessarily have to be as big.

As a general rule of thumb, starting with 50 inches, the minimum seating distance will be around 5 feet.

Then every 5 inches in display size you go up from that will correspond to a 6 inch increase in distance; meaning at 55 inches the minimum distance should be 5’6, and so on.

But you can always use the calculator to get a more exact answer too.

https://www.inchcalculator.com/tv-size-viewing-distance-calculator/


https://easyhometheater.net/what-is-a-4k-television


https://easyhometheater.net/the-best-tvs


20.) Not Optimizing Your Display


I’m not sure if it’s just me, but I often feel like the display is incredibly neglected when it comes to home theater.

We place so much emphasis on getting things right with our speakers, that it can be somewhat easy to forget that the display holds just as much importance in the AV world.

I mean heck it’s even in the name. So just like with calibrating our speakers, a major step that a lot of people tend to forget to do is to actually calibrate their display.

Now some manufacturers do provide decent presets out of the box that claim that they’re all ready to go, but you won’t have a picture that’s completely your own until you adjust the picture for your specific viewing environment.

Doing so can be the difference between an initially bad looking picture to a much better looking one after.

This, granted you do things the right way.

You can either have your television professionally calibrated for a fee, or you can adjust things yourself.

The professionally calibrated way will be much more in depth than what is normally possible since they use special tools to access a special menu, which then allows them to tweak it with precision.

But an interesting thing to note is I’ve seen people who have had it done, and preferred the way the picture looked before.

That’s probably due to the fact that it’s typically calibrated in the warm 2 setting, which is the closest to the reference standard film makers use, 6500K; which can be seen as too yellow to some.

What I would personally do is adjust it yourself first then see how you like it.

I’m personally of the opinion that you can get a more than satisfactory result by yourself.

But how can you actually optimize it?

Well to make it easy, check out the article I did that shows you exactly that.

It’s not that hard, and shouldn’t take too long so don’t worry. But it’s definitely worth doing if you want the best visual experience possible.

https://easyhometheater.net/how-to-optimize-your-tv


21.) Not Turning On 4k Support In The Settings Menu For A Samsung TV


This tip is a a very specific one that only applies if you have a recent Samsung TV, but I definitely thought it was important to include because it was a mistake that even I made and only recently corrected.

If you happen to use multiple HDMI ports on the TV with devices that support 4K, weirdly enough, 4K pass through for HDMI slots 3 and 4 is turned off by default.

That means not turning them on in the menu will result in only 1080p being displayed.

I’m not sure if this is an error that Samsung isn’t aware of, something only specific to my model of TV, or whether it’ll be patched in the future, but for now you will want to check to see if they’re turned on.

In order to do this, go into the general setting in the menu, hit external device manager, then hit HDMI UHD Color.

The first and second slots should already be active by default, but check to see whether the 3rd and 4th ones are as well. If not, simply press the center button on the remote on each of them so that they are.

That’s pretty much it.

Again I’m not sure if it’s just my display, but it’s certainly worth checking in your own. It’ll save you the hours of confusion that I went through wondering why the 4K wasn’t working.

That was certainly fun…


22.) Using The Wrong Aspect Ratio


Here’s another scenario that isn’t common, but may apply to you if you notice something off about the way content looks.

To keep it simple, displays use what is known as an aspect ratio to display content.

An aspect ratio is basically a standard used to determine the shape of your display. For example for square displays, a 4:3 aspect ratio is used.

That means that if the screen were to be cut into 4 equal parts width wise, you would have 3 equal parts height wise.

4:3 isn’t used that much anymore and instead, 16:9 has become the new standard.

What’s interesting is that filmmakers use a completely different standard, 21:9.

21:9 is much wider, and in order to actually fit, they have to place black bars at the top and bottom of the screen so that it’s displayed correctly. I’m sure you’ve seen those before.

They’re actually called letterboxes, and they’re used because the content was originally filmed in a much wider context (the more you know right?)

But what you want to be careful of is using the wrong aspect ratio because doing so can cause the content to either look stretched, too small, letterboxed, and so on.

Unless you want to use a different one, I’d personally just stick with the 16:9 ratio since that’s what the current standard is.

I know that occasionally, updates in your cable box or television can change your aspect ratio completely so check in the menus to see what it’s currently set at.

https://www.rtings.com/tv/learn/what-is-the-aspect-ratio-4-3-16-9-21-9


23.) Not Setting The Cable Box To 1080p Or Its Highest Setting


This one can be the result of either an update, or a brand new cable box not being set as this initially, but make sure that your settings use the highest available display resolution within the actual device.

Normally this is 1080p, but I do know that 4K cable boxes exist and are being rolled out to more people as time goes on. I’d check to see what yours is currently set to because it may just turn out that it’s capable of a lot more than you originally thought.

Plus like I said, a stray update or setting change can alter this, so it’s always good to check up on this from time to time.


24.) Using HDR+ On Actual HDR Content


Proper HDR, which stands for High Dynamic Range, probably makes one of the biggest differences when it comes to picture quality.

I mean it allows the brightest and darkest parts of the screen to show at the same time while giving you the most detail in each. It’s similar to how the human eye works in that that contrast between light and dark doesn’t come at the expense of detail.

It really is one of those things you just have to see in person because no joke, I honestly think it’s one of the most mind blowing tech advancements in recent years.

It’s really incredible on a TV with correct settings.

Because of that though, manufacturers have developed a faux HDR dubbed HDR+ which simulates this effect on non HDR content.

While it is a little better than standard content, it’s not as good as the real thing since colors can sometimes get somewhat saturated.

But a big mistake that I’ve seen people make is using HDR+ on actual HDR content. That’s definitely something that you don’t want to do.

If the content natively expands the dynamic range already, then applying this setting on top is not only unnecessary, but degrades picture fidelity as well.

So if you see that your TV has this setting and you wish to use it, only use it on regular content. Otherwise you’ll just be sacrificing quality.

You should have a look at the following article to see exactly why HDR is the future of display tech, and why I laud it so much.

https://easyhometheater.net/what-is-an-hdr-television


25.) Setting Display To PC Instead Of RGB In A Gaming Console


A device plugged in incorrectly which is one of 25 of the worst home theater mistakes people often make. Image credit: https://www.abelectricians.com.au/

This is another really specific thing that you might do if you having a gaming console like an Xbox Series X or Playstation 5.

If you go into the settings, you might notice that under the display setting is a few different options that include PC and RGB.

Make sure that it’s set to RGB and not PC. RGB, which stands for Red, Green, & Blue, is basically a denotation for the pixel standard used in televisions.

PC on the other hand, is used for, like the name suggests, PCs. Setting it to anything other than RGB on a TV might provide you with a seemingly better picture at first, but it’s not as it seems.

When you do this, black levels can become crushed, and you begin to lose shadow detail which is definitely something that you don’t want. So leave it on the default, unless you’re actually using a PC monitor, since they use a different display technology.

This is further compounded when you add things like HDR and Wide Color to the mix. More about that here if you’re curious.

https://easyhometheater.net/what-is-a-wide-color-gamut-tv


Bonus: Not Using A Surge Protector


This is a huge investment that a lot of people don’t use but should.

A surge protector can literally be the difference between riding out a harmless lightning storm, and finding out you have fried electronics.

I want to emphasize the importance of using one because I always doubted the efficacy or even need of having them until one faithful day, a terrible thunderstorm came through and completely trashed my receiver and speakers.

It was eye opening to say the least, and showed me that they’re used for a reason.

Since then, I’ve always had one and haven’t had a single problem since. When storms like that happen, the excess electricity that they generate can overload any electronics to the point that they can’t recover.

A surge protector helps to negate this extra energy. So yeah, just want to spare your new toys of the same fate mine unfortunately suffered.

Highly, highly recommend you use one if you aren’t already. Take it from me, it’s not just hyperbole; this can actually happen.

AmazonBasics 6-Outlet Surge Protector Power Strip


Bonus#2: Using Only 1 Set Of Wires With A Stereo Ceiling Speaker


If you’ve ever had the pleasure of owning a ceiling speaker, then you’d know how convenient they are. This is even truer when it comes to stereo ceiling speakers — which are able to replicate stereo sound from only a single speaker.

But what some may not realize is that when you use these kinds in particular, 2 sets of wires should be used instead of 1 since they’re technically 2 speakers in 1.

When you don’t do this, what can happen is 1 side of the speaker not working, the sound being very low, or worse, it not working entirely.

Again this is for the stereo kind, not the normal ones.Normal ceiling speakers only require 1.

The only exception to this is if you use 4 core speaker cables, which essentially combines those 2 pairs into a single wire. I’d definitely recommend it if you plan on going this route.

https://easyhometheater.net/the-best-ceiling-speakers


Bonus#3: Setting Your Speakers To Large Instead Of Small In The Receiver Settings


A common issue that sometimes happens (depending on what receiver you use) is that after automatic calibration, it may end up setting your speakers to the large setting instead of small.

Basically the determination of whether a speaker is capable of reproducing a full range sound or not is denoted by the name large or small. Large means it’s full range and can produce sounds both above and below 80 Hz, while small means it can’t and is only capable of the ones above it.

80 Hz is of course the recommended setting of where your subwoofer should take over, but the problem is, receivers can sometimes set the speakers to large — causing an overlap in sound.

By setting a smaller bookshelf speaker to the large setting, this not only asks more of it than what it’s likely capable of, but you end up with holes in your sound or things just seeming off.

You’d probably notice a reduction in volume and most likely clarity too unfortunately.

So the solution is to go back into the receiver menu and change the setting to small for everything except the subwoofer so that way the speakers handle everything above 80 Hz, and the sub takes care of things below that; giving you a much cleaner sound.

Now the exception to this is if you’re using floorstanding speakers since they actually are full range typically due to their bigger drivers, and can handle bass ranges much lower than a bookshelf speaker can.

But from personal experience, even then I’d still set those to small too since it puts less stress on the drivers, and frees up more power for them to execute the higher range sounds with much more breadth.


Final thoughts


Woo that took a while, but hopefully this will help you to avoid 25 of the worst home theater mistakes that new, and even seasoned enthusiasts often make.

Hopefully you learned at least one new tip that can help you to take your setup to the next level.

Actually speaking of which, be sure to check out 10 Home Theater Ideas To Use Right Now and Extremely Common Home Theater Problems if you want to make sure that you have all your bases covered in terms of optimizing your set up.

But if you apply the things talked about here, you’ll have a system that should provide for a great experience..

Until next time, make it easy, keep it simple.


How To Connect 2 Subwoofers To One Receiver

A picture showing the author setting up 2 subwoofers

How To Connect 2 Subwoofers To One Receiver


A picture showing the author setting up 2 subwoofers

So you heard about the benefits of setting up dual subwoofers, and decided that you were finally serious about creating a truly memorable home theater experience.

Now you need help with figuring out how to connect 2 subwoofers to one receiver.

Well interestingly enough, that’s exactly what we’ll be learning how to do today.

Setting up 2 subwoofers isn’t terribly hard to do, and if anything, the most work lies in actually sitting the subs in the right place.

There’s a few ways to do this though, so lets take a look to see which way best fits your current situation as well as more importantly, why even go dual in the first place.

I’ll even walk you through exactly where to place the subwoofers in the room so that you get the best sound for your particular room.

We’ll make it super easy!

“Sound” good?

Let’s do it! ?

(Afterwards for more clarity on actually picking a good subwoofer, highly recommend to check out the article below showing you how to choose a good one that also includes my top recommendations for the year)

https://easyhometheater.net/the-best-home-theater-subwoofers


Feel free to jump to any section


Connecting A Pair Of Subwoofers With A Receiver That Has 2 Outputs


Connecting With A Receiver That Doesn’t Support 2 Subs Using An RCA Y Splitter


Connecting 2 Using The Line In Input


Using Wireless Subs


The Benefits Of Going Dual


Where To Place Them For The Best Sound Using The Subwoofer Crawl


Can You Mix And Match Different Sizes And Brands?


Why And How Would You Connect More Than 2?


Final Thoughts


Connecting A Pair Of Subwoofers With A Receiver That Has 2 Outputs


A closeup of a subwoofer

Now before you do any of this, or anything else talked about in the article, you’re going to want to make sure that your seating arrangement is set optimally.

Seating has one of, if not the biggest impact on sound quality, so you’re going to want to make sure that you get this right.

I showed you how to do that in this article.

https://easyhometheater.net/home-theater-seating-ideas


Anyways the easiest way on how to hookup multiple subwoofers would be using a receiver that has 2 subwoofer outputs — though if you don’t have a receiver that has 2 of these, then don’t fret, there are other ways to work around this.

*Skip ahead to the next section if you don’t*

Conversely if you want to make it easy for yourself, there’s an article I did on the various receivers I personally recommend that do have these so you won’t have to do any extra work.

https://easyhometheater.net/the-best-home-theater-receivers


But if you do have one, then all you have to do is connect each subwoofer with an RCA cable (often referred to as a component cable) to the outputs labeled sub 1 and 2 on the receiver.


A picture of the LFE In input

Then on the back of each subwoofer, connect the other side of the component cable into the terminal named line in, or something similar to that. It may even be called LFE In like you see in the picture above.

You just want to make sure it’s in the input basically.

When it comes to which cable to use, I personally use this one.

Cable length is of course important too, so get a general idea of where you would hypothetically want the subwoofers, and measure the distance from the your seating area to each of them. That length is the cord length you’d want to go with.

Make sure that the receiver is also completely off when you’re plugging/unplugging things by the way, since there’s electricity running through it when it’s powered on.

Once they’re plugged in, that’s it, you’re good to go.


Connecting With A Receiver That Doesn’t Support 2 Subs Using An RCA Y Splitter


A picture of an RCA Y splitter

This method is a little different, but it’s one that I’ve used previously so I can confirm that this works. The first thing you’re going to need is a neat little wire called an RCA Y splitter.

What this does is take a signal from a single source, and then split it into two so that an RCA cable can then be connected to each end.

This can essentially allow you to use 2 subwoofers, even though the receiver may only technically support one by sending two low frequency audio signals to each from that original signal.

Pretty cool right?

This is the one that I use which is also the one that you see in the picture. It’s specifically called a male to female adapter since the end that connects into the device is called male, and the other end that accepts the connection is called female.

Male to 2 Female RCA Adapter Audio


A picture of both component cables connected into the Y splitter

First Method – Connecting The Y Splitter To The Subwoofer


So there’s actually 2 different ways to connect dual subs when using a Y splitter.

Either way is fine, just make sure everything is turned off and unplugged first before doing anything.

But for this method, you might notice in the picture that the Y splitter is actually connected to the sub instead of the receiver.

In this case, the Y splitter goes into the input of the first subwoofer, (labeled line In or LFE In depending on what you have) the two subwoofer cables go into the female ends, (shown in red and white) and the other sides of the cables go into the input of your second subwoofer, and the sub input on the back of your receiver respectively.


Second Method – Connecting The Y Splitter To The Receiver


There’s various methods with regards on how to connect two subwoofers to one receiver and this one involves connecting the Y splitter to the receiver first instead.

First, make sure that everything is turned off and unplugged.

Next, connect the male end of the y splitter into the output on the back of the receiver labeled sub or something similar.

Then, connect the RCA cables for each subwoofer into each of the female ends of the splitter. The other side of the cables goes into the inputs labeled line In, or LFE In on both of the subwoofers — again the particular name depending on what you have.

After that, well that’s it, that’s everything. Turn everything back on and you’re all set.


Connecting 2 Using The Line In Input


Here’s another way on how to connect 2 subwoofers to one amp. Instead of using an adapter to split the signal, what you can instead opt to do is use an RCA cable to pass the signal along from one subwoofer to another.

In order to do this, at least one of the subs has to have both an output and an input.

So what you do is plug one end of the cable into the sub out of the receiver, and the other end into the line in of the subwoofer.

Then you take another cable and connect one end into the line out of that same subwoofer, and connect the other end of the cable into the line In of the second sub.

This is often referred to as daisy-chaining in the audio world.

But after everything is all connected, you’re ready to move on.


Using Wireless Subs


Yet another way to go about using more than one sub is if you know that the subs you’re using have wireless capabilities built in.

Some even have adapters that you can buy that enables wireless capability.

Of course It’s impossible for me to tell if you have one that can do this since I don’t know what you have, but if you do have one that’s capable, just know that’s it possible to use 2 of them.


The Benefits Of Going Dual


So here’s the real question you might be asking yourself, why exactly bother with using 2 subwoofers instead of one?

Well the answer to that is multifaceted since there are actually quite a number of benefits with doing so.


~Smoother Bass Response


The first major benefit of going dual is that you get a much smoother bass response when you use more than 1 sub.

But what does that mean exactly?

Well to give you a better understanding, let’s break down what typically happens when you use only 1.

Whenever you’re watching content, the sound waves from your speakers travel all around the room; reflecting, being absorbed, etc. until they finally reach your ears.

The higher the sound seems (aka the frequency) the shorter in length these waves are.

When you get into the lower frequencies that the subwoofer is responsible for (typically 100 and under) the longer these waves are.

But what happens is that depending on the room, the waves will begin to interact in really strange ways. For example, in some spots, the sound waves will reflect and collide with each other; effectively cancelling itself out.

This is what is known as a null, and this null is what causes a deadzone for bass so to speak.

This means that within that null, the bass will sound almost nonexistent, making it seem like you weren’t using a subwoofer at all.

Conversely, in some spots the wave will double upon itself, making the bass sound many times stronger.

This is known as a peak.

Peaks cause the bass to sound extremely boomy, resulting in a near loss of detail all around. The problem arises when you realize that your seating area may be located in one of these peaks or nulls, and a single subwoofer can have major problems with eliminating all of these from just one location.

When you add a second one, it can help to tame these waves resulting in a much more enjoyable experience in more spots across the room.


~It Can Increase Your Bass Output


A picture of a home theater system

Interestingly enough, sound isn’t necessarily linear with how you perceive it.

When you add a second subwoofer, it will provide at the minimum a 3 decibel increase in low frequency output.

While 3db may not seem like a lot, that actually provides an acoustical output that’s double the previous level, meaning technically double the bass

But what’s makes things really interesting is how we actually perceive that sound — because you see, it actually takes at least 5dB before we notice a significant difference, and 10dB before we notice a doubling in sound.

While 1dB is the smallest perceptible change in volume we can detect under controlled conditions and almost imperceptible in normal conditions, 3dB is typically where we tend to notice it a lot easier.

This is due to our ears not only having a flat response, but hearing certain frequencies as louder than the other — even going up by the same volume.

Yeah seriously.

For every 10db that you go up in output, your perception will be that it has doubled in output.

Isn’t that strange?

This article talks about that in more detail if you’re interested in how that all works.

But this increase in power will give you a lot more leeway when it comes output, and is particularly helpful in bigger rooms where you may just need that extra output so that the low end doesn’t seem too weak.


~Less Localizable


Yet another benefit of setting up multiple subwoofers is that the bass is less localizable as a result of that.

Localization is basically being able to tell where a sound is coming from.

This is bad when it comes to subwoofers because they’re supposed to be omnidirectional — meaning the bass is supposed to seem as though it’s coming from all around you and not from any particular direction.

However if you’re able to easily tell which direction it’s coming from, then the immersion is disrupted and it ends up being really distracting.

It’s the opposite of what you’d ideally want for an optimal entertainment experience.

When you add a second one however, it reduces the chances of this dramatically due to the bass emanating from an additional source.

This gives a much more even sound overall which is important.


~Less Strain On Your System


Again the benefits of adding an additional sub to your system are many, and one of the more interesting ones is the fact that it actually alleviates the workload from just having a single one.

I mean think about it, with just a single sub present, that means it becomes responsible for the entirety of the LFE (low frequency effects) channel, meaning all of the bass present in a soundtrack/mix is left to just that 1 sub.

This can put a lot of stress on it over time, especially if played often at higher volumes.

The benefit of another subwoofer though is that you can split the workload between the 2, reducing the strain on them both.

This actually has another hidden benefit of giving you a cleaner bass as well because with the additional power added from a second one, things like distortion and chuffing are also reduced.

Chuffing is the audibility of air passing through the speaker and the more of this that is actually audible, the less clean of a sound you’re going to get.

A really great example of this is if you’ve ever heard a car blasting music with a lot of bass, and it almost sounds like its speaker system is about to break.

That’s a more extreme scenario of course, but same general idea.

Distortion is well, exactly what you’d expect, a disruption in the way the bass is supposed to sound.

With one subwoofer, you typically have to turn the volume up a lot more than if you had 2, and the higher the volume, the greater the amount of measurable distortion in your audio.

So with 2, these issues are mitigated greatly, making the experience a lot more enjoyable.


Where To Place Them For The Best Sound Using The Subwoofer Crawl


A picture of me explaining how to do the subwoofer crawl

So now that you’ve got your subwoofers all hooked up, just like we do with speakers, we’re going to calibrate them. But not in the traditional sense.

We’re going to be using what is known as the subwoofer crawl. Basically, the idea here is we’ll be going around the room listening to where it sounds best.

This is an oversimplification of course, but you get the idea.

Now before you do anything, you’re going to want to make sure that your seating is in the most optimal spot. I touched upon this once before earlier, but it is important that it’s right if you want the best sound possible from your system.

If you’re certain it is then we’ll move on, but for those of you that are not quite sure, make sure that you check out this article on that very subject.

https://easyhometheater.net/home-theater-seating-ideas


~Making A Few Adjustments


Anyways the first thing you’re going to want to do is make sure that both of your subs are set properly.

We’ll start with the crossover setting. This is basically the point where the subwoofer takes over from the speakers. Typically it’s set at 80 Hertz (Hz), but this is usually handled on the receiver’s end.

This means turn the crossover on the back of the sub all the way to the right or the point it states that it’s no longer processing it. It’s different for each one so you’ll have to see what yours says.

Next make sure that the phase is set to 0 or normal. Phase adjusts the delay between the sub and the speakers but this isn’t usually something you’ll have to mess with. Just leave it as is.

Finally the volume control (often referred to as the gain) adjusts, you guessed it, the volume; but again this is usually done on the receiver’s end.

There are a lot of recommendations out there when it comes to the correct setting, but my personal recommendation is to simply turn the knob to the halfway mark. I’ve found that it honestly sounds best there.

Now that that’s all set, we can get right to the action.


~The Crawl


So you won’t necessarily have to crawl (though you can if you want to) but you will want to be crouched low enough so that you’re at the same level you’re typically seated at.

Anyways, place one of the subwoofers at your seating position, and play either music or a movie that you’re so familiar with that you could recite it in your sleep. It should have a decent amount of bass as well.

Now go around the room and listen to the differences in sound.

You’ll notice in some spots that it’s nonexistent while in others it’s way too strong. Find the spot that you think sounds the best and mark that spot with a piece of tape or an object.

Place the sub there and do the same for the other one.

There are different ways to do this, but I’ve personally found doing them one at a time is much easier to manage honestly.

When all is said and done, sit down and listen to how it sounds. If it sounds good then congrats, you did it!

If not, then there’s a few configurations I’ve found that produces decent sound so feel free to try them.

You could place one in the front left corner with one in the back right corner; each of them at the midline point of the wall across from each other, or one on each side of the left and right speaker.

There are more depending on the room, but those are generally safe bets.


Can You Mix And Match Different Sizes And Brands?


Another angle of a home theater system

But what if you have 2 different sized subwoofers or even ones from a different brand, can you use those?

Technically yes, but you ideally want to match them; at least when it comes to size and type. When you use 2 different sized subs together, one is going to be more powerful than the other, and this could cause issues with giving you a smooth bass response.

Now that isn’t a definite since there’s a lot of different factors at play, but the chances of the bass just generally seeming “off” when you mix and match like this is possible, so I personally wouldn’t. The type is just as important too.

That means if one of your subs is ported, you’ll want both of them to be ported. If one’s sealed, make both of them sealed.

The brand isn’t nearly as important as those first two things, but in an ideal world, you’d be better of with the exact same pair.

https://easyhometheater.net/what-is-a-subwoofer


Why And How Would You Connect More Than 2?


Here’s another interesting question, can you use more than 2 subwoofers?

To answer that simply; yes you can, and there’s actually some benefit to doing so.

While 2 would in fact make your bass smooth across all listening positions, in bigger or oddly shaped rooms, this may not necessarily be the case.

When you introduce a 3rd or even 4th one to the mix, it can help to smooth out peaks and nulls even further, but be careful since it is also possible it could introduce them as well.

Many of the same benefits of going dual exists with more than 2 including further reduced system strain, stronger output, and smoother bass. However you would have to have the space to do this as well, which is why many people may not go this route.

Now connecting 3 or more isn’t that hard as you have a few options. If you have a receiver with two sub outputs, you can use an RCA Y splitter for each one, which would give you a total of 4 outputs.

Or you could daisy chain them all together by connecting an RCA cable into the input, and using another RCA cable to run it from the output of the same one into the input of the next sub; continuing the chain like that.

If you thought movie nights were intense with 1, then try to imagine 4.

It’s simply incredible to be honest.


Final Thoughts


Well that about wraps it up for this one.

Hopefully that helps with how to connect 2 subwoofers to one receiver along with other things you want to keep in mind when doing so.

Like always if you have any questions or you run into any problems, then feel free to reach out and I’ll help you out.

Actually speaking of problems, the following article should help you out if you’ve been dealing with other more general home theater problems, along with another going over a few secret tips to help eke out even more performance from your system.

Before even that though, you’ll certainly want to have a look at the comprehensive guide I created that goes over many of the most common errors that people often make, along with exactly how to fix them.

https://easyhometheater.net/25-of-the-worst-home-theater-mistakes


https://easyhometheater.net/home-theater-problems


https://easyhometheater.net/home-theater-ideas


Until next time; make it easy, keep it simple. ?

Interesting Cyber Monday Home Theater Deals (2024 Edition)

Cyber Monday Home Theater Deals

Interesting Cyber Monday Home Theater Deals (2024 Edition)


(With the unofficial holiday over, these deals may no longer be applicable. So with that, prices may be different, and the availability of said products may have changed. This will most certainly be updated when the next one rolls around)


Like the title suggests, today we’re going to be looking at interesting cyber monday home theater deals for 2024 that might be well….interesting!

Now it is possible that a few of these last longer than a day, (especially since some consider this cyber week)

However the flipside is that it’s possible they could also end quickly depending on what it is, so that’s something to remember.

So the way I’m going to do this is list the best things that I’ve personally come across in my opinion, but there won’t be mentioning of price since that’s something that could change.
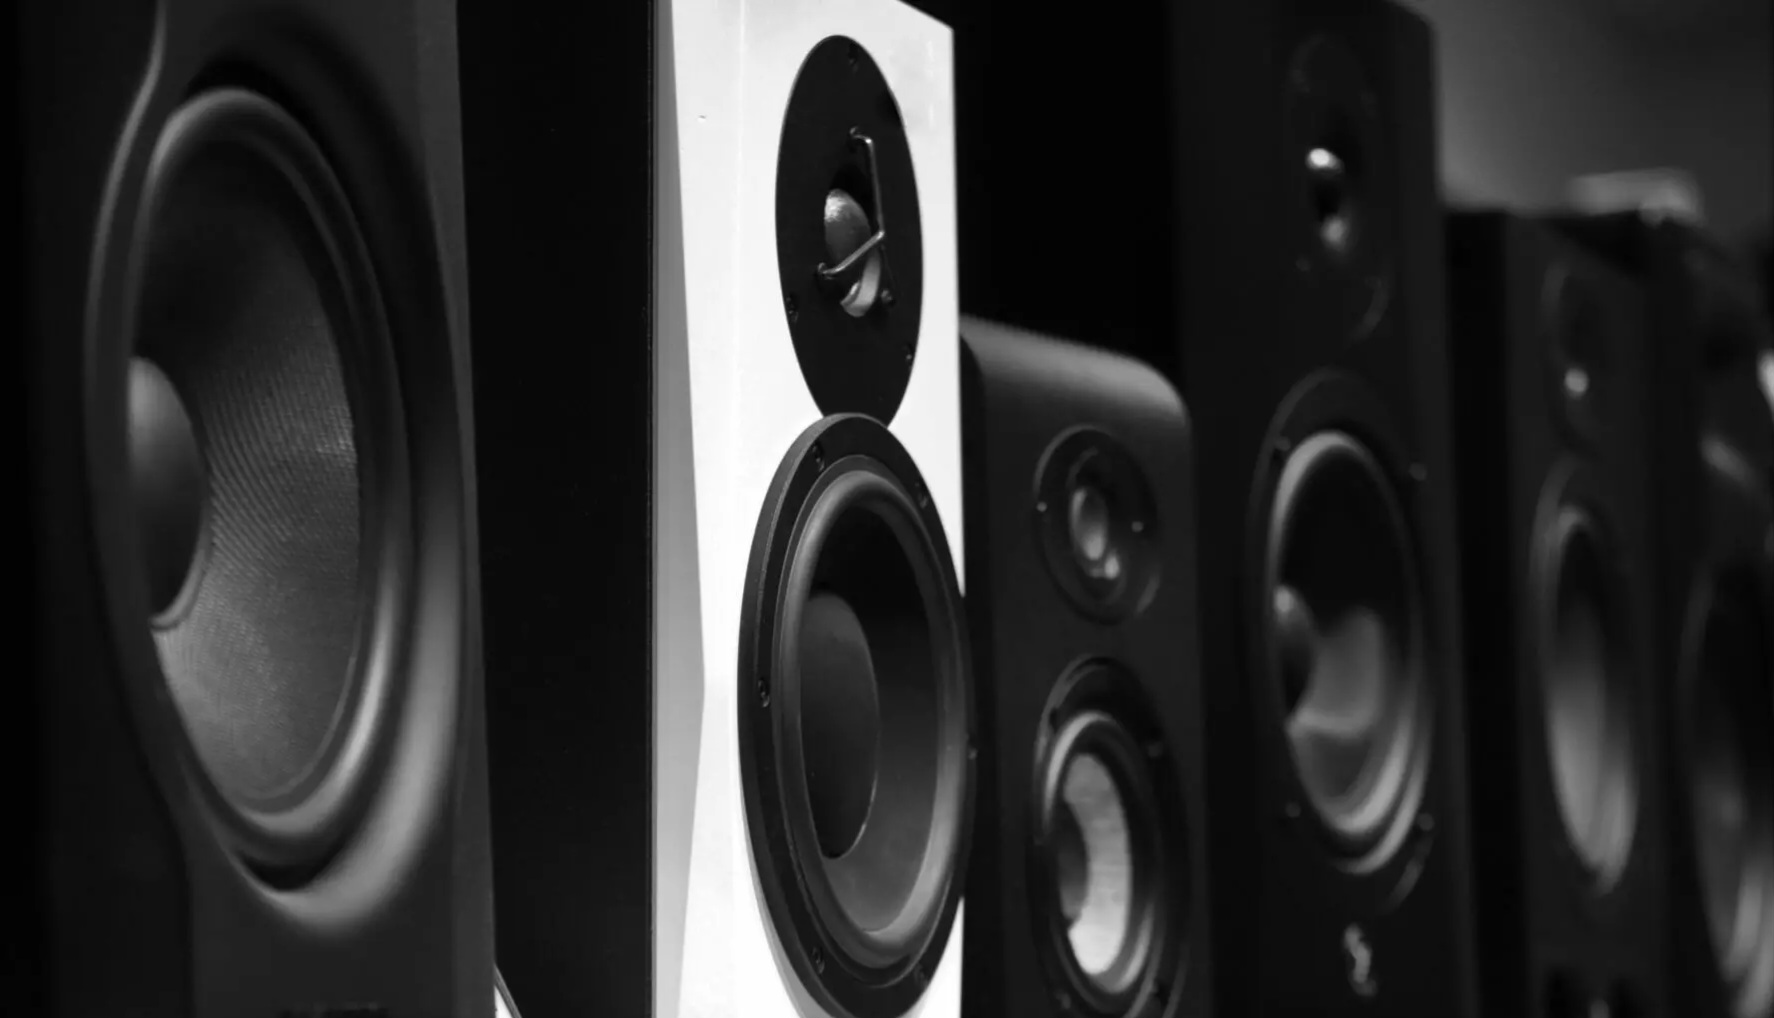
The same applies to availability since that can also change.
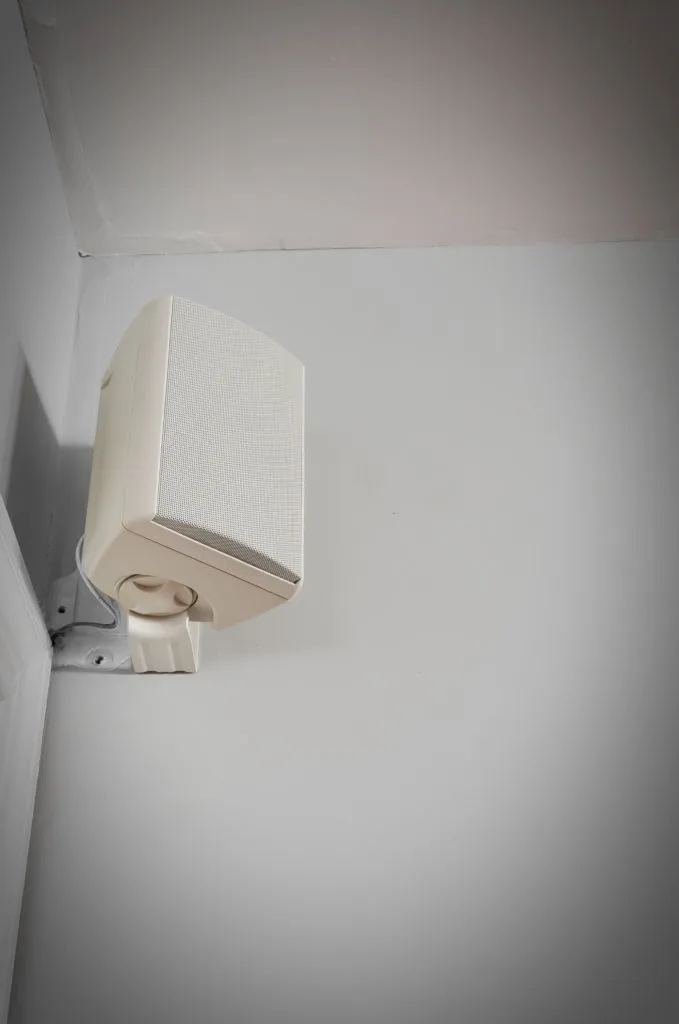
It’ll also be partitioned off into sections.

So without further ado, let’s get right to it!


Televisions


Complete Home Theater Systems


Center Speakers


Bookshelf Speakers


Subwoofers


Receivers


Soundbars


Floor Standing Speakers


Projectors


What Is Cyber Monday?


Televisions


A picture of a TV

It goes without saying that having a good TV can improve the movie watching experience.

Here’s a few I thought looked good.


Check Samsung 43-Inch Q60D QLED Availability


Check Samsung 50-Inch Class QLED 4K Availability


Check LG G3 Series 77-Inch Class OLED Availability


Check LG B4 Series 65-Inch Class OLED Smart TV Availability


Check Samsung 65-Inch Class QLED 4K QN85D Series Availability


There’s so much to cover when it comes to televisions that we’d honestly be here all day. I created a post on the best TVs that includes more information so feel free to check that out as well.

https://easyhometheater.net/the-best-tvs


Complete Home Theater Systems


Obviously choosing and even creating the best home theater system is subjective since there are so many things to look for, but when going the premade route besides doing my own research, I like to hear the opinions of others to see what they think.

So that being said, these are a few ready made setups that certainly caught my eye (note some may need a receiver to function if it doesn’t come with it unless stated it doesn’t need one)


Check Yamaha Audio YHT 4950U Ultra HD 5.1 Channel Home Theater System Availability


Check Klipsch Reference R-26FA 5.1 Home Theater Pack Availability


Check Logitech Z906 5.1 Surround Sound Speaker System Availability


Check Platin Monaco 5.1.2 Home Theater System Availability


Check Acoustic Audio AA5171 5.1 Surround Sound Bluetooth Home Entertainment System Availability


Here’s a few more of my favorite systems that I covered in a different article.

https://easyhometheater.net/the-best-home-theater-systems


Center Speakers


The importance of a good center speaker can never be emphasized enough as that is where up to 80 percent of the dialogue is represented in a movie.

If you skimp on that, then chances are you won’t be able to enjoy everything nearly as much because you’ll be struggling to hear things.

Luckily these are quality since I actually have experience with them.


Check Klipsch R-52C Powerful Detailed Center Channel Home Speaker Availability


Check Sony SSCS8 2-Way 3-Driver Center Channel Speaker Availability


Check Klipsch RP-450C Center Channel Speaker Availability


Check Polk Audio T30 100 Watt Home Theater Center Channel Speaker Availability


Check Polk Audio CS1 Series II Center Channel Speaker Availability


Check Polk Signature Elite ES35 Center Channel Speaker Availability


Check ELAC Debut 2.0 C5.2 Center Speaker Availability


Also check out the article below for even more ideas.

https://easyhometheater.net/the-top-10-center-channel-speakers


Bookshelf Speakers


Like the name suggests, a bookshelf speaker is one that is meant to sit upon a desk or bookshelf due to their smaller design.

Because of that, they’re very versatile, and they can be used for music or movies.

They’re also an important part of any 5.1 and up home theater because they’re responsible for almost all of the sound effects. 

Here’s a few good ones I came across.


Check Edifier R1280T Powered Bookshelf Speakers Availability


Check Polk Signature Elite ES10 Speakers Availability


Check Edifier S2000MKIII Bookshelf Speakers Availability


Check Klipsch R-51PM Speakers Availability


Check Polk Monitor XT15 Bookshelf Speakers Availability


Check Edifier P17 Passive Bookshelf Speakers – 2-Way Speakers Availability


Check ELAC Debut 2.0 B6.2 Bookshelf Speakers Availability


Check Sony SS CS5 3-Way 3-Driver Bookshelf Speaker System Availability


Check Polk Audio T15 100 Watt Home Theater Bookshelf Speakers (Pair) Availability


For more, check out the article I did on my top 10 recommended bookshelf speakers as of right now.

https://easyhometheater.net/the-best-bookshelf-speakers


Subwoofers


Subwoofers are arguably the most fun part of an entertainment setup because they’re responsible for the bass that’s heard.

When you’re watching a movie and say an explosion happens, the subwoofer is the one that provides the bass that makes that scene that much more convincing.

Getting a good one of course is ideal because the better the subwoofer, the more lifelike that film is going to seem.

That said, here’s a few worth taking a look at.


Check Polk Audio Monitor XT10 Home Subwoofer Availability


Check Klipsch R-120SW Subwoofer Availability


Check SVS SB-1000 Subwoofer Availability


Check Polk Audio Signature Elite ES10 Subwoofer


Check Definitive Technology Descend DN8 Subwoofer Availability


Check Polk Audio PSW10 10″ Powered Subwoofer Availability


Check BIC America F12 12-Inch 475-Watt Front Firing Powered Subwoofer Availability


Check Denon Home Subwoofer Availability


Check Bic Acoustech PL-200 II Subwoofer Availability


For even more options, check out these:


https://easyhometheater.net/the-best-home-theater-subwoofers


Receivers


The receiver of course is important since it acts as the central hub, powering all of your speakers.

It’s ideally best to get one where the number of channels on the receiver matches the amount of speakers you plan on using.

So with that, here are a few worth taking a look at too.


Check Yamaha TSR 700 Receiver Availability


Check Onkyo TX-NR5100 7.2 Channel Network A/V Receiver Availability


Check Sony STRDH590 5.2 Channel Surround Sound Home Theater Receiver Availability


Check Onkyo TX-NR6050 7.2-Channel Network Home Theater Smart AV Receiver Availability


Check Denon AVR-S760H 7.2-Channel Home Theater AV Receiver 8K Video Ultra HD 4K/120 Availability


Check Denon AVR-X1700H 7.2 Channel AV Receiver Availability


Here’s an article that talks about these more depth.

https://easyhometheater.net/the-best-home-theater-receivers


Soundbars


A soundbar is really cool because it combines all the best parts of a surround system into one. It’s a rectangular, bar shaped speaker that can be placed in front of your TV.

These are great to use if you’re pressed for space, but still want a better sound than what your TV can provide. I’d definitely think these are pretty awesome.


Check Bose Smart Soundbar Availability


Check JBL Bar 2.1 Deep Bass (MK2): 2.1 Channel Soundbar Availability


Check VIZIO 5.1 Sound Bar Availability


Check YAMAHA SR-B20A Compact Sound Bar with Built-in Subwoofer and Bluetooth Availability


Check Klipsch Flexus Core 200 Soundbar Availability


Check Yamaha Audio YAS-209BL Sound Bar Availability


Check Polk MagniFi Max 5.1.2 Channel Soundbar Availability


Check Bestisan 2.1 Channel 100Watt Sound bar Availability


Check ZVOX AV355 Soundbar Availability


Check LG SN5Y 2.1 Channel Soundbar Availability


Check Denon DHT-S316 Home Theater Soundbar Availability


If you need more ideas, then check out these:


https://easyhometheater.net/the-best-sound-bars


Floor Standing Speakers


The Best Floorstanding Speakers For 2023


Floor standers are awesome because they can be used for either movies or music, and they don’t need to be placed on anything due to their size.

But because of that, you usually need some space for these since they stand from the ground up.

Here’s a few good ones.


Check Sony SSCS3 3-Way Floor-Standing Speaker (Single) Availability


Check Polk Audio T50 Tower Speaker (Single) Availability


Check Definitive Technology BP-9020 Tower Speakers Availability


Check Signature Elite ES60 Tower Speaker (Single) Availability


Check Dayton Audio Classic T65 Floorstanding Tower Speaker Availability


Check Klipsch Reference Premiere RP 8000F II Pair Availability


Check Availability Of JBL Stage 180 Tower Speaker (Single)


A few more of my favorite ones are talked about here.

https://easyhometheater.net/the-best-floor-standing-speakers


Projectors


Make no mistake about it, a projector plays a very important role too. These are helpful if you want to watch your content on a bigger screen without the hassle of lugging that big screen in the house.

They’re convenient because they’re portable while still giving you the picture quality you’d expect from a TV of that size.

These are a few I came across.


Check BenQ TH575 1080p Gaming Projector Availability


Check BenQ HT3550 4K Home Theater Projector with HDR10 and HLG Availability


Check Epson EpiqVision Ultra LS800 Ultra Short Throw 3-Chip 3LCD Smart Streaming Laser Projector Availability


Check Epson EpiqVision Flex CO-W01 Portable Projector Availability


Check TMY Mini Projector Availability


Check XGIMI MoGo 2 Portable Projector Availability


Check XGIMI Horizon Pro 4K Projector Availability


This should help if you want to figure out the best one for your current situation as well as some others to consider:


https://easyhometheater.net/the-best-home-theater-projectors


What Is Cyber Monday?


A picture of a store

Here’s something that I almost forgot to address; what in the world is Cyber Monday, and why exactly does it exist?

Well to keep it short, it’s basically the first Monday after thanksgiving that’s supposed to signal the official kick off of the holidays for online retailers.

This is basically done to drum up business by offering limited time promotions and/or price drops in some products. If that seems familiar, it’s because it stems from Black Friday which is basically the same principle but for retail in general.

Black Friday however has been around much longer, the 50’s in fact — with the latter only being around since 2005.

But what’s interesting is that they’ve both become entwined in recent years, where physical and online deals have become a big part for both holidays.

That’s not to say they’ve become the same, since they still do retain their differences. Here’s 8 differences between the two.

https://www.dealnews.com/features/ways-cyber-monday-is-different-from-black-friday/


Final Thoughts


Well that just about does it for this article on Cyber Monday home theater deals. It really seems like every year is more festive and this year certainly is looking no different in my opinion.

I’ve seen a lot of amazing things already, but unfortunately how long they last really depends. That means that you’ll really need to be on your toes if you’re to catch any of them.

Also if you need some actual gift ideas, then here’s a cool little piece I put together talking about exactly; and if you need help with setup, I got you covered there as well.

https://easyhometheater.net/25-awesome-home-theater-gift-ideas


https://easyhometheater.net/how-to-set-up-a-home-theater